
My Head Has Holes In It. They Need A Port And Polish!

Thread Starter
Super Moderator


Joined: Sep 2001
Posts: 10,795
Likes: 5
From: Pflugerville, TX
Vehicle: 2000 Elantra
Wrong, how my friend?
You are looking at 12 and 6! There is very little scuffing anywhere in the bores, and this engine was run to high miles, with crap gas and probably the cheapest oil possible, and still the bores look nice. There is some baked-on crap oil residue, but otherwise it looks ok to me (! ? ) I'll hit 1 or 4 with some alcohol to cut the crud down and take another shot, to satisfy my own curiosity.
You are looking at 12 and 6! There is very little scuffing anywhere in the bores, and this engine was run to high miles, with crap gas and probably the cheapest oil possible, and still the bores look nice. There is some baked-on crap oil residue, but otherwise it looks ok to me (! ? ) I'll hit 1 or 4 with some alcohol to cut the crud down and take another shot, to satisfy my own curiosity.
Senior Member
Joined: Aug 2004
Posts: 2,764
Likes: 0
From: South Korea where u car from fool
Vehicle: 2008/Hyundai/Tiburon gt
look at 1-4 on my pic not your LOL
any where in the bore where you have " shiny spot" thats wear. clean out them bores and get a closer look also get you a bore gauge and check the out of round
any where in the bore where you have " shiny spot" thats wear. clean out them bores and get a closer look also get you a bore gauge and check the out of round
Thread Starter
Super Moderator
Joined: Sep 2001
Posts: 10,795
Likes: 5
From: Pflugerville, TX
Vehicle: 2000 Elantra
ooooooh LOL I didn't follow. Yes, I see the wear in your photos.
There aren't any worn-smooth spots in my cylinders, that I could see. I'll clean it up like I said & get back w/ you.
There aren't any worn-smooth spots in my cylinders, that I could see. I'll clean it up like I said & get back w/ you.
Thread Starter
Super Moderator
Joined: Sep 2001
Posts: 10,795
Likes: 5
From: Pflugerville, TX
Vehicle: 2000 Elantra
I cleaned out one of the end cylinders (forgot if it was 1 or 4) and took a closeup.

There is some wear there, but it's not even all the way through the crosshatching. It's surely out of round, but I'm guessing by less than 1/1000"
I'd still run it like that if I didn't have the tools to freshen up the bore myself.
********
The kind and gracious hookin' a brotha' up side of Random comes through! The computer w/ the images was down. Now it's up. This cylinder head did not die in vain! wink1.gif
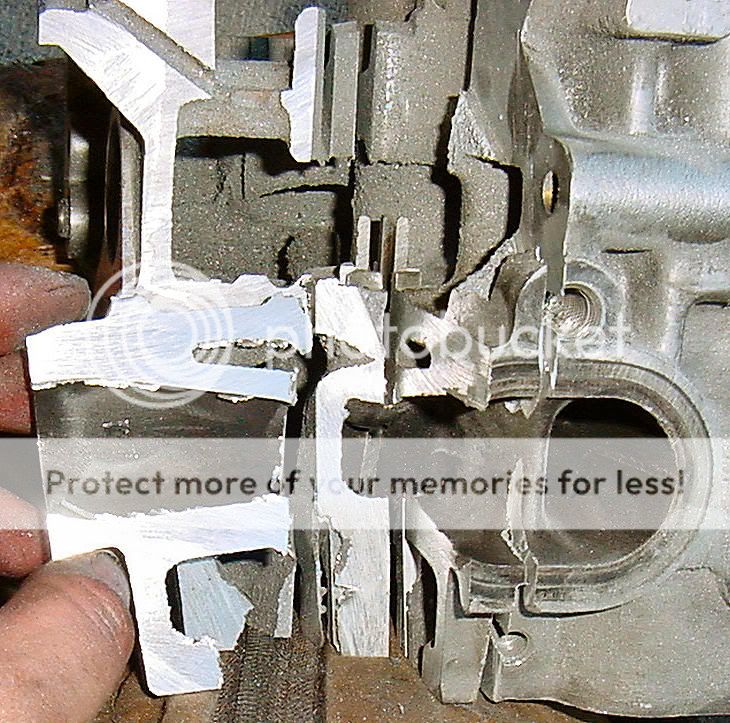
This is a cut-off exhaust port on a Beta cylinder head. The port is ridiculously small, but it's a 500CC swept volume coming out 2 of them at the same time. There is a HUGE amount of material around the runner, and especially on the side we're interested in. Opening up the bottom will yield a short-side radius much more gentle than the current 90 degree turn. It was nice of Hyundai to put the valve guide right in the narrowest, worst-flowing part of the entire runner eh? Oh well, we can work with that. I think just widening the floor of the port will be a good place to start.

you can see the radius a little bit better with flash. Sharp.
It would have been cool to see photos of the guts of the intake side, but the exhaust side is the one with the messed-up flowpath.
It looks like as much as 1/8" can come out of the exhaust short side radius. Now I just have to figure out how to do it consistently across all 8 (!) ports. I'm thinking I'll do one, then make a form from it, to let me compare the form to the work being done in the other ports.
MAN this is going to be a(nother) lot of work.
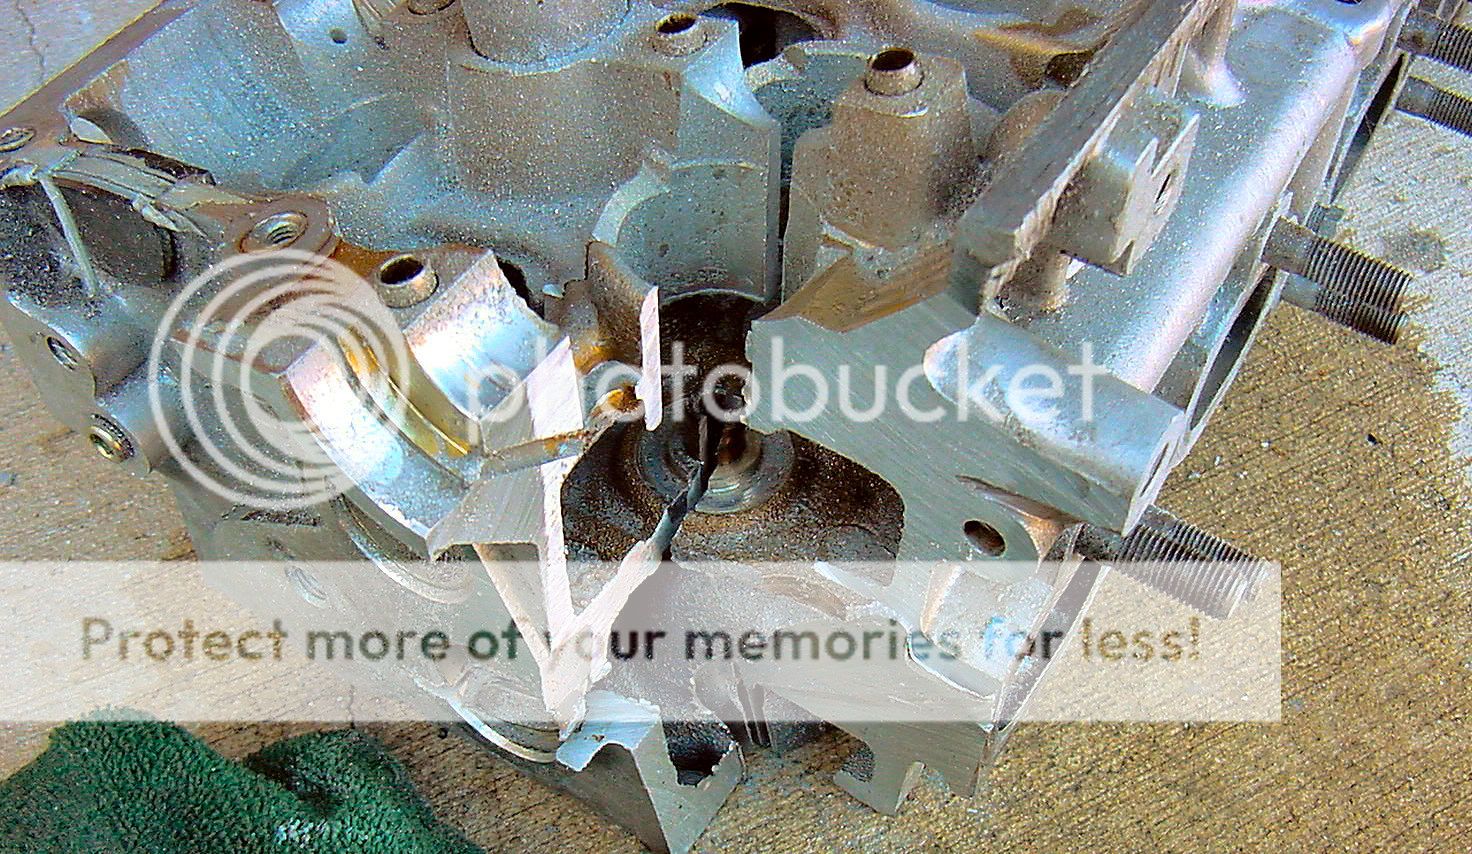
Interested parties looking for an oil gallery will notice the one on the right of this image. It runs the full length of the head and I think has an allen-keyed plug in it.
Many thanks to Random for both the work and the photos.
There is some wear there, but it's not even all the way through the crosshatching. It's surely out of round, but I'm guessing by less than 1/1000"
I'd still run it like that if I didn't have the tools to freshen up the bore myself.
********
The kind and gracious hookin' a brotha' up side of Random comes through! The computer w/ the images was down. Now it's up. This cylinder head did not die in vain! wink1.gif
This is a cut-off exhaust port on a Beta cylinder head. The port is ridiculously small, but it's a 500CC swept volume coming out 2 of them at the same time. There is a HUGE amount of material around the runner, and especially on the side we're interested in. Opening up the bottom will yield a short-side radius much more gentle than the current 90 degree turn. It was nice of Hyundai to put the valve guide right in the narrowest, worst-flowing part of the entire runner eh? Oh well, we can work with that. I think just widening the floor of the port will be a good place to start.
you can see the radius a little bit better with flash. Sharp.
It would have been cool to see photos of the guts of the intake side, but the exhaust side is the one with the messed-up flowpath.
It looks like as much as 1/8" can come out of the exhaust short side radius. Now I just have to figure out how to do it consistently across all 8 (!) ports. I'm thinking I'll do one, then make a form from it, to let me compare the form to the work being done in the other ports.
MAN this is going to be a(nother) lot of work.
Interested parties looking for an oil gallery will notice the one on the right of this image. It runs the full length of the head and I think has an allen-keyed plug in it.
Many thanks to Random for both the work and the photos.

Senior Member
Joined: Mar 2002
Posts: 501
Likes: 0
From: Daegu, Korea
Vehicle: Hyundai Pony
Not bad... I'd have hot tanked it first to remove all that crap, esp. for cleaning out the tiny passages in the cam bridges and oil passages in general.
I Cleaned and portmatched Liz's IM so i'd like to do the head too.
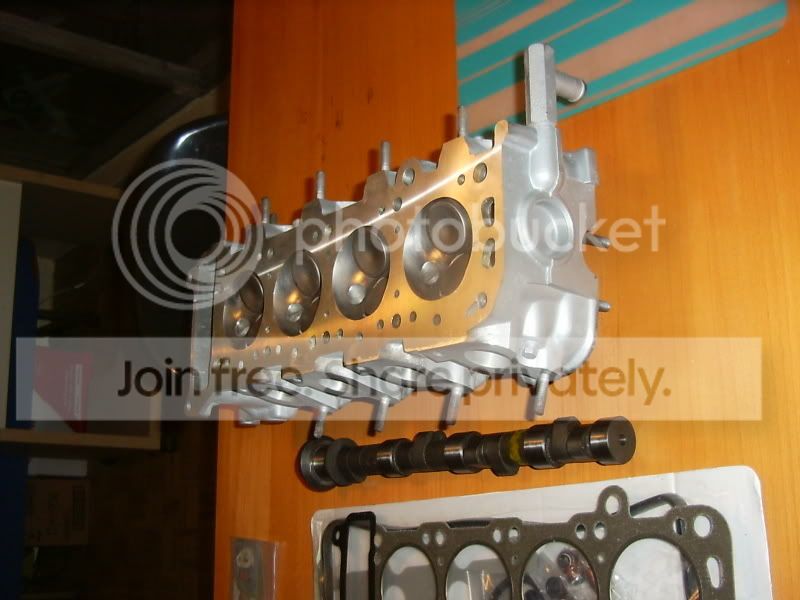
Here's mine (4G32 SOHC) before I put it in. I had the head milled and light porting done, as well as a 3 angle and a proper reseat. The guy doing it has done much work on these engines back in the day.

I reassembled it using the finest lifters I had and a cleaned set of springs, put in an aggressive 246 cam and, heh, if you wanna hear/see it youtube for "how do we make a pony breathe fire"
I cleaned up the head a little, but to be honest, it was a damn good pour - no major casting flaws, no flash ANYWHERE, and just a little excess material around the base of the valve guide area. Compared to the Beta's head, it was 300% cleaner, even before a mild cleanup (which I later polished)
Keep us posted, I'm digging this buildup of yours. I guess that's the advantage of owning a car in the internet era... I had to learn everything the hard way on (even then) rare components and mostly intuition and shop manuals!
Good luck!
I Cleaned and portmatched Liz's IM so i'd like to do the head too.
Here's mine (4G32 SOHC) before I put it in. I had the head milled and light porting done, as well as a 3 angle and a proper reseat. The guy doing it has done much work on these engines back in the day.
I reassembled it using the finest lifters I had and a cleaned set of springs, put in an aggressive 246 cam and, heh, if you wanna hear/see it youtube for "how do we make a pony breathe fire"
I cleaned up the head a little, but to be honest, it was a damn good pour - no major casting flaws, no flash ANYWHERE, and just a little excess material around the base of the valve guide area. Compared to the Beta's head, it was 300% cleaner, even before a mild cleanup (which I later polished)
Keep us posted, I'm digging this buildup of yours. I guess that's the advantage of owning a car in the internet era... I had to learn everything the hard way on (even then) rare components and mostly intuition and shop manuals!
Good luck!
Thread Starter
Super Moderator
Joined: Sep 2001
Posts: 10,795
Likes: 5
From: Pflugerville, TX
Vehicle: 2000 Elantra
Thanks for the kind wishes.
Hot tanking: =$ and it cleans out the crap (duh). The problem with a clean head is that the dirt is actually a pretty good reference for what you have touched and what not with your tools. A clean head doesn't have the black/white contrast of a dirty head. For a first-time porter, every little bit helps.
Yes the casting does stink. Flash right in the corner of the intake port. BOO!
Intake manifold to head junction: make the holes on the head about a millimeter or less larger than the holes on the end of the runners, to prevent reversion. I'm thinking of keeping my spare manifold so I can do just that.
Thread Starter
Super Moderator
Joined: Sep 2001
Posts: 10,795
Likes: 5
From: Pflugerville, TX
Vehicle: 2000 Elantra
Okay lads back at it! No photos but an update:
I have determined to my own satisfaction that the paresthesia is physiological, not neurological (I slouch too much and need to start stretching and sitting/standing erect) thank God.
Also I found the collet/nut required to run my flexible dremel extension, so I should be able to get my cutters down into the runners now. I started working on the 7th exhaust valve deshrouding but didn't get very far before bedtime (23:40) last night. My bench is now wired for power again after relocating it, so that's a couple of minutes saved every time I go to work on anything which is also nice. Now I need to un-destroy my garage so my wife can park in it again and we'll be set, with only studying, parenting, and life in general to prevent progress on this head project. laugh.gif

Thread Starter
Super Moderator
Joined: Sep 2001
Posts: 10,795
Likes: 5
From: Pflugerville, TX
Vehicle: 2000 Elantra
"I fart in your general direction!"
Don't worry. When it comes time for some new developments, pics will be forthcoming. I'm probably going to try to include an intake manifold port match job but maybe that's it's own thread eh.
Don't worry. When it comes time for some new developments, pics will be forthcoming. I'm probably going to try to include an intake manifold port match job but maybe that's it's own thread eh.