
Should I remove my engine?


Thread Starter
Senior Member
Joined: Nov 2007
Posts: 429
Likes: 0
From: Toronto, Canada
Ok, I owe you all a bit of an update. I haven't been able to be around my tib, which I soooo enjoy working on, due to family/health reasons:
- my wife and I are expecting our first baby, due in 4 weeks!!!! (it's a boy, btw :-) So obviously medical visits and stuff.
- then my dad had to go into ER for surgery
- my wife had to go into emergency 3 weeks ago
So the month of January for me was one to forget.
Also, it's been like -30Celcius (-22 Fahrenheit). Imagine working in the cold for several hours a day. I bought a portable gas-powered heater. That really helps. :biggrin:
Anyway, onto tib news:
Engine removal was ok. No major problems. Only difficulty I had, was trying to get the engine to come upwards, while the crossmember was still bolted on to the bottom of the car. So the front and rear rollstop wouldn't allow it to move enough. Took a while to figure that one out after playing about with the engine hoist, lifting here, dropping there...
I gotta tell you guys! This was the first time I have ever removed an engine! What a gratifying experience to know that I was able to remove the engine! *ALONE* So others reading this, if you're thinking of removing an engine, you can do it. And I did it alone, so don't be too scared if you don't have a buddy to give you a hand.
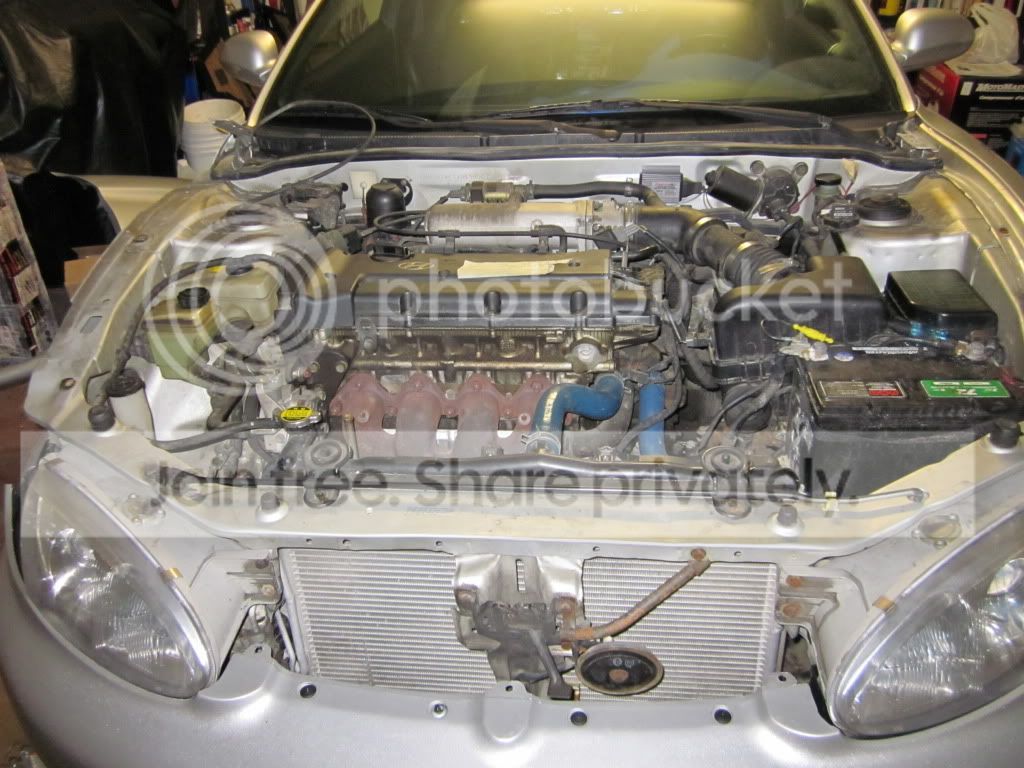
Here's a pic of my engine bay before the engine removal:
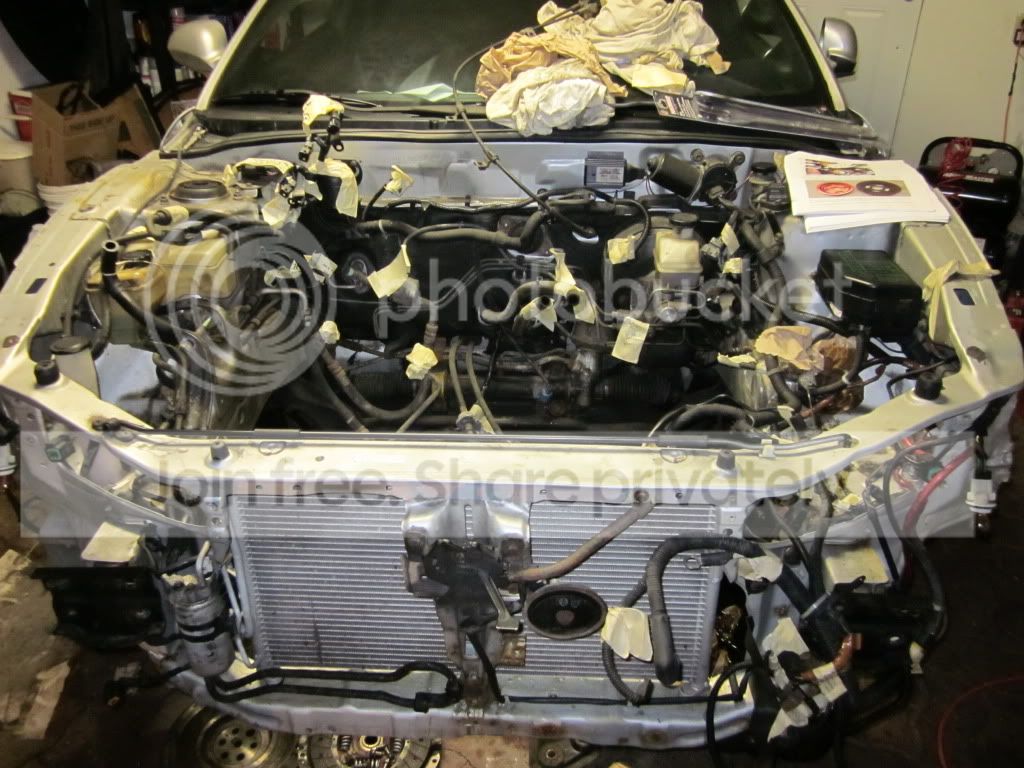
And here's one of it after:
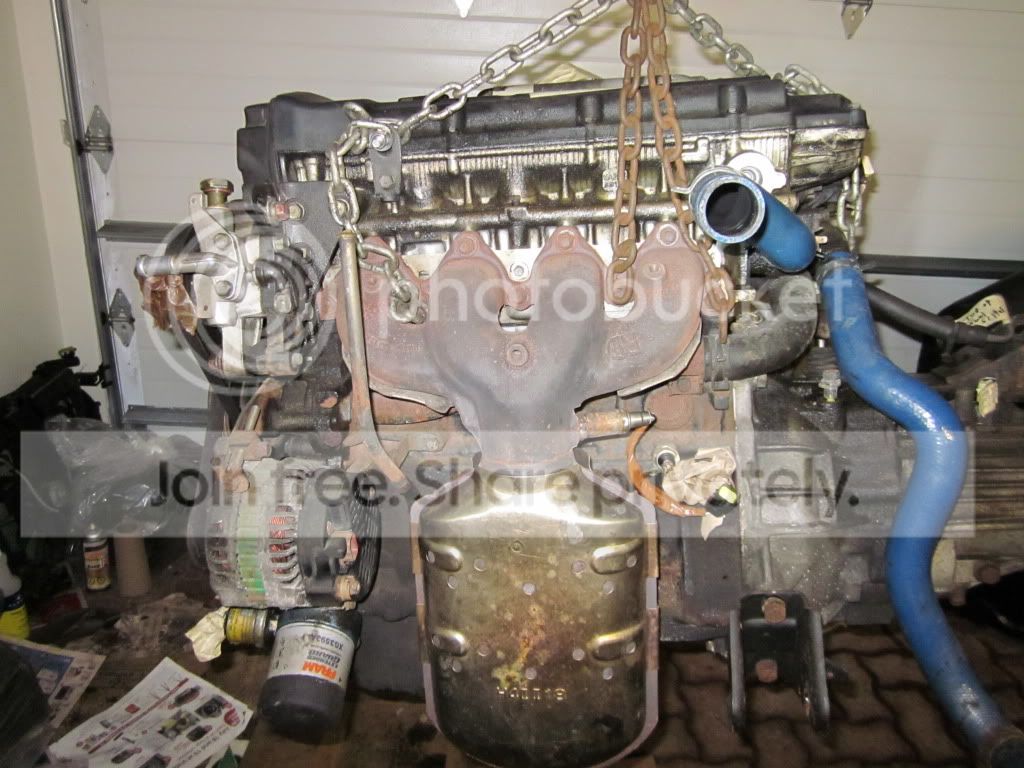
Here's the engine out:
So I found a guy, local to me, selling his beta2 2001 Elantra engine for $100 (80,000Km, approx 55,000miles) and beta2 tranny, same mileage, for $100 = $200 total.
Problem - When I got his engine disassembled, the guy hadn't removed the crank bolt! I secured the engine to the ground, placed a huge socket wrench on the cam sprocket bolt, and went to town on the crank pulley bolt - I ended up snapping the timing belt in two, and bending cyl 1's exhaust valve
I broke the beta2 cam sprocket pin that ties the sprocket to the actual intake cam. That's a big one! So now I'm going to tap into precisely where that pin was attached to the intake cam, apply loctite to a bolt, and bolt it to the intake cam. The cam sprocket will then align with that.
Beta2 oil pan - a b**ch to remove! But I got it out.
I now have both engines (mine, and the beta2), 100% apart!
My beta1 piston rings looked like crap!!!! WOW! There was oil all around the actual piston (where the piston ring is).
My beta1 IM, has a bunch of black soot/oil in there! Why?! Could it be blow-off from worn out piston rings?
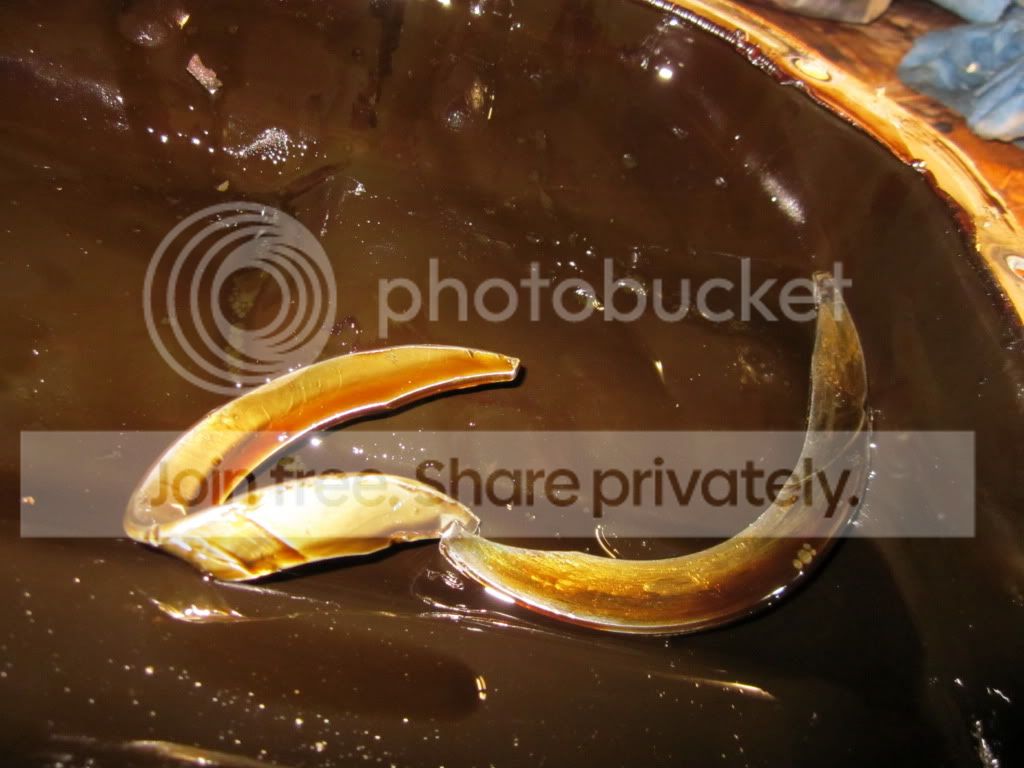
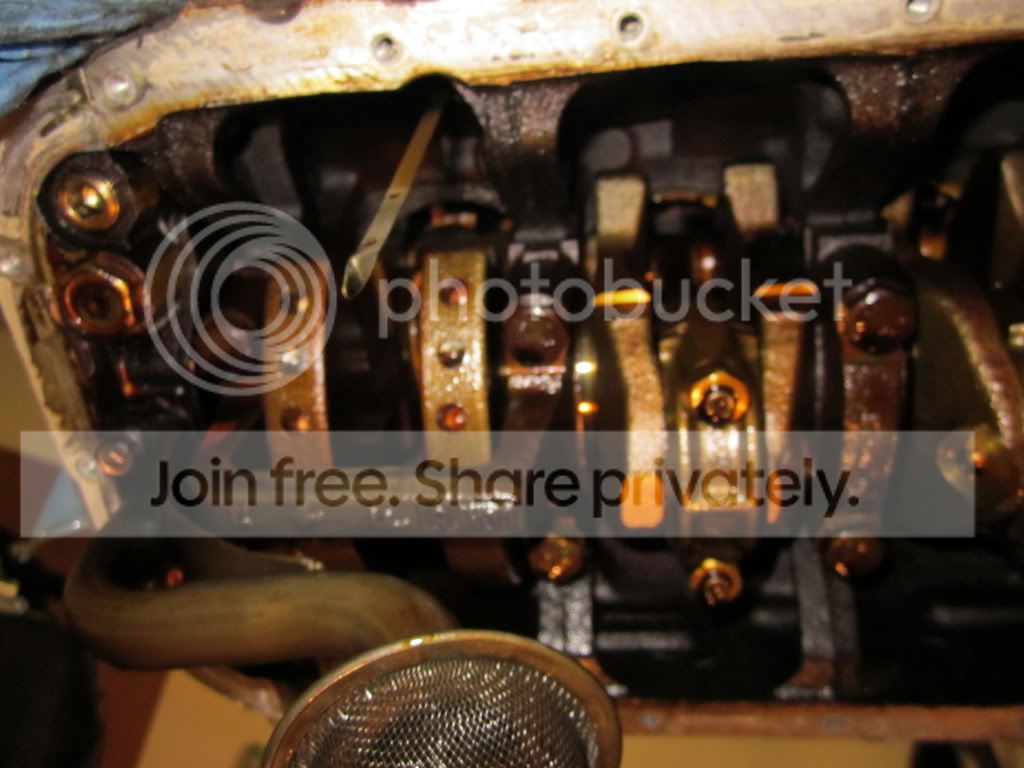
Look at what the heck I found inside my beta 1 oil pan!!! What the heck is that?! I looked around in the crank case, but couldn't find anything missing 2 metal pieces. Where do you guys think this came from?
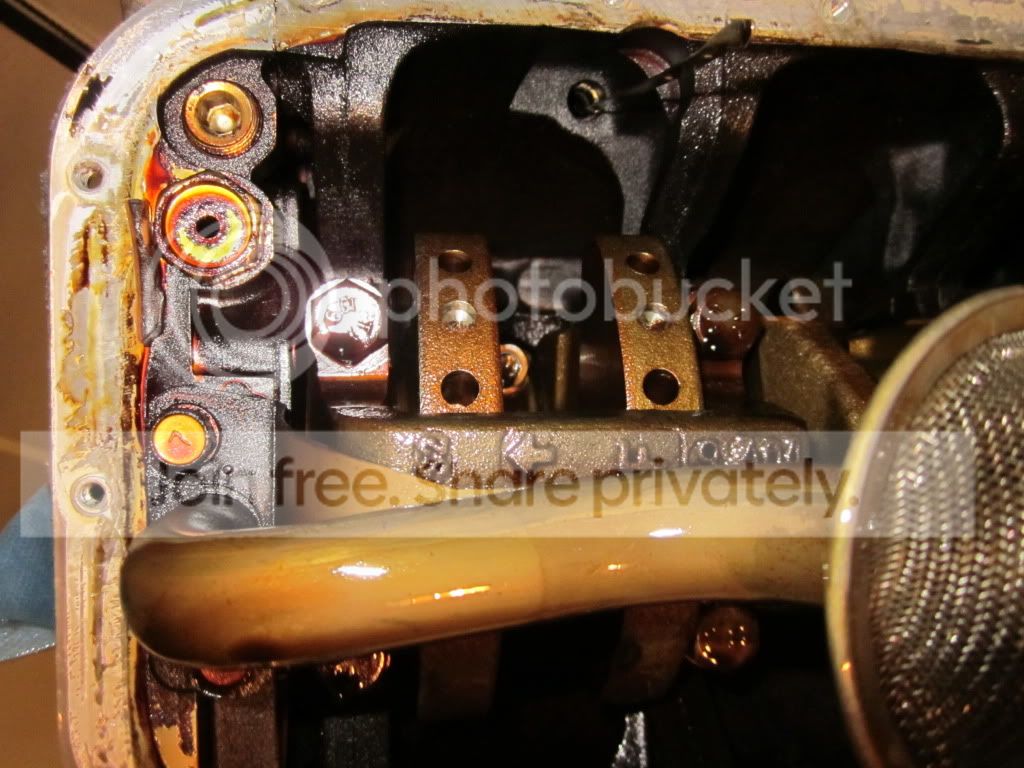
Oil Restrictor. You guys told me to remove this on the beta1, but I can't find it. Here are a couple of pics. Can you guys identify it? Faitho?
Pic1:
Pic2:
Now, about the machine shop. The guy wants $250CDN to:
- reseat the valves
- put in new valve stem seals
- 3 angle valve grind
- replace that one bent exhaust valve
- check the condition of the other valves
- shave the head if it's not straight, and if it is straight, I told him to shave 0.4mm
What do you guys think of that price?
About the pistons. He didn't give me a quote. He asked me to bring the entire block, and that he would install the new 1.8L pistons, grind the crank if it needs to be, replace the bearings. He didn't give a quote for that because he said he needs to take a look at the condition of the piston/rods/crank, first. But it sounded like he's gonna rape me there!
I don't know, I got the feeling like he was trying to rip me off.
How do you guys suggest I approach this? I wanna do as much work on those pistons/crank as possible, on my own, but I think I'm gonna need some special tools. There's also the problem of knowing if I should get standard or oversized pistons. So here's the question:
1. should I let him decide and work on the entire piston removal (2.0L) and installation (1.8L), as well as the crank removal/machining/installation? Cylinder Hone. Or should I:
2. buy a cylinder bore measuring tool, decide which pistons to get, remove the crank ....?
What do you guys suggest?
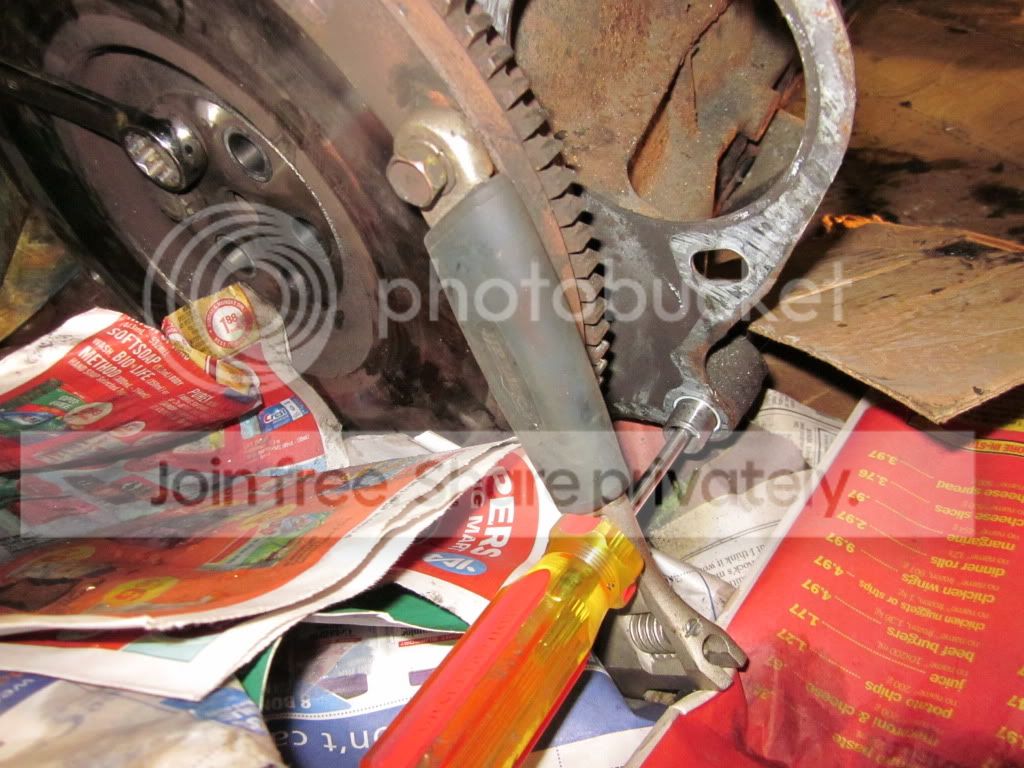
I also wanted to share a tip for removing the flywheel bolts:
Flywheel Pic1:
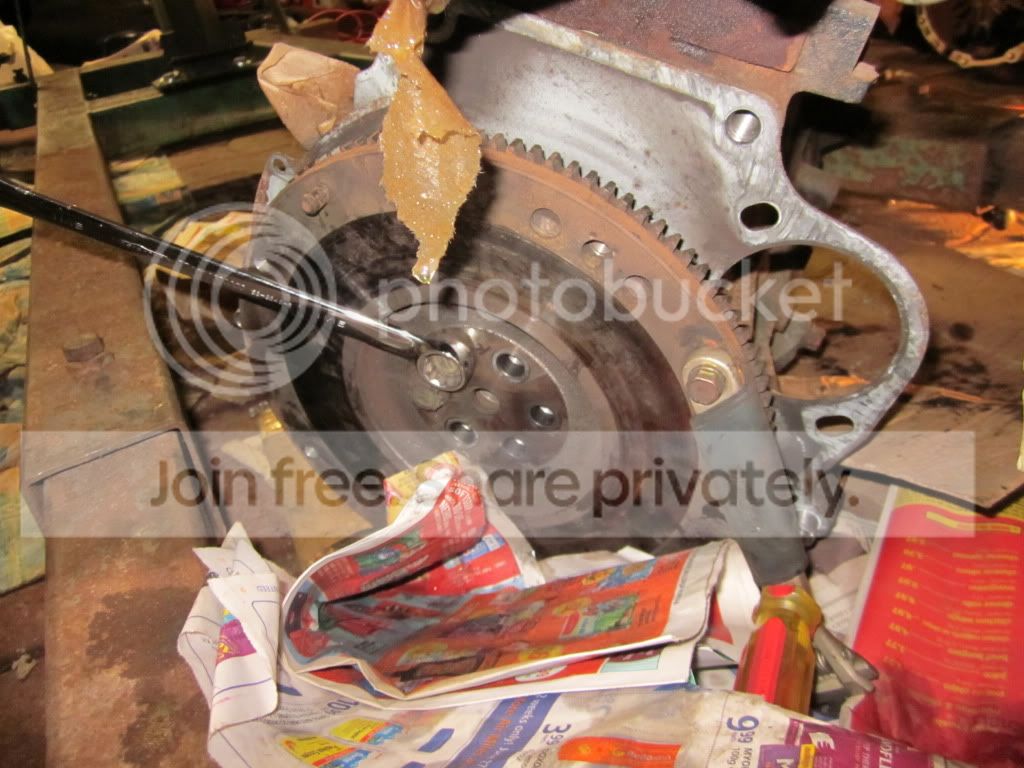
Flywheel Pic2:
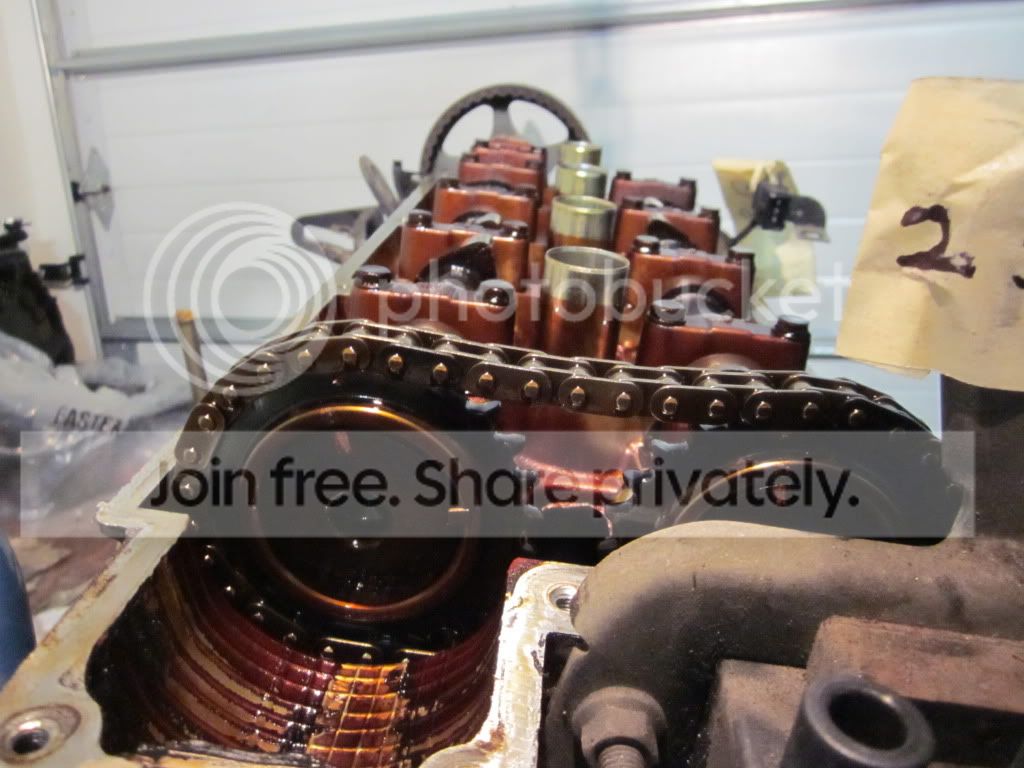
Pic of Beta 1 Head:

- my wife and I are expecting our first baby, due in 4 weeks!!!! (it's a boy, btw :-) So obviously medical visits and stuff.
- then my dad had to go into ER for surgery
- my wife had to go into emergency 3 weeks ago
So the month of January for me was one to forget.
Also, it's been like -30Celcius (-22 Fahrenheit). Imagine working in the cold for several hours a day. I bought a portable gas-powered heater. That really helps. :biggrin:
Anyway, onto tib news:
Engine removal was ok. No major problems. Only difficulty I had, was trying to get the engine to come upwards, while the crossmember was still bolted on to the bottom of the car. So the front and rear rollstop wouldn't allow it to move enough. Took a while to figure that one out after playing about with the engine hoist, lifting here, dropping there...
I gotta tell you guys! This was the first time I have ever removed an engine! What a gratifying experience to know that I was able to remove the engine! *ALONE* So others reading this, if you're thinking of removing an engine, you can do it. And I did it alone, so don't be too scared if you don't have a buddy to give you a hand.
Here's a pic of my engine bay before the engine removal:
And here's one of it after:
Here's the engine out:
So I found a guy, local to me, selling his beta2 2001 Elantra engine for $100 (80,000Km, approx 55,000miles) and beta2 tranny, same mileage, for $100 = $200 total.
Problem - When I got his engine disassembled, the guy hadn't removed the crank bolt! I secured the engine to the ground, placed a huge socket wrench on the cam sprocket bolt, and went to town on the crank pulley bolt - I ended up snapping the timing belt in two, and bending cyl 1's exhaust valve
I broke the beta2 cam sprocket pin that ties the sprocket to the actual intake cam. That's a big one! So now I'm going to tap into precisely where that pin was attached to the intake cam, apply loctite to a bolt, and bolt it to the intake cam. The cam sprocket will then align with that.
Beta2 oil pan - a b**ch to remove! But I got it out.
I now have both engines (mine, and the beta2), 100% apart!
My beta1 piston rings looked like crap!!!! WOW! There was oil all around the actual piston (where the piston ring is).
My beta1 IM, has a bunch of black soot/oil in there! Why?! Could it be blow-off from worn out piston rings?
Look at what the heck I found inside my beta 1 oil pan!!! What the heck is that?! I looked around in the crank case, but couldn't find anything missing 2 metal pieces. Where do you guys think this came from?
Oil Restrictor. You guys told me to remove this on the beta1, but I can't find it. Here are a couple of pics. Can you guys identify it? Faitho?
Pic1:
Pic2:
Now, about the machine shop. The guy wants $250CDN to:
- reseat the valves
- put in new valve stem seals
- 3 angle valve grind
- replace that one bent exhaust valve
- check the condition of the other valves
- shave the head if it's not straight, and if it is straight, I told him to shave 0.4mm
What do you guys think of that price?
About the pistons. He didn't give me a quote. He asked me to bring the entire block, and that he would install the new 1.8L pistons, grind the crank if it needs to be, replace the bearings. He didn't give a quote for that because he said he needs to take a look at the condition of the piston/rods/crank, first. But it sounded like he's gonna rape me there!
I don't know, I got the feeling like he was trying to rip me off.
How do you guys suggest I approach this? I wanna do as much work on those pistons/crank as possible, on my own, but I think I'm gonna need some special tools. There's also the problem of knowing if I should get standard or oversized pistons. So here's the question:
1. should I let him decide and work on the entire piston removal (2.0L) and installation (1.8L), as well as the crank removal/machining/installation? Cylinder Hone. Or should I:
2. buy a cylinder bore measuring tool, decide which pistons to get, remove the crank ....?
What do you guys suggest?
I also wanted to share a tip for removing the flywheel bolts:
Flywheel Pic1:
Flywheel Pic2:
Pic of Beta 1 Head:
Super Moderator


Joined: Sep 2001
Posts: 10,795
Likes: 5
From: Pflugerville, TX
Vehicle: 2000 Elantra
The restrictor should be in the top of the block, it blocks oil flow to the head.
+1 rep for a most excellent bolt removal method technique
The mysterious metal crescents are thrust bearings. They prevent crankwalk when they're not bent up and laying in the oil pan.
Engine machine work is highly skilled labor requiring expensive equipment. The price you mentioned doesn't sound outrageous, but you should feel free to call a couple of other shops for quick 'phone quotes' if you don't like the first price you heard.

Moderator

Joined: Feb 2009
Posts: 11,732
Likes: 5
From: Leesville, Louisiana
Vehicle: 2001 Hyundai Tiburon
You should take the fly wheel bolts off in a star (criss-cross) pattern. That will eliminate pressure which can potentially warp the flywheel. In the past, whenever I've removed the flywheel, it was always my intention to replace it. Even still, I took care in case the flywheel needed to go back in.
To get those flywheel bolts off I use the palm-impact technique. It's not beautiful, but it works. Take a big 12pt wrench, and smack the end of the wrench with your palm. When fighting against the locktight that Hyundai installs, using an impact wrench is better then just pushing against the bolts... of course. You used a good method.
Also, I use some rust remover. Whenever I work with critical areas of the car (actually, whenever I work with any area of the car), I use some penetrating oil. Penetrating oil makes every job alot easier. Simply spray the stuff on to the outside of the bolts, then tap the bolt with your wrench to allow "sonic vibrations" to push the penetrating oil into the cracks between the the head of the bolt and the surface, and work it into the threads. Then I go wait 15 minutes to let it set in and do it's job. Before putting the engine back together, every bolt gets penetrating oiled.... unless it gets lock-tighted. Put locktight on most engine things.
I'm trying to figure out what the red color in the head is caused from. My engine was nicely yellow tinted for years, then it overheated once. From then on my valve cover was reddish.
Thread Starter
Senior Member
Joined: Nov 2007
Posts: 429
Likes: 0
From: Toronto, Canada
You should take the fly wheel bolts off in a star (criss-cross) pattern. That will eliminate pressure which can potentially warp the flywheel. In the past, whenever I've removed the flywheel, it was always my intention to replace it. Even still, I took care in case the flywheel needed to go back in.
About the penetrating oil, believe or not, nothing was seized too badly. My suspension, on the other hand, I used to get the shivers to just think about working on it, because everything was just seized *BADLY*! But now that I've worked on it in the past and applied anti-seize compound to every single nut and bolt, it's a piece of cake to work on my suspension.

I don't know what the reddish is from. I was wondering the same thing. The other guy's beta2 cylinder head was a bit more pinkish than mine, but still had some red to it. Not sure why.
Ok, so my plan for this week is to:
1. tap into the beta2 intake cam to replace that broken pin with a bolt (it aligns with the cam sprocket).
2. get the beta2 head to the machine shop for the head work I mentioned above
3. get the beat1 block to the machine shop for him to quote me and tell me what needs machining. As for the 1.8L pistons, I haven't ordered those because I'm not sure if the cylinder needs to be bored, so I'll order those once he takes a look at it.
4. install a newer/used 2001 tib steering rack. Mine was leaking.
5. install my Phantom Grip LSD in the beta2 tranny.
6. remove/move all accessories, hoses, lines from the engine bay so that I can sandblast some rust areas, clean all up, and re-paint. My plan is to change the car colour to metallic blue.
7. End of the week (when I get the block/head back) - install beta2 oil pan on my beta1 block, sand blast rear block, paint block silver (por15), install new water pump, install the OBX crank/water pulley, timing belt, new ported IM, PRD ignition wires, clutch, flywheel. Engine will be ready for detailing and to be put back in.
Let's see how well I manage these tasks for this week.
What do you guys think of the colour change to metallic blue? If you have suggestions, I'm all ears.
Super Moderator
Joined: Sep 2001
Posts: 10,795
Likes: 5
From: Pflugerville, TX
Vehicle: 2000 Elantra
LOL years of experience. The first time I saw a set of thrust bearings fall out it took a minute to realize what I was looking at. 


My flexplate bolts were totally resistant to handheld trenches to include several feet of breaker bar and a mallet, with penetrating oil. It took 120PSI on the impact gun to get them going. Then of course they came out like nothing.
If memory serves, you're looking into what looks like a harmless little hole on the deck, which turns out to have somthing in it (the restrictor) but I could be wrong.
I am pretty sure the red/orange is from cooked oil. I've always run good quality synthetic oils and occasionally Marvel Mystery Oil and my head looks like fresh metal with fresh oil on everything. I got a cam from a head that was red inside, and the red washed away in a couple of weeks, now it looks like the rest of the engine's internals.
Have fun with the steering rack.
I vote for satin black in the engine bay. 2nd choice is black mixed with whatever color your local dust happens to be. Unless you don't mind cleaning the bay every once in a while, or having it look dirty.
Thread Starter
Senior Member
Joined: Nov 2007
Posts: 429
Likes: 0
From: Toronto, Canada
You weren't kidding, were you?!

I removed all of the bolts that bolt the rack to the frame. I tried pushing down on the box (where the pinion connects, but I just can't get it to come off. Is there a trick? A special tool? something else that I need to uninstall (perhaps from the inside of the car)?
Super Moderator
Joined: Sep 2001
Posts: 10,795
Likes: 5
From: Pflugerville, TX
Vehicle: 2000 Elantra
^ I LOL'd
Hyundaitechinfo won't let me log in, but fortunately this is still up:
http://www.newtonnet.co.uk/coupe/service/mechanical.htm
http://www.newtonnet.co.uk/coupe/ser...d=12808#_12808
HTH
Hyundaitechinfo won't let me log in, but fortunately this is still up:
http://www.newtonnet.co.uk/coupe/service/mechanical.htm
http://www.newtonnet.co.uk/coupe/ser...d=12808#_12808
HTH
Thread Starter
Senior Member
Joined: Nov 2007
Posts: 429
Likes: 0
From: Toronto, Canada
Sure, make fun of me, Stocker! LOL 
Alright, thanks for the tip. Well, apparently there was this pesky 12mm bolt on the steering shaft (half shaft that connects steering wheel shaft, to the pinion). Getting that bolt off wasn't that easy; I couldn't fit a socket, and it was kinda hard to work with a wrench in the small space. But I managed to remove it! I just hope when I put in the newer/used steering rack, that I get the steering shaft properly lined up, or I'll mess up my clockspring (which is from a GK). I got the GK stock steering wheel (with airbag), shortened to 13.5" diameter, so I don't wanna go through the hassle of taking it apart AGAIN and dealing with a broken clockspring.
Anyway, it looks like I'm on track with most of my tasks for this week.
Thanks, Stocker!
Alright, thanks for the tip. Well, apparently there was this pesky 12mm bolt on the steering shaft (half shaft that connects steering wheel shaft, to the pinion). Getting that bolt off wasn't that easy; I couldn't fit a socket, and it was kinda hard to work with a wrench in the small space. But I managed to remove it!
I just hope when I put in the newer/used steering rack, that I get the steering shaft properly lined up, or I'll mess up my clockspring (which is from a GK). I got the GK stock steering wheel (with airbag), shortened to 13.5" diameter, so I don't wanna go through the hassle of taking it apart AGAIN and dealing with a broken clockspring.Anyway, it looks like I'm on track with most of my tasks for this week.
Thanks, Stocker!


