
Spray Painting Puddle Problems


Thread Starter
Senior Member

Joined: Apr 2006
Posts: 1,401
Likes: 0
Vehicle: 2000 Tiburon
I'm painting my sparkplug cover and I'm using the Duplicolor Engine Enamel paint to do it. I did all the prep and put down 3 coats of Duplicolor Metalcast Ground Coat and let it dry for about 1.5 hours. Sanded that down a little. Then when I went to spray on the Enamel it left medium sized puddles on my piece. I shook the can for a good 2 minutes. I did "test spots" on the side to get the can flowing and even warmed the can up a little(momentarily set next to hott lamp/not recommended). It's 72 degrees right now at 3:50 in the morning and was probably about 75 when I was doing it so it wasn't even cold outside. I did the same sweeping motions that got good results from the ground coat and other spray painting projects but the engine enamel doesn't seem to like me. What am I doing wrong? I know I'm a bit tired but I don't think I missed anything. Help?
Senior Member
Joined: Mar 2002
Posts: 34,642
Likes: 0
From: Los Lunas, New Mexico, USA.
Vehicle: 2001 Hyundai Tiburon, 2004 Kia Sorento, 2010 Kia Soul
The final coats should be really light, don't try to cover every tiny bit with every coat, just a general light "dusting". They'll all merge together and give you a great looking coverage.

Moderator

Joined: Feb 2009
Posts: 11,732
Likes: 5
From: Leesville, Louisiana
Vehicle: 2001 Hyundai Tiburon
make sure you sand it down well enough. Usually paint puddles because theres something on the surface or you sprayed closer then 8 inches. Adhesion promoter will cause the first coat to stick right where it initially lands. Use some of that before you spray.
Thread Starter
Senior Member
Joined: Apr 2006
Posts: 1,401
Likes: 0
Vehicle: 2000 Tiburon
Arg... in my "panic" I "overcorrected" and put down too many layers of paint(spraying 10inches away as recommended on the can). I need to redo it because the paint is so caked on that it's no longer natural looking. owned.gif So, should I go with "oops" to get the paint off or paint thinner? I'm worried that thinner might hurt the plastic.
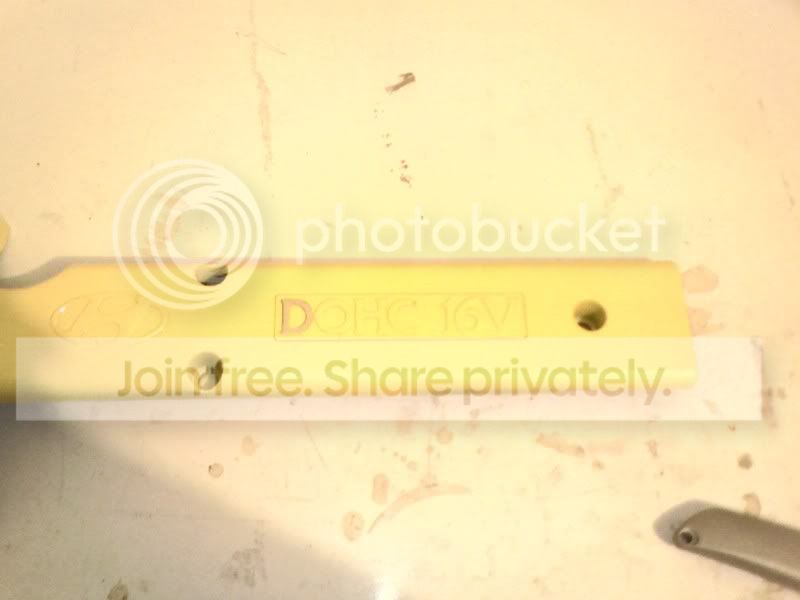
You can see at the bottom of my "D" in my pics it looks like overspray but actually that part of the paint layered up so thick it just looks like that. Sorry for the quality of my pics but my digital cam is at my sister's and I only had my cameraphone available but you get the idea. So sad. Here I go again! Grr...

...and here I just half-assed at taking off the paint...
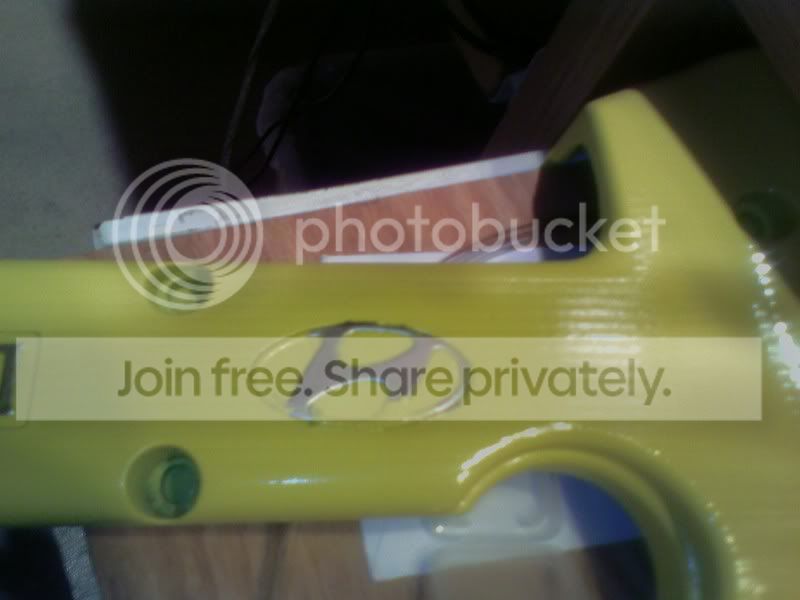
You can see at the bottom of my "D" in my pics it looks like overspray but actually that part of the paint layered up so thick it just looks like that. Sorry for the quality of my pics but my digital cam is at my sister's and I only had my cameraphone available but you get the idea. So sad. Here I go again! Grr...
...and here I just half-assed at taking off the paint...

Senior Member
Joined: Feb 2006
Posts: 977
Likes: 0
From: Hereford Az.
Um, i'm guessing you havent read the DIY on this? With what are you taking off the paint of the logos? Are you planning to keep the logos painted?
On the DIY they mention how to take the logos off before you paint so you will have a cleen look after it's all done.
On the DIY they mention how to take the logos off before you paint so you will have a cleen look after it's all done.
Thread Starter
Senior Member
Joined: Apr 2006
Posts: 1,401
Likes: 0
Vehicle: 2000 Tiburon
Lol, I read the DIY. Actually, I've read EVERY DIY lol. I'm just trying this out to see how it works and it's working out pretty well for me. I accidently ran the sandpaper over the hyundai logo so it's a bit scuff from that but otherwise it's working very well.
I bought some GLAD cling wrap. Then I pressed it over and worked over each letter/number and the logo. Then I took a sharp razor blade and traced along each one very slowly. I was hoping it would work and it looks like it did. I still have the "HC 16" to uncover though. I didn't like the black part showing through on the lettering and logo so I had to try something.
I bought some GLAD cling wrap. Then I pressed it over and worked over each letter/number and the logo. Then I took a sharp razor blade and traced along each one very slowly. I was hoping it would work and it looks like it did. I still have the "HC 16" to uncover though. I didn't like the black part showing through on the lettering and logo so I had to try something.