
Pandy Is A Noob !


Senior Member

Joined: Jul 2004
Posts: 5,155
Likes: 0
From: Eau Claire, WI
Vehicle: 97 Tib
You can always tell when someone's actually used forums before, I hate reading introductory posts that contain 100% fragmet sentences and absolutely nothing about their car.
BTW, to post pictures you have to upload them to an external site (geocities, photobucket, etc) and then link them with the [IMG] tags.
Glad you found the site fing02.gif
BTW, to post pictures you have to upload them to an external site (geocities, photobucket, etc) and then link them with the [IMG] tags.
Glad you found the site fing02.gif

 bsure south park reference::
Thread Starter
Senior Member
Joined: May 2007
Posts: 869
Likes: 0
Vehicle: 1998 Tiburon
Again thanks guys smile.gif
ok Im not sure on image tags but here goes laugh.gif
Side on

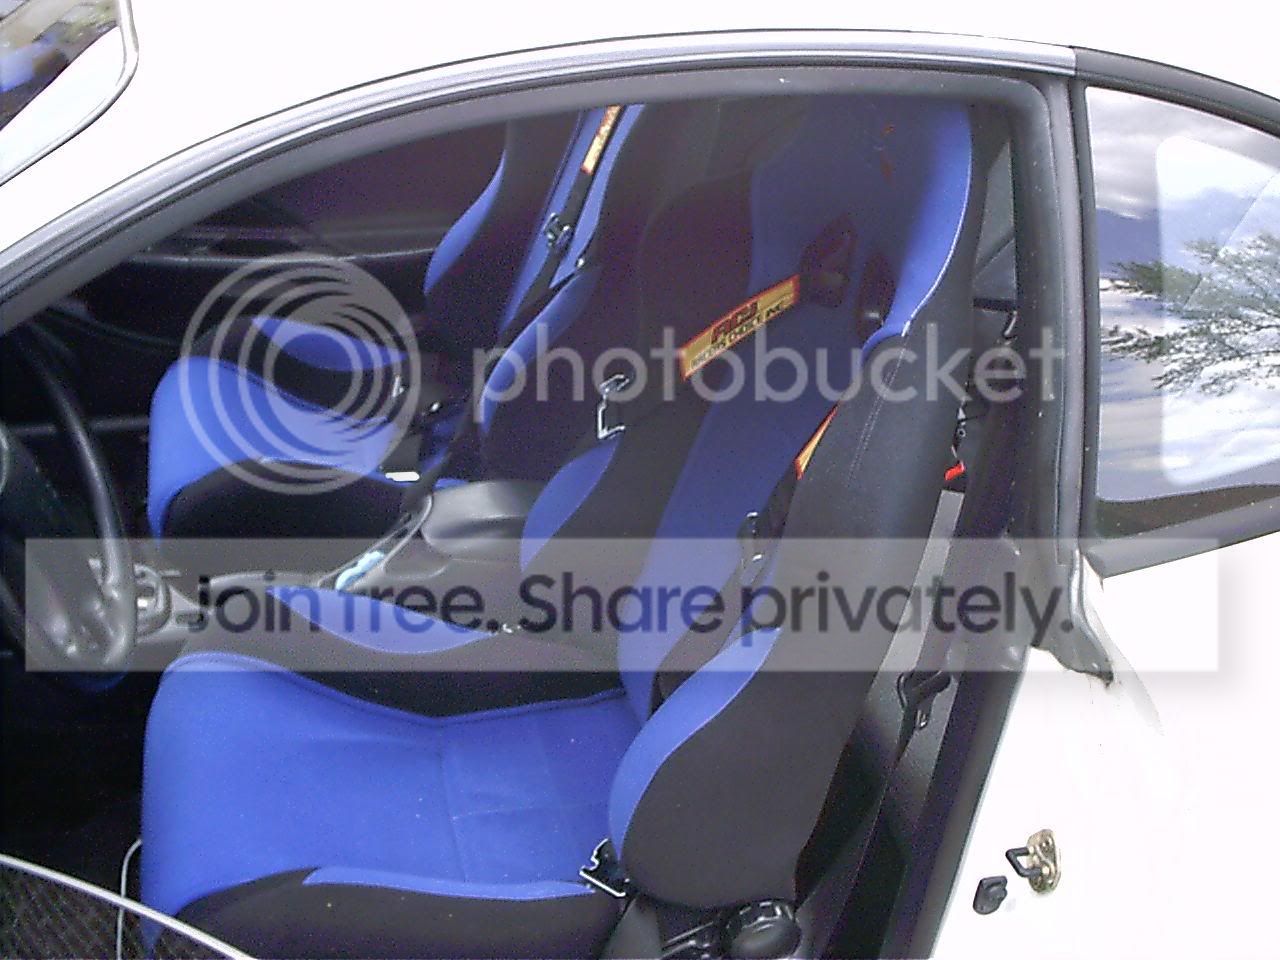
Seat hookup
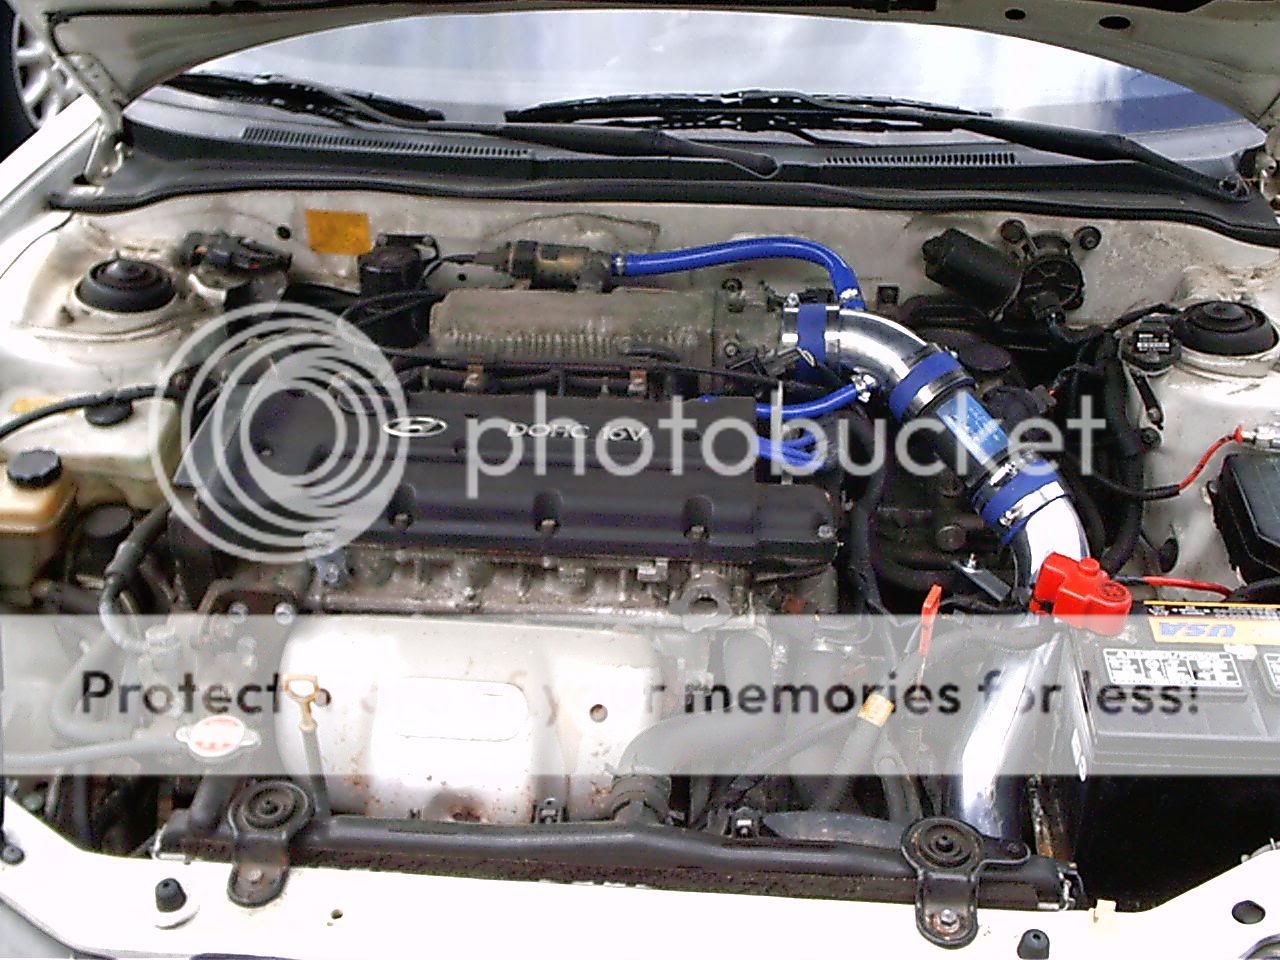
Engine work, it's not done yet so nothing has been cleaned....
And the back, Ratfinked and 06 badged with some lights smile.gif

ok Im not sure on image tags but here goes laugh.gif
Side on
Seat hookup
Engine work, it's not done yet so nothing has been cleaned....
And the back, Ratfinked and 06 badged with some lights smile.gif
Senior Member
Joined: Jul 2004
Posts: 5,155
Likes: 0
From: Eau Claire, WI
Vehicle: 97 Tib
That's the first time I've ever seen those chrome tails on a tib look decent..
I like the tiburon badge at the back, but i'm not a fan of all your other decals..
dear god clean that engine bay!!!!! lmao.gif
too bad you have an autotragic.
hey, wanna make me some of those brackets for my seats? we have the same seats but my brackets are less than perfect (the passenger side is only held down by 3, LOL)
I like the wheels also, but I think 16s would've suited it much nicer.
It looks hot being lowered like that, now get some tint cool.gif
Thread Starter
Senior Member
Joined: May 2007
Posts: 869
Likes: 0
Vehicle: 1998 Tiburon
Seats? man they were a nightmare 02.gif
Ok, here's how I did and what I used..
They came on sliders and so I worked out pretty quickly that it would be very easy to tap and bolt into the floorbeam in the front where the stock seats bolted it.
Very very easy, tap cost about $3 and the bolts were cheap.
However once they were bolted down it was clear to see the islands at the back where the stock seats bolted down were miles away from the sliders and the back part of the bucket seat slider was about an inch too high anyways.
After alot of head scratching I hatched my plan.. go to the steel yard (fazzios) and get some 1"x3" box section steel.
If memory serves these were about 17.5 inches accross but dont count me on that smile.gif
So I then used the stock seats to mark the holes and drilled into the 3x1 all the way through.
At which point I cut out sections so that the bolts (the stock seat bolts) could pass through the top layer and bolt the bottom layer down.
Once these beams were fabbed and very sturdy on the floor I then bolted the front bolts down and marked the rear holes through the sliders onto the new beams I had on the floor... remove seat, drill and tap rear holes into the beams and then completely bolt the seat down.. very very solid..
The harnesses are bolted as follows...
The side harness fixtures are in between the stock bolt and the rear fabbed beam and the rear harness points anchor to the rear seatbelt bolts below the rear window.
A bit of a pain because one strap needs to be adjusted slightly longer than the other so that they center ok but after an hour or so of twiddling it all went together well.
What ill do is draw up a diagram of how I did it.. you'll also need a angle grinder with a cut wheel to fab the side parts so that you can get the bolts in smile.gif
The decals are Ratfink, who is Ed Roth (big daddy roth) mascot.
Ed Roth is a very famous name from the 50's and 60's in drag racing in Cali.. he was the first person to make popular the use of metal flake gold leaf and airbrush graphics.. Im a *huge* fan of his and plus when I was a kid my nickname was ratfink cos I had big buck teeth laugh.gif
There aint much left of the teeth now, my BMX hobby smashed them to pieces lmao.
The side decals cover scratches, I kinda like them they have that racey look but arent too OTT for me..
The engine bay needs a good steam clean yes, but next week I have to do a complete belt replacement as the 'gine is nearing 89k and I dont want the timing belt to snap.. so I will wait til thats done before cleaning the bay and painting the HOT cover smile.gif
Being originally from england I have a odd taste in cars.. I like the euro look and know how to use it (plain.. those tail lights only look good on plain cars) with minimal bling.. just keep the look flowing smile.gif
Getting Tint here in south jersey isnt something I want to entertain, the cops around here take a VERY dim view of it and a friend of mine got caught coming home from the tinters.. they made him wind the windows down which destroyed his tint and then he was given 24 hours to remove it.
Gits.

