
Gauge Led's?


Senior Member
Joined: Apr 2007
Posts: 102
Likes: 0
From: Buffalo, NY
now i havent opened up my dash yet but if you could would you have just bought two of the 5-LED bulbs? think that would have made an improvement?
and have you considered doing something similar behind the heat/AC controls or do those not use incandescent bulbs?
or does anyone else know of an easier solution to the ripping apart and re-inserting of LEDs for both of these locations?
and have you considered doing something similar behind the heat/AC controls or do those not use incandescent bulbs?
or does anyone else know of an easier solution to the ripping apart and re-inserting of LEDs for both of these locations?

Senior Member
Joined: Feb 2009
Posts: 1,932
Likes: 0
From: Boston
Vehicle: 2006 Pontiac GTO
What do you mean? I used 5-led bulbs in all the places where the bigger bulbs were (4 if I remember correctly).
For the heater panel, there are only two very small bulbs used in there, so I don't think just swapping them with leds would work. Plus, the red part of the heater dial would barely light up (just like the tach and temp redline barely light up on the dash).
For the heater panel, there are only two very small bulbs used in there, so I don't think just swapping them with leds would work. Plus, the red part of the heater dial would barely light up (just like the tach and temp redline barely light up on the dash).

Moderator


Joined: Feb 2009
Posts: 11,732
Likes: 5
From: Leesville, Louisiana
Vehicle: 2001 Hyundai Tiburon
LOL! A little better? A lot better! I know what 40 LEDs looks like in person... it dosn't look as bright as your pictures. You should post less misleading pix.
Guys, do not take those LED shots seriously.. you will not get anywhere near those results. That's a camera trick.
Guys, do not take those LED shots seriously.. you will not get anywhere near those results. That's a camera trick.
Senior Member
Joined: Feb 2009
Posts: 1,932
Likes: 0
From: Boston
Vehicle: 2006 Pontiac GTO
Have you actually tried the 5-WLED bulbs DTN?
Like I said, the pictures look a little better than reality. It surely is a lot brighter than stock, so I wouldn't agree that these pictures are misleading. I never said they're as good as the real thing (putting a lot of LEDs in there yourself), but it is acceptable, and I will stand by my statement.
If you have any suggestions on how to take better pics, I can try again. A stock photo with the same camera is this:
http://picasaweb.google.com/radu.rd2/DashW...760360259204258
Now I know you can't directly compare them, even though they were taken in the same conditions, but I don't think you can deny they're significantly brighter than stock. And the pictures do show that the light is pretty uniform, which actually was the main problem with the usual led bulbs.
Senior Member
Joined: Apr 2007
Posts: 102
Likes: 0
From: Buffalo, NY
well if they're brighter than stock in most places AND blue... then i can sacrifice a little bit of consistency, how long did it take you to replace the 4 stock bulbs (4, right?), and where'd you get them from? im definitely doing this then man, thanks for the idea and the info, i like nice and easy fixes like this. maybe someday ill do the real thing but i like the look of this right now.

Senior Member
Joined: Mar 2010
Posts: 2,615
Likes: 11
From: Denver Co
Vehicle: 1999 Hyundai Tiburon
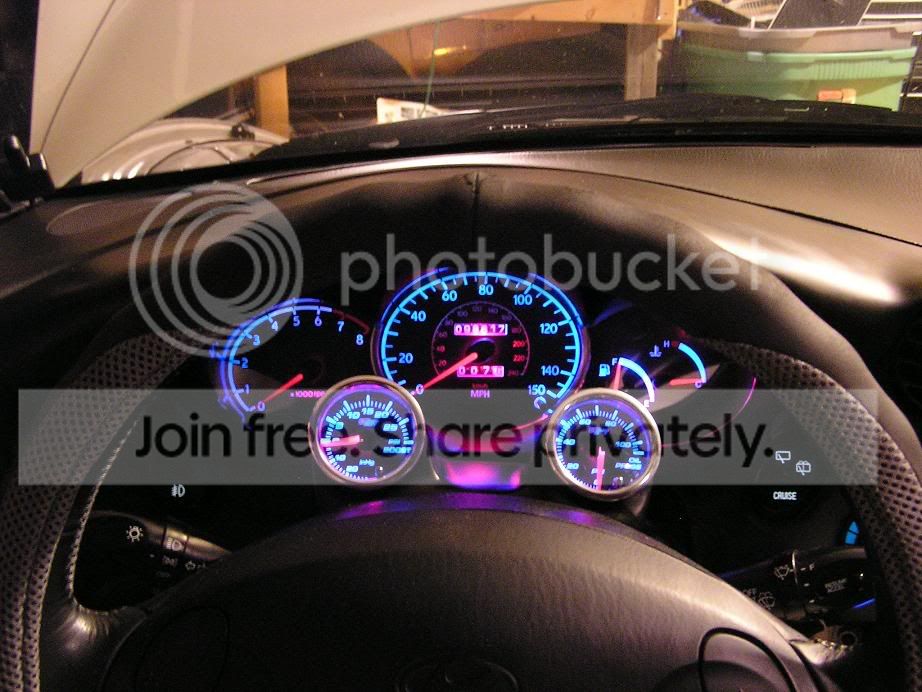
I liked how the wedge LED's from SuperbrightLEDS.com came out as well. I did modify the needles with red LED's so the needles would be bright, but even before i did that, I liked how it looked. The only drawback is your needles will probably be very dim. I did a lot of work to get the blue numbers and rings and red needles. I almost wish I would have just gotten red LED's and just did everything in red. I think if you did that, it would look great! Everyone here seems to have blue LED's, it would be cool to see someone do red or another color instead. But with some work and some patience, you can do just about anything.
Here is a pick of my gauges:
Here is a pick of my gauges:
Senior Member
Joined: Feb 2009
Posts: 1,932
Likes: 0
From: Boston
Vehicle: 2006 Pontiac GTO
Yup, my needles are dim, and they look weird. I also thought that red would have looked a lot better..
Yours look great! How did you add the red leds? Did you drill holes through the lens thingy? And how did you get those blue circles around the gauges (the left and top part of the tach and the left and right parts of the speedo)?
Yours look great! How did you add the red leds? Did you drill holes through the lens thingy? And how did you get those blue circles around the gauges (the left and top part of the tach and the left and right parts of the speedo)?

Senior Member
Joined: Aug 2005
Posts: 174
Likes: 0
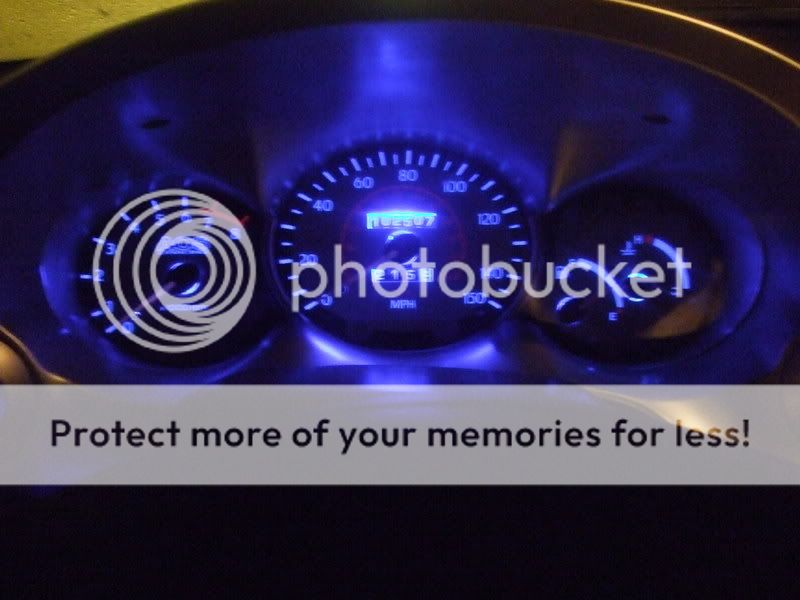
Here are the pics I promised to put on. Remember, they are gonna be quite a bit brighter than the actual lights because thats how cameras work. I have two concerns with my current setup. First, the bulb behind the fuel gauge is offset a bit and makes the needle dimmer than the other needles. (The needles are a little on the dim side but I like the effect.) Second, the bulbs behind the heater cluster are set back further than behind the gauge cluster. It creates dark/bright spots across the numbers/icons. If I could do this again, I would try to use a brighter bulb behind the fuel gauge and maybe put some LED's behind the heater cluster to even out the lighting. All in all, I'm pretty happy with the results and do not plan on ripping it out to make any adjustments. BTW, make sure you test everything before you put it back together!

Senior Member
Joined: Mar 2010
Posts: 2,615
Likes: 11
From: Denver Co
Vehicle: 1999 Hyundai Tiburon
radu_rd2: If you know what the back of the gauges look like, you know there are those clear plastic "feet" that travel down to the bulb location. This is to direct light to the needles. Its actually very cool how they did that. Well, I cut them completely off. I got some 3mm LED's from SuperbrightLEDs.com and actually sanded them even smaller. Then I removed the clear plastic discs that the gauges are attached to, turned them over so all my work would be done on the bottom so the gauge faces would still sit flush, and figured out good locations for the LED's to sit so they would light up the needle. I believe I used about 3 per needle on the tach and MPH, the fuel and coolant gauges I used one.
Then I used a soldering gun to heat the plastic and make "trenches" for my LED's so they would sit flush. When I got them just right, I put the shaved down 3mm LED in place and used the melted plastic I removed, put it over the LED, and re-melted it with the soldering gun to fuse the red LED in the plastic. I did it this way so the LED's would have no chance of interfering with the gauges themselves. This was especially important with the speed gauge as it has your mileage ticker under there as well. I also used some of the melted plastic to fuse the wires to the underneath of the plastic as well so I didnt have wires interfering with the gauges.
i'm sure some one will have an easier way, but thats how I did it. oh, and the rings that you are seeing is the reflection off the black rounded bezel that surrounds and snaps on the front of the gauge cluster. I chromed that piece. I didnt realize that doing that would have extra benefits when i turned my lights on at night! smile.gif


