My Head Has Holes In It. They Need A Port And Polish!
 09-20-2008, 03:09 PM
#31
Super Moderator


Thread Starter
Cleaning the exhaust manifolds of all the burnt-on oil and carbon fouling is like a porting job all by itself. There has got to be an easier way, without getting the whole head hot-tanked. So how do you get this stuff off, besides with a pick (the hard way, like I did one set of ports last night)? The runners, bowls, EVERYTHING, was coated up to 1/8" thick.
PICS!
The runners
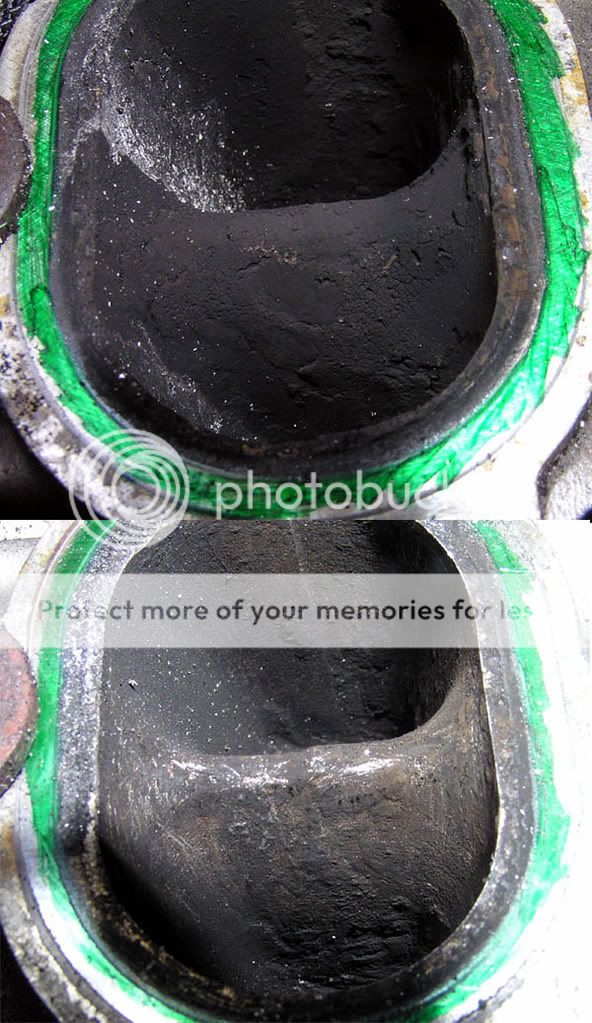
The bowls. Yes it is very lumpy in there, and no, it doesn't all have to be made smooth. You want to be careful on the top of the runner, to try and avoid making a reversion in the flow. There's a slight overhang there, and it's got to be left as shallow as possible (don't grind it all pretty). The short-side radius can definitely stand to be opened up a little wider. The valve guide is literally completely covered with nastiness that's hard as cement (not concrete, but at least cement). Very little is to be gained by reshaping that area, also, to the point of not being worth too much time.
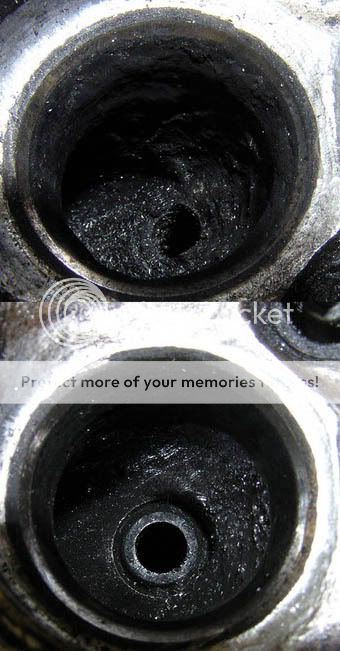
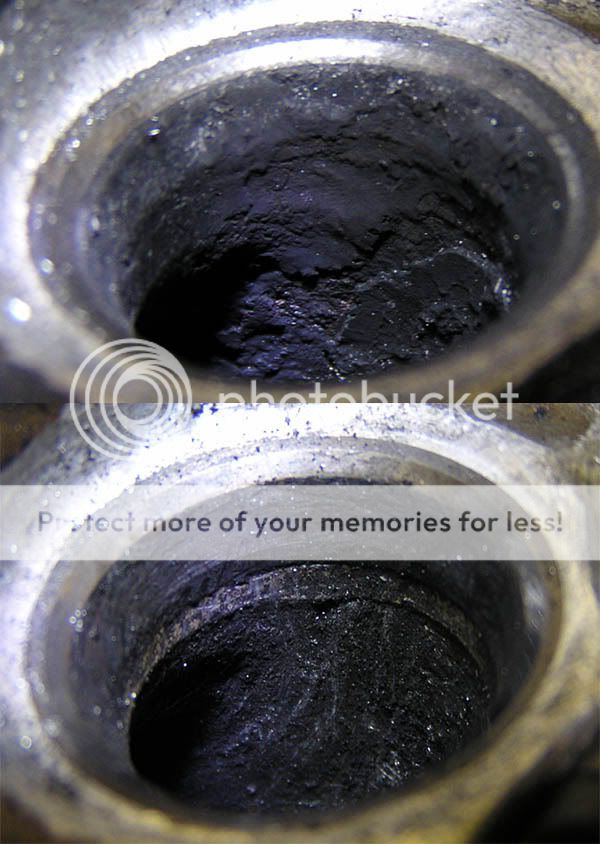
The throats. Build-up, even here!
There will probably not be many pictures of the turn in the port, because you can't see it. It's a right-angle. And narrow. Looking from either end, you can't see around the bend. I'm going to have to think about just what to do here.
IF VISIONZ WOULD GET ME THE CUTAWAY PHOTOS I would know how far I could widen the floor of the exhaust runners hint hint
PICS!
The runners
The bowls. Yes it is very lumpy in there, and no, it doesn't all have to be made smooth. You want to be careful on the top of the runner, to try and avoid making a reversion in the flow. There's a slight overhang there, and it's got to be left as shallow as possible (don't grind it all pretty). The short-side radius can definitely stand to be opened up a little wider. The valve guide is literally completely covered with nastiness that's hard as cement (not concrete, but at least cement). Very little is to be gained by reshaping that area, also, to the point of not being worth too much time.
The throats. Build-up, even here!
There will probably not be many pictures of the turn in the port, because you can't see it. It's a right-angle. And narrow. Looking from either end, you can't see around the bend. I'm going to have to think about just what to do here.
IF VISIONZ WOULD GET ME THE CUTAWAY PHOTOS I would know how far I could widen the floor of the exhaust runners hint hint
 09-20-2008, 03:20 PM
#32
Senior Member

Join Date: Mar 2008
Location: Grand Rapids, MI
Posts: 1,759
Likes: 0
Received 0 Likes
on
0 Posts
Vehicle: 2001 Hyundai Tiburon
Wow, that fouling is WAAAAY worse then my spare head. I had some crud to clean off, but none of it needed more then a good scrubbing with the rotary tool.
09-20-2008, 04:22 PM
#33
Super Moderator
Thread Starter
Yeah. I'm thinking it's time for some new valve stem seals @ 165,000 miles! I'm not so sure the exhaust valves were sealing very well either.
09-24-2008, 10:49 AM
#34
Super Moderator
Thread Starter
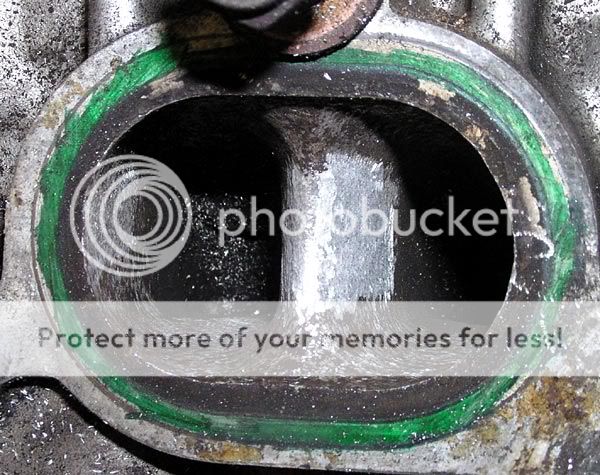
I decided it sucked too bad to use a pick to remove the fouling. I grabbed my biggest, dullest ball milling tip and took out chunks at a time, enough to let me see what the metal looks like underneath. There is some sanding to be done yet wink1.gif but at least I was able to get an idea what's happening. I went as far as my current setup will let me reach into the exhaust runners, removing flash and evening out the core shift. Looks MUCH better now eh.

BTW MJ your images are gone (boo! )
BTW MJ your images are gone (boo! )
09-24-2008, 08:23 PM
#35
Senior Member

Join Date: Mar 2006
Posts: 313
Likes: 0
Received 0 Likes
on
0 Posts
Vehicle: 2000
Im Not sure if this pic I found will help you any but i figured it would be better than nothing. Its of a cut beta head showing the exhaust and intake ports. Its Going to be the second pic down.
Head Pic
Head Pic
09-24-2008, 11:06 PM
#36
Super Moderator
Thread Starter
That's actually pretty helpful, thanks!
forever and a day ago, Random chopped up a cylinder head and took pictures. His photobucket is all wedding stuff these days and nobody wants to go dig out the photos. Like the pothead said:
"It'd be a lot cooler if you did!"
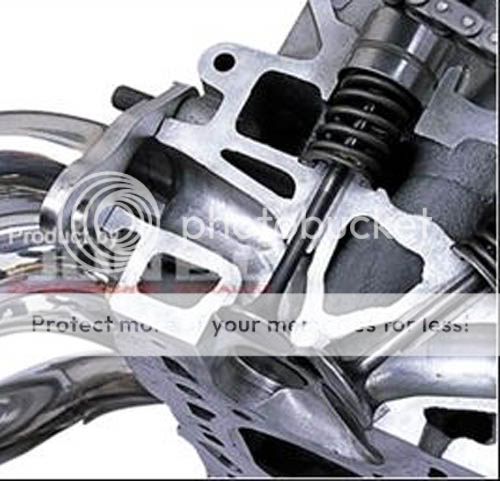
Looks like the limitation on the Singh grooves is ... nonexistant. Don't cut so deep you end up in China, when you are cutting Singh grooves in a Beta head. That also explains how the Koreans can delete the exhaust side quench pad... it's solid all the way out past the edge of the chamber. Good, now I can feel much more comfortable, deshrouding the exhaust valves all the way out to the deck!
And if the thickness is the same (looks like 1/4") all the way around the port, that means a good 1/8" can come out of the sides & floor of the SSR on both intake and exhaust, if need be.
Image from www.performancecoupe.co.uk, where you can get headers for only $800 or so. Wow. Do they come with a singing monkey or something?
forever and a day ago, Random chopped up a cylinder head and took pictures. His photobucket is all wedding stuff these days and nobody wants to go dig out the photos. Like the pothead said:
"It'd be a lot cooler if you did!"
Looks like the limitation on the Singh grooves is ... nonexistant. Don't cut so deep you end up in China, when you are cutting Singh grooves in a Beta head. That also explains how the Koreans can delete the exhaust side quench pad... it's solid all the way out past the edge of the chamber. Good, now I can feel much more comfortable, deshrouding the exhaust valves all the way out to the deck!
And if the thickness is the same (looks like 1/4") all the way around the port, that means a good 1/8" can come out of the sides & floor of the SSR on both intake and exhaust, if need be.
Image from www.performancecoupe.co.uk, where you can get headers for only $800 or so. Wow. Do they come with a singing monkey or something?
09-25-2008, 10:15 AM
#37
Senior Member
Join Date: Mar 2006
Posts: 313
Likes: 0
Received 0 Likes
on
0 Posts
Vehicle: 2000
Im glad that picture helped ya i ran acrossed it because of the motoria intake manifold thread and remembered that you were looking for a cut pic. Anyway good luck with this whole project, Im following your progress closely.
09-27-2008, 09:44 PM
#38
Super Moderator
Thread Starter
I just re-read this whole thread and realized a few things need clarification:
*The Singh grooves will need re-cut, after the head is decked for compression. I'd like to have compression as high as I can, since the grooves will keep detonation away. I will have to do something clever with the timing between measuring valve/piston clearances and getting the work done, to be able to get the job done in a single weekend & drive it to work monday.
*I intend to install the pistons from that donor engine, assuming they will clean up. That, plus a thinner 2002 elantra head gasket would normally net a 1 point static compression ratio increase. It may get me back to stock or just slightly higher
*The exhaust runner outlet divider needs to be thinned out a little, maybe to a dull edge.
*I'll have to see what my manifolds look like, before I can decide how much to remove to do a port match/blend on the intake AND exhaust runners. (I think this will have me down for more than a weekend, shh, don't tell the wife)
*The underhangs on the intake/exhaust bowls need to be left mostly alone, aside from removing the sharp transitions between the casting & machining
*The shape and volume of the runners is going to stay pretty much the same, aside from easing the short-side radii, especially on the exhaust side, and widening the SSRs a little bit as well. The casting flash & shift cleanup should help alot, especially at the bowl/chamber transitions.
*Minor smoothing/reshaping of the spark plug hole needs to be done, still.
*The only other big operation in the chamber will be to pull the deshrouding out to about 1/2" from the exhaust seat, and then maybe make a large-radius roundover to the quench pad
Unless anybody else has some hands-on flowbench time to tell me different, that's about it. Just another full day with the grinder...
If anybody has a spare beta head and a big bandsaw, I'd sure like photos of one that's been chopped up a bunch of different ways (coughVISIONZcoughcough)