The New 1.8 Cam Install


Senior Member
Joined: Jan 2008
Posts: 245
Likes: 0
From: Hamburg PA
I've put new cams in before. I put exhaust and intake cams in. BUT!!!! I screwed up the timing and regretted ever doing it because it cost me a fortune to get it back in time. I am willing to try it again though with just the intake cam. Is it worth getting a new cam gear? Is it really worth the money and time?
Also do you have to remap your ecu? If so where can I get that done?
Also do you have to remap your ecu? If so where can I get that done?

Senior Member

Joined: Feb 2006
Posts: 977
Likes: 0
From: Hereford Az.
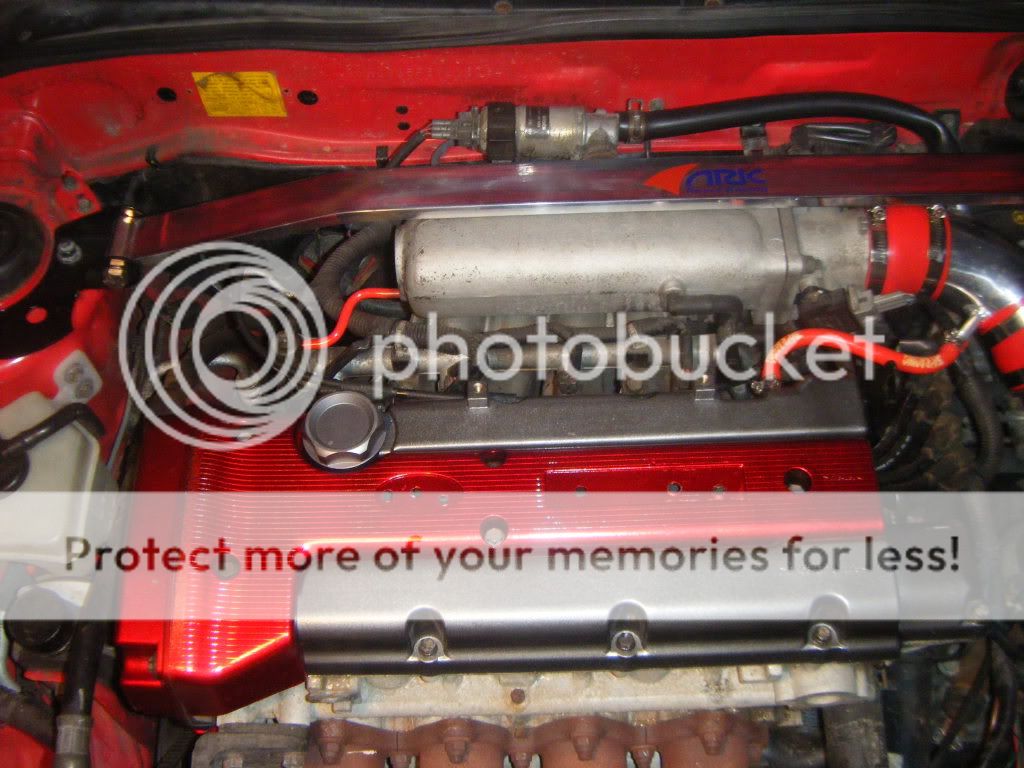
Pics are needed here... i've always woundered how to do this, i feel my tib is getting a little sluggish and after i get a job i would like to do this and get some other stuff also, including the shifter ring i've always wanted...
Anyway, we need the pics again... please? tongue.gif
Anyway, we need the pics again... please? tongue.gif

Senior Member
Joined: May 2006
Posts: 1,497
Likes: 0
Vehicle: 1998/Hyundai/Tiburon FX
Pick up a CHILTON manual everyone, if you don't already have one.
It explains the cam removal/install quite well, and gives you good explanations/pictures on how many chain links to separate the cams by when you install them.
It really is quite easy to do if you have some mechanical ability.
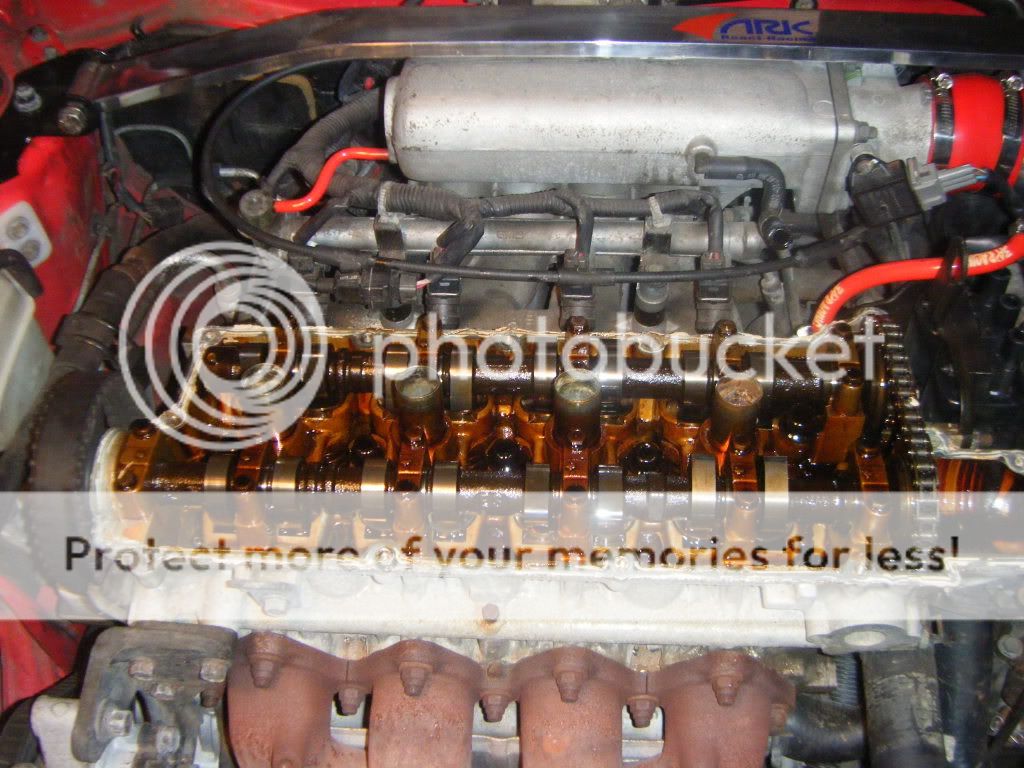
Pull the spark plugs wires off, pull the pcv valve and valve cover vent tubes off, unbolt the throttle cable, then remove all of the 10mm bolts that hold the valve cover down make sure you get them ALL (including the one in the center of the cover to the left of the oil cap). Then lift on the valve cover to separate it from the head, it will likely be stuck to the head since you guys don't take it off on a regular basis. Instead of just trying to pull straight up, put your hands on the firewall side of the cover and pull hard toward the front of the car in bursts, throw your weight into it. This should get the gasket to pop free. If not, VERY, VERY carefully get a small screwdriver (flathead of course - make sure the head isn't too sharp so you don't gouge the aluminum head where the gasket mates to) and pry between the head and the cover every few inches of the perimiter to get the valve cover to free up from the head.
Now to actually get the cover off the head you will need to lift the drivers side of the cover up and wiggle the cover out from between the cam gear and the last exhaust cam cap (not too hard, be patient).
Once you have the cover removed, use a 17mm wrench to move the cams back and forth via the cam gear bolt. Make sure there is no spring tension that could cause the cams to spin (if you can move them back and forth without them moving on their own or pulling themselves to another position via the valve spring pressure, you are fine), though it won't really matter if they spin or not because the exhaust cam is always linked with the crankshaft via the timing belt, and you match the intake cam with the exhaust cam via the timing chain.
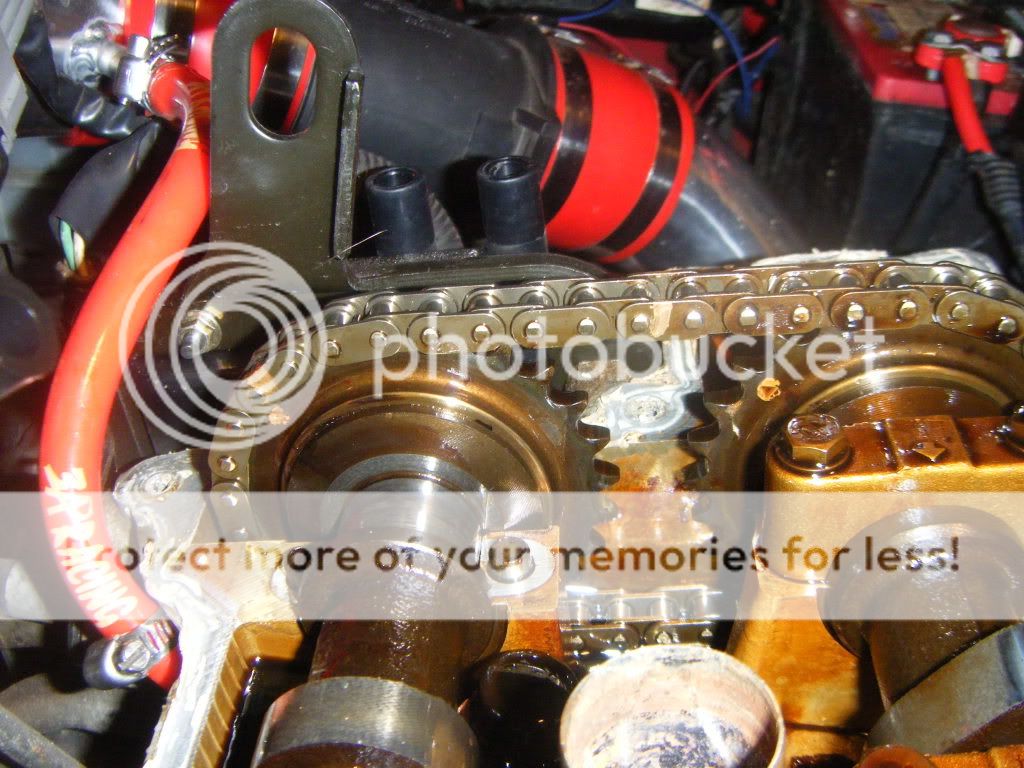
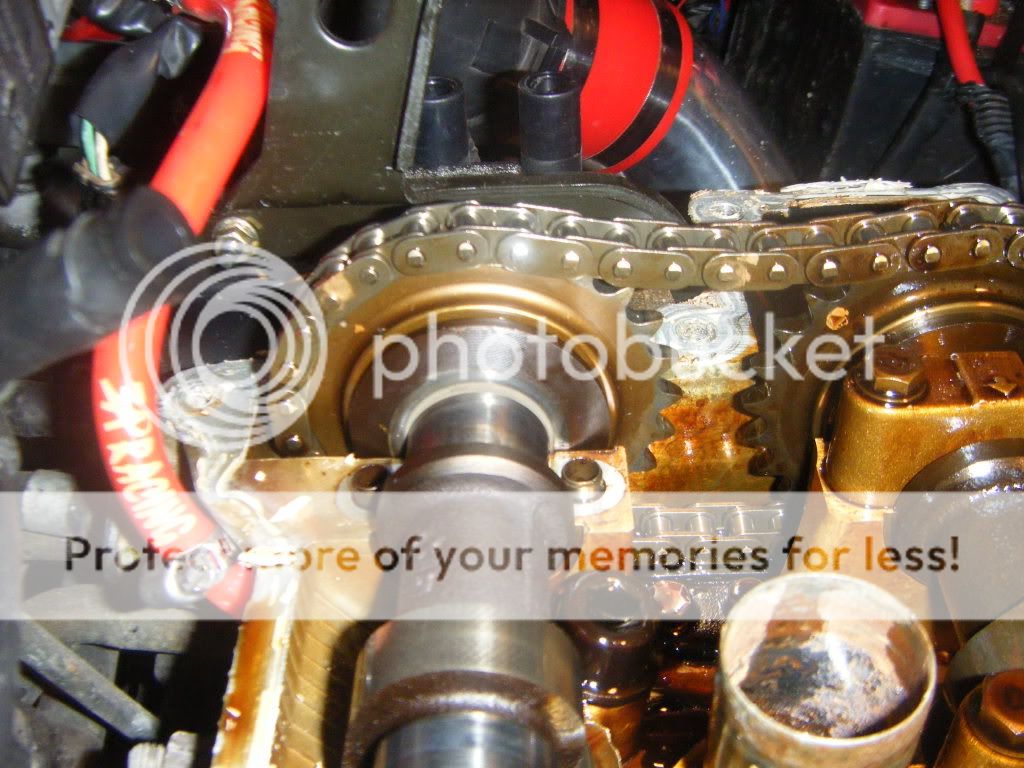
IMPORTANT!!!: Before removing the intake cam, make a note of how many chain links separate the cams (there will be little notches on the sprockets, count how many links are between these notches from cam to cam. It makes it easier to make sure these notches are facing upward before removing the intake cam as well). If there are no notches, just use the alignment pins that hold the sprockets in a certain position on each cam. Both of the cams notches/pins should face exactly the same way (both perfectly upward at the same time). You need to make sure that after the install they are pointing identically as well; otherwise, your cam timing will be off by +/- 10 degrees for every chain link!
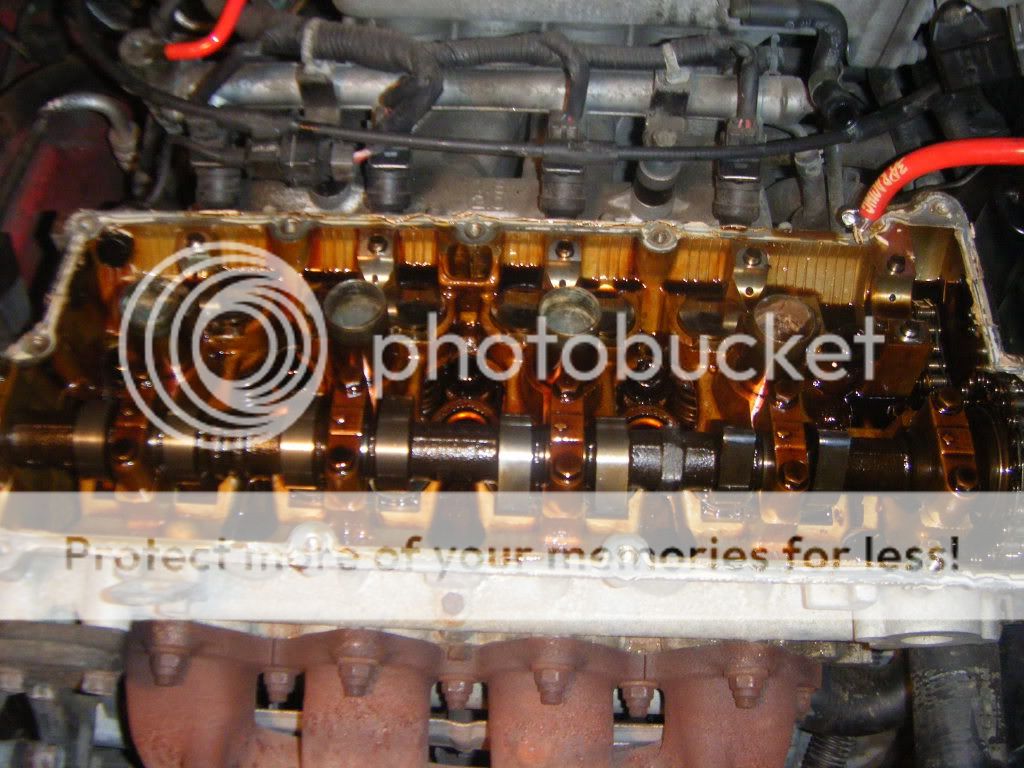
When removing the intake cam caps, start with the center, and only loosen the bolts a few turns each, then work your way to the outer caps in a back and forth fasion; loosen the center, then the one to the right of it, then the one to the left of the center cap, etc. etc.
Once you have all the caps removed, lift the passengers side of the cam up and get the cam out of the timing chain, install the 1.8L cam making sure to follow the alignment steps listed above. (the CHILTON manual has pictures of that information that make it easier to visualize). Make sure all the caps go the same direction and place they came off!! The will be labeled 1E 2E 3E, etc. The lowest number should be at cylinder one and the arrows should face toward cyl. 1 (cyl. 1 is the cyl. closest to the passenger side). Just make sure the numbers increase as you work your way to cyl. 4 (closest to drivers side), and that the arrows all face toward cyl. 1. Get all the caps on and hand tightened. (make sure the alignment dowels are still in the head/caps for every cap bolt! Depending on the position of the cam lobes (what open the valves), the cam will be sitting crooked or cocked a certain way, don't worry, just start in the middle and slowly work your way to the outside following the same procedure listed for removal, back and forth, only a few turns on both bolts for each cap at a time. It should take 3-4 cylcles of this process to get all the cam cap bolts snug (BARELY snug them!), once you get them snug, follow a torque process of 3 ft/lbs, then 6 ft/lbs, then 9-10 ft/lbs. (the chilton will explain this as well), you should buy an in/lbs. torque wrench for this as you shouldn't use the lower end of a torque wrench. Just convert the in/lbs to ft/lbs, every ft/lb is 12 in/lbs. (you can pick up a cheap in/lb wrench at sears for about $50 on sale).
Once the cam caps are all torqued down, do a test, spin the engine multiple revolutions by hand with the 17mm wrench or breaker bar (is somewhat hard with just a wrench - you can remove the spark plugs to make this easier by eliminating the compression factor), make sure you can spin the engine somewhat freely, it will feel difficult at times, but that is normal (do this before you remove and replace the stock cam to get a feel for how hard it should be to turn over). This test is just confirming you aren't hitting the pistons with the valves, if you did that, you wouldn't be able to spin the engine over by hand.
After that test is completed and passed, install the valve cover, put a LIGHT coat of high temp RTV around the gasket after cleaning all oil from the head surface and the rubber gasket itself (this will ensure proper adhesion). Make sure to get the RTV around the #1 exhaust cam cap well to make sure there are no leaks there, get it around that cap and down to the head (leaks are common at that joint).
Now re-install the valve cover (make sure you get every bolt tight!), connect the spark plug wires (install the spark plugs first of course if you removed them to make turning over the engine easier), connect the PCV and vent hoses and bolt down the throttle cable.
Start her up and enjoy the extra power!
Note: it may take a bit for the ecu to learn the new timing values due to the cam change, it wouldn't hurt to reset your ecu by disconnecting the battery (which should be done whenever working under the hood anyway) during the cam change.
Hope that helped!
Eh, sorry for re-writing the diy, just realized it, lol.
It explains the cam removal/install quite well, and gives you good explanations/pictures on how many chain links to separate the cams by when you install them.
It really is quite easy to do if you have some mechanical ability.
Pull the spark plugs wires off, pull the pcv valve and valve cover vent tubes off, unbolt the throttle cable, then remove all of the 10mm bolts that hold the valve cover down make sure you get them ALL (including the one in the center of the cover to the left of the oil cap). Then lift on the valve cover to separate it from the head, it will likely be stuck to the head since you guys don't take it off on a regular basis. Instead of just trying to pull straight up, put your hands on the firewall side of the cover and pull hard toward the front of the car in bursts, throw your weight into it. This should get the gasket to pop free. If not, VERY, VERY carefully get a small screwdriver (flathead of course - make sure the head isn't too sharp so you don't gouge the aluminum head where the gasket mates to) and pry between the head and the cover every few inches of the perimiter to get the valve cover to free up from the head.
Now to actually get the cover off the head you will need to lift the drivers side of the cover up and wiggle the cover out from between the cam gear and the last exhaust cam cap (not too hard, be patient).
Once you have the cover removed, use a 17mm wrench to move the cams back and forth via the cam gear bolt. Make sure there is no spring tension that could cause the cams to spin (if you can move them back and forth without them moving on their own or pulling themselves to another position via the valve spring pressure, you are fine), though it won't really matter if they spin or not because the exhaust cam is always linked with the crankshaft via the timing belt, and you match the intake cam with the exhaust cam via the timing chain.
IMPORTANT!!!: Before removing the intake cam, make a note of how many chain links separate the cams (there will be little notches on the sprockets, count how many links are between these notches from cam to cam. It makes it easier to make sure these notches are facing upward before removing the intake cam as well). If there are no notches, just use the alignment pins that hold the sprockets in a certain position on each cam. Both of the cams notches/pins should face exactly the same way (both perfectly upward at the same time). You need to make sure that after the install they are pointing identically as well; otherwise, your cam timing will be off by +/- 10 degrees for every chain link!
When removing the intake cam caps, start with the center, and only loosen the bolts a few turns each, then work your way to the outer caps in a back and forth fasion; loosen the center, then the one to the right of it, then the one to the left of the center cap, etc. etc.
Once you have all the caps removed, lift the passengers side of the cam up and get the cam out of the timing chain, install the 1.8L cam making sure to follow the alignment steps listed above. (the CHILTON manual has pictures of that information that make it easier to visualize). Make sure all the caps go the same direction and place they came off!! The will be labeled 1E 2E 3E, etc. The lowest number should be at cylinder one and the arrows should face toward cyl. 1 (cyl. 1 is the cyl. closest to the passenger side). Just make sure the numbers increase as you work your way to cyl. 4 (closest to drivers side), and that the arrows all face toward cyl. 1. Get all the caps on and hand tightened. (make sure the alignment dowels are still in the head/caps for every cap bolt! Depending on the position of the cam lobes (what open the valves), the cam will be sitting crooked or cocked a certain way, don't worry, just start in the middle and slowly work your way to the outside following the same procedure listed for removal, back and forth, only a few turns on both bolts for each cap at a time. It should take 3-4 cylcles of this process to get all the cam cap bolts snug (BARELY snug them!), once you get them snug, follow a torque process of 3 ft/lbs, then 6 ft/lbs, then 9-10 ft/lbs. (the chilton will explain this as well), you should buy an in/lbs. torque wrench for this as you shouldn't use the lower end of a torque wrench. Just convert the in/lbs to ft/lbs, every ft/lb is 12 in/lbs. (you can pick up a cheap in/lb wrench at sears for about $50 on sale).
Once the cam caps are all torqued down, do a test, spin the engine multiple revolutions by hand with the 17mm wrench or breaker bar (is somewhat hard with just a wrench - you can remove the spark plugs to make this easier by eliminating the compression factor), make sure you can spin the engine somewhat freely, it will feel difficult at times, but that is normal (do this before you remove and replace the stock cam to get a feel for how hard it should be to turn over). This test is just confirming you aren't hitting the pistons with the valves, if you did that, you wouldn't be able to spin the engine over by hand.
After that test is completed and passed, install the valve cover, put a LIGHT coat of high temp RTV around the gasket after cleaning all oil from the head surface and the rubber gasket itself (this will ensure proper adhesion). Make sure to get the RTV around the #1 exhaust cam cap well to make sure there are no leaks there, get it around that cap and down to the head (leaks are common at that joint).
Now re-install the valve cover (make sure you get every bolt tight!), connect the spark plug wires (install the spark plugs first of course if you removed them to make turning over the engine easier), connect the PCV and vent hoses and bolt down the throttle cable.
Start her up and enjoy the extra power!
Note: it may take a bit for the ecu to learn the new timing values due to the cam change, it wouldn't hurt to reset your ecu by disconnecting the battery (which should be done whenever working under the hood anyway) during the cam change.
Hope that helped!
Eh, sorry for re-writing the diy, just realized it, lol.

Junior Member
Joined: Oct 2008
Posts: 23
Likes: 0
From: CT and RI, United States
Well, I have a written DIY on my blog here. The install is on a beta2, but it should be the exact same thing on the beta1. I tried to make the install as clear as possible. When ever I get the money to get full regrinds, I'll throw the 1.8 L cam in the beta1 and shoot a video. The guide is also available via iPhone/iTouch. Sorry for the lack of video. I think that the writing is clear enough where you shouldn't need any pictures. Just read as you go. If you run across any questions, just pm me.
EDIT: I just noticed the date on this last post. I guess the DIY sub-forum is a bit slow rolling. Sorry guys.
EDIT: I just noticed the date on this last post. I guess the DIY sub-forum is a bit slow rolling. Sorry guys.