
DIY: Veloster/Veloster turbo spring install.

Thread Starter
Super Moderator
Joined: Mar 2006
Posts: 1,304
Likes: 0
From: ABQ, NM
Vehicle: 2001 hyundai tiburon
On Friday, I finally got some time to tackle the NGM springs in my VTurbo.
First things first, the install should be identical on the NA V but I am doing the write up so the turbo peeps know how to do it.
The project took a while longer than it should have, as I always have some sort of issue with those damn spring compressors.. I hate those things.. I don't know why I always have such bad luck...
I missed a couple pictures of the rear suspension but it was SUPER easy and the text alone should be enough for anyone..
FRONT:
Step 1: Make sure car is on pretty much level surface!! Pop the hood of the car (to get access to strut towers) Put the car in 1st gear. Pull the handbrake.
Step 2: Break the lug nuts loose on all 4 wheels (just loose, don't remove)
Step 3: Jack up front of the car, from each side. I always use the pinch welds to jack the car up, just make sure you use a solid point and NOT from the suspension as it will make the work harder to impossible.
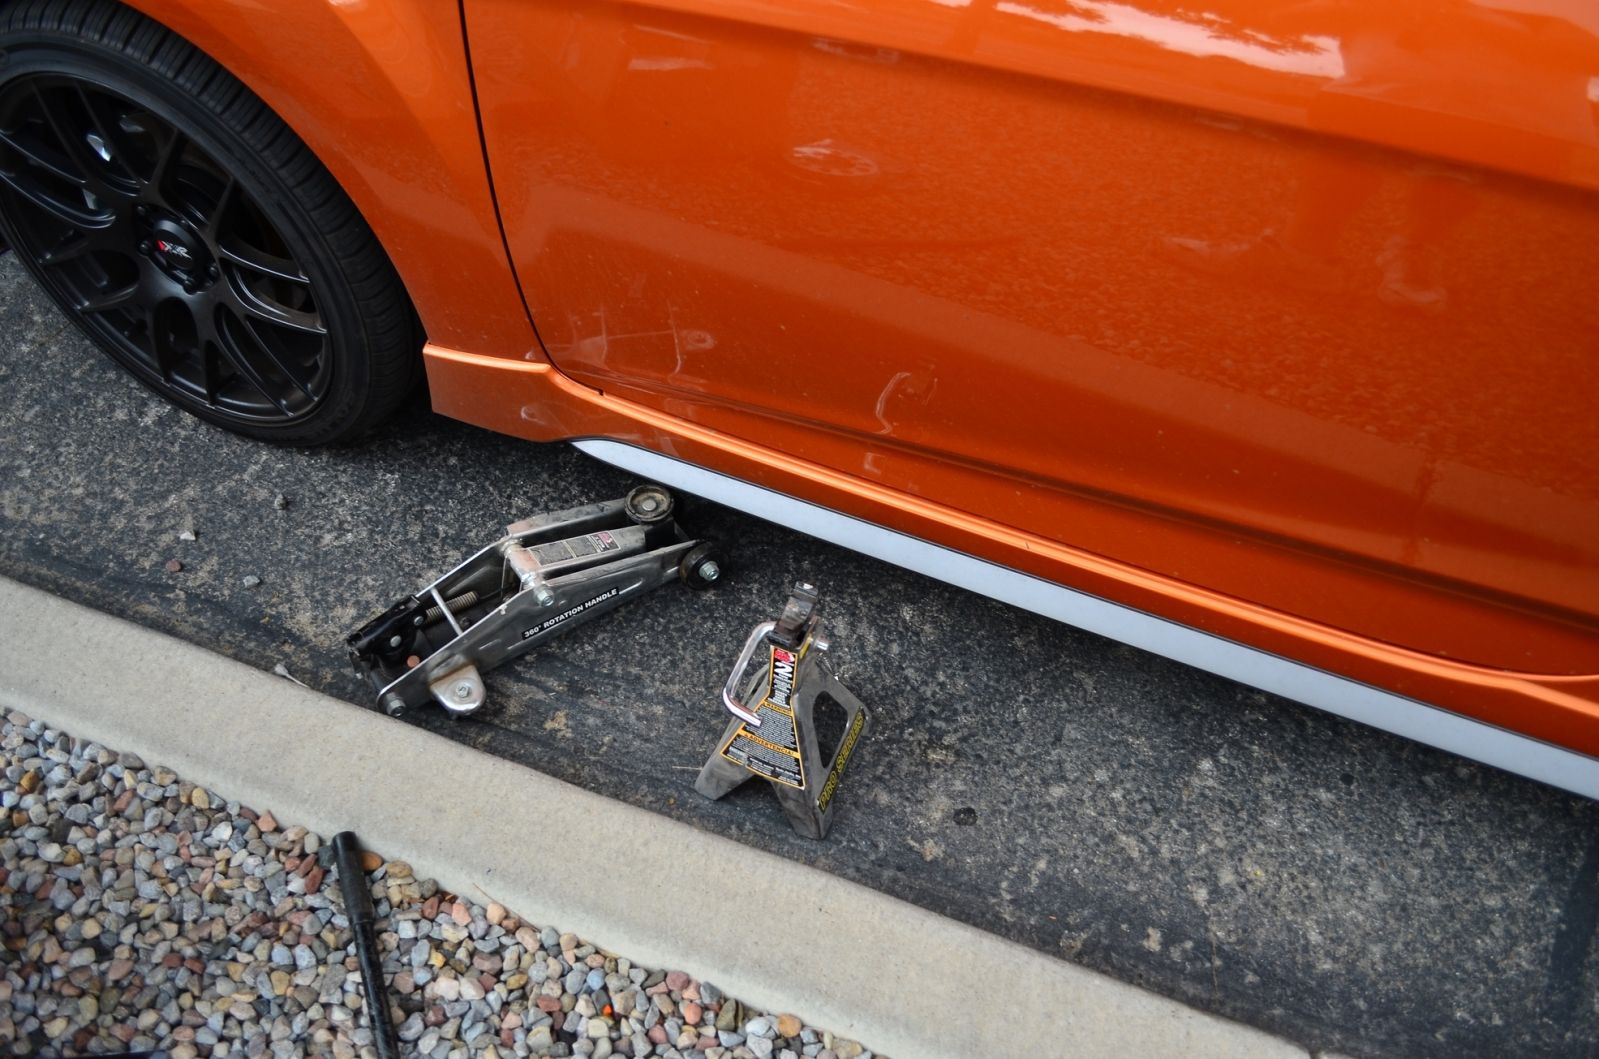
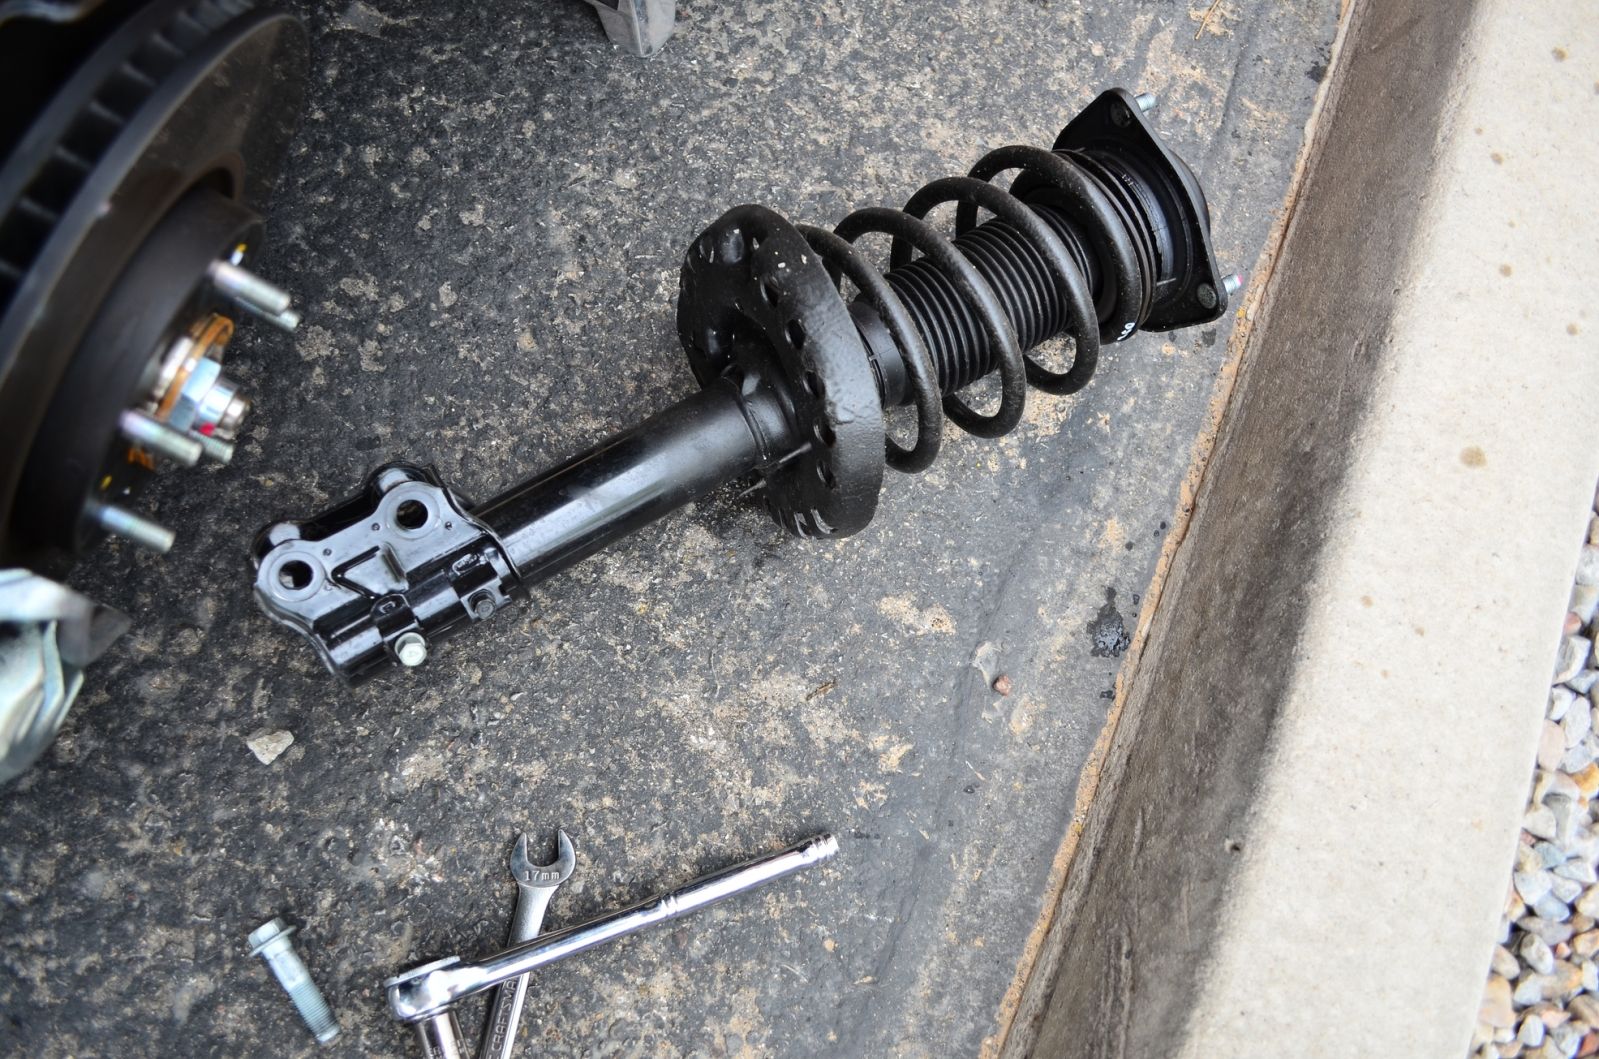
Step 4: Remove the lug nuts and set aside. Remove wheel carefully so you don't scratch it.
Step 5: The following will be exposed:
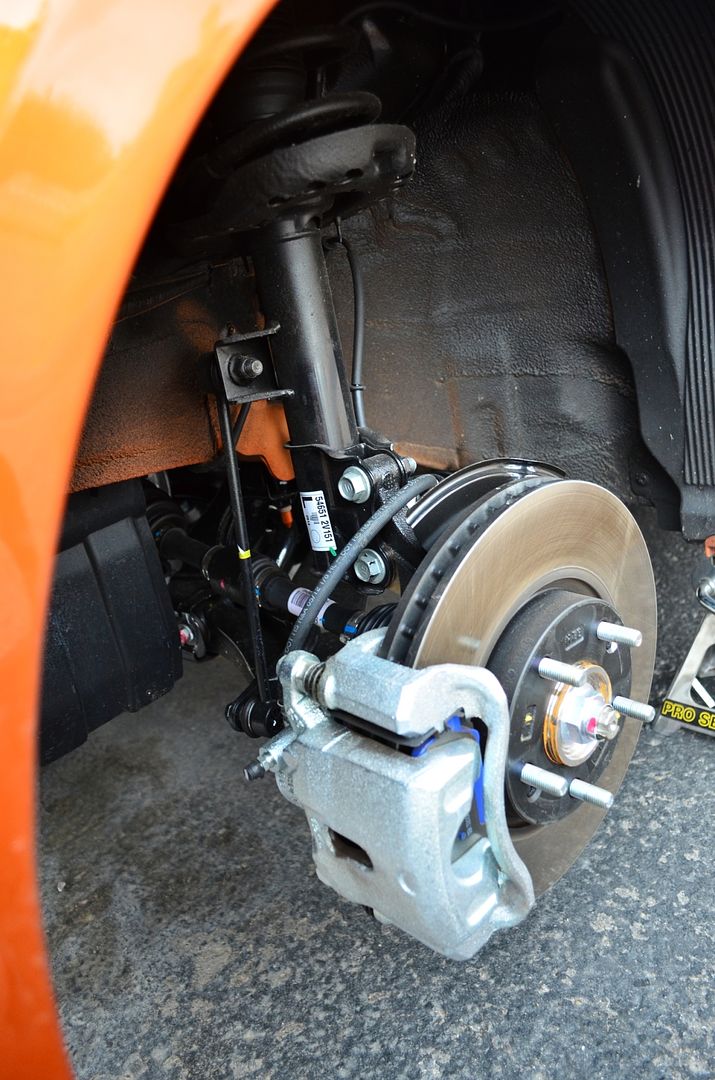
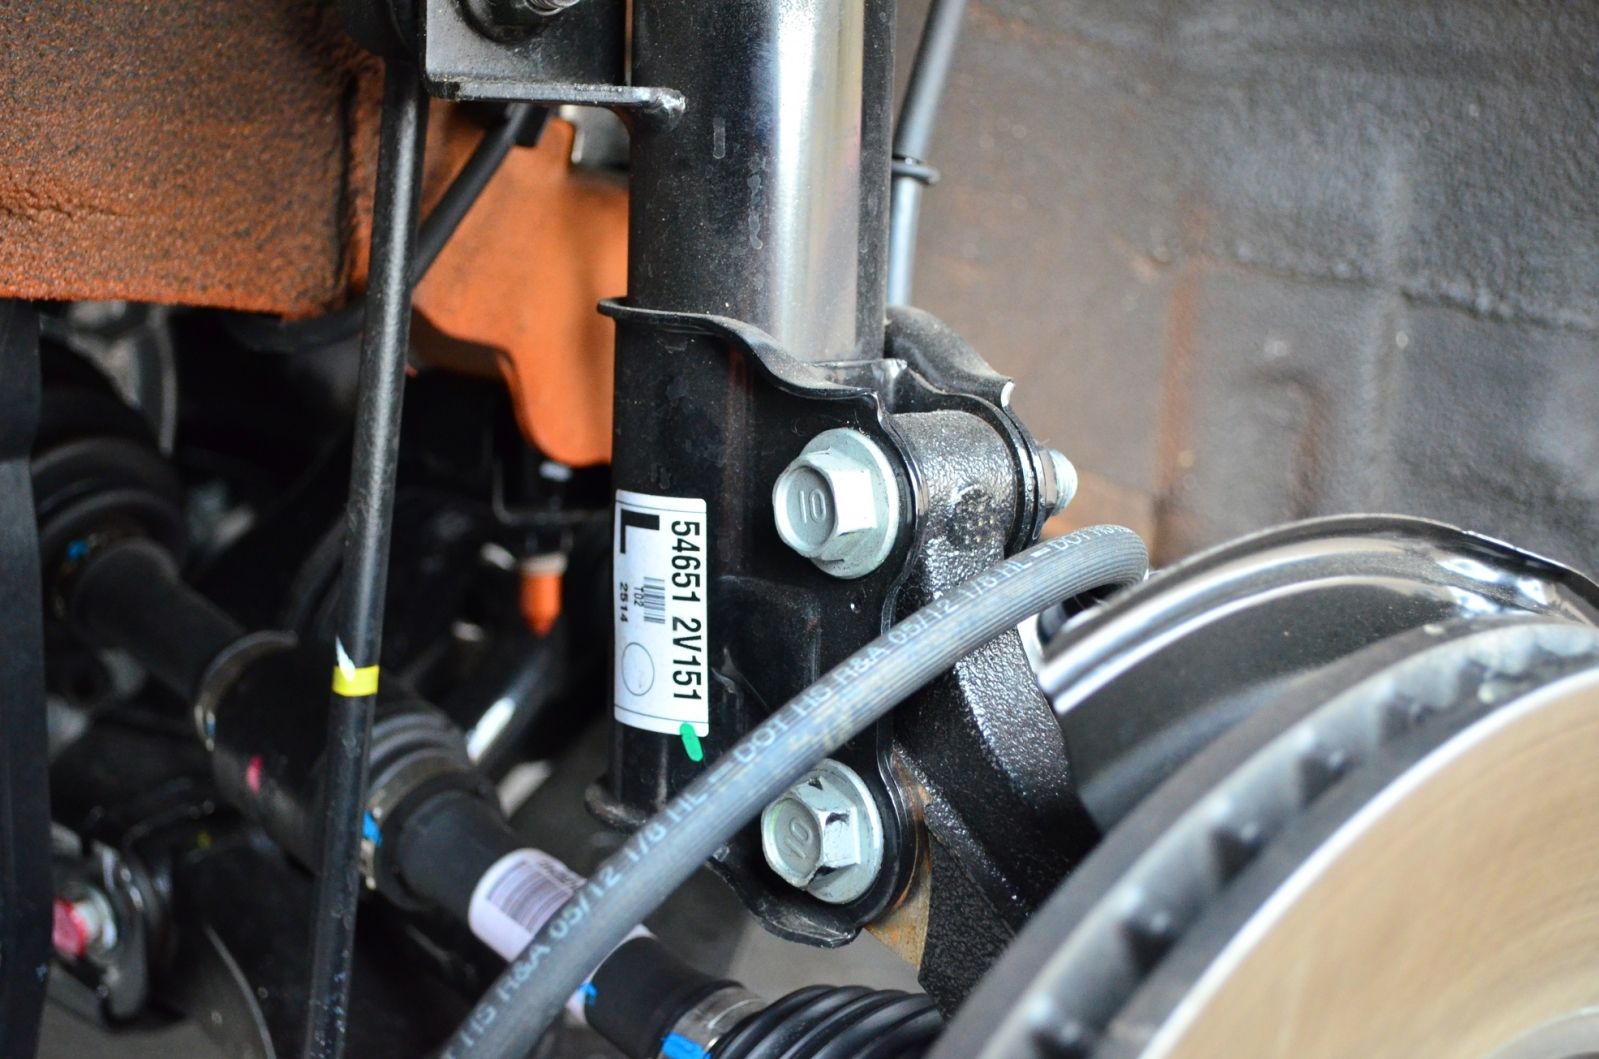
Brake loose the Strut bolt/nut combo. (The two big ones at the bottom, connecting to the hub) 17mm silver bolt and 19mm black nut
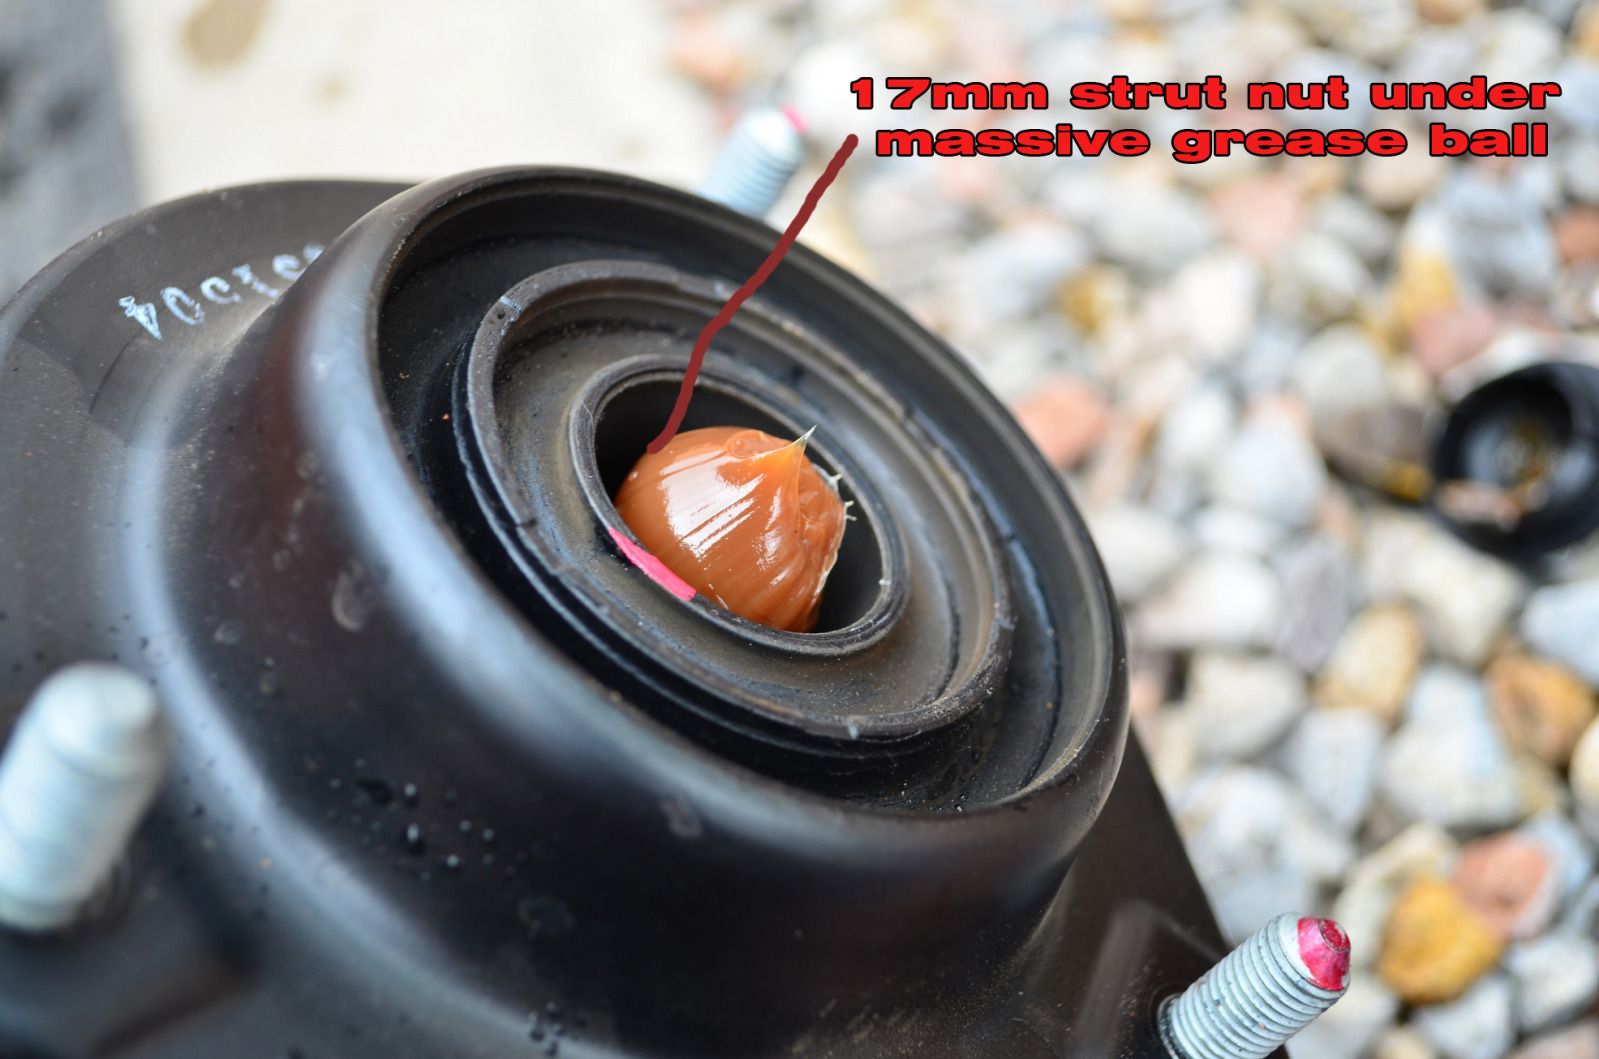
Step 6: Remove the top grease cap from the top of the strut. Remove glob of grease. Break the top strut bolt loose with a 17mm socket. JUST BREAK IT LOOSE, DO NOT REMOVE!!!!!!!!!!!
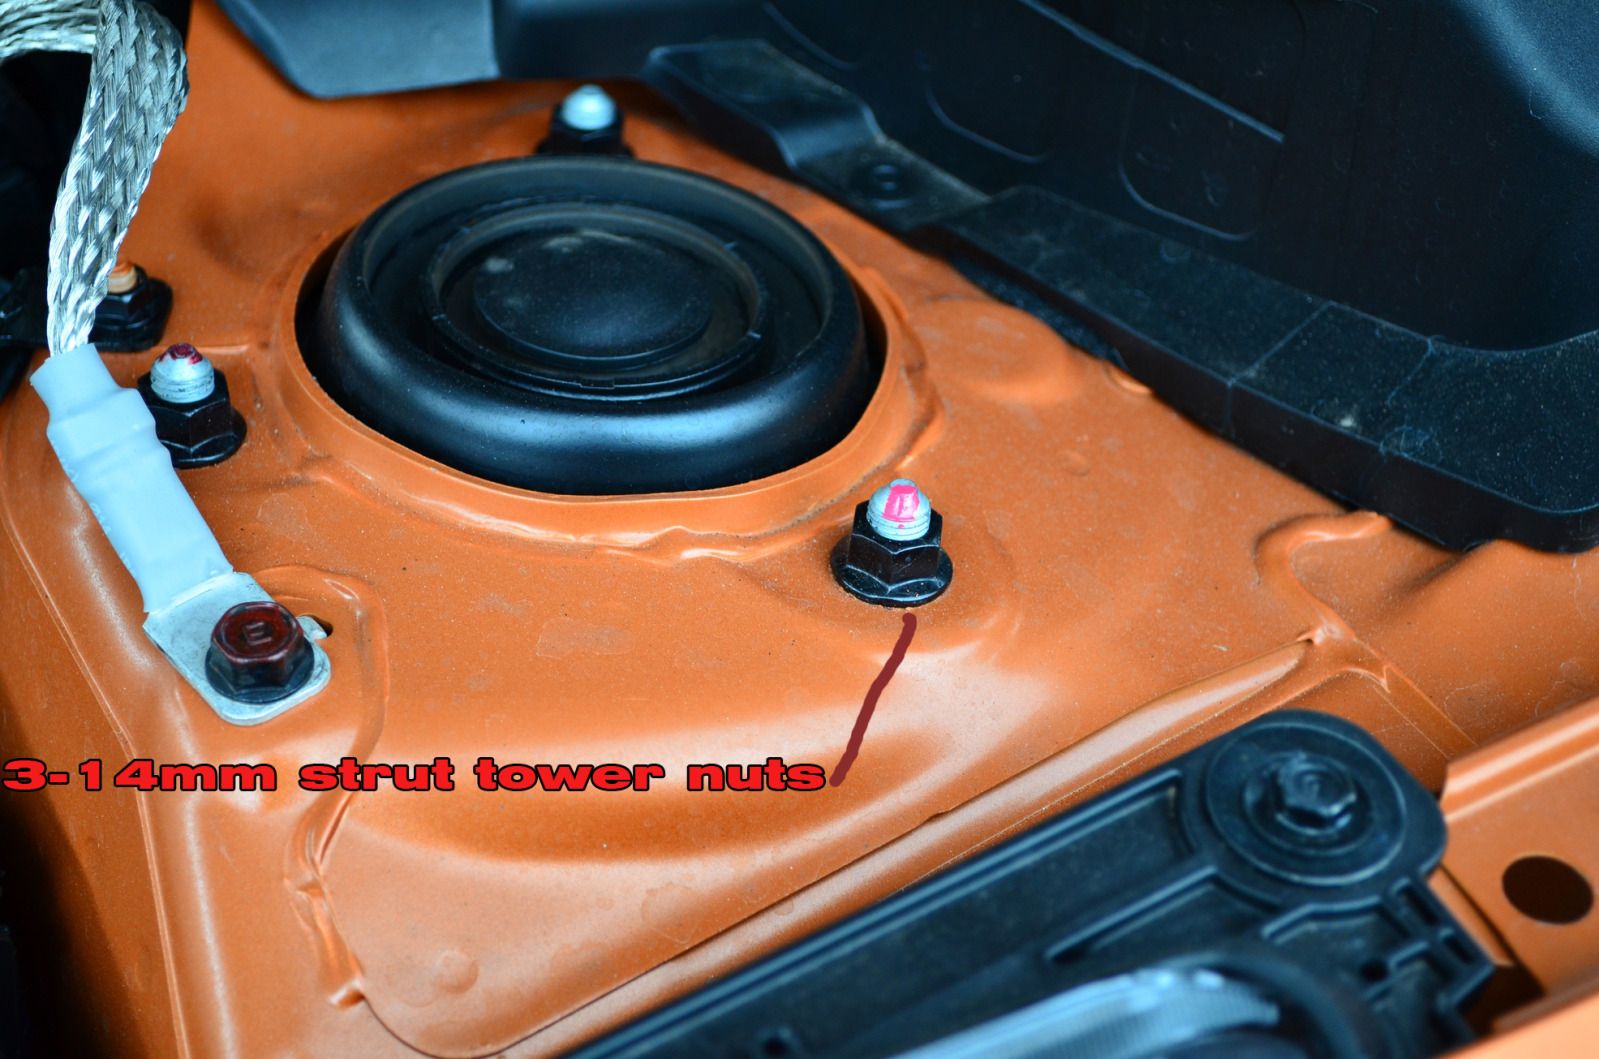
Step 7: Loosen the 3 14mm strut tower nuts but leave them on, for now.
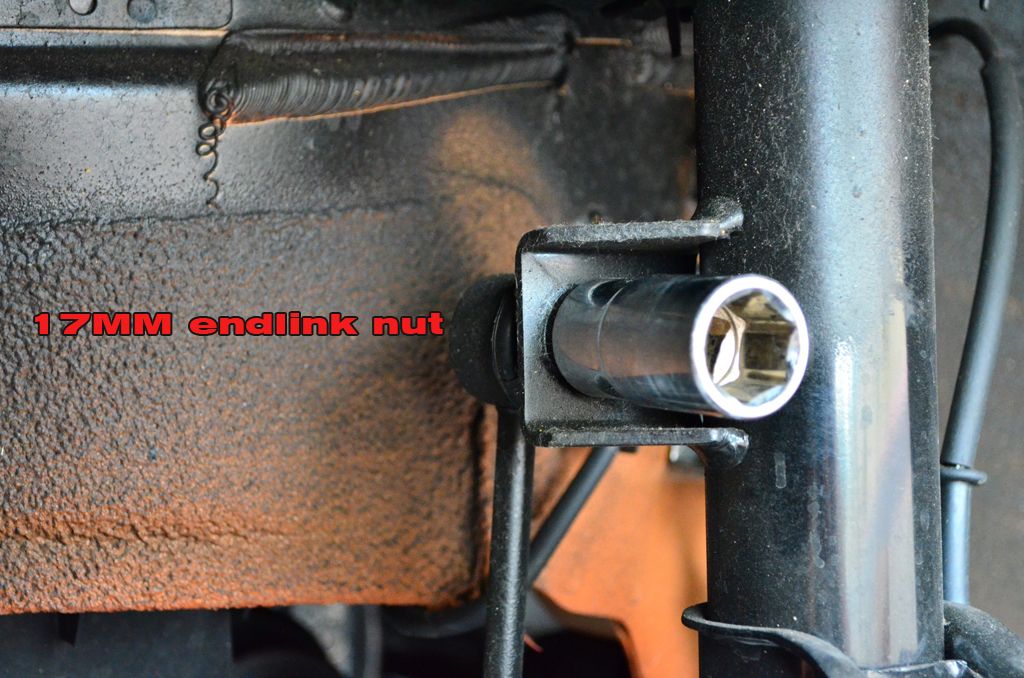
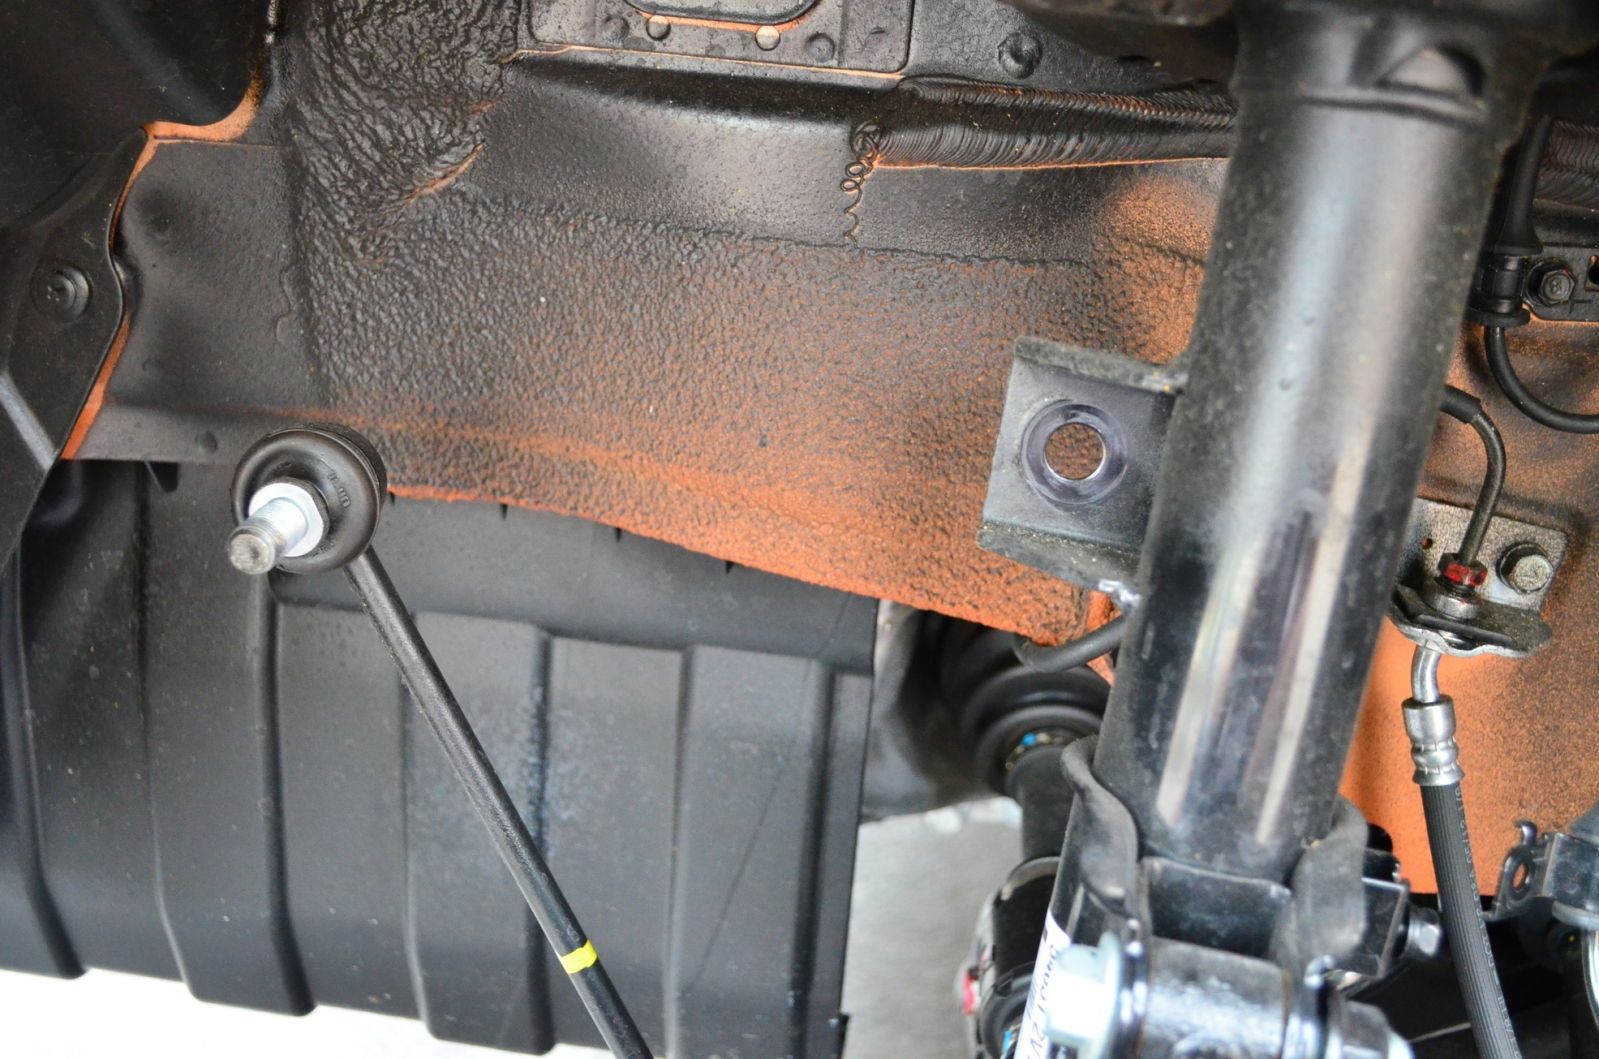
Step 8: Remove the 12mm brake line bolt and the 10mm ABS bolt on the side of the strut. Also, remove the 17mm endlink nut from the strut assembly.
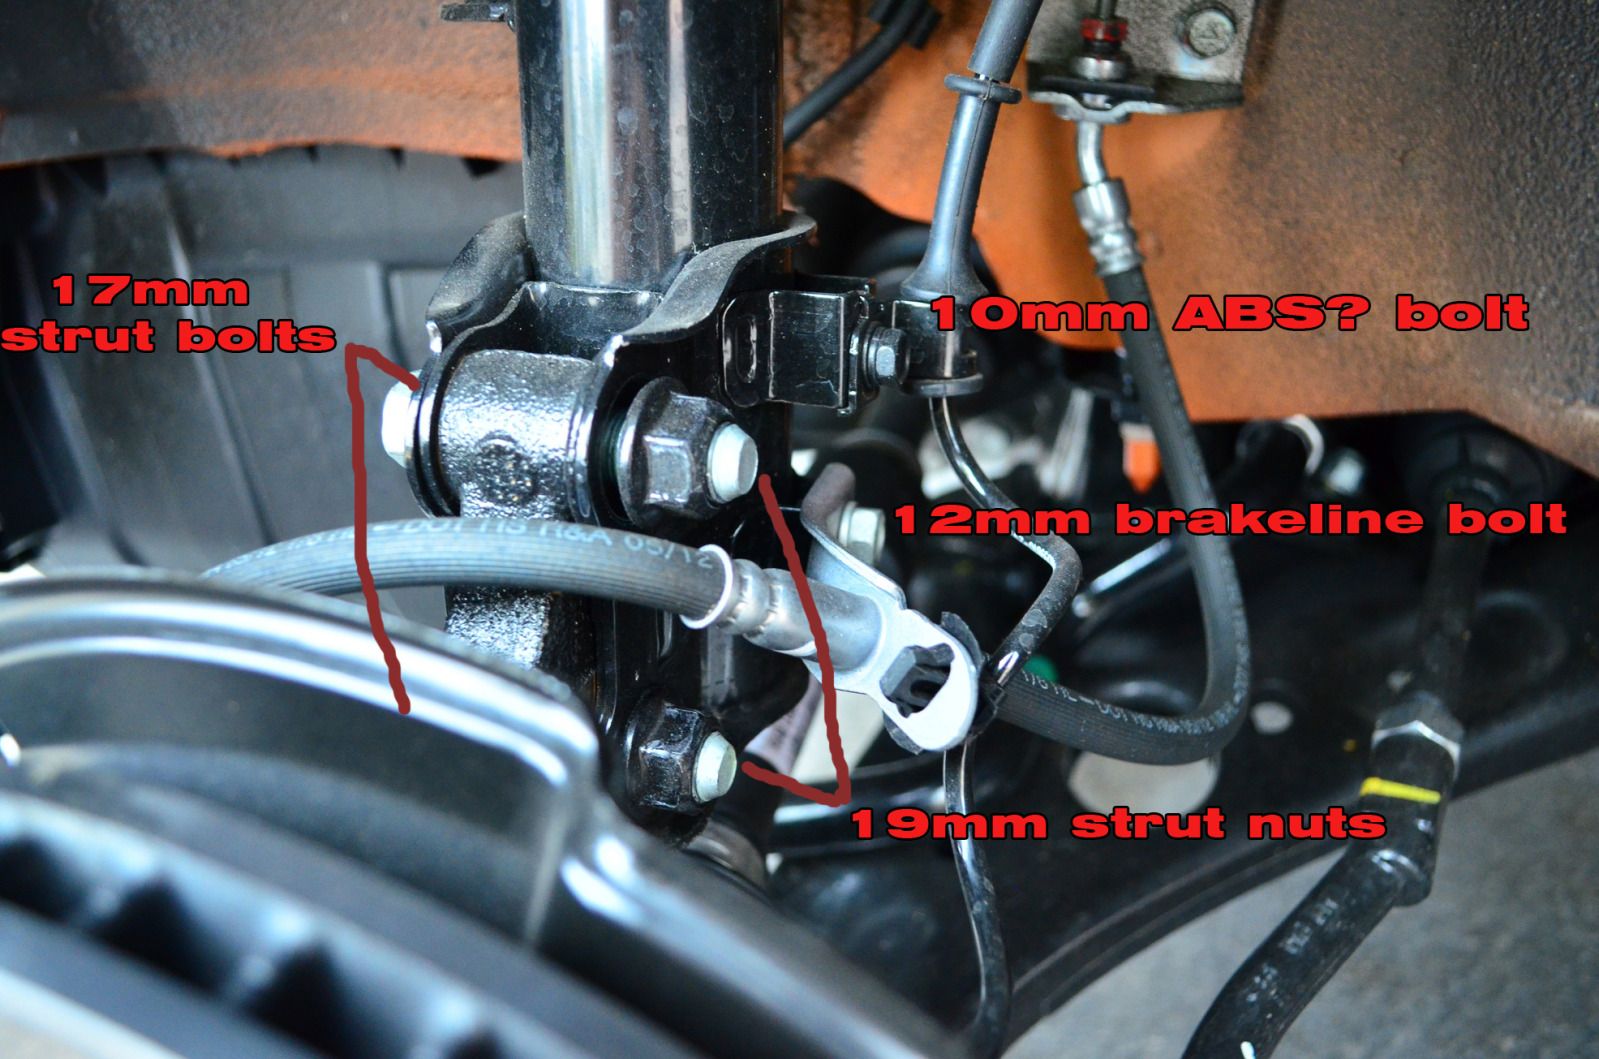
Step 9: Finish removing the two lower strut bolts. You may need to tap the bolts a bit with a mallet to get them out. pull/wiggle slightly from the other side and they should come out easily.
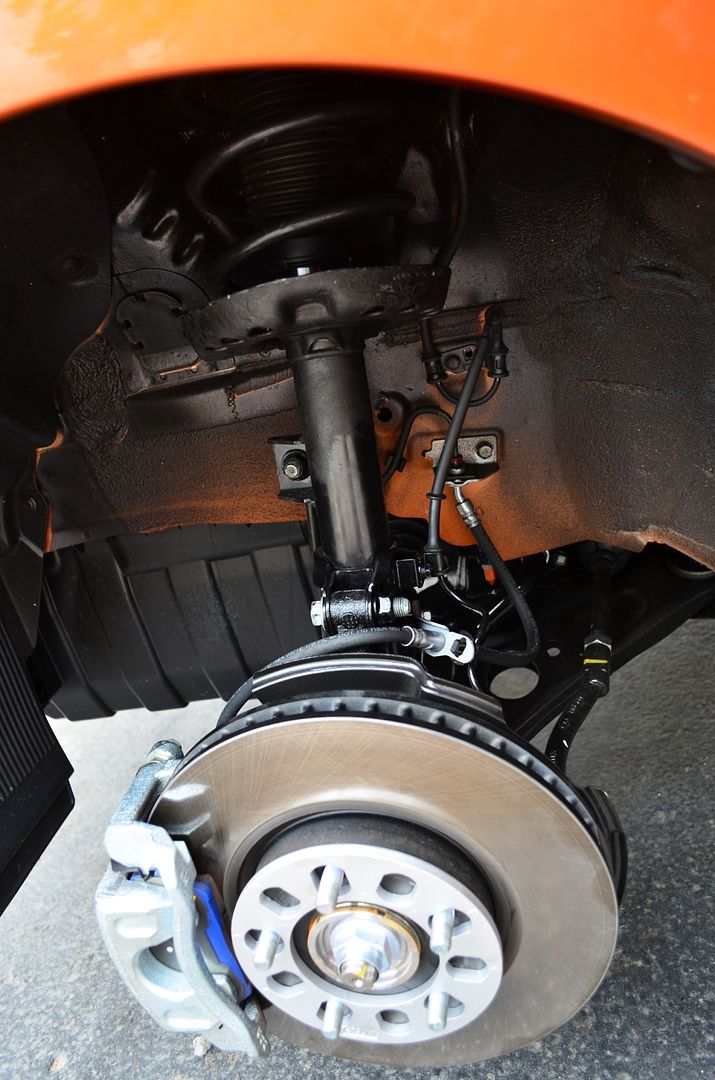
Step 10: Back in the engine bay, hold the bottom of the strut with one hand and finish loosening/removing the 3 strut tower nuts (14mm) and remove the strut from the car.
Step 11: This is where the spring compressors come into play. I always have issues with these things but hopefully you wont. You basically needs to compress the springs to safely remove the stock spring from the assembly. Typically, you want to grab three coils and tighten the compressors almost as far as they can go.
Step 12: Once compressed you can finish removing the top 17mm strut nut and the spring will come right out. Remove the strut compressors from the spring.
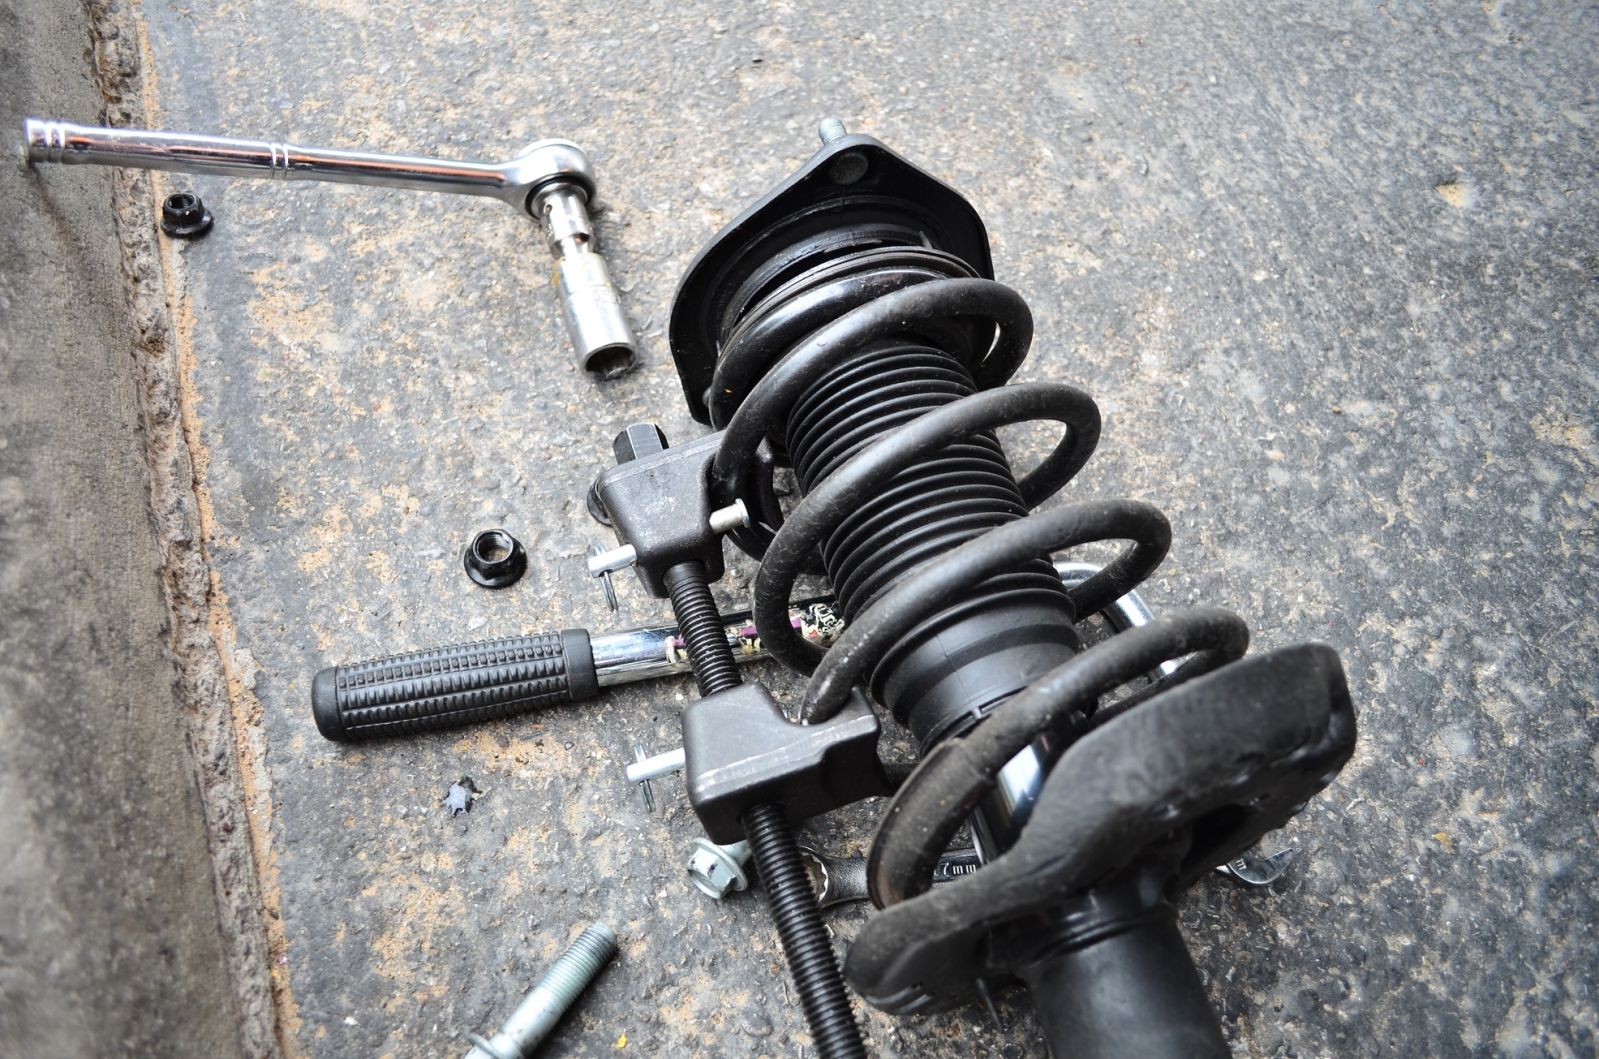
Step 13: Now you will do the opposite and install the spring compressors on the NGM/other lowering springs. Make sure you put them on in a way that they wont interfere with the top strut mount or spring seat when you put the spring on the strut!!!!!!!!!!!
Step 14: Once the spring is compressed enough, seat it in the correct position in the strut. (There is a tab for the end of the spring to sit in at the bottom. MAKE SURE YOU PUT THE SPRING IN RIGHT SIDE UP!!!! Install the spring 'cap' and strut mount. At this point, you can tighten the 17mm nut all the way on the top of the strut.
Step 15: Remove the spring compressors. I found that it helps to do each side a little at a time. You may find a different way is easier.
Step 16: Install the finished assembly back into the car and put the 14mm nuts on finger tight.
Step 17: To help with lining up the strut with the hub, I used slight pressure from the jack under the ball joint to get the hub to a proper height. Install the 17mm/19mm bolt/nut combo in the bottom of the strut, finger tight.
Step 18: Reinstall 12mm brake line bolt, 10mm ABS bolt, 17mm endlink nut. Tighten up the bottom two strut bolts, make sure the top 17mm strut nut is tightened all the way and tighten up the 3-14mm strut mount nuts. Refer to HMA for torque on the bolts. I always tighten by feel but if you are NOT confident, I would refer to HMA.
Step 19: Go over your bolts/nuts again to make sure everything is tightened up properly.
Re-install your wheel and repeat on the other side. Since the car is jacked up, you will not be able to torque the lugs properly so MAKE SURE YOU DO IT AT THE END!!!
After the other side is finished, lower the car off the jack stands and torque the lugs on both wheels!!!
REAR:
The rear suspension is a cakewalk.. couldn't be much easier.
I forgot to upload most of the pictures but when you get the wheel off and the car jacked up, it will be pretty simple.
Step 1: Jack up the car, the same as the front.. but in the rear of the vehicle. Make sure the wheels are a couple inches off the ground.
Step 2: Remove the 19mm upper shock bolt. It is located behind where the wheel would be and is SILVER.
Step 3:Remove the 19mm lower shock nut. After removed, you will be able to drop the shock out of the car.
Step 4: Repeat step 2 and 3 on the opposite side. Since the suspension is not independent, you can do both sides at the same time.
Step 5: Put some downward tension on the torsion beam and the springs will come right out.
Step 6: Remove the rubber 'spring caps' from each spring and put them on the new springs the same way. They twist right on.. Install the springs. Make sure they are the right way up!!!
Step 7: Reinstall the shock and bolt/nuts for the shock.. Torque down, install the wheel. lower car.. you are DONE!!!
For some of you suspension veterans out there, you will be able to do most of this without as many steps or the DIY. I focused on the people who may not be as mechanically inclined..
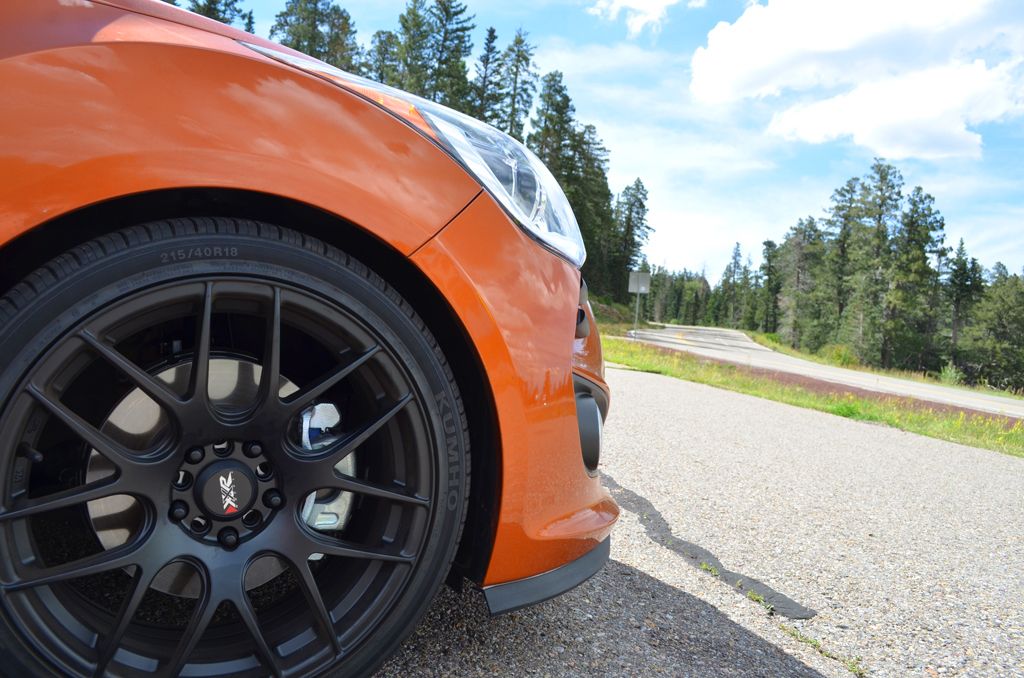
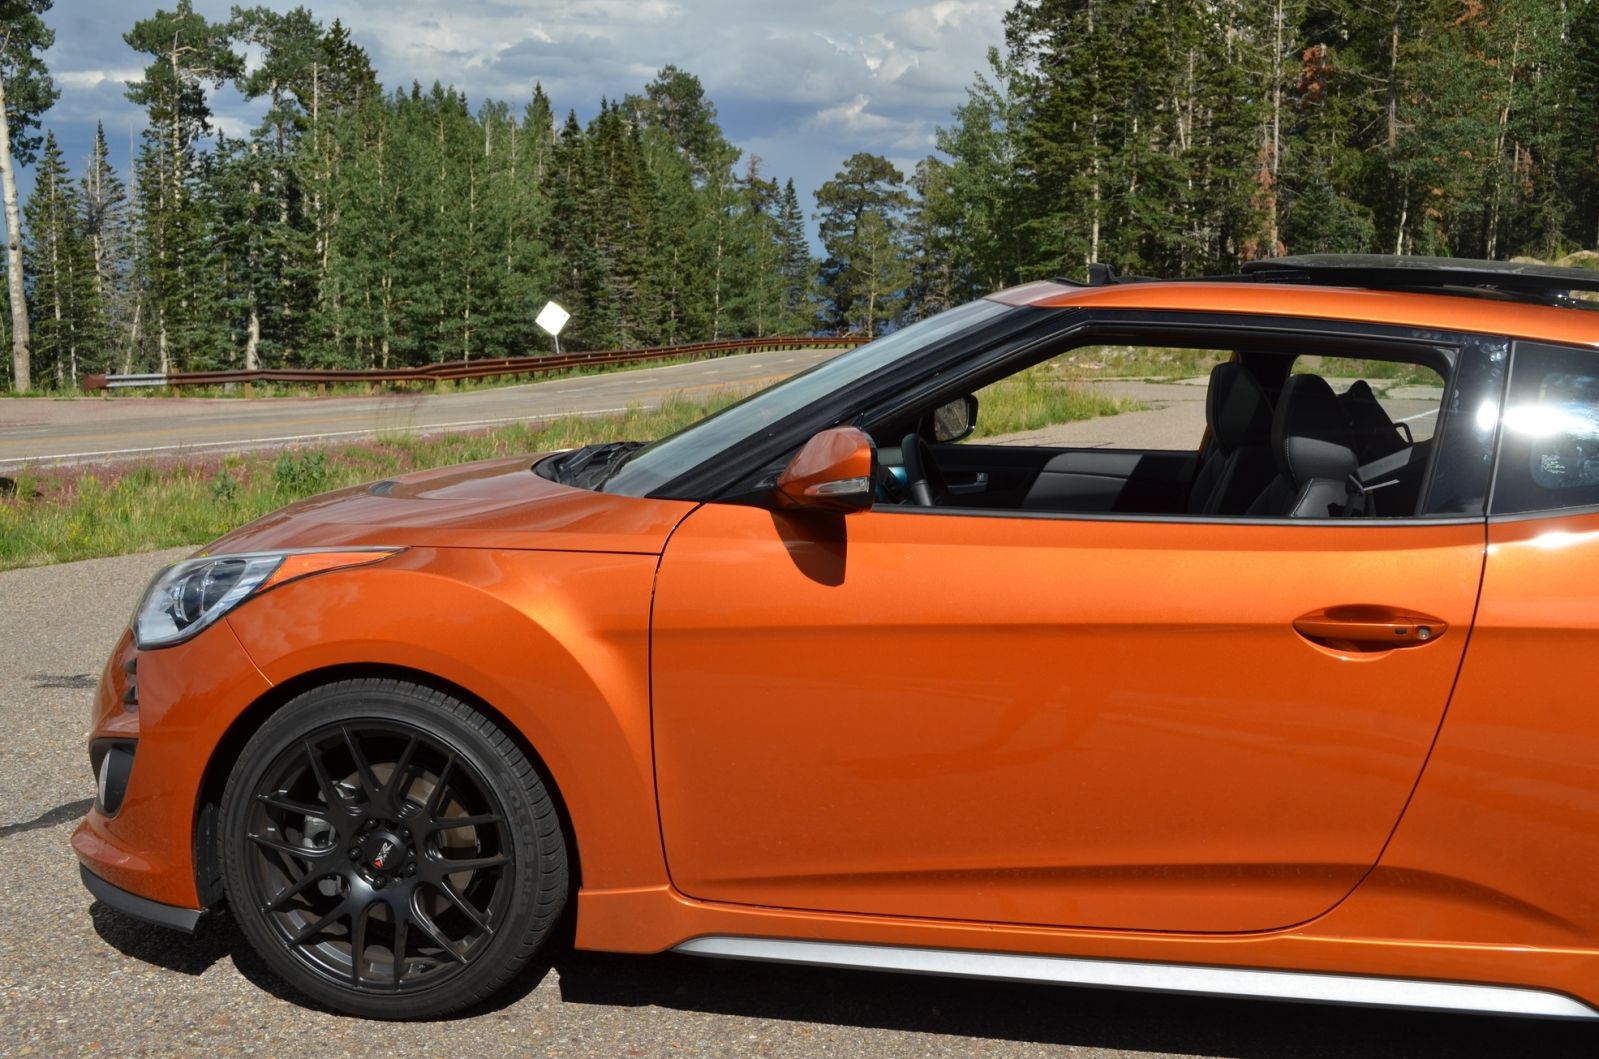
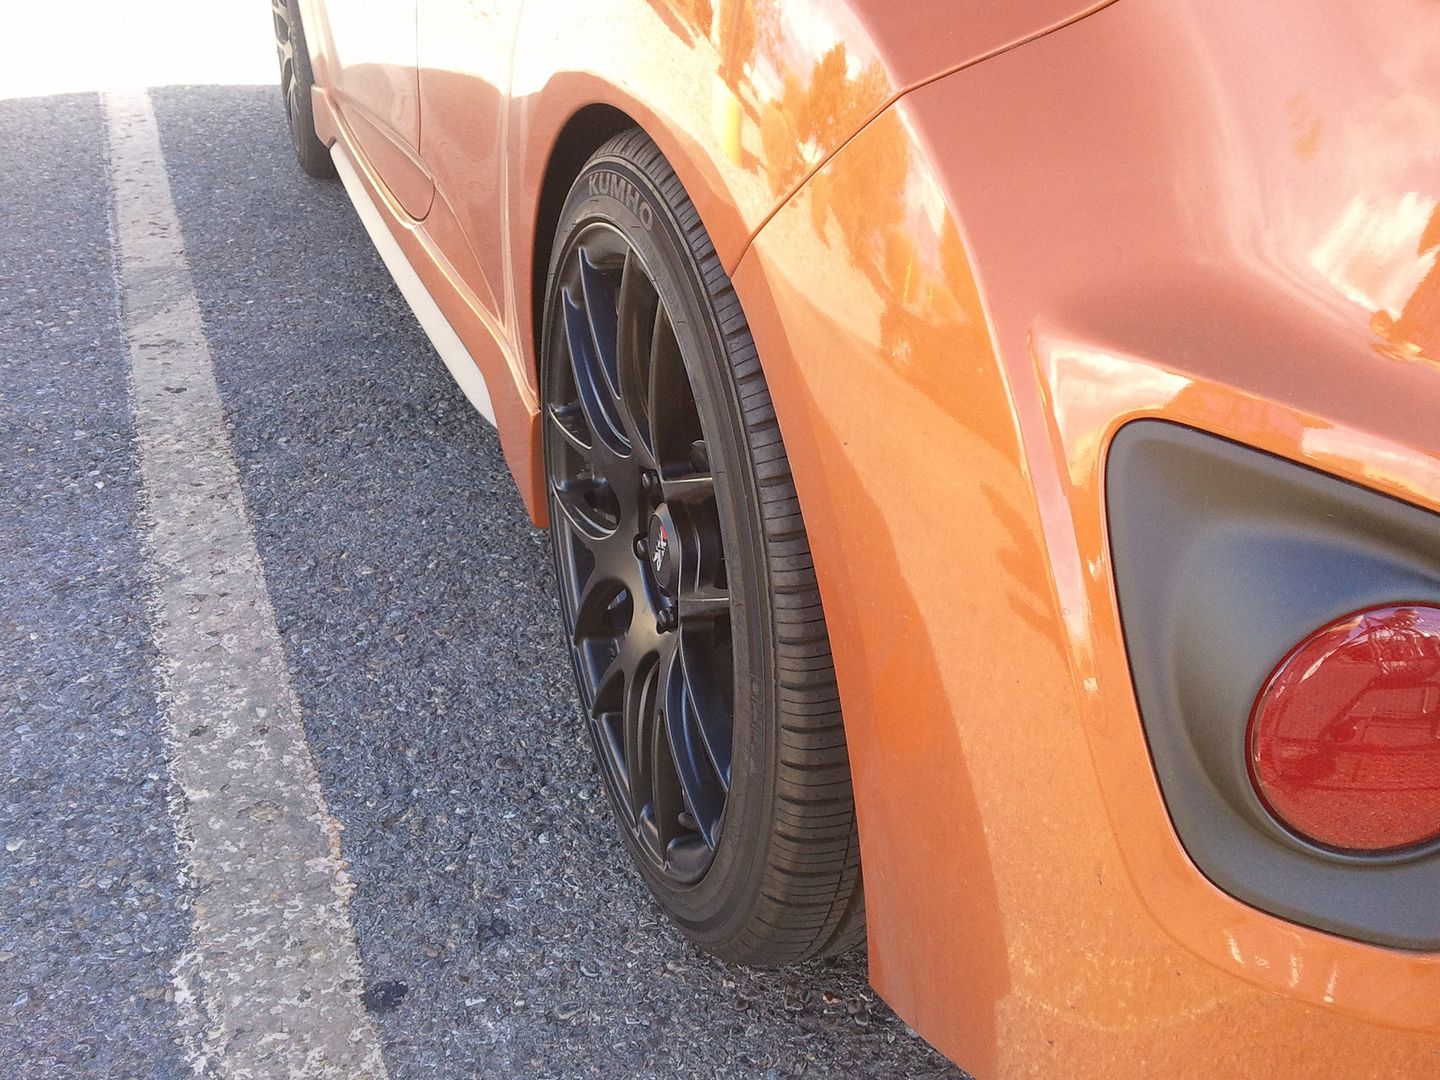
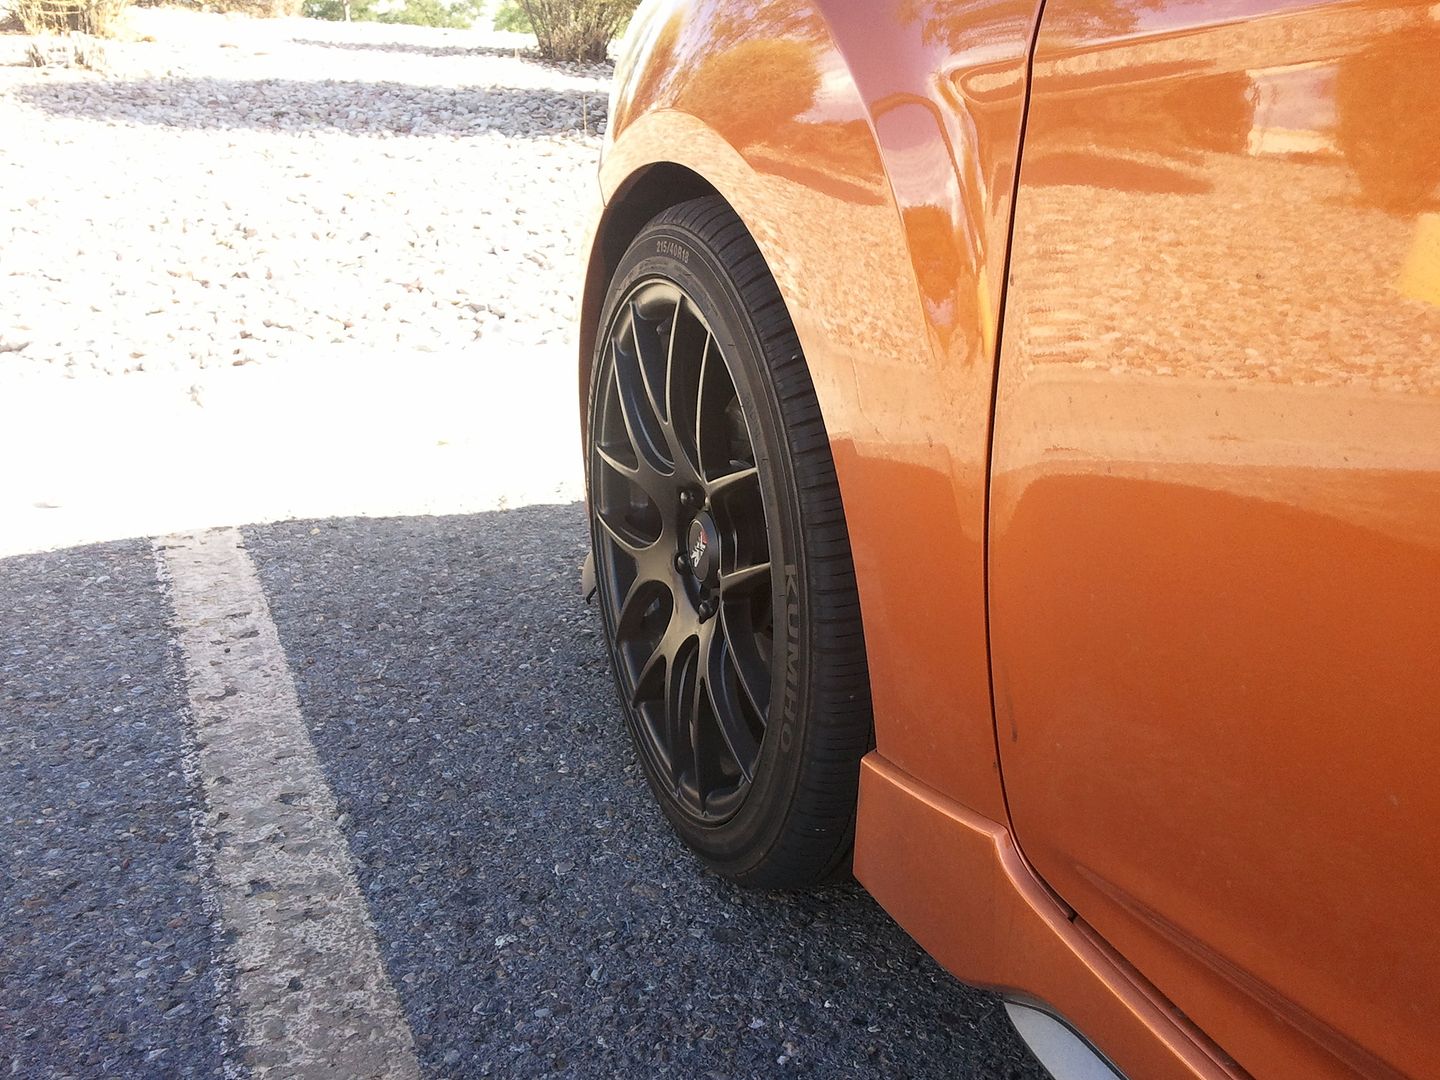
The wheel gap in the back is VERY MINIMAL now and the front wheel gap looks MUCH BETTER!!!
The ride on the NGM springs is definitely stiffer than stock but not to the point where you are afraid of every little bump and crack in the road.
The car handles better also, much more 'planted'. Did a mountain road test drive and really liking the way the car feels now.
These springs are SUCH a great value, I would recommend them to anyone that is looking for a ride that isn't to harsh, a drop that looks fantastic and better handling to boot!
The wheel spacers were simple and the MAXIMUM size I would recommend without getting longer studs. I used 5/16" (8mm) spacers from autozone/oreilys. You just remove the wheel, put the spacers on and re-install the wheel.. It is THAT SIMPLE!!! Then admire your new stance!!!


First things first, the install should be identical on the NA V but I am doing the write up so the turbo peeps know how to do it.
The project took a while longer than it should have, as I always have some sort of issue with those damn spring compressors.. I hate those things.. I don't know why I always have such bad luck...
I missed a couple pictures of the rear suspension but it was SUPER easy and the text alone should be enough for anyone..
FRONT:
Step 1: Make sure car is on pretty much level surface!! Pop the hood of the car (to get access to strut towers) Put the car in 1st gear. Pull the handbrake.
Step 2: Break the lug nuts loose on all 4 wheels (just loose, don't remove)
Step 3: Jack up front of the car, from each side. I always use the pinch welds to jack the car up, just make sure you use a solid point and NOT from the suspension as it will make the work harder to impossible.
Step 4: Remove the lug nuts and set aside. Remove wheel carefully so you don't scratch it.
Step 5: The following will be exposed:
Brake loose the Strut bolt/nut combo. (The two big ones at the bottom, connecting to the hub) 17mm silver bolt and 19mm black nut
Step 6: Remove the top grease cap from the top of the strut. Remove glob of grease. Break the top strut bolt loose with a 17mm socket. JUST BREAK IT LOOSE, DO NOT REMOVE!!!!!!!!!!!
Step 7: Loosen the 3 14mm strut tower nuts but leave them on, for now.
Step 8: Remove the 12mm brake line bolt and the 10mm ABS bolt on the side of the strut. Also, remove the 17mm endlink nut from the strut assembly.
Step 9: Finish removing the two lower strut bolts. You may need to tap the bolts a bit with a mallet to get them out. pull/wiggle slightly from the other side and they should come out easily.
Step 10: Back in the engine bay, hold the bottom of the strut with one hand and finish loosening/removing the 3 strut tower nuts (14mm) and remove the strut from the car.
Step 11: This is where the spring compressors come into play. I always have issues with these things but hopefully you wont. You basically needs to compress the springs to safely remove the stock spring from the assembly. Typically, you want to grab three coils and tighten the compressors almost as far as they can go.
Step 12: Once compressed you can finish removing the top 17mm strut nut and the spring will come right out. Remove the strut compressors from the spring.
Step 13: Now you will do the opposite and install the spring compressors on the NGM/other lowering springs. Make sure you put them on in a way that they wont interfere with the top strut mount or spring seat when you put the spring on the strut!!!!!!!!!!!
Step 14: Once the spring is compressed enough, seat it in the correct position in the strut. (There is a tab for the end of the spring to sit in at the bottom. MAKE SURE YOU PUT THE SPRING IN RIGHT SIDE UP!!!! Install the spring 'cap' and strut mount. At this point, you can tighten the 17mm nut all the way on the top of the strut.
Step 15: Remove the spring compressors. I found that it helps to do each side a little at a time. You may find a different way is easier.
Step 16: Install the finished assembly back into the car and put the 14mm nuts on finger tight.
Step 17: To help with lining up the strut with the hub, I used slight pressure from the jack under the ball joint to get the hub to a proper height. Install the 17mm/19mm bolt/nut combo in the bottom of the strut, finger tight.
Step 18: Reinstall 12mm brake line bolt, 10mm ABS bolt, 17mm endlink nut. Tighten up the bottom two strut bolts, make sure the top 17mm strut nut is tightened all the way and tighten up the 3-14mm strut mount nuts. Refer to HMA for torque on the bolts. I always tighten by feel but if you are NOT confident, I would refer to HMA.
Step 19: Go over your bolts/nuts again to make sure everything is tightened up properly.
Re-install your wheel and repeat on the other side. Since the car is jacked up, you will not be able to torque the lugs properly so MAKE SURE YOU DO IT AT THE END!!!
After the other side is finished, lower the car off the jack stands and torque the lugs on both wheels!!!
REAR:
The rear suspension is a cakewalk.. couldn't be much easier.
I forgot to upload most of the pictures but when you get the wheel off and the car jacked up, it will be pretty simple.
Step 1: Jack up the car, the same as the front.. but in the rear of the vehicle. Make sure the wheels are a couple inches off the ground.
Step 2: Remove the 19mm upper shock bolt. It is located behind where the wheel would be and is SILVER.
Step 3:Remove the 19mm lower shock nut. After removed, you will be able to drop the shock out of the car.
Step 4: Repeat step 2 and 3 on the opposite side. Since the suspension is not independent, you can do both sides at the same time.
Step 5: Put some downward tension on the torsion beam and the springs will come right out.
Step 6: Remove the rubber 'spring caps' from each spring and put them on the new springs the same way. They twist right on.. Install the springs. Make sure they are the right way up!!!
Step 7: Reinstall the shock and bolt/nuts for the shock.. Torque down, install the wheel. lower car.. you are DONE!!!
For some of you suspension veterans out there, you will be able to do most of this without as many steps or the DIY. I focused on the people who may not be as mechanically inclined..
The wheel gap in the back is VERY MINIMAL now and the front wheel gap looks MUCH BETTER!!!
The ride on the NGM springs is definitely stiffer than stock but not to the point where you are afraid of every little bump and crack in the road.
The car handles better also, much more 'planted'. Did a mountain road test drive and really liking the way the car feels now.
These springs are SUCH a great value, I would recommend them to anyone that is looking for a ride that isn't to harsh, a drop that looks fantastic and better handling to boot!
The wheel spacers were simple and the MAXIMUM size I would recommend without getting longer studs. I used 5/16" (8mm) spacers from autozone/oreilys. You just remove the wheel, put the spacers on and re-install the wheel.. It is THAT SIMPLE!!! Then admire your new stance!!!