
DIY: Forge Motorsport BOV install - Veloster Turbo

Thread Starter
Super Moderator
Joined: Mar 2006
Posts: 1,304
Likes: 0
From: ABQ, NM
Vehicle: 2001 hyundai tiburon
Well, I decided to make the plunge and verify that the forge would or wouldn't work on the Vturbo. The BOV in question is the one made for the Genesis coupe..
Good news!!! IT WORKS and sounds louddddd
The hardest part about the install was getting the stock vacuum line to work.
The first thing you will need to do is take off your bumper. This is the easiest bumper I have ever removed. I don't have any pics of me removing the bumper but I can explain it easily.
First, pop the hood.... Between the headlights there are some plastic screws (typical pop in dealios) that you need to remove and a couple/few 10mm bolts. Remove these and set aside.
Second, In the wheelwell, where the bumper attaches to the fender there is ONE 10mm bolt on each side, remove and set aside.
Third, get under the car and remove the SIX plastic screw things (two on each side, two in the middle) Maker sure you don't remove the ones holding the little black 'air diffuser lip' on as it wont help you with the removal.
Fourth, This is where some will get scared. You need to put pull and put some pressure on pulling the bumper forward from the sides to 'unsnap' it from under the headlights. Doesn't take much pressure. The bumper should pretty much fall off so be sure to keep a hold on it so you don't scrape it.
Fifth, Unplug the foglights and put the bumper to the side..
Now comes the super easy part, removing and installing the BOV.
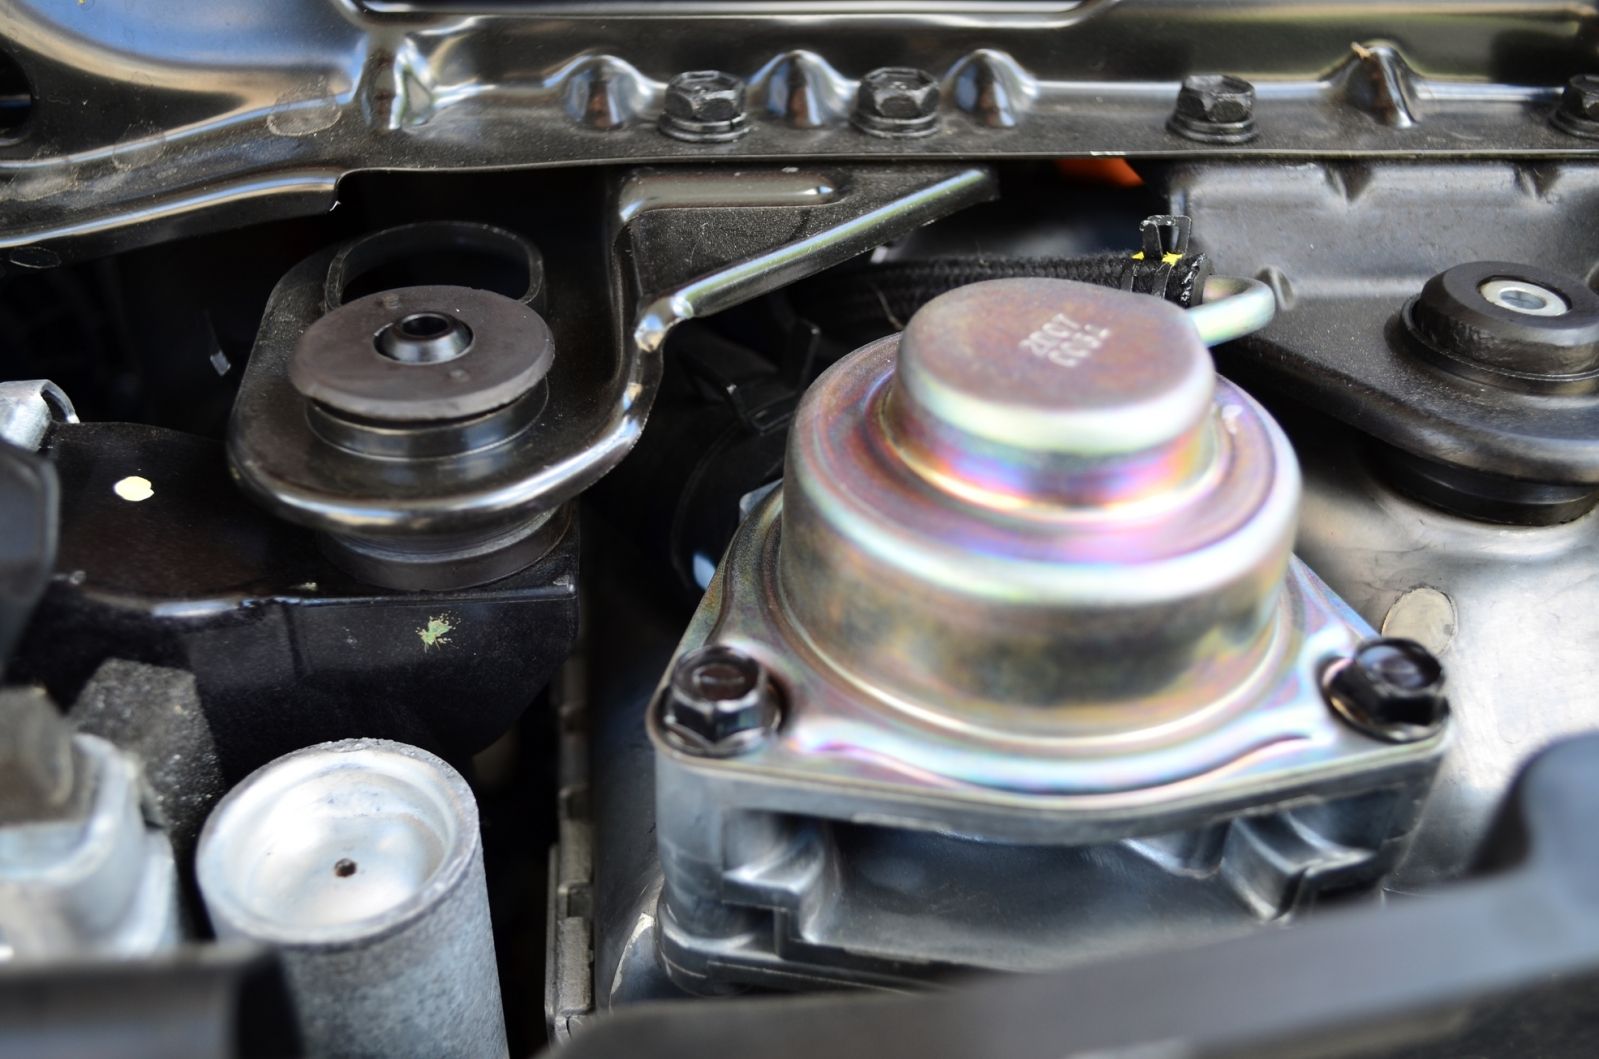
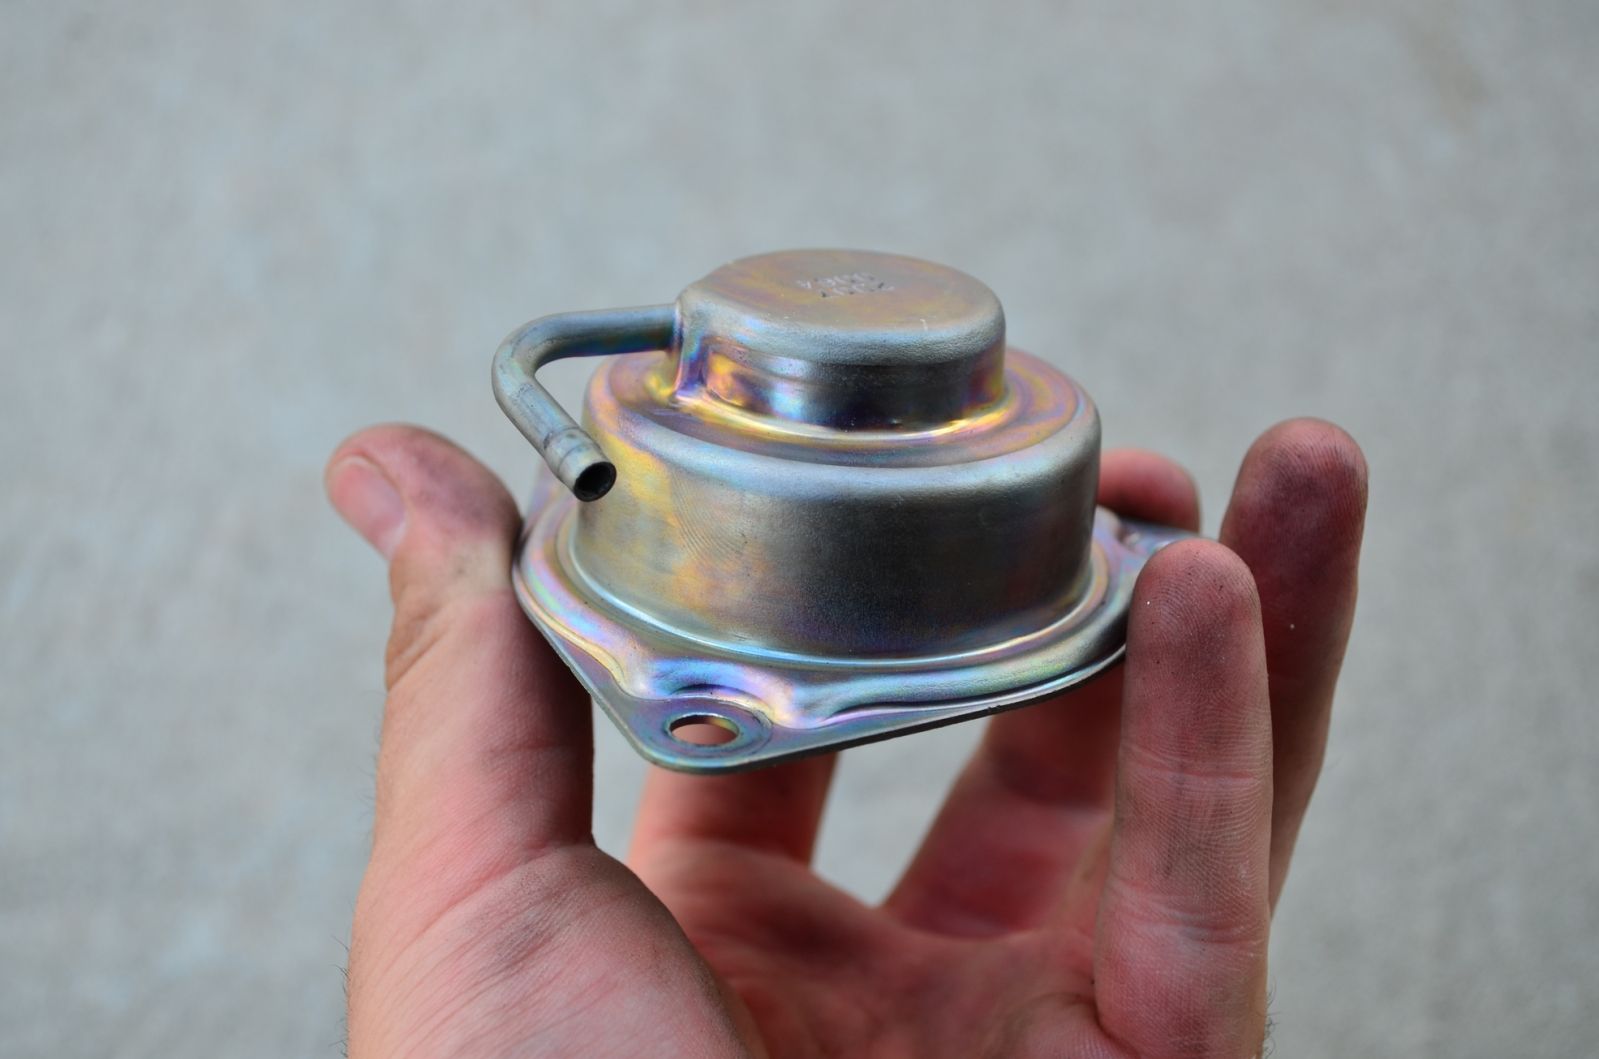
There are 3-10mm bolts holding the BOV on. Remove them. Remove the stock vacuum hose from the nipple on the BPV.
If you have the stock intake, here is where you can leave the bypass hose connected (so you don't suck anything in from the open port. If you have an SRI, you can remove the bypass hose completely. All it takes is some pliers to remove the clamps and pull the hose off..
The Forge BOV blocks off the bypass plate from functioning so if the hose is connected or not it doesn't matter from the Intercooler/BOV side of things.
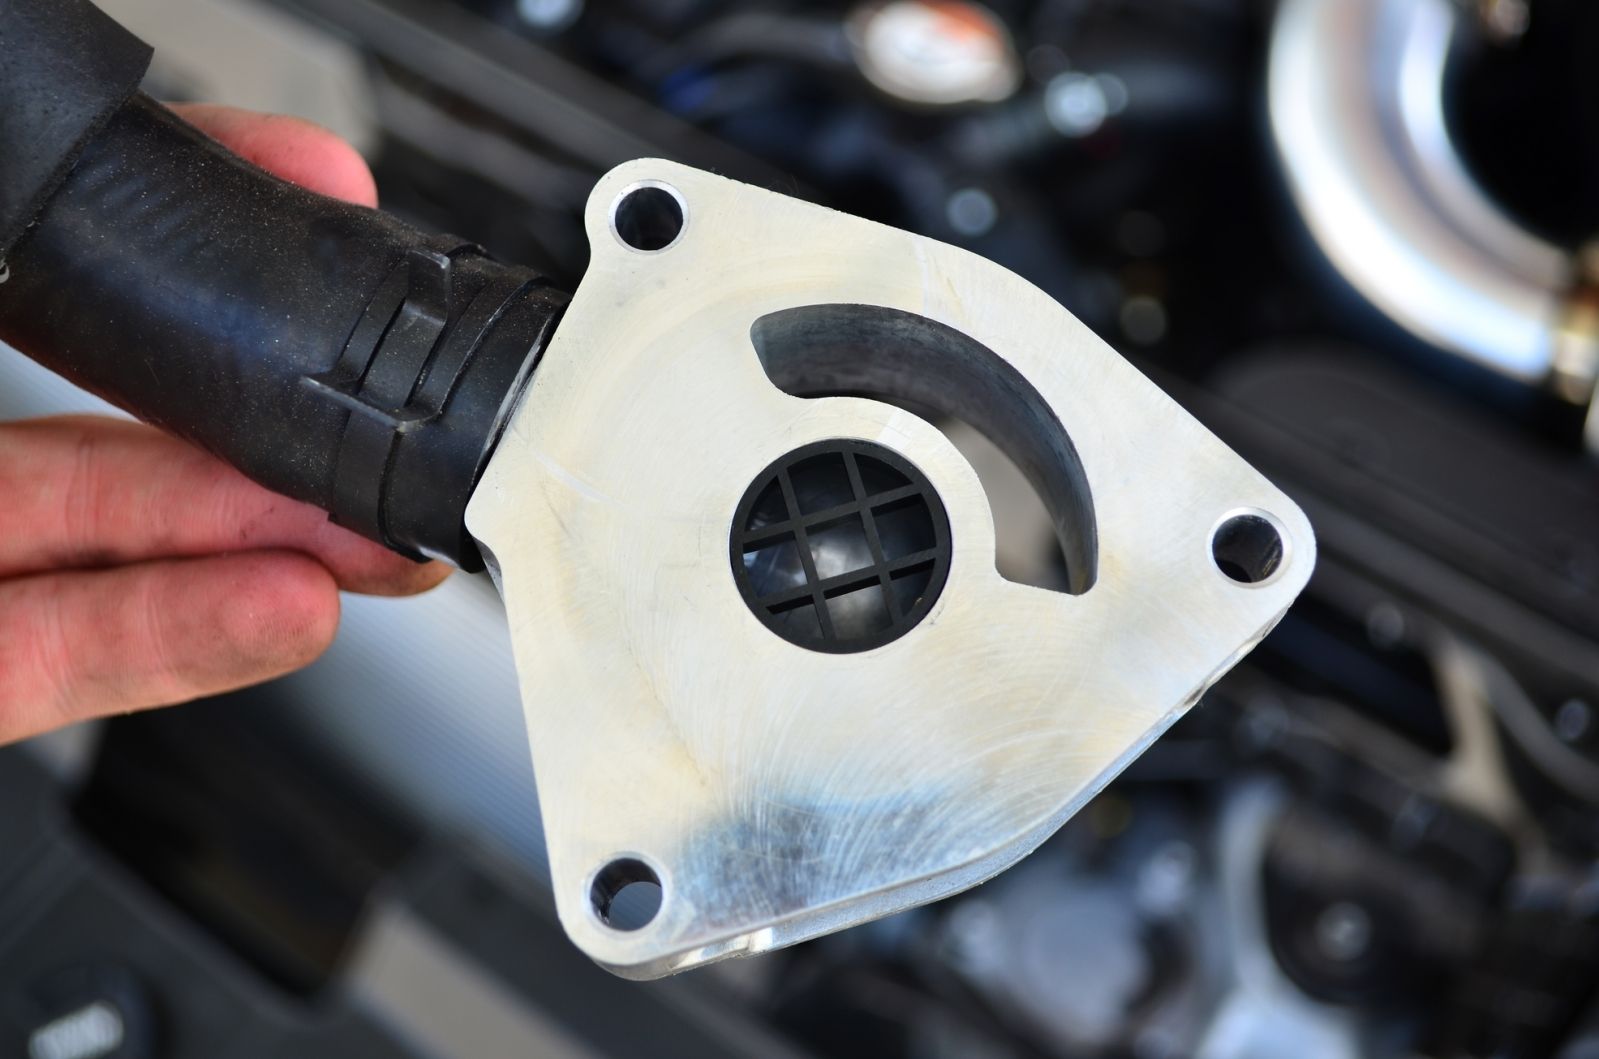
You can see the plate here, between the stock BPV and the intercooler.
This is with the BPV and bypass plate removed.

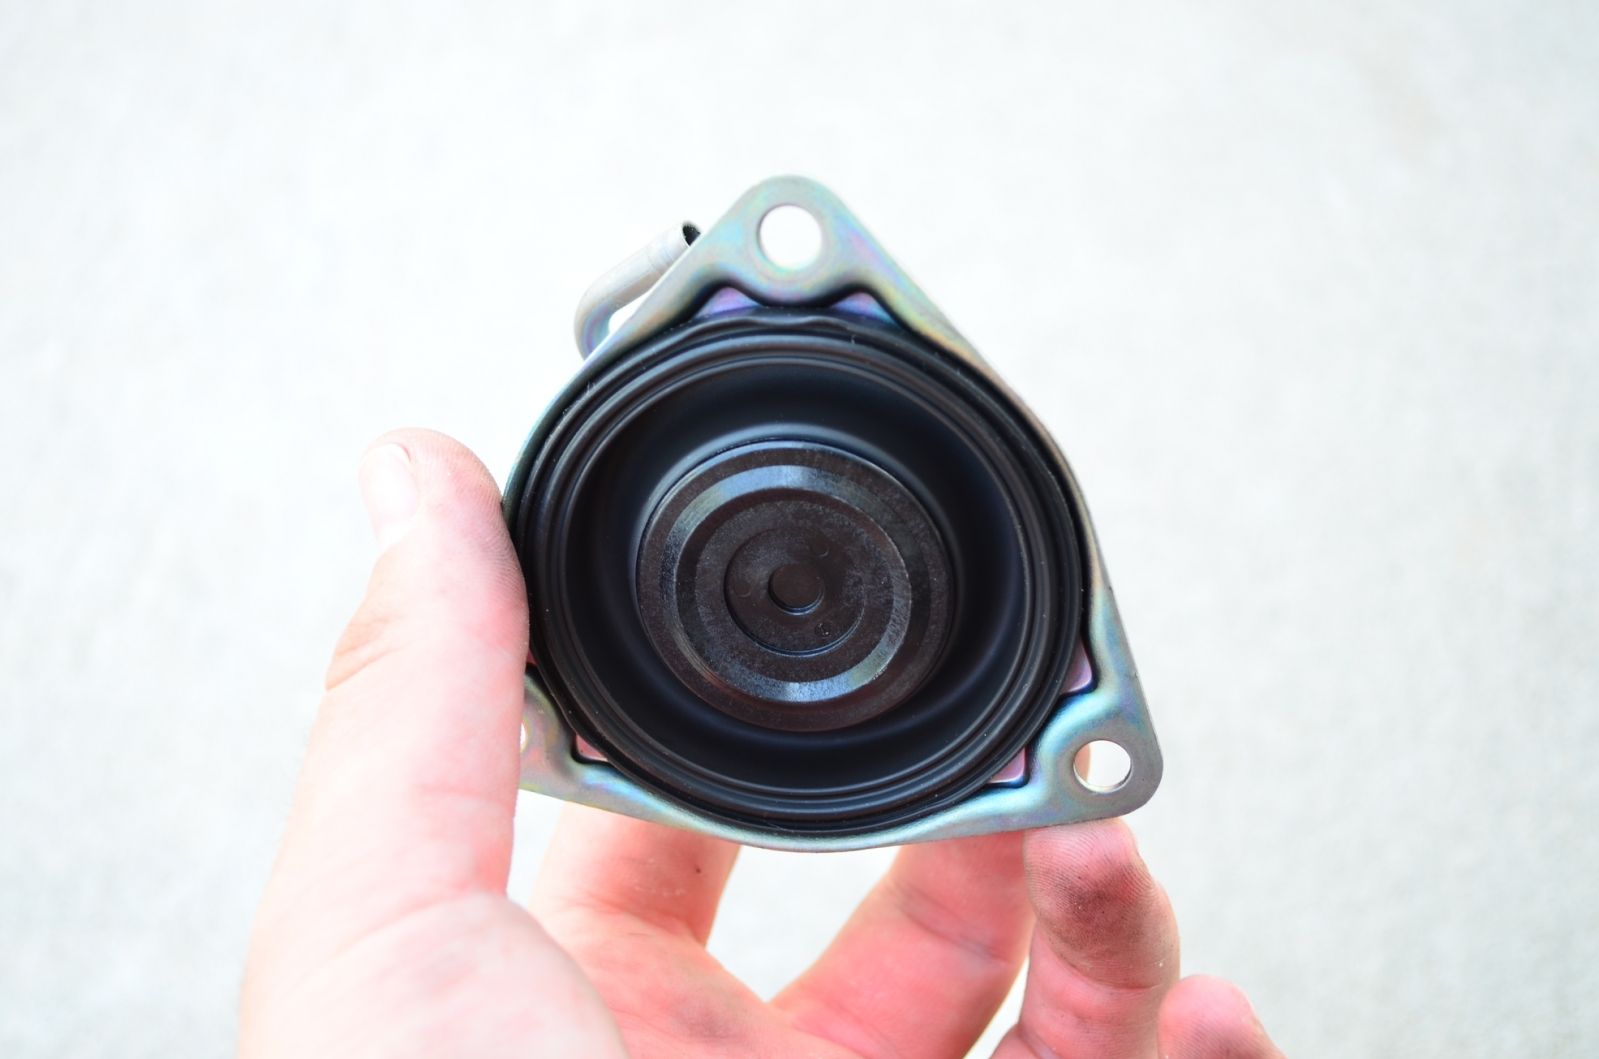
There is a little hold in the bypass plate that when the stock BPV opens, it lets the air go through the 1/2" hole and back into the intake..
The forge is SOLID on the bottom so it only lets air through the crescent shaped slot so no worries about the plate. I didn't get any pictures of the bottom of the forge, sorry
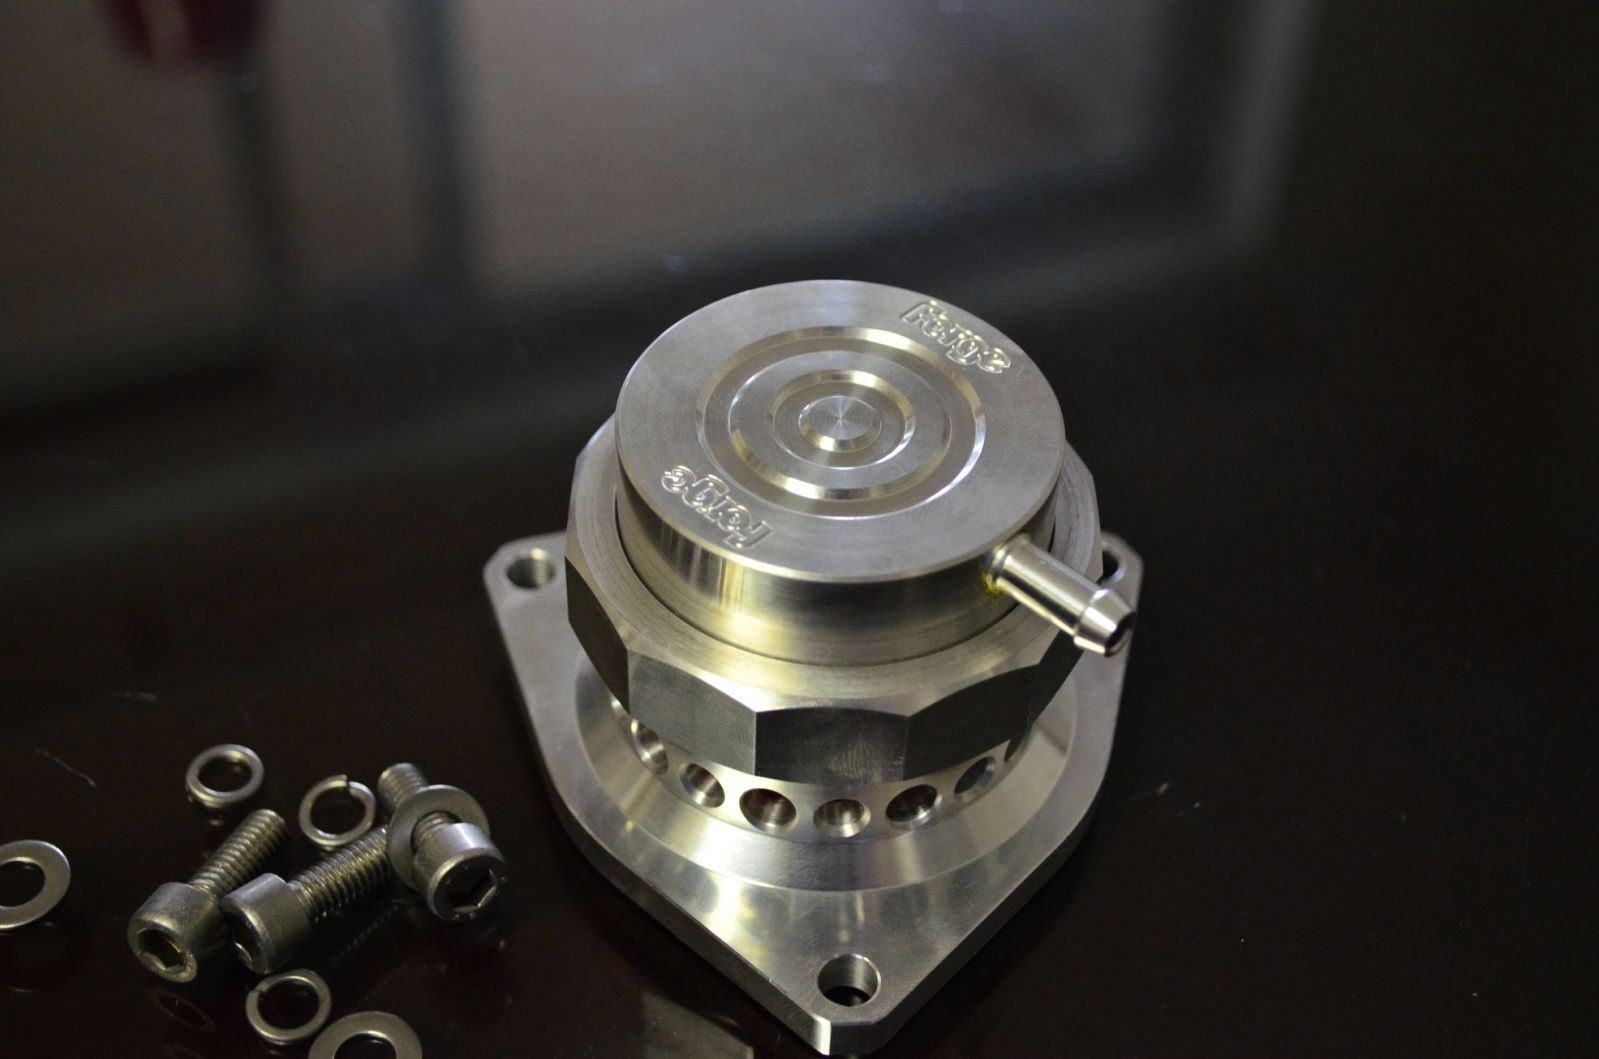
Here comes the forge!!!

You can replace the springs and add shims for the boost levels. I installed the green (light spring) I would suggest running the middle spring (yellow) I will switch mine out in a couple days.
Install (or leave) the bypass plate in place and unscrew the forge a bit to adjust the nipple placement of the vacuum port. Tighten the 3-10mm bolts.
Here comes the somewhat interesting part. You will need to either get a bigger vacuum line or cut 1/2" of the braiding off the stock vacuum line (it is braided to keep from swelling and to prevent rubbing causing issues. By cutting the braiding where it goes over the nipple, it will expand enough to get over the bigger size vacuum nipple of the Forge BOV. This method worked well.
That is it.. Pretty drawn out DIY for just simply swapping one part for another but I wanted to explain some of my findings.
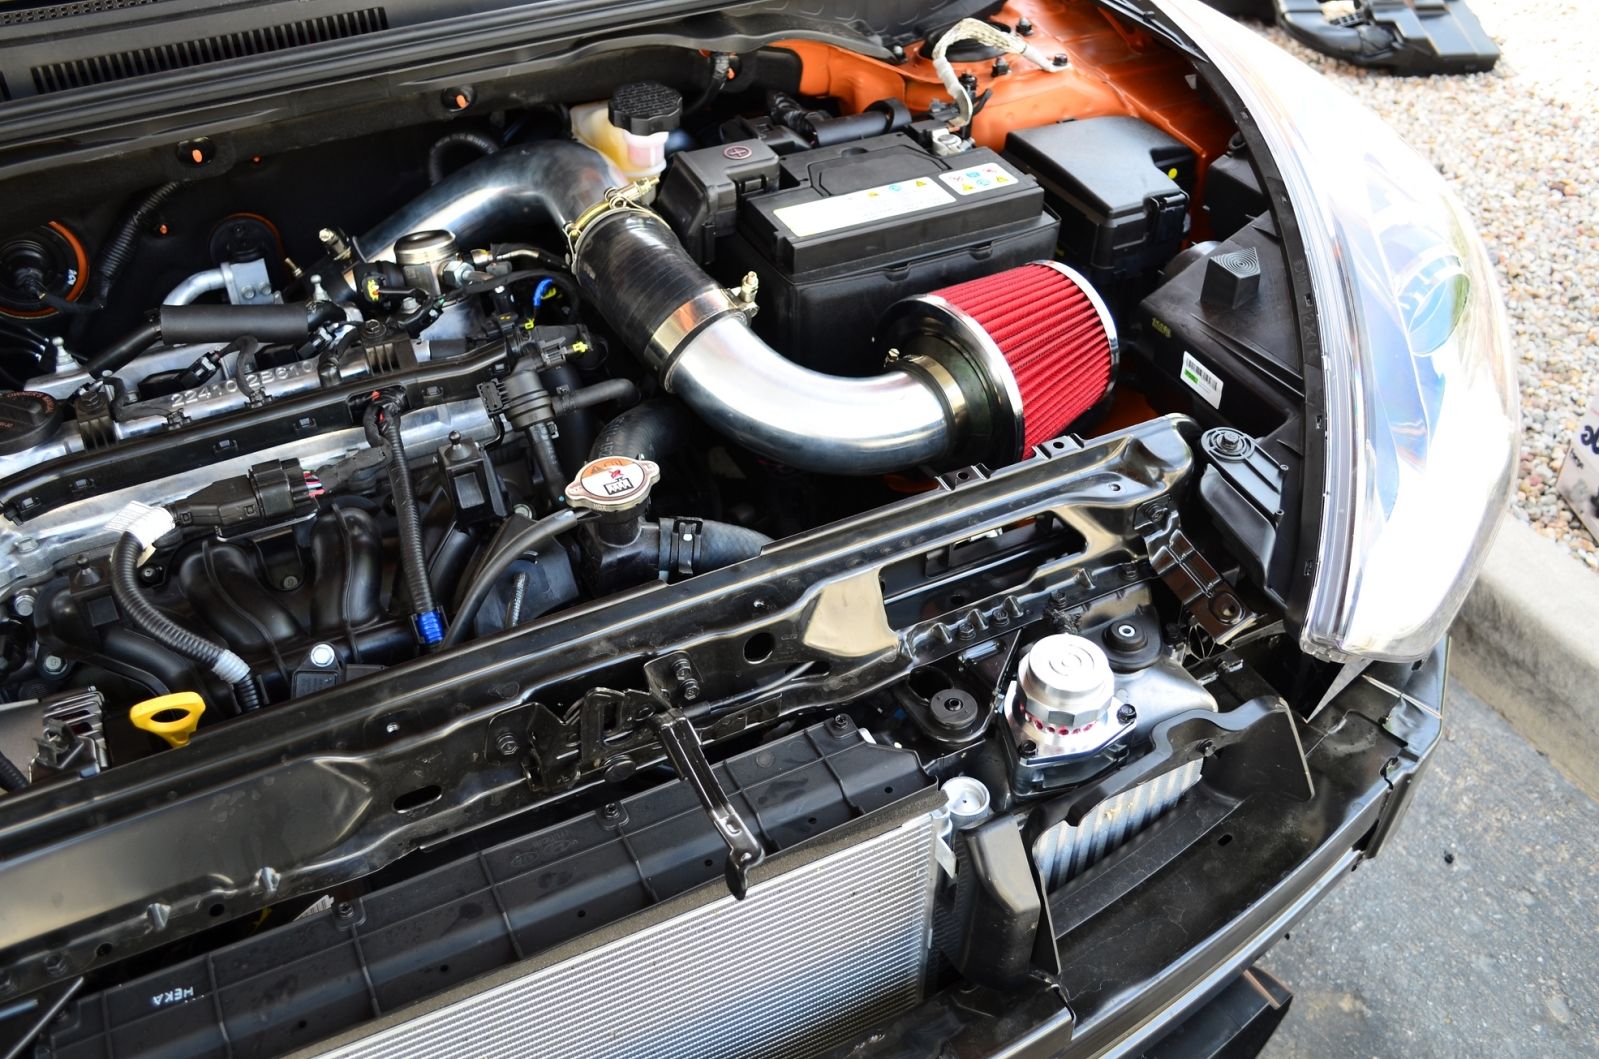
You can see here I have the bypass tube removed since I have the SRI.

Here is a video of the forge. Don't mind my shitty focus. All I had for video was my SLR and I have to manually focus (never done it before) because otherwise you would have heard the AF motor over the sounds of the car.
http://s860.photobucket.com/albums/a...t=DSC_0051.mp4
I would give the difficulty of this install about a 3 on a scale of 1-10. The only thing that makes it anywhere near 'skillful' is cutting the braiding to get the vacuum line over the larger sized nipple on the BOV.
bumper removal is the easiest I have encountered.
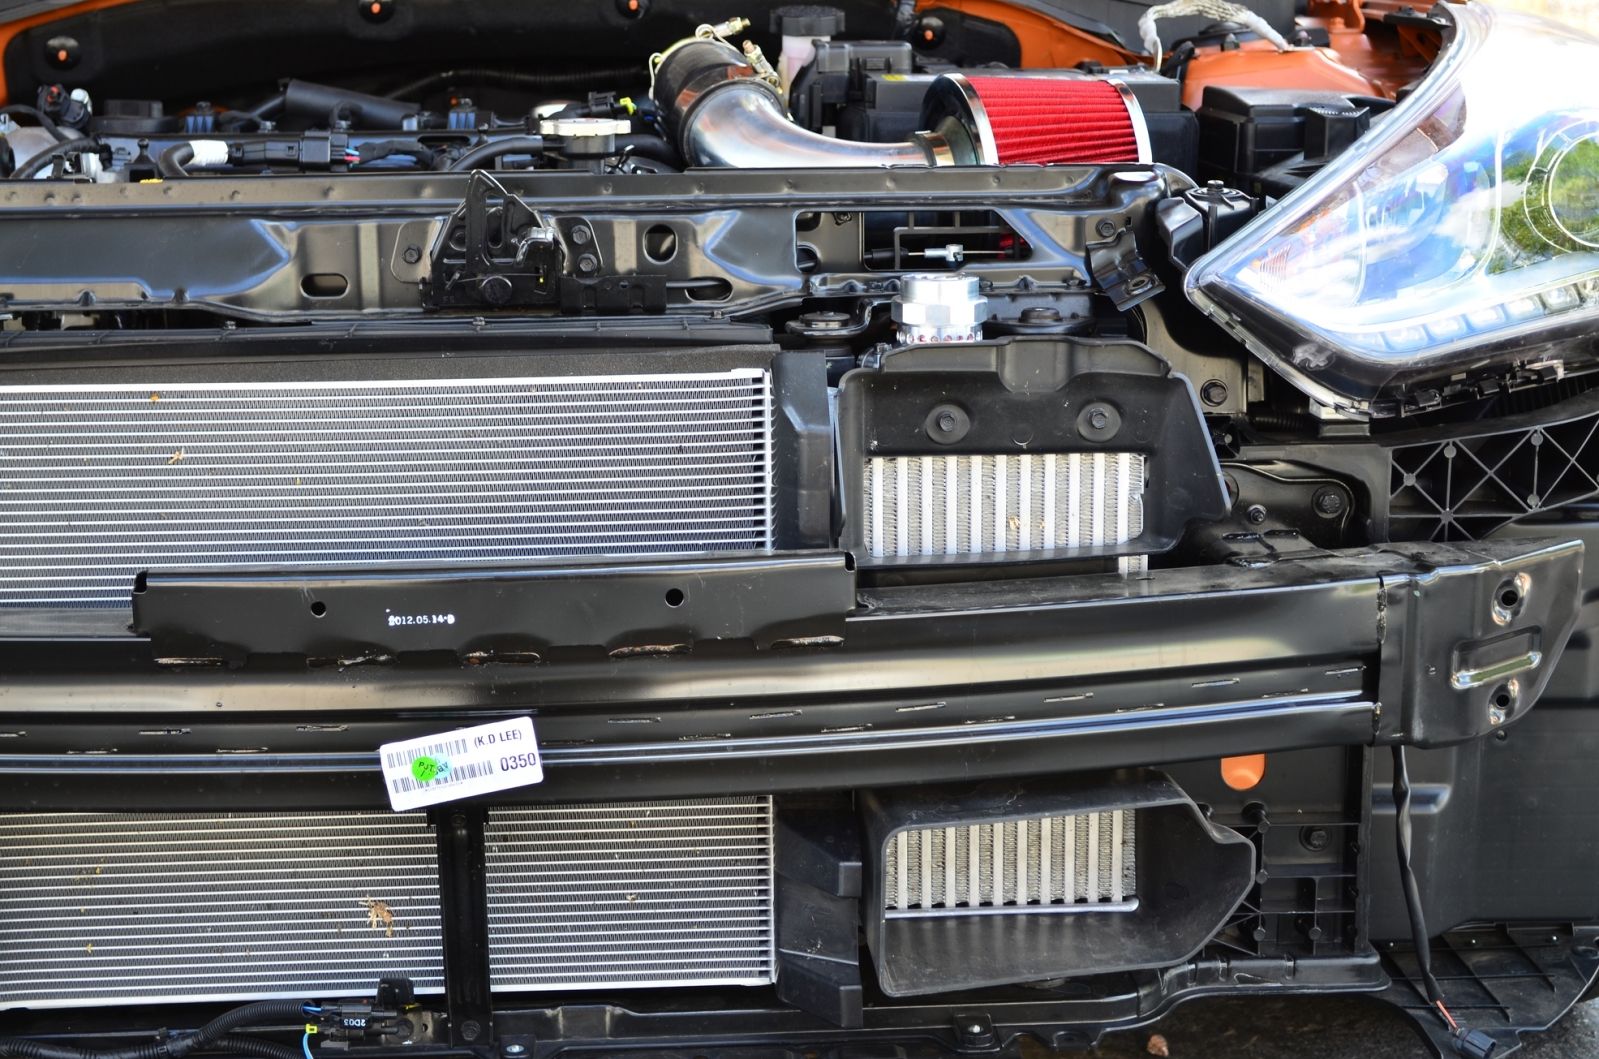
Another thing I noticed and that I will follow up with a couple companies about is that instead of going with your standard FMIC upgrade in a horizontal style this car might be a good candidate for a replacement crash bar and an upgraded core that utilizes the stock piping connections!! <<< Most of you wont give a rats ass about this but it looks like there is room for it!
Good news!!! IT WORKS and sounds louddddd
The hardest part about the install was getting the stock vacuum line to work.
The first thing you will need to do is take off your bumper. This is the easiest bumper I have ever removed. I don't have any pics of me removing the bumper but I can explain it easily.
First, pop the hood....
Between the headlights there are some plastic screws (typical pop in dealios) that you need to remove and a couple/few 10mm bolts. Remove these and set aside.Second, In the wheelwell, where the bumper attaches to the fender there is ONE 10mm bolt on each side, remove and set aside.
Third, get under the car and remove the SIX plastic screw things (two on each side, two in the middle) Maker sure you don't remove the ones holding the little black 'air diffuser lip' on as it wont help you with the removal.
Fourth, This is where some will get scared. You need to put pull and put some pressure on pulling the bumper forward from the sides to 'unsnap' it from under the headlights. Doesn't take much pressure. The bumper should pretty much fall off so be sure to keep a hold on it so you don't scrape it.
Fifth, Unplug the foglights and put the bumper to the side..
Now comes the super easy part, removing and installing the BOV.
There are 3-10mm bolts holding the BOV on. Remove them. Remove the stock vacuum hose from the nipple on the BPV.
If you have the stock intake, here is where you can leave the bypass hose connected (so you don't suck anything in from the open port. If you have an SRI, you can remove the bypass hose completely. All it takes is some pliers to remove the clamps and pull the hose off..
The Forge BOV blocks off the bypass plate from functioning so if the hose is connected or not it doesn't matter from the Intercooler/BOV side of things.
You can see the plate here, between the stock BPV and the intercooler.
This is with the BPV and bypass plate removed.
There is a little hold in the bypass plate that when the stock BPV opens, it lets the air go through the 1/2" hole and back into the intake..
The forge is SOLID on the bottom so it only lets air through the crescent shaped slot so no worries about the plate. I didn't get any pictures of the bottom of the forge, sorry
Here comes the forge!!!
You can replace the springs and add shims for the boost levels. I installed the green (light spring) I would suggest running the middle spring (yellow) I will switch mine out in a couple days.
Install (or leave) the bypass plate in place and unscrew the forge a bit to adjust the nipple placement of the vacuum port. Tighten the 3-10mm bolts.
Here comes the somewhat interesting part. You will need to either get a bigger vacuum line or cut 1/2" of the braiding off the stock vacuum line (it is braided to keep from swelling and to prevent rubbing causing issues. By cutting the braiding where it goes over the nipple, it will expand enough to get over the bigger size vacuum nipple of the Forge BOV. This method worked well.
That is it.. Pretty drawn out DIY for just simply swapping one part for another but I wanted to explain some of my findings.
You can see here I have the bypass tube removed since I have the SRI.
Here is a video of the forge. Don't mind my shitty focus. All I had for video was my SLR and I have to manually focus (never done it before) because otherwise you would have heard the AF motor over the sounds of the car.
http://s860.photobucket.com/albums/a...t=DSC_0051.mp4
I would give the difficulty of this install about a 3 on a scale of 1-10. The only thing that makes it anywhere near 'skillful' is cutting the braiding to get the vacuum line over the larger sized nipple on the BOV.
bumper removal is the easiest I have encountered.
Another thing I noticed and that I will follow up with a couple companies about is that instead of going with your standard FMIC upgrade in a horizontal style this car might be a good candidate for a replacement crash bar and an upgraded core that utilizes the stock piping connections!! <<< Most of you wont give a rats ass about this but it looks like there is room for it!