
Diy- Rev'a Evap Cannister Relocation


Thread Starter
Senior Member
Joined: Mar 2006
Posts: 1,272
Likes: 0
Vehicle: 1997/ Hyundai/ Tiburon
Ok, so you got an AEM intake or Somthing like the AEM intake, but whats wrong? You got a Rev'A tibby.. dont be discouraged, i have a solution....that will cost around 10-20max bucks depending on the quality of the supplies you buy. Mine costed 10 bucks.
<u>Tools
</u>
- Philips Screw Diver + Flat head screw driver.
- 10mm, 12mm, 14mm socket + rachet
- 2 Pliers
- Maybe a hammer...
- Jack+ Jack Stand
<u>Stuff to buy
</u>
- 4 feet of 3/4" fuel line tubing.
- 2 feet of 1/2" fuel line tubing. ( make sure the tubing allows fuel to travel through them, if not, the fumes may deteriorate the tubing.)
- 2x 3/4" to 3/4" tube connectors (best if metal)
- 1x 1/2" to 1/2 connectors (best if Metal)
- 4x Clamps to hold the piping to connectors
These can be found in Honedepot, Osh, or any Home supply place.
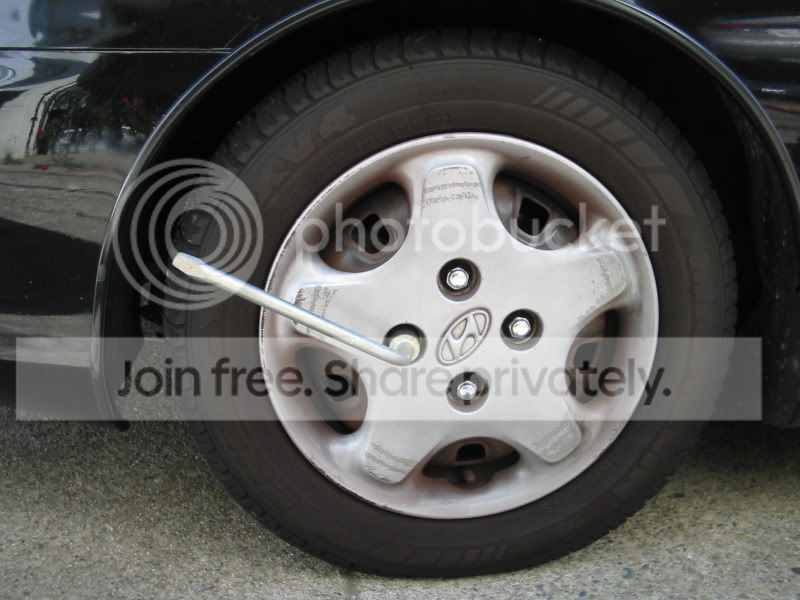
First You loosen your lug nuts. Then jack up the car and remove the wheel.
Then unscrew 4 the plastic screws in the fender guard.( number 4 in my car did not come off, so i just flexed the fender guard and worked behind it since it wasnt in my way. You dont have to take off the guard of you dont want to.)
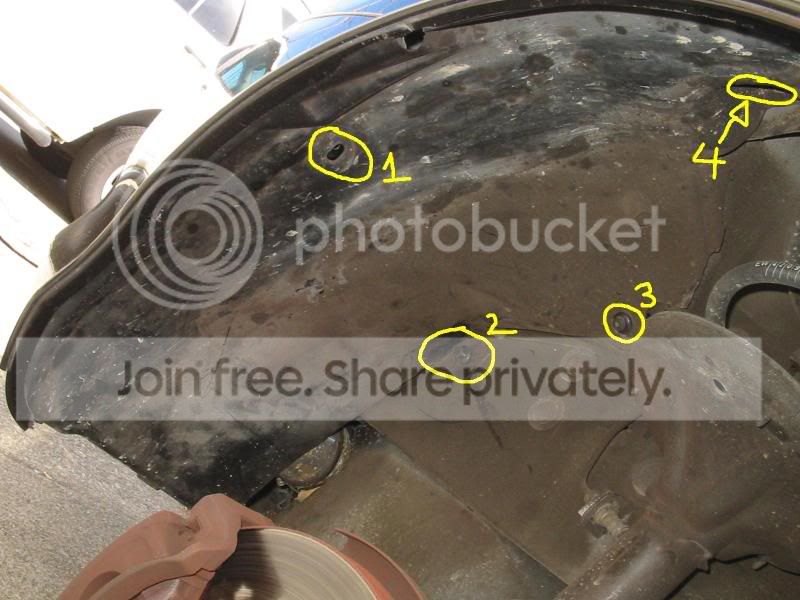
Then the 2 plastic screws on the bottom of the car.
Look inside the fender well towards the front bumper and unscrew the cannister... label the tubes and where they go on the canister itself. ( i do not have pictures of these because i removed the cannister a while ago)
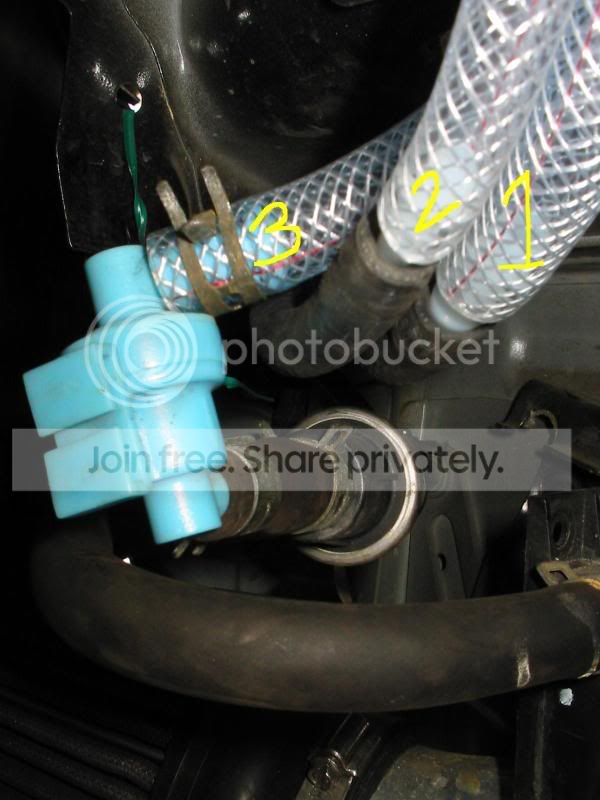
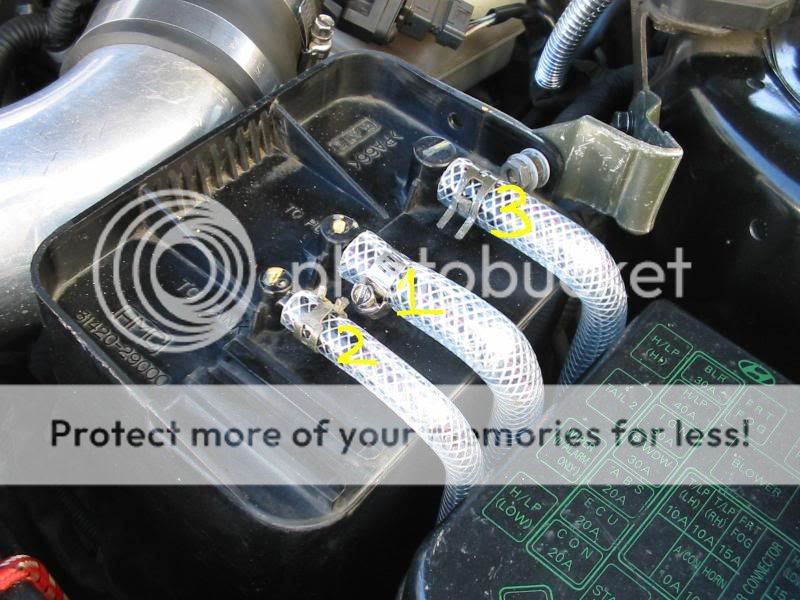
After labeling, disconnet the tubes that go in the cannister. And unscrew the small box thing attached to the cannister but do not take apart the tubes.( notice that number 3 is the largest, 1 the medium size, and 2 the smallest stock tubing)
Then you should have three loose tubes that is ready to be connected. Attached the connectors to each of the ends and clamp them

Then you connect the tubes you bought measure about 25inches for each tube.( mine tubes were about 22" each) Number 1 uses the 3/4" tubing, number 2 uses the 1/2" tubing, and number 3 uses the 3/4" tubing.

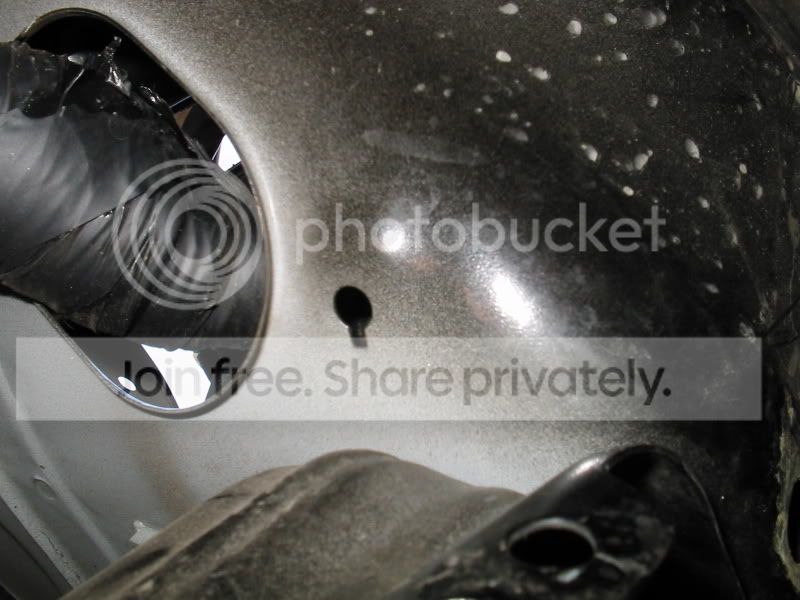
Then you pull one tube at a time up the small opening on the top upper right side. This whole should lead you to the engine bay behind the battery.
This picture below is the hole it go through.
This is how it should look with the tubes dragged up.
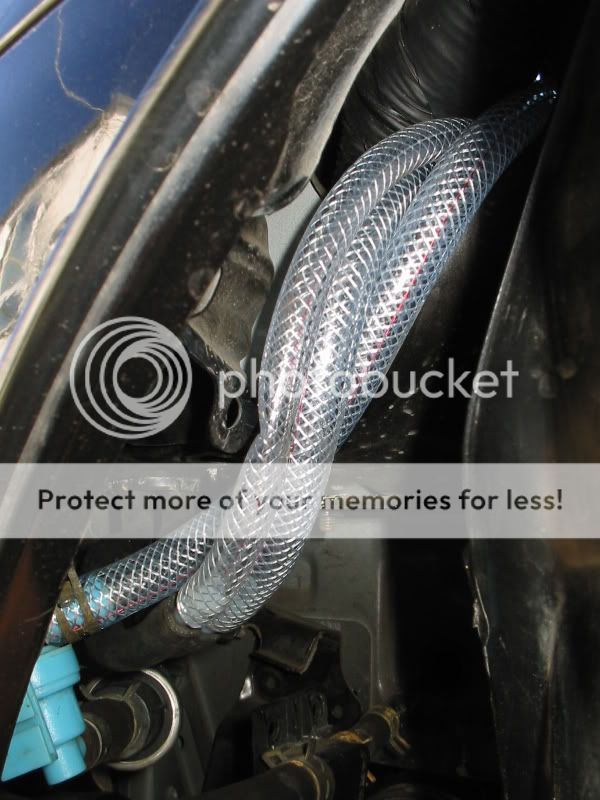

This is how it should look like in the engine bay
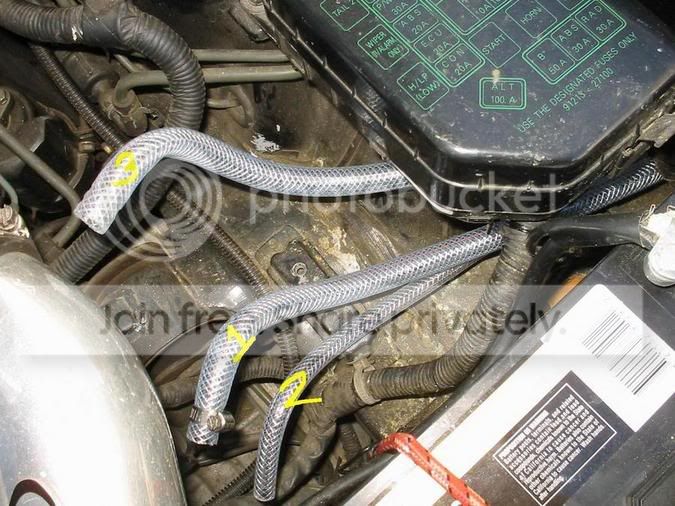
Then you shoudl place your canister in the space behind the battery and measure the length of the tubes, so that they connect perfectly to the cannister. Cut the tubes to despired length. and it shoud look like this.
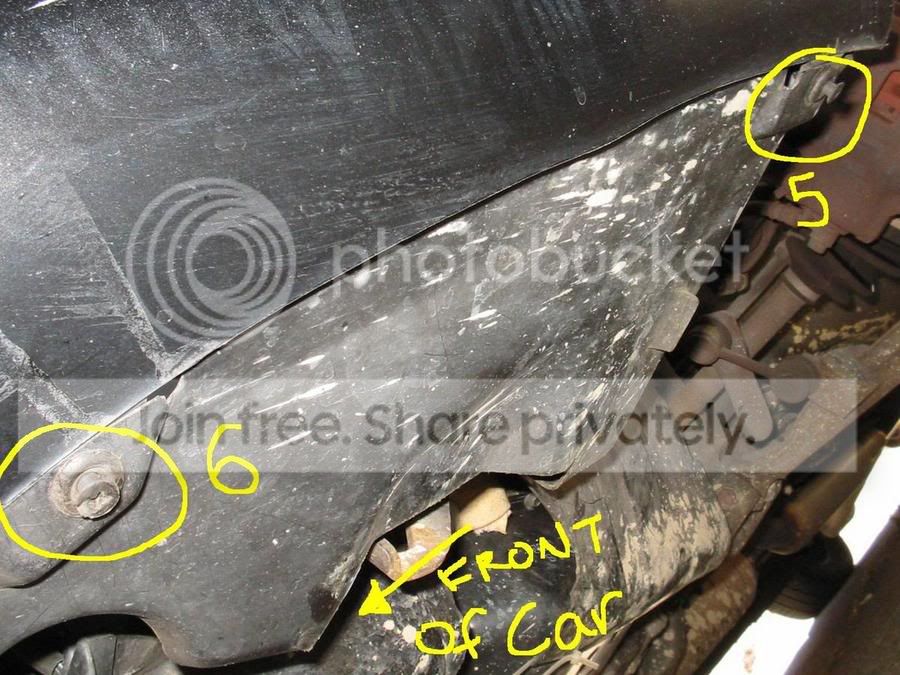
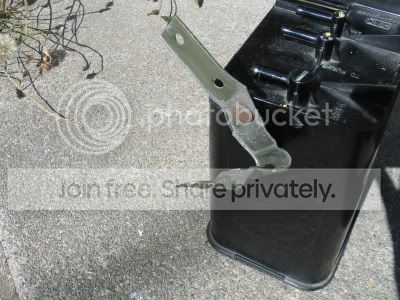
Now is for the hard part, the bracket. This takes alot of creativeity and a whole lot of twisting. During the removal of the cannister, there shoudl be a braket that was removed with the cannister. You now have to use that bracket and shape it so that it will screw to the bracket underneath the knock sensor..As you can see in the picture above.^^^
This is what i did to my bracket, i dont know what i did but just experiment and it will fit
After you are done with the bracket, make sure all your clamps are tight or else you will get a cel.
Then put back all the plastic screws in their holes, and put the tire back on.. and your done.
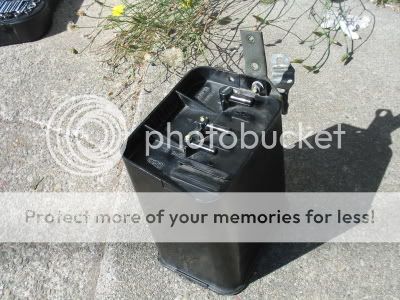
Then your finishing product would look like this....

Happy moddin smile.gif .....
<u>Tools
</u>
- Philips Screw Diver + Flat head screw driver.
- 10mm, 12mm, 14mm socket + rachet
- 2 Pliers
- Maybe a hammer...
- Jack+ Jack Stand
<u>Stuff to buy
</u>
- 4 feet of 3/4" fuel line tubing.
- 2 feet of 1/2" fuel line tubing. ( make sure the tubing allows fuel to travel through them, if not, the fumes may deteriorate the tubing.)
- 2x 3/4" to 3/4" tube connectors (best if metal)
- 1x 1/2" to 1/2 connectors (best if Metal)
- 4x Clamps to hold the piping to connectors
These can be found in Honedepot, Osh, or any Home supply place.
First You loosen your lug nuts. Then jack up the car and remove the wheel.
Then unscrew 4 the plastic screws in the fender guard.( number 4 in my car did not come off, so i just flexed the fender guard and worked behind it since it wasnt in my way. You dont have to take off the guard of you dont want to.)
Then the 2 plastic screws on the bottom of the car.
Look inside the fender well towards the front bumper and unscrew the cannister... label the tubes and where they go on the canister itself. ( i do not have pictures of these because i removed the cannister a while ago)
After labeling, disconnet the tubes that go in the cannister. And unscrew the small box thing attached to the cannister but do not take apart the tubes.( notice that number 3 is the largest, 1 the medium size, and 2 the smallest stock tubing)
Then you should have three loose tubes that is ready to be connected. Attached the connectors to each of the ends and clamp them
Then you connect the tubes you bought measure about 25inches for each tube.( mine tubes were about 22" each) Number 1 uses the 3/4" tubing, number 2 uses the 1/2" tubing, and number 3 uses the 3/4" tubing.
Then you pull one tube at a time up the small opening on the top upper right side. This whole should lead you to the engine bay behind the battery.
This picture below is the hole it go through.
This is how it should look with the tubes dragged up.
This is how it should look like in the engine bay
Then you shoudl place your canister in the space behind the battery and measure the length of the tubes, so that they connect perfectly to the cannister. Cut the tubes to despired length. and it shoud look like this.
Now is for the hard part, the bracket. This takes alot of creativeity and a whole lot of twisting. During the removal of the cannister, there shoudl be a braket that was removed with the cannister. You now have to use that bracket and shape it so that it will screw to the bracket underneath the knock sensor..As you can see in the picture above.^^^
This is what i did to my bracket, i dont know what i did but just experiment and it will fit
After you are done with the bracket, make sure all your clamps are tight or else you will get a cel.
Then put back all the plastic screws in their holes, and put the tire back on.. and your done.
Then your finishing product would look like this....
Happy moddin smile.gif .....

Senior Member
Joined: Mar 2006
Posts: 820
Likes: 0
Vehicle: 1997 Hyundai Tiburon
very nice DIY fing02.gif
i have done this mod it works great
no cel ,no problems ,and no harmful vapors going into the atmosphere
also smog legal wich means if u have to get your car smoged u wont fail. fing02.gif
u dont have to put the canistor in the engine bay either. all u really need to do is run the three hoses to where ever u want to put the canister.

the other mod just links all three hoses together not too great n my opinion.

http://www.rdtiburon.com/index.php?showtopic=4980
i have done this mod it works great
no cel ,no problems ,and no harmful vapors going into the atmosphere
also smog legal wich means if u have to get your car smoged u wont fail. fing02.gif
u dont have to put the canistor in the engine bay either. all u really need to do is run the three hoses to where ever u want to put the canister.
the other mod just links all three hoses together not too great n my opinion.
http://www.rdtiburon.com/index.php?showtopic=4980

Senior Member

Joined: Mar 2002
Posts: 34,642
Likes: 0
From: Los Lunas, New Mexico, USA.
Vehicle: 2001 Hyundai Tiburon, 2004 Kia Sorento, 2010 Kia Soul
The one in the very last picture up there, from HP.com . I'm sure it's posted here somewhere.
We did it on a 97 Tib here and it's driven fine for months.
We did it on a 97 Tib here and it's driven fine for months.

Senior Member
Joined: Mar 2002
Posts: 34,642
Likes: 0
From: Los Lunas, New Mexico, USA.
Vehicle: 2001 Hyundai Tiburon, 2004 Kia Sorento, 2010 Kia Soul
Doing what?
Relocating it keeps it in the car, as some folks are scared of not having it there for inspections.
The thing is, no one will ever tear your car apart to see if it's there, and the only way they'll know it's NOT there is if you get a CEL.
If you do the HP.com method correctly, there is no CEL, you don't relocate anything, and you lose some weight.
If you DO relocate as shown above, you lose engine bay room, have to buy more materials, and actually gain a bit of weight from the extra hoses and such.
Do which ever method you want, but I know which we did.
Moderator

Joined: Mar 2006
Posts: 6,976
Likes: 0
From: Arizona
Vehicle: N/A as in Not Applicable, not Naturally Aspirated
<div class='quotetop'>QUOTE (REDZMAN @ Oct 15 2005, 07:59 AM) <{POST_SNAPBACK}></div><div class='quotemain'>If you DO relocate as shown above, you lose engine bay room, have to buy more materials, and actually gain a bit of weight from the extra hoses and such.</div>
Lmao, nice reasoning. The hoses weigh what? ...8 ounces. That equals like 6 extra seconds at the track, AT LEAST. lmao.gif
No but seriously, I did the HM.com method by removing the cannister completely and just closing the circuit of hoses (you must leave purge valve plugged in and connected) and my car has run fine. If you leave hoses disconnected they will read atomospheric pressure (i.e. not a vacuum) and will throw a CEL, plus when you turn your car off it will hiss for about 2 seconds, cuz it's mad at you for not connected the hoses with a t-clamp connector from Home Depot.
I have posted in the RevA EVAP Cannister thread on how to do this, and so have others, including Sparticus who did a full write up on what produsts to buy, etc. It's in his FAQ thread.