
Diy: Install Hood Lifters


Thread Starter
Moderator


Joined: Feb 2009
Posts: 11,732
Likes: 5
From: Leesville, Louisiana
Vehicle: 2001 Hyundai Tiburon
<span style="font-size:14pt;line-height:100%">Scope:</span>
This DIY will cover installation of Sokie Tech hood dampers.
<span style="font-size:14pt;line-height:100%">Introduction:</span>
Hood dampers raise your hood pneumatically and suspend it without the use of a hood prop. In fact, after the installation of your hood lifters, you may remove your hood prop. The coolest thing about this project; removal comes after installation.
Also, sorry for the dirty pictures guys. It's been pretty cold out and I can't keep up with the pollen.
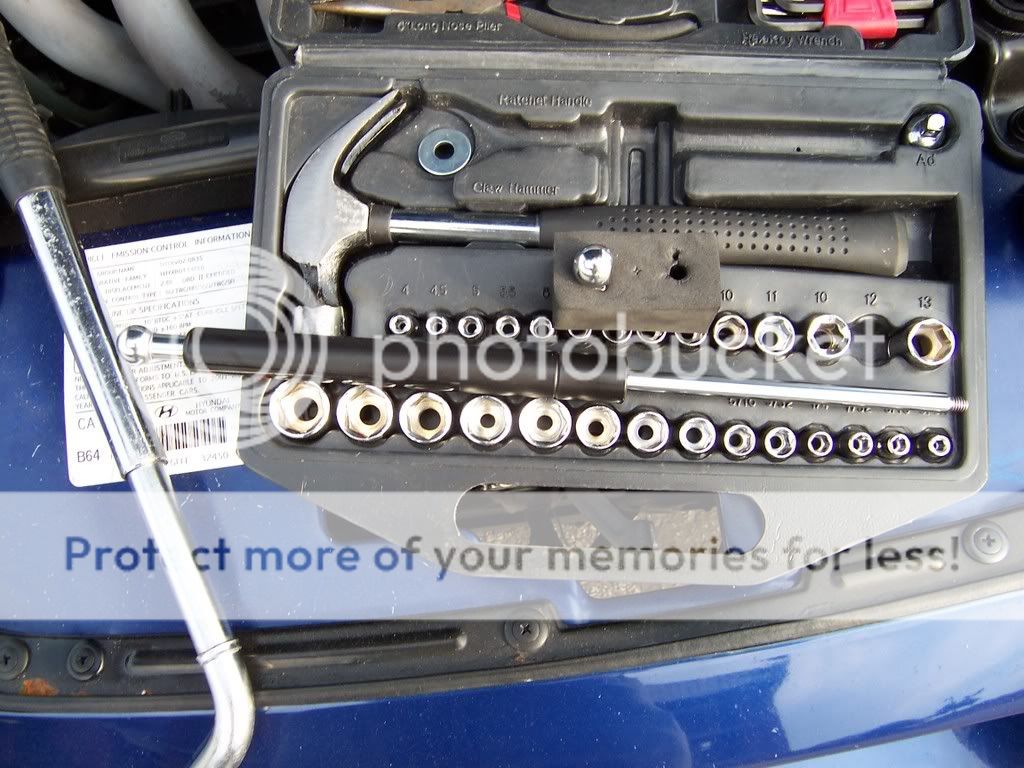
<span style="font-size:14pt;line-height:100%">You will need:</span>
General Purpose Tool set including:
Socket wrench
12MM socket
14MM socket
Small adjustable wrench
Phillips Screwdriver
Diet Pepsi MAX

<span style="font-size:14pt;line-height:100%">Sokie Tech Hood dampers:</span>
The Sokie Tech hood dampers kit is advertised for 97-99 RD-1 Tiburons, but in fact it will fit ALL RD tiburons from 1996-2001. This kit provides all hardware necessary for installation.
Sokie Tech Hood lifters cost approximately $65. They are available from E-Bay member alvoturk9000. This E-Bayer currently has 99.4% positive feedback which means he is pretty reliable and you can trust that you will be satisfied.
To remove the hood lifters from the packaging, you can unscrew the longer metallic end. That was the hardest part of this installation.
It should be noted that R means Passenger side and L means Drivers side.
<span style="font-size:14pt;line-height:100%">
Installation:</span>
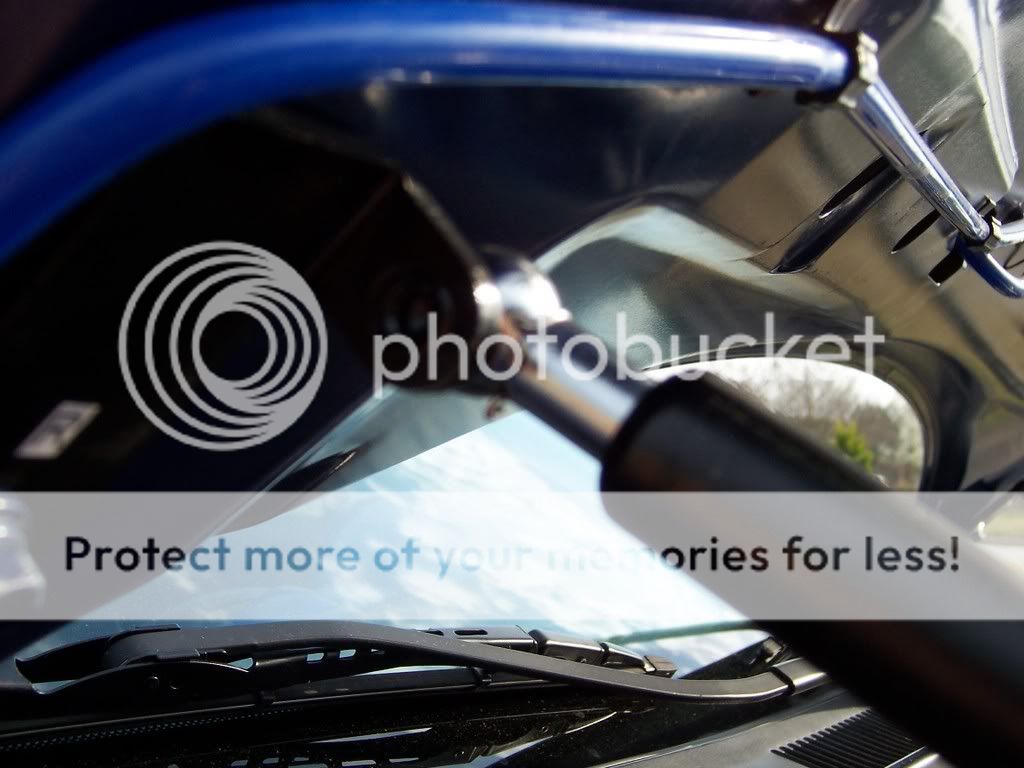
1. Lift your hood
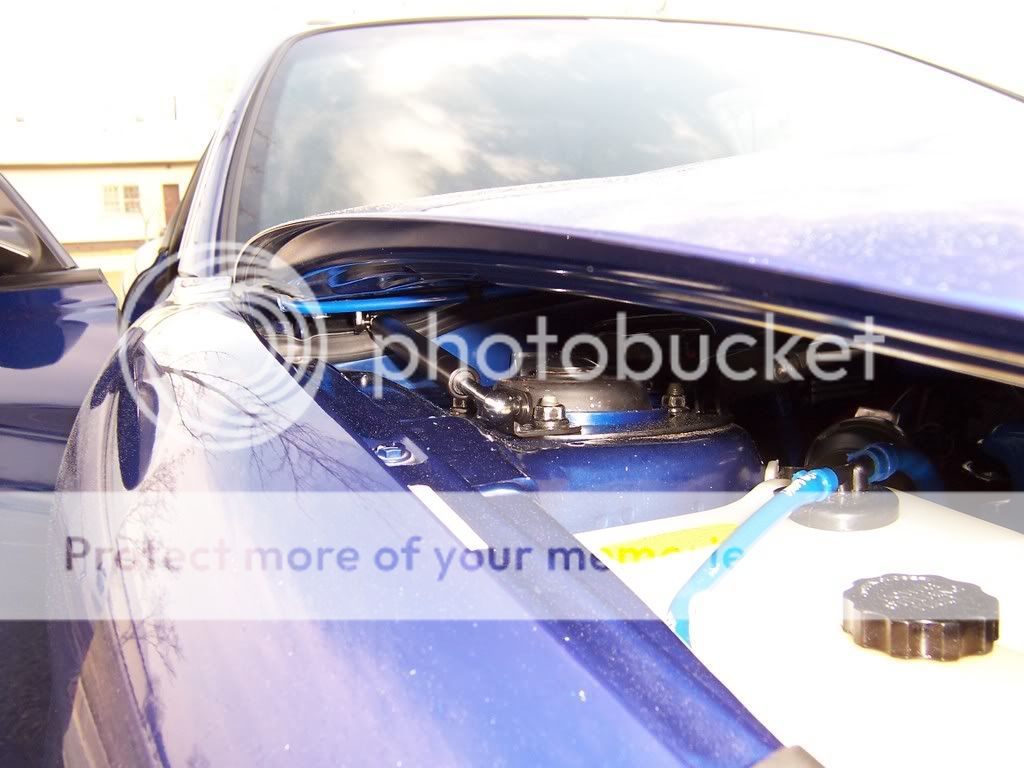
2. remove 1 12mm lower mounting bolt which secures hood to hinge
3. replace bolt with provided washer loosely
3. slide provided mounting hardware notch over hole
<span style="font-size:8pt;line-height:100%">*note: if you do not use the washer it will look like this picture, you can see that the stock washer is incapable of holding the hardware in place</span>
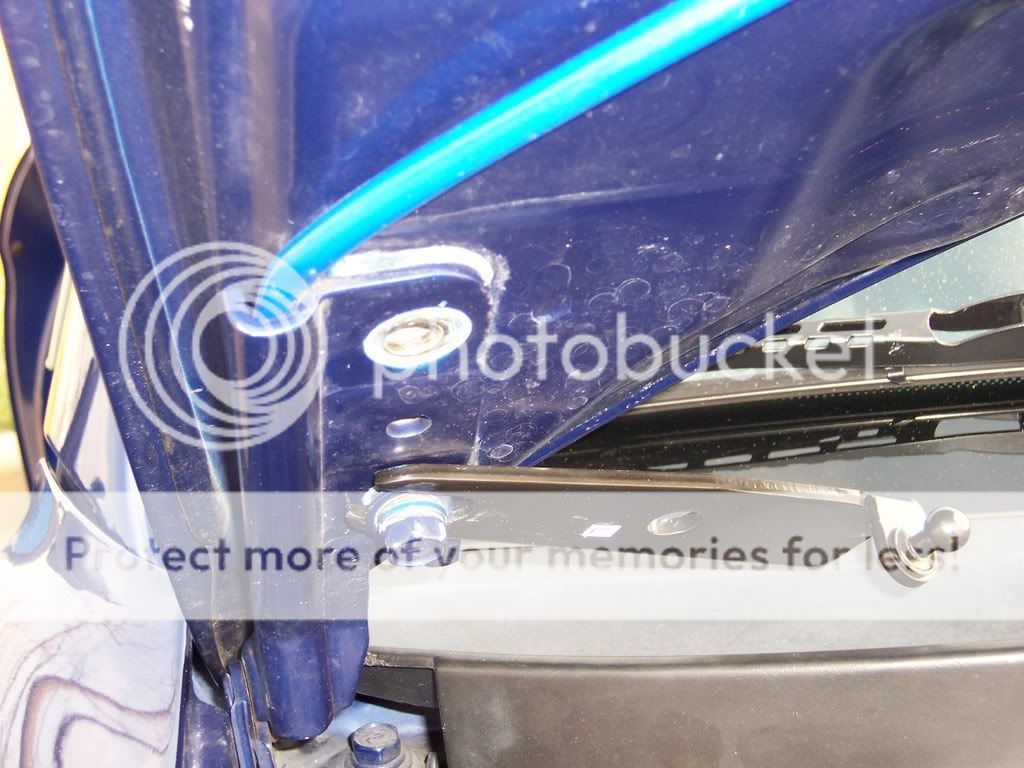
4. remove 1 12mm upper mounting bolt which secures hood to hinge
5. slide upper portion of mounting hardware over the hole and replace bolt
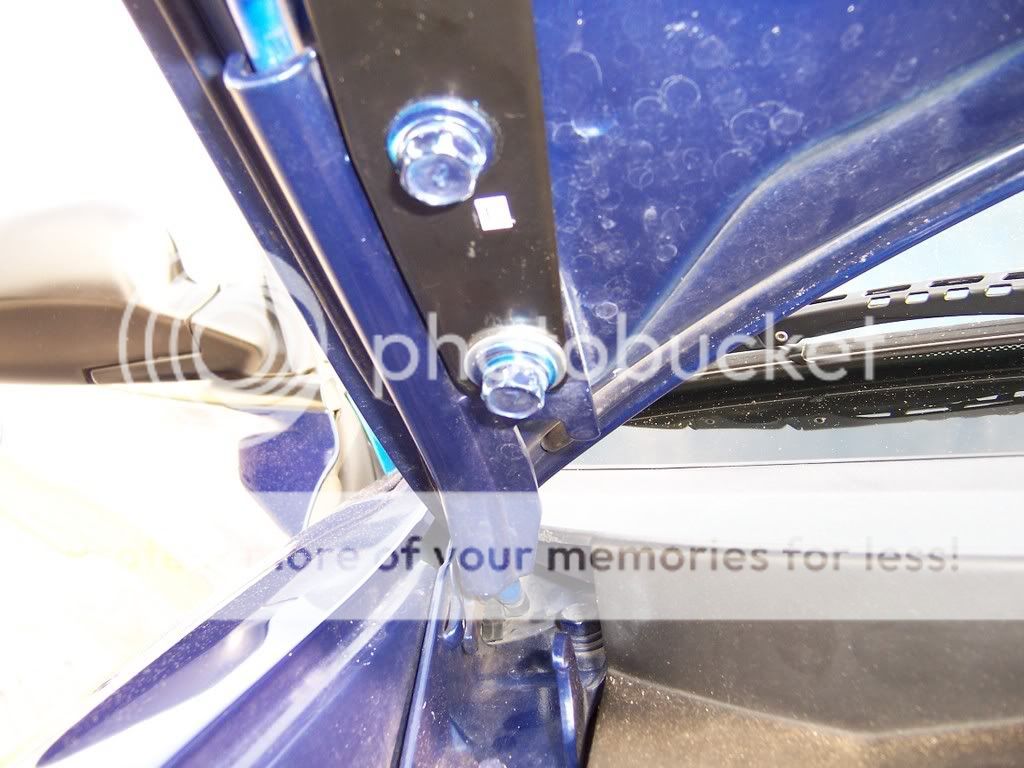
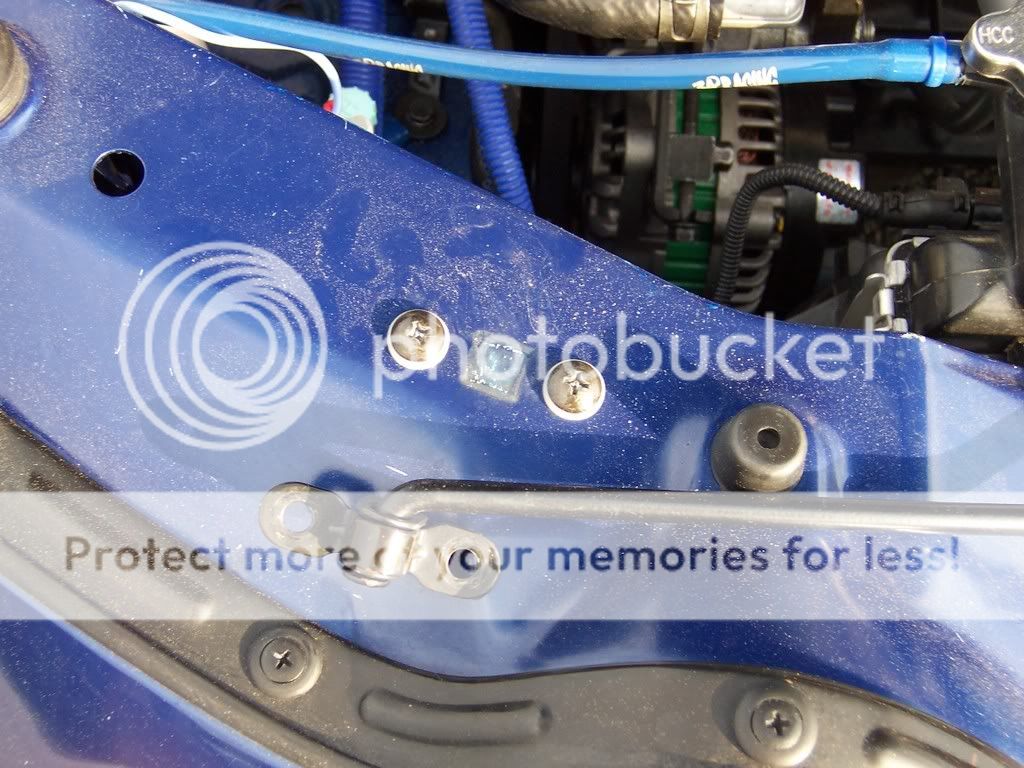
6. remove 1 14MM nut from front of strut mount located closest to the outside of the car
7. Replace nut with provided mounting hardware and washer.
<u><span style="font-size:8pt;line-height:100%">*note: when replacing nut, lower mounting hardware tends to spin, You can use an adjustable wrench to hold the hardware in place while you work.</span></u>
8. Remove locking pin from longer metallic end of provided hood lifter
9. Slide hood lifter onto lower mount and replace pin
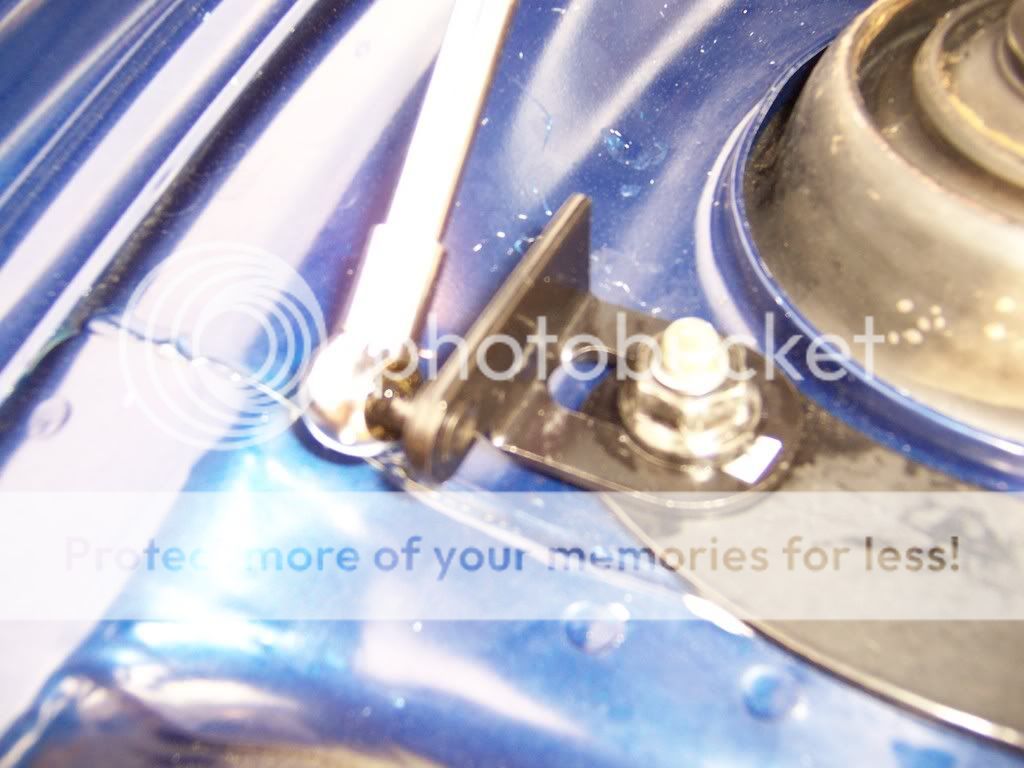
10. Remove locking pin from shorter metallic end
11. slide hood lifter onto upper mount and replace pin
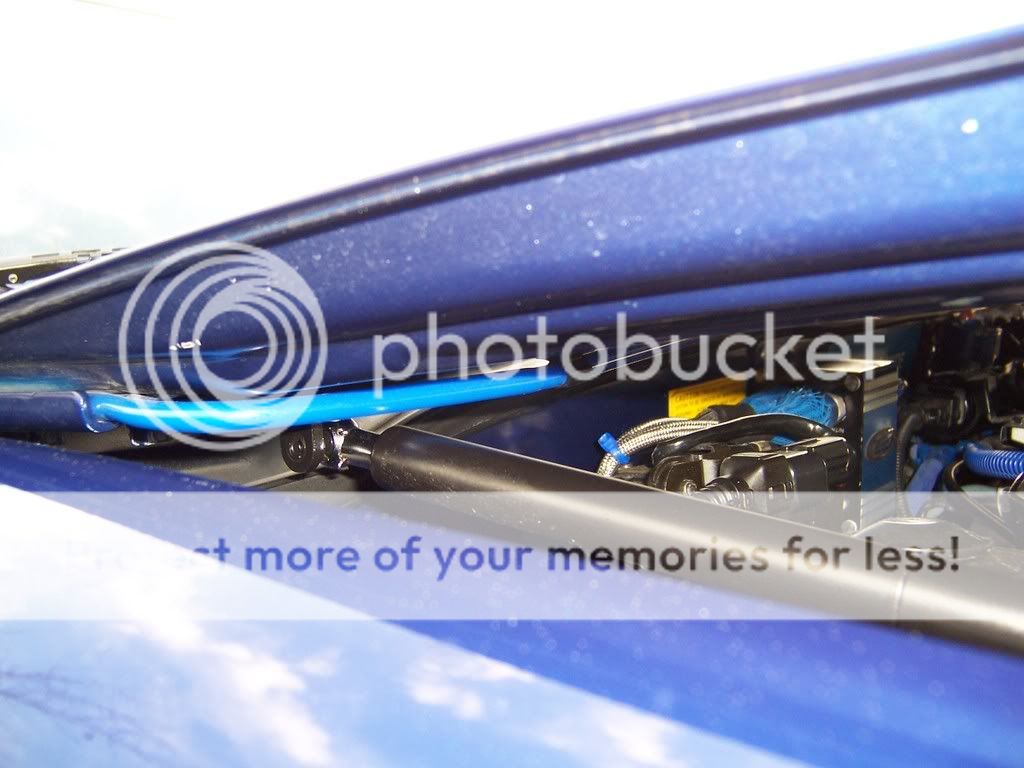
The single hood lifter will keep the hood up.
12. repeat steps 1-11 for the other side.
<span style="font-size:14pt;line-height:100%">Removal:</span>
13. Remove 2 Phillips head screws securing hood prop hinge.
14. remove hood prop hinge
<span style="font-size:14pt;line-height:100%">Conclusion:</span>
I find the sokie tech hood lifters to be much more safe, especially in high winds while working on the car. I like the kit overall. It is functional and fashionable. It makes more room to work in the front of the engine by removing the hood prop.
The things I do not like about this kit are 1. the hood lifters cause a slight bit of upward pressure and bow the hood upwards when closed. 2. Because of the different mounting point, it tends to sway more in wind even though it is secure. I assume that these problems are simply the nature of the beast.
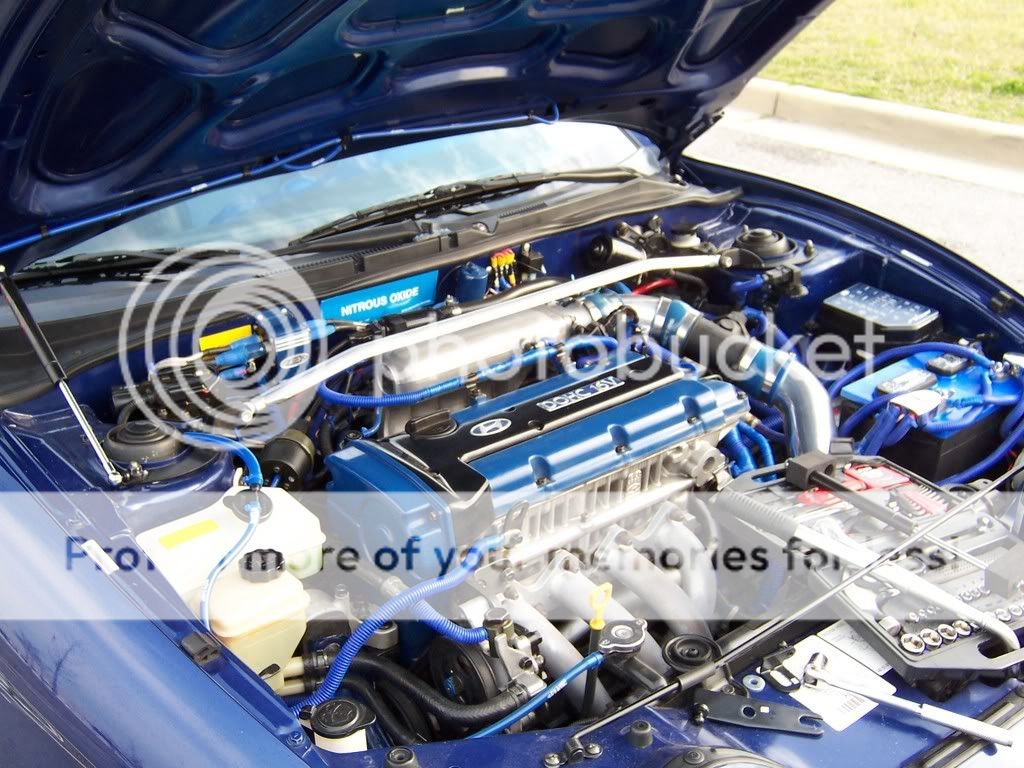
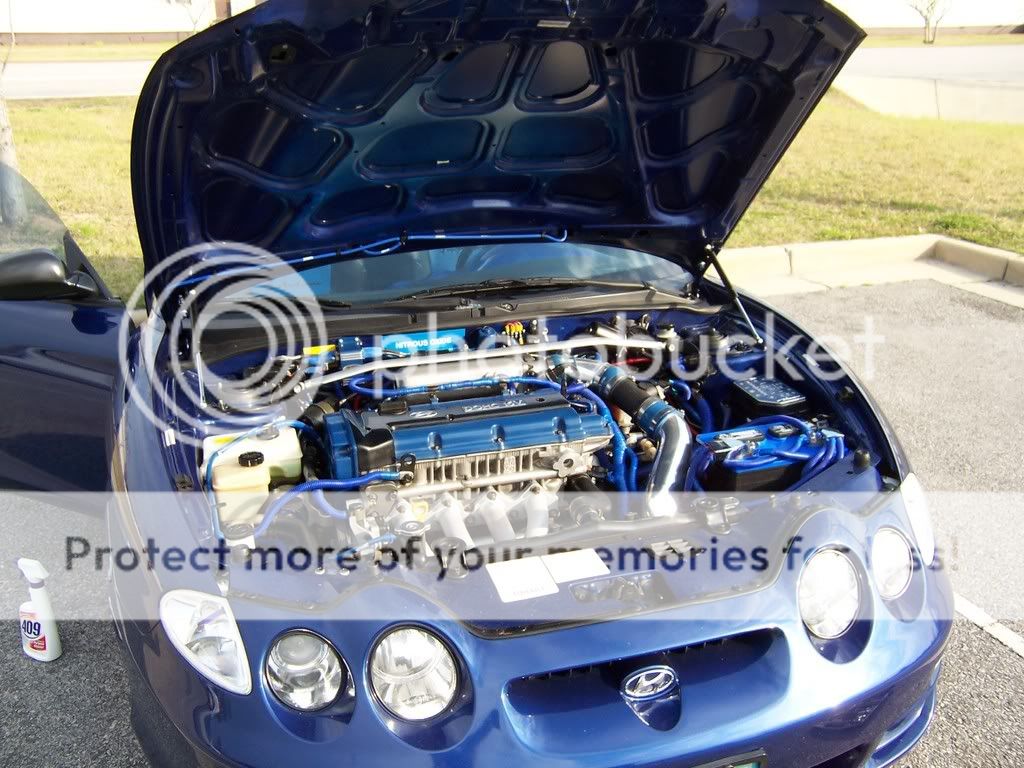
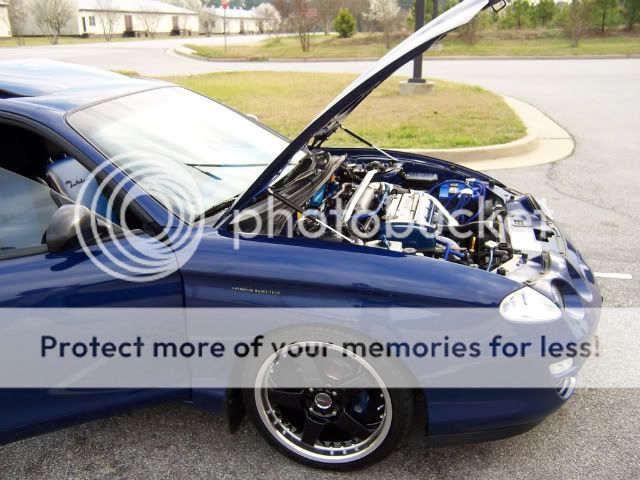
Here's some installed pictures


This picture misrepresents the clearance. It is seated well in front of the firewall.
I hope you enjoyed reading this as much as I enjoyed installing and using them on my RD-2 smile.gif
This DIY will cover installation of Sokie Tech hood dampers.
<span style="font-size:14pt;line-height:100%">Introduction:</span>
Hood dampers raise your hood pneumatically and suspend it without the use of a hood prop. In fact, after the installation of your hood lifters, you may remove your hood prop. The coolest thing about this project; removal comes after installation.
Also, sorry for the dirty pictures guys. It's been pretty cold out and I can't keep up with the pollen.
<span style="font-size:14pt;line-height:100%">You will need:</span>
General Purpose Tool set including:
Socket wrench
12MM socket
14MM socket
Small adjustable wrench
Phillips Screwdriver
Diet Pepsi MAX
<span style="font-size:14pt;line-height:100%">Sokie Tech Hood dampers:</span>
The Sokie Tech hood dampers kit is advertised for 97-99 RD-1 Tiburons, but in fact it will fit ALL RD tiburons from 1996-2001. This kit provides all hardware necessary for installation.
Sokie Tech Hood lifters cost approximately $65. They are available from E-Bay member alvoturk9000. This E-Bayer currently has 99.4% positive feedback which means he is pretty reliable and you can trust that you will be satisfied.
To remove the hood lifters from the packaging, you can unscrew the longer metallic end. That was the hardest part of this installation.
It should be noted that R means Passenger side and L means Drivers side.
<span style="font-size:14pt;line-height:100%">
Installation:</span>
1. Lift your hood
2. remove 1 12mm lower mounting bolt which secures hood to hinge
3. replace bolt with provided washer loosely
3. slide provided mounting hardware notch over hole
<span style="font-size:8pt;line-height:100%">*note: if you do not use the washer it will look like this picture, you can see that the stock washer is incapable of holding the hardware in place</span>
4. remove 1 12mm upper mounting bolt which secures hood to hinge
5. slide upper portion of mounting hardware over the hole and replace bolt
6. remove 1 14MM nut from front of strut mount located closest to the outside of the car
7. Replace nut with provided mounting hardware and washer.
<u><span style="font-size:8pt;line-height:100%">*note: when replacing nut, lower mounting hardware tends to spin, You can use an adjustable wrench to hold the hardware in place while you work.</span></u>
8. Remove locking pin from longer metallic end of provided hood lifter
9. Slide hood lifter onto lower mount and replace pin
10. Remove locking pin from shorter metallic end
11. slide hood lifter onto upper mount and replace pin
The single hood lifter will keep the hood up.
12. repeat steps 1-11 for the other side.
<span style="font-size:14pt;line-height:100%">Removal:</span>
13. Remove 2 Phillips head screws securing hood prop hinge.
14. remove hood prop hinge
<span style="font-size:14pt;line-height:100%">Conclusion:</span>
I find the sokie tech hood lifters to be much more safe, especially in high winds while working on the car. I like the kit overall. It is functional and fashionable. It makes more room to work in the front of the engine by removing the hood prop.
The things I do not like about this kit are 1. the hood lifters cause a slight bit of upward pressure and bow the hood upwards when closed. 2. Because of the different mounting point, it tends to sway more in wind even though it is secure. I assume that these problems are simply the nature of the beast.
Here's some installed pictures
This picture misrepresents the clearance. It is seated well in front of the firewall.
I hope you enjoyed reading this as much as I enjoyed installing and using them on my RD-2 smile.gif

Senior Member
Joined: Feb 2009
Posts: 1,932
Likes: 0
From: Boston
Vehicle: 2006 Pontiac GTO
Is the upward bow visible on the closed hood? Can you take a pic of that?
Is there any way these kind of dampers can be modified to provide less force? If one is enough to keep the hood up, then lower force would be better to keep the bowing at a minimum..
Is there any way these kind of dampers can be modified to provide less force? If one is enough to keep the hood up, then lower force would be better to keep the bowing at a minimum..
Thread Starter
Moderator
Joined: Feb 2009
Posts: 11,732
Likes: 5
From: Leesville, Louisiana
Vehicle: 2001 Hyundai Tiburon
^^ Yes the bowing is noticable with the hood closed. It's not much, but it annoyed me when I first drove it because the field of view from the drivers seat makes the fender and the hood not line up perfectly.

Thread Starter
Moderator
Joined: Feb 2009
Posts: 11,732
Likes: 5
From: Leesville, Louisiana
Vehicle: 2001 Hyundai Tiburon
I have no idea. I was able to colapse them by hand, but I couldn't guess. They were somewhat difficult to colapse by hand.
It may be that the hood didn't line up or something else is going on. Any suggestions?
it dosn't look like anything is rubbing or binding so it's not being directly pushed up. It's my guess tthat it's bowing the hood. I'll try removing the connection tomorrow and see if that changes anything
The instructions said, and I'll paraphrase the Japarish, don't install them on a carbon fiber hood.

Senior Member
Joined: Mar 2002
Posts: 34,642
Likes: 0
From: Los Lunas, New Mexico, USA.
Vehicle: 2001 Hyundai Tiburon, 2004 Kia Sorento, 2010 Kia Soul
Yeah, there's no way these should be able to BOW a OEM hood. No other members with these installed have mentioned that.
Ericy, what's your plan man? I need some for my CF hood.
BTW, if someone ever gets me a good measurements on these in length, I can se if NRG has the carbon fiber rated ones at the same size.
Ericy, what's your plan man? I need some for my CF hood.
BTW, if someone ever gets me a good measurements on these in length, I can se if NRG has the carbon fiber rated ones at the same size.

Senior Member
Joined: Mar 2006
Posts: 7,799
Likes: 0
Vehicle: 2001 Hyundai Tiburon
I have to find the ones I got and see what they are rated. Honestly for cf we need something SUPER light duty if theres going to be two of them. Ill find them and post back. There were measurments somewhere from a member but I gotta find them. I think mine were the same though.