
Diy Chrome Paint


Thread Starter
Senior Member

Joined: Mar 2010
Posts: 2,615
Likes: 11
From: Denver Co
Vehicle: 1999 Hyundai Tiburon
Ok, this DIY is going to be mostly explanation, as I didn't take a whole lot of picks of the process. And, you really just have to practice your spray techniques on test pieces to get it right before you start spraying the actual parts. Do not use this paint on anything that gets over 200 degree's Fahrenheit as I am clueless to how long it will last at those high temps.
OK...
<u>SUPPLIES NEEDED:</u>
400 grit Wetsandable sandpaper 1 package
1000 grit Wetsandable sandpaper 1 package
A high build automitve primer, Duplicolor 1 can
High Gloss Black Engine Paint Duplicolor - this is what I used. 1 can
Optional Paint: High Gloss Enamel - Rustoleum 1 can - I do not recommend this as enamels are very soft paints. You have to bake it for it to cure hard enough to exhist in your engine bay. BUT, you will get better results with an enamel then with the duplicolor enigne paint. Choice is yours. I went with the safe approach and just used the engine paint. Finished product still came out great!
Alclad II High Polish Chrome 2 bottles, I ordered 4 so I could practice spraying
***you can purchase Alclad II from a variety of venders. Do a yahoo search. I purchased mine through scalemodelingbychris.com. Here is a direct link to the chrome I purchased: http://www.scalemodelingbychris.com/alclad.htm
Also, here is a link to Alclad's home page: http://www.alclad2.com/alclad-home.html
Paint thinner
Carburator cleaner
dish soap
scrub brush
Soda of choice!!!! Seriously, the fumes will make you happy enough!
HIGHLY RECOMMENED- airbrush. I tried one of those testor model car airbrush sets because I already had one. It didn't spray the chrome fine enough to get the best results. I already had an air compressor with a regulator, so I bought a fairly inexpensive airbrush kit and a water and oil separating filter for my air compressor and I got MUCH better results. I used a single action siphon (bottom) feed airbrush.
Basic steps to Chroming
<u>PREP WORK</u>
1. Remove the piece you want to chrome. If its the coolant or power steering tank, of course, drain the fluid.
2. Now, take you carb cleaner and start cleaning the part. It wont take much.
3. Once it is clean, wash it THOROUGHLY with soap, water, and a scrub brush Allow to dry.
4. Sand the part with the 400 grit sandpaper. This will allow the primer something to bite into.
5. When this is done, either air-hose it off with your air compressor, or rewash it with just water this time. If you wash it with water, either air-hose it completely dry or wait until it is completely dry before moving on. Try to handle the piece as little as possible. Your part is ready for paint and if you touch the surfaces, the oil's from your fingers may inhibit the paint from adhering to the plastic.
OPTIONAL: I was going to do this, and forgot! Take a piece of masking tape, cut it into a super small strip and put it next to your filling guides. This way you can see how much fluid is in you tanks!!!
<u>PAINTING PRIMER AND BASE COAT</u>
6. Now take your high build primer and spray a "tack" coat. This is a very light coat that will help the paint stick as well. It should look like you frosted the part, not painted it.
7. You primer should dry fast, so give it 2 min and then give it a good medium wet coat, wait 5 min, and give it one more good medium wet coat.
8. Now for the hardest part of the project: GET AWAY FROM IT!!! Let it dry for at least on hour, I'd say 2.
9. When the primer has dried completely, use your 1000 grit to sand down the primer. Make sure EVERYTHING is super smooth. The smoother your finish, the better the chrome will look.
10. When you are happy with your prep work, Air hose the part or wash with water one more time. how you can start spraying the Gloss Black Engine Paint. Same as before, you want a tack coat, but make this one a little more heavy.
11. Follow this by a medium wet coat 3 min after your tack coat.
12. Allow to dry for 4-5 min, then apply a heavy wet coat. This is the scariest coat to apply, You want your gloss paint to literally be a mirror finish. Spray it heavy, but don’t overdo it or you'll get a huge run in your paint.
***For those who are airbrushing, have a bottle of paint thinner ready. You guys/gals shouldn’t have to spray such a heavy coat, although it will still be a very heavy wet coat. Use the paint thinner to help flow out the paint. it will take about twice as long to dry, but you'll have a mirror finish once you are done. Use it sparingly!! The paint thinner can help flow it out, but it can also ruin your paint job. I did this and ended up having to strip the tank back to plastic and start all over. It worked the second time though! fing02.gif
13. Now, go get a bite to eat, drink, whatever. Let this dry AT LEAST 5 hours. If you decide to use the gloss enamel, you will have to wait at least 24 hours to allow the paint to dry
<u>APPLYING CHROMING PAINT</u>
***This chroming effect works only if you have a super glossy black finish to paint onto. The way the effect works is the gloss black paint absorbs light while the translucent chrome finish reflects light. YOU NEED BOTH TO GET IT TO WORK!!! If you spray to much, you will just have a silver paint job, If you spray to little, you will not get enough reflection to create the chrome appearance. While you are spraying, when it starts to look like black chrome, you are almost there!!!!
14. You need to get your air compressor running and set your air line between 6-9 PSI. Do this with the airbrush attached to the compressor and the trigger pulled. Take your gauge all the way to 0 and come back up to the correct pressure. **Don’t have your chrome paint bottle on during this or you will waste your paint!!!
Optional: I suggest getting a water and oil separating filter. Put this filter as close to the Airbrush line and as far away from the air compressor as possible. This will allow the most condensation and oil to be trapped in the filter. The cooler the air the better the filter will work
15. Now, take your Alclad II Chrome paint and shake it up well. Fill one of your feeding bottles with the chrome paint and attach it to your airbrush. Now you need to adjust how fine your spray is going to be. Imagine its a very cold day and when you breath you can see your breath. THIS is how fine a mist you need to get the best results. Once you think you have it as fine as it will be, try to get it finer one more time!! This is one of the most crucial steps to this process. Seriously, the paint should BARELY be coming out of your airbrush.
16. Once you have the airbrush set up properly, start spraying your part.
*****************USE AS LITTLE PAINT AS POSSIBLY TO CREATE THE EFFECT*****************
*Build the effect up VERY SLOWLY! That’s why we set the PSI and the airbrush to just barely spray anything.
**Also, do not hold the airbrush in one spot while spraying. Hit the trigger with the airbrush off the object, sweep past the object until you are spraying off the object, then release the trigger. If you spray in one spot for longer the 1/2 second, you will have too much chrome in that spot and your finish will not be uniform. Sweep past the object quickly as well. This will allow you to slow down the buildup of the chrome.
***Use crisscross patterns while you spray the chrome to avoid "modeling" the paint. Modeling can occur with all metallic paints. It’s when you only spray in horizontal patterns and your paint actually dries in horizontal lines, giving a striped appearance. To avoid this, spray in crisscross patterns.
Once you are satisfied with the finished product, allow the paint to cure for one hour. Handle surfaces to a minimum. When refilling your tanks, use funnels and try not to spill any fluids on the chrome finish. Do not scrub the finish as it will eventually rub off. Use medium force of water and air-hose it dry to clean. DO NOT GET DEGREASER ON THE FINISH. If you have to, use only a light dish soap.
Once the paint has cured for about 3 hours, you can take a SOFT polishing cloth, I used a very soft fleece sweater, and LIGHTLY rub the finish to give it a little more luster. DONT BE GREEDY!!! if you rub to much, you'll rub the chrome off. Remember, it's only had a few hours to cure so be careful!!!
I do not recommend clearcoating. I spent 40.00 trying every clearcoat possible with no success. All of the clearcoats reactivated the chrome paint and it became just a silver paint with no chrome effect. I did have a little sucess with a waterbased clear coat called polycrylic, but it really dulled the shine of the chrome finish on my practice parts. I even watered it down 4:1. I would suggest leaving it with no clearcoat and doing touch-ups with your airbrush once or twice a year. Very easy to do and should only take about 20 min total.
NOTE:The longevity of the Alclad II chrome paint is undetermined. It is a model car/plane hobby paint that we are using under the hood. It is very experimental and I am taking a chance to see how long it will last. Touch ups should be relatively painless though. When the chrome wears off, simply get your airbrush set up as described above, through some paper towers around the area to avoid over spray, and lightly touch up the part that needs it. The hard part is done. The most important part is the super glossy black finish that the Alclad II is sprayed over.
Well, I hope you all enjoy this and give it a shot. It’s a lot of work, but the payoff can be very rewarding!!!
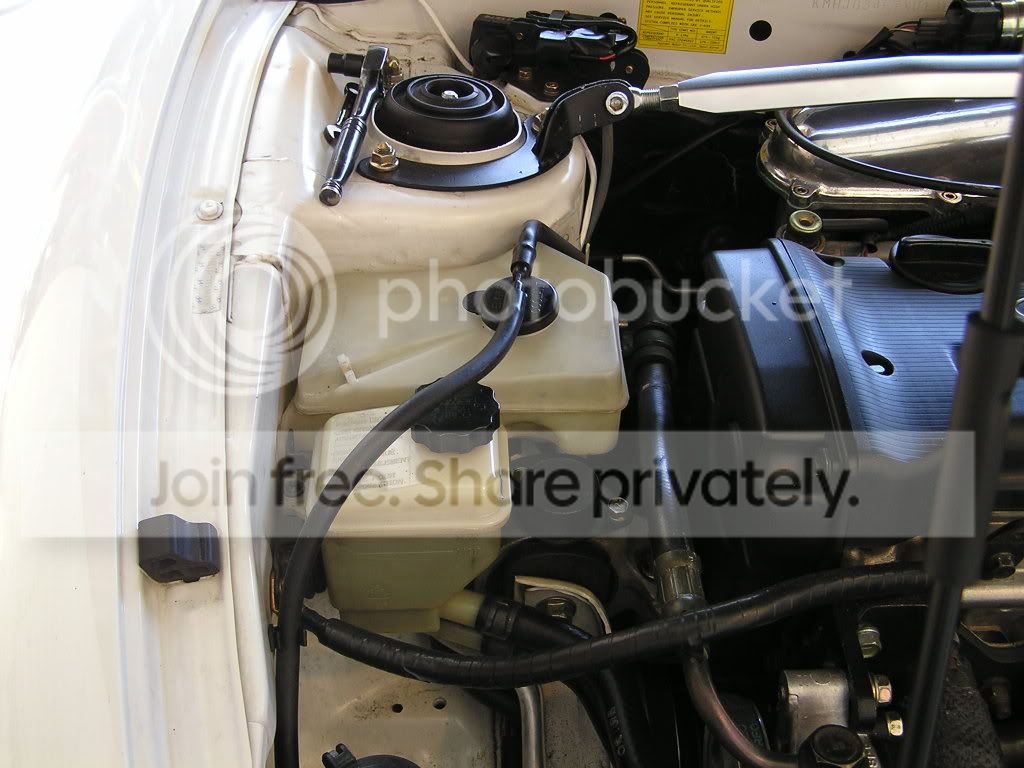
Before:
After:


OK...
<u>SUPPLIES NEEDED:</u>
400 grit Wetsandable sandpaper 1 package
1000 grit Wetsandable sandpaper 1 package
A high build automitve primer, Duplicolor 1 can
High Gloss Black Engine Paint Duplicolor - this is what I used. 1 can
Optional Paint: High Gloss Enamel - Rustoleum 1 can - I do not recommend this as enamels are very soft paints. You have to bake it for it to cure hard enough to exhist in your engine bay. BUT, you will get better results with an enamel then with the duplicolor enigne paint. Choice is yours. I went with the safe approach and just used the engine paint. Finished product still came out great!
Alclad II High Polish Chrome 2 bottles, I ordered 4 so I could practice spraying
***you can purchase Alclad II from a variety of venders. Do a yahoo search. I purchased mine through scalemodelingbychris.com. Here is a direct link to the chrome I purchased: http://www.scalemodelingbychris.com/alclad.htm
Also, here is a link to Alclad's home page: http://www.alclad2.com/alclad-home.html
Paint thinner
Carburator cleaner
dish soap
scrub brush
Soda of choice!!!! Seriously, the fumes will make you happy enough!
HIGHLY RECOMMENED- airbrush. I tried one of those testor model car airbrush sets because I already had one. It didn't spray the chrome fine enough to get the best results. I already had an air compressor with a regulator, so I bought a fairly inexpensive airbrush kit and a water and oil separating filter for my air compressor and I got MUCH better results. I used a single action siphon (bottom) feed airbrush.
Basic steps to Chroming
<u>PREP WORK</u>
1. Remove the piece you want to chrome. If its the coolant or power steering tank, of course, drain the fluid.
2. Now, take you carb cleaner and start cleaning the part. It wont take much.
3. Once it is clean, wash it THOROUGHLY with soap, water, and a scrub brush Allow to dry.
4. Sand the part with the 400 grit sandpaper. This will allow the primer something to bite into.
5. When this is done, either air-hose it off with your air compressor, or rewash it with just water this time. If you wash it with water, either air-hose it completely dry or wait until it is completely dry before moving on. Try to handle the piece as little as possible. Your part is ready for paint and if you touch the surfaces, the oil's from your fingers may inhibit the paint from adhering to the plastic.
OPTIONAL: I was going to do this, and forgot! Take a piece of masking tape, cut it into a super small strip and put it next to your filling guides. This way you can see how much fluid is in you tanks!!!
<u>PAINTING PRIMER AND BASE COAT</u>
6. Now take your high build primer and spray a "tack" coat. This is a very light coat that will help the paint stick as well. It should look like you frosted the part, not painted it.
7. You primer should dry fast, so give it 2 min and then give it a good medium wet coat, wait 5 min, and give it one more good medium wet coat.
8. Now for the hardest part of the project: GET AWAY FROM IT!!! Let it dry for at least on hour, I'd say 2.
9. When the primer has dried completely, use your 1000 grit to sand down the primer. Make sure EVERYTHING is super smooth. The smoother your finish, the better the chrome will look.
10. When you are happy with your prep work, Air hose the part or wash with water one more time. how you can start spraying the Gloss Black Engine Paint. Same as before, you want a tack coat, but make this one a little more heavy.
11. Follow this by a medium wet coat 3 min after your tack coat.
12. Allow to dry for 4-5 min, then apply a heavy wet coat. This is the scariest coat to apply, You want your gloss paint to literally be a mirror finish. Spray it heavy, but don’t overdo it or you'll get a huge run in your paint.
***For those who are airbrushing, have a bottle of paint thinner ready. You guys/gals shouldn’t have to spray such a heavy coat, although it will still be a very heavy wet coat. Use the paint thinner to help flow out the paint. it will take about twice as long to dry, but you'll have a mirror finish once you are done. Use it sparingly!! The paint thinner can help flow it out, but it can also ruin your paint job. I did this and ended up having to strip the tank back to plastic and start all over. It worked the second time though! fing02.gif
13. Now, go get a bite to eat, drink, whatever. Let this dry AT LEAST 5 hours. If you decide to use the gloss enamel, you will have to wait at least 24 hours to allow the paint to dry
<u>APPLYING CHROMING PAINT</u>
***This chroming effect works only if you have a super glossy black finish to paint onto. The way the effect works is the gloss black paint absorbs light while the translucent chrome finish reflects light. YOU NEED BOTH TO GET IT TO WORK!!! If you spray to much, you will just have a silver paint job, If you spray to little, you will not get enough reflection to create the chrome appearance. While you are spraying, when it starts to look like black chrome, you are almost there!!!!
14. You need to get your air compressor running and set your air line between 6-9 PSI. Do this with the airbrush attached to the compressor and the trigger pulled. Take your gauge all the way to 0 and come back up to the correct pressure. **Don’t have your chrome paint bottle on during this or you will waste your paint!!!
Optional: I suggest getting a water and oil separating filter. Put this filter as close to the Airbrush line and as far away from the air compressor as possible. This will allow the most condensation and oil to be trapped in the filter. The cooler the air the better the filter will work
15. Now, take your Alclad II Chrome paint and shake it up well. Fill one of your feeding bottles with the chrome paint and attach it to your airbrush. Now you need to adjust how fine your spray is going to be. Imagine its a very cold day and when you breath you can see your breath. THIS is how fine a mist you need to get the best results. Once you think you have it as fine as it will be, try to get it finer one more time!! This is one of the most crucial steps to this process. Seriously, the paint should BARELY be coming out of your airbrush.
16. Once you have the airbrush set up properly, start spraying your part.
*****************USE AS LITTLE PAINT AS POSSIBLY TO CREATE THE EFFECT*****************
*Build the effect up VERY SLOWLY! That’s why we set the PSI and the airbrush to just barely spray anything.
**Also, do not hold the airbrush in one spot while spraying. Hit the trigger with the airbrush off the object, sweep past the object until you are spraying off the object, then release the trigger. If you spray in one spot for longer the 1/2 second, you will have too much chrome in that spot and your finish will not be uniform. Sweep past the object quickly as well. This will allow you to slow down the buildup of the chrome.
***Use crisscross patterns while you spray the chrome to avoid "modeling" the paint. Modeling can occur with all metallic paints. It’s when you only spray in horizontal patterns and your paint actually dries in horizontal lines, giving a striped appearance. To avoid this, spray in crisscross patterns.
Once you are satisfied with the finished product, allow the paint to cure for one hour. Handle surfaces to a minimum. When refilling your tanks, use funnels and try not to spill any fluids on the chrome finish. Do not scrub the finish as it will eventually rub off. Use medium force of water and air-hose it dry to clean. DO NOT GET DEGREASER ON THE FINISH. If you have to, use only a light dish soap.
Once the paint has cured for about 3 hours, you can take a SOFT polishing cloth, I used a very soft fleece sweater, and LIGHTLY rub the finish to give it a little more luster. DONT BE GREEDY!!! if you rub to much, you'll rub the chrome off. Remember, it's only had a few hours to cure so be careful!!!
I do not recommend clearcoating. I spent 40.00 trying every clearcoat possible with no success. All of the clearcoats reactivated the chrome paint and it became just a silver paint with no chrome effect. I did have a little sucess with a waterbased clear coat called polycrylic, but it really dulled the shine of the chrome finish on my practice parts. I even watered it down 4:1. I would suggest leaving it with no clearcoat and doing touch-ups with your airbrush once or twice a year. Very easy to do and should only take about 20 min total.
NOTE:The longevity of the Alclad II chrome paint is undetermined. It is a model car/plane hobby paint that we are using under the hood. It is very experimental and I am taking a chance to see how long it will last. Touch ups should be relatively painless though. When the chrome wears off, simply get your airbrush set up as described above, through some paper towers around the area to avoid over spray, and lightly touch up the part that needs it. The hard part is done. The most important part is the super glossy black finish that the Alclad II is sprayed over.
Well, I hope you all enjoy this and give it a shot. It’s a lot of work, but the payoff can be very rewarding!!!
Before:
After:

Moderator

Joined: Feb 2009
Posts: 11,732
Likes: 5
From: Leesville, Louisiana
Vehicle: 2001 Hyundai Tiburon
Sweet, great writeup. I will do this in a few months when i get a chance. Keep us updated on maintenance of your system. We need to know how often we have to break out the touchup paint. Anything so far?

Senior Member
Joined: May 2001
Posts: 3,338
Likes: 0
nice write up..
for anyone who wants to attemtp this with a spray can...go here to purchase.
http://www.discountmodels.com/alclad_lacquers.htm
for anyone who wants to attemtp this with a spray can...go here to purchase.
http://www.discountmodels.com/alclad_lacquers.htm