
Diy Changing Non-captive Wheel Bearings/hubs


Thread Starter
Senior Member
Joined: Jan 2008
Posts: 741
Likes: 0
Vehicle: 2001 Tiburon
I believe this applies to all RD2's and later gen RD1's, correct me if I'm wrong. This was done on an RD1, rear right hub.
Difficulty: 2.5 out of 5
Tools needed:
-Torque Wrench
-32mm Socket (I used a 1 1/4" socket)
-14mm socket
-one regular ratchet
-one long handled ratchet (for leverage)
-sledgehammer (maybe)
-Impact
-flat head screwdriver
Parts Needed:
-Hub Assembly (includes the bearing)
-Rotor (you'll probably break it)
You may not need the impact, but it'll help. You may also not need a new rotor (I didnt) however it's good to have one ready just in case, and if you're planning on swapping rotors this is the perfect time.
This can take anywhere from 30min to 2 hours, depending on how rusted your bolts and rotor are. Took me about 45min.
Step 1. Jack up your car (see DIY Jacking Up Your Car). Sit car on jackstands.
2. Remove wheel.
3. Remove the caliper. Using the 14mm socket, remove the 2 bolts securing the caliper to the rotor (not the two bolts holding the caliper together). These two bolts go through the dust shield, and are a b**** to remove, hence use the long handled ratchet, or a breaker bar, to loosen them. I didn't get a pic, but you can see the two bolts I'm talking about in step 7. Once these are out the caliper assembly should come right off. Just hang it somewhere safe (you can zip tie it to something if you please).
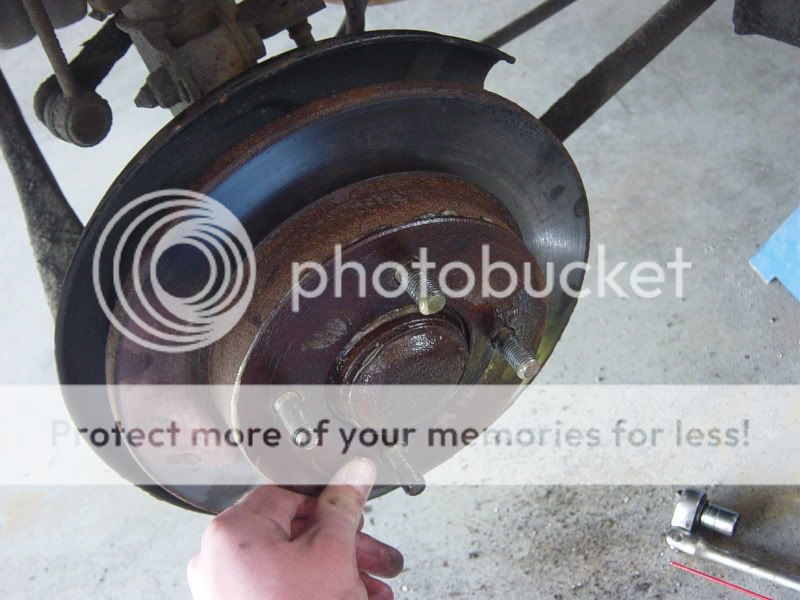
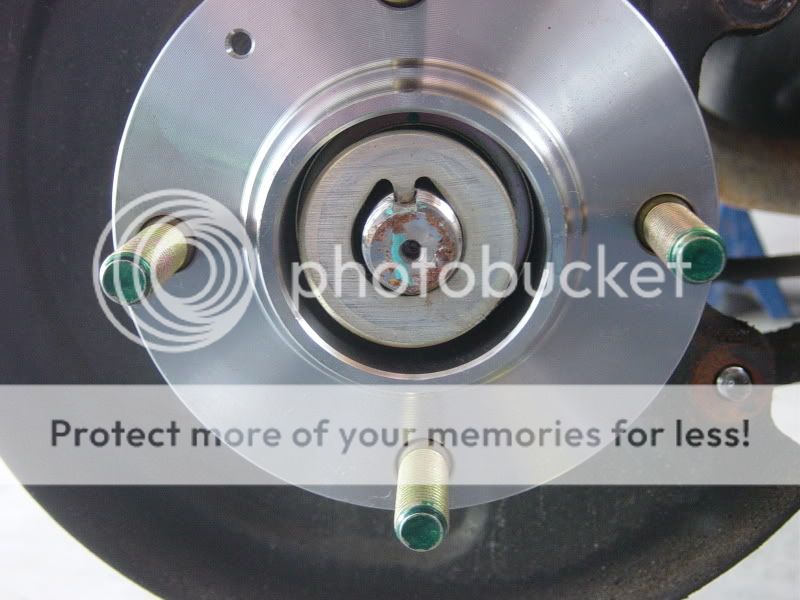
You should now see this
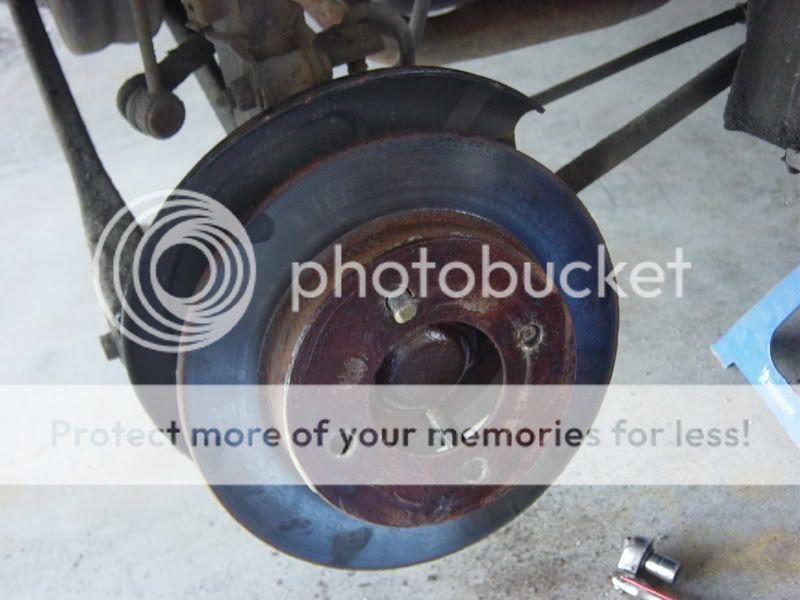
4. Remove the rotor. Do this by hammering away from the inside-out. Most people find this tremendously difficult, and end up destroying the rotor in the process. Mine came off with two small taps of the hammer. Most people suggest using a small sledgehammer and banging on it until the rotor falls apart and then can easily be removed.
5. Remove the hub cap. Using a flat head screwdriver and a hammer, just tap the screwdriver around until the cap is loose enough to pull out.
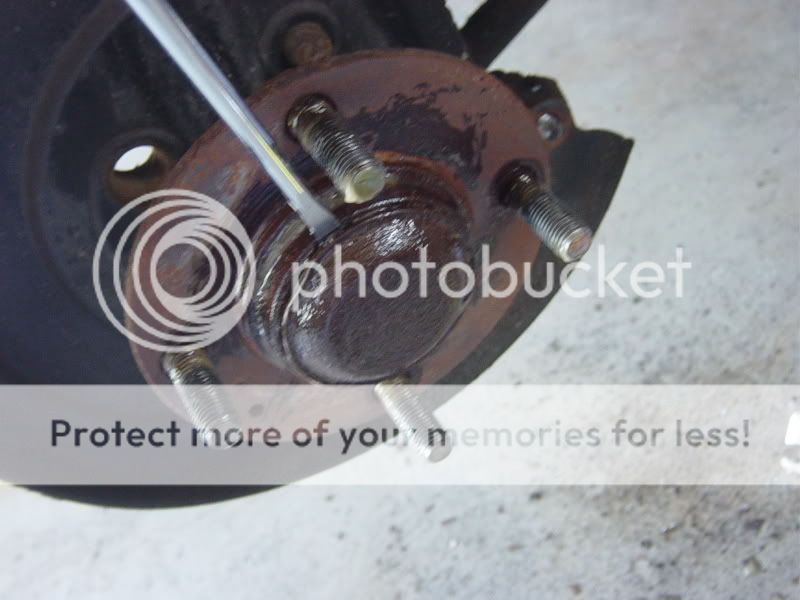
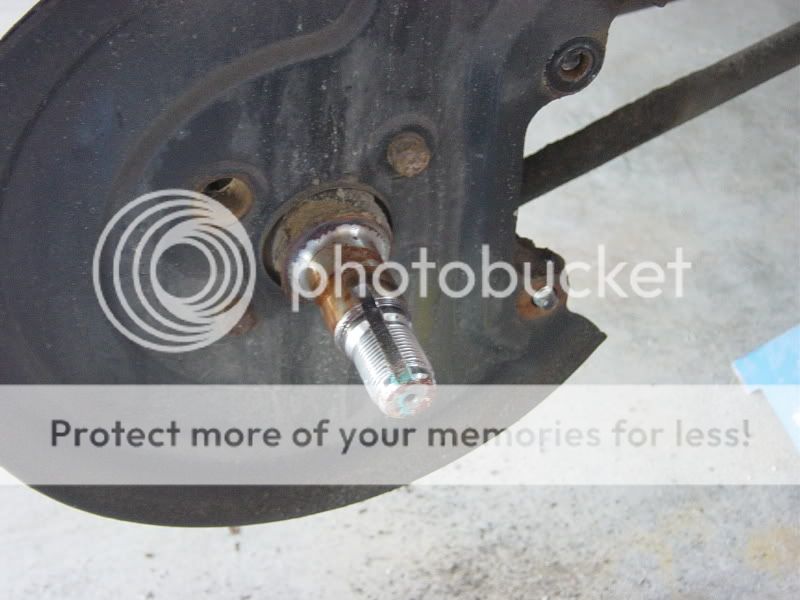
6. You should now be able to see the end of the axle, and a huge nut. Pull out the 32mm socket and the impact, or long handled ratchet, to remove it.
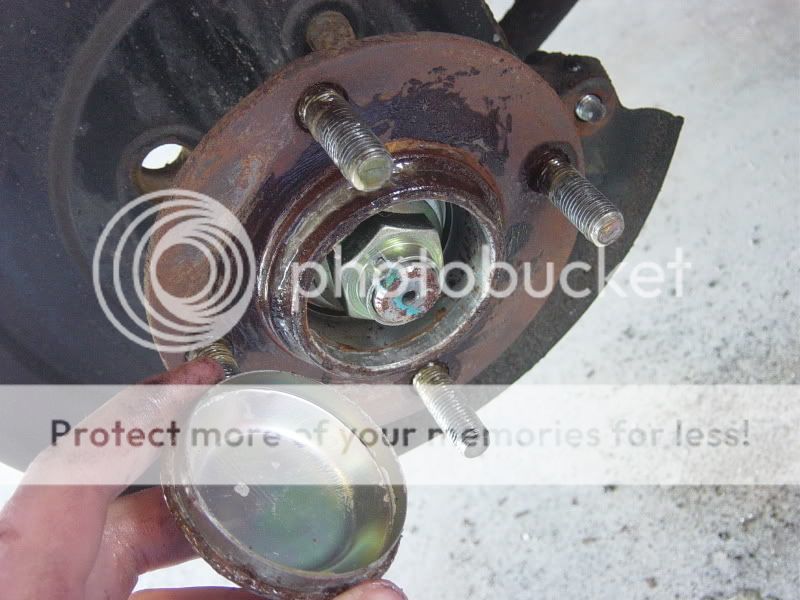
7. Pull on the hub. A little wiggling and it should come off smoothly. Use a rag to clean off any residue left by the old bearing.
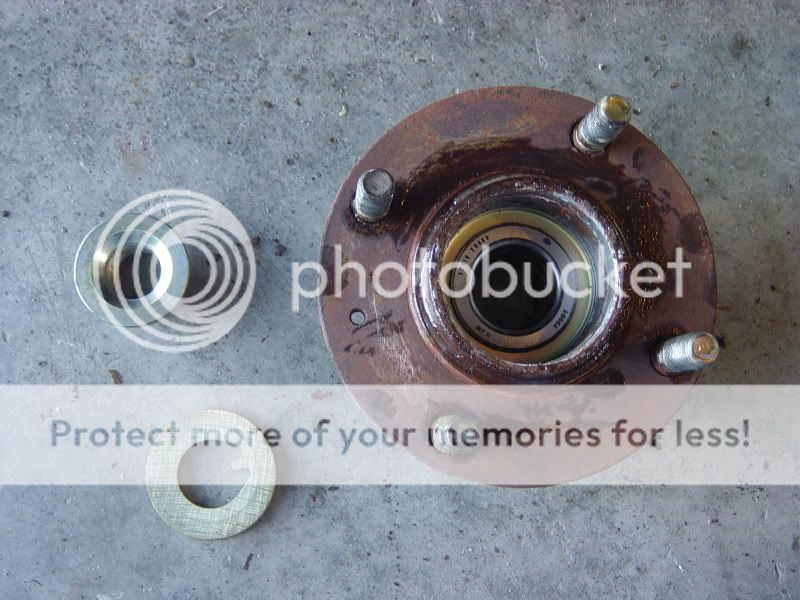
32mm Nut, keyed washer, and hub assembly. Re-use the first two.
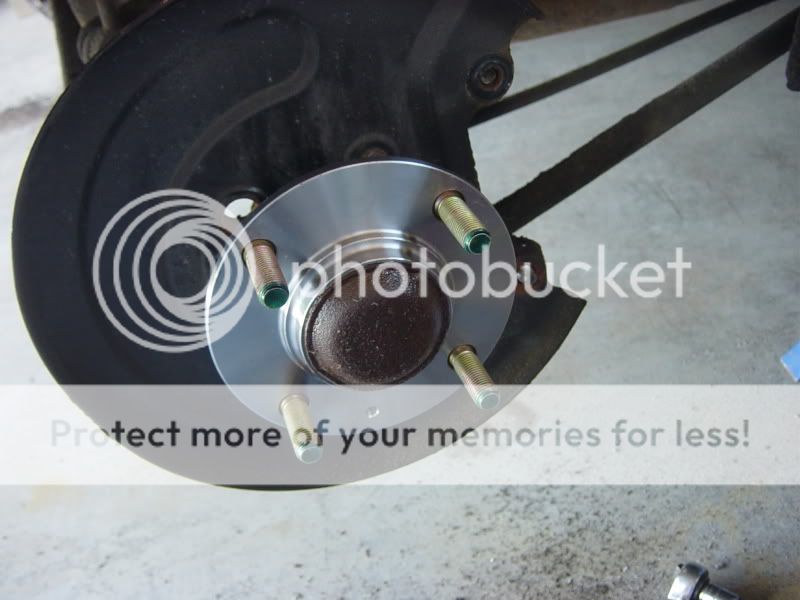
This is what you should have now.
8. Place the new hub on the axle. Place the washer-thingy on the axle, making sure line up the key with the slot in the axle. Thread the nut back onto the axle and torque it to 150-190 ft-lbs (I did 180). This torque may vary by front/rear hubs (this is the rear). Replace the cap.
9. Place new/old rotor back over the hub. Re-attach the caliper to the rotor with the two 14mm bolts. Grease them so next time it isn't such a pain to remove them.
10. Use some brake cleaner on the rotor in case you got grease on it like I did.
11. Put the wheel back on. Remove jack stands, and go for a drive. Enjoy your car not sounding like an airplane hangar!!!
This was my first time replacing a hub, or really doing anything besides changing brake pads/oil, and was surprisingly easy, minus the tough bolts. Also my first DIY. Hardest part was removing the caliper.
Difficulty: 2.5 out of 5
Tools needed:
-Torque Wrench
-32mm Socket (I used a 1 1/4" socket)
-14mm socket
-one regular ratchet
-one long handled ratchet (for leverage)
-sledgehammer (maybe)
-Impact
-flat head screwdriver
Parts Needed:
-Hub Assembly (includes the bearing)
-Rotor (you'll probably break it)
You may not need the impact, but it'll help. You may also not need a new rotor (I didnt) however it's good to have one ready just in case, and if you're planning on swapping rotors this is the perfect time.
This can take anywhere from 30min to 2 hours, depending on how rusted your bolts and rotor are. Took me about 45min.
Step 1. Jack up your car (see DIY Jacking Up Your Car). Sit car on jackstands.
2. Remove wheel.
3. Remove the caliper. Using the 14mm socket, remove the 2 bolts securing the caliper to the rotor (not the two bolts holding the caliper together). These two bolts go through the dust shield, and are a b**** to remove, hence use the long handled ratchet, or a breaker bar, to loosen them. I didn't get a pic, but you can see the two bolts I'm talking about in step 7. Once these are out the caliper assembly should come right off. Just hang it somewhere safe (you can zip tie it to something if you please).
You should now see this
4. Remove the rotor. Do this by hammering away from the inside-out. Most people find this tremendously difficult, and end up destroying the rotor in the process. Mine came off with two small taps of the hammer. Most people suggest using a small sledgehammer and banging on it until the rotor falls apart and then can easily be removed.
5. Remove the hub cap. Using a flat head screwdriver and a hammer, just tap the screwdriver around until the cap is loose enough to pull out.
6. You should now be able to see the end of the axle, and a huge nut. Pull out the 32mm socket and the impact, or long handled ratchet, to remove it.
7. Pull on the hub. A little wiggling and it should come off smoothly. Use a rag to clean off any residue left by the old bearing.
32mm Nut, keyed washer, and hub assembly. Re-use the first two.
This is what you should have now.
8. Place the new hub on the axle. Place the washer-thingy on the axle, making sure line up the key with the slot in the axle. Thread the nut back onto the axle and torque it to 150-190 ft-lbs (I did 180). This torque may vary by front/rear hubs (this is the rear). Replace the cap.
9. Place new/old rotor back over the hub. Re-attach the caliper to the rotor with the two 14mm bolts. Grease them so next time it isn't such a pain to remove them.
10. Use some brake cleaner on the rotor in case you got grease on it like I did.
11. Put the wheel back on. Remove jack stands, and go for a drive. Enjoy your car not sounding like an airplane hangar!!!
This was my first time replacing a hub, or really doing anything besides changing brake pads/oil, and was surprisingly easy, minus the tough bolts. Also my first DIY. Hardest part was removing the caliper.
Senior Member

Joined: Mar 2006
Posts: 3,285
Likes: 0
From: Columbus, Ohio
Vehicle: 2000 tiburon
very useful i was doing my rears this morning and i got stuck for a second. i just jumped on here and searched for rear hub. i got pics and an explaination. thanks for the help
