
Diy = O2 Wire Harness Extensions

Thread Starter
Senior Member

Joined: Mar 2002
Posts: 34,642
Likes: 0
From: Los Lunas, New Mexico, USA.
Vehicle: 2001 Hyundai Tiburon, 2004 Kia Sorento, 2010 Kia Soul
Well, for the primary harness, you shouldn't need to extend it, and I mean cut and splice. Given the idea by Faithofadragon some time ago, I was able to do it and make it look good and work perfectly without cutting any wires.
What you need for the primary o2 Sensor Extension...
1. Diagonal Cutters or very sharp scissors.
2. Electrical Tape (high heat)
3. Some .25 and .50 inch wire loom.
4. PATIENCE!!!
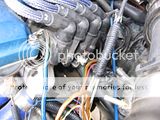
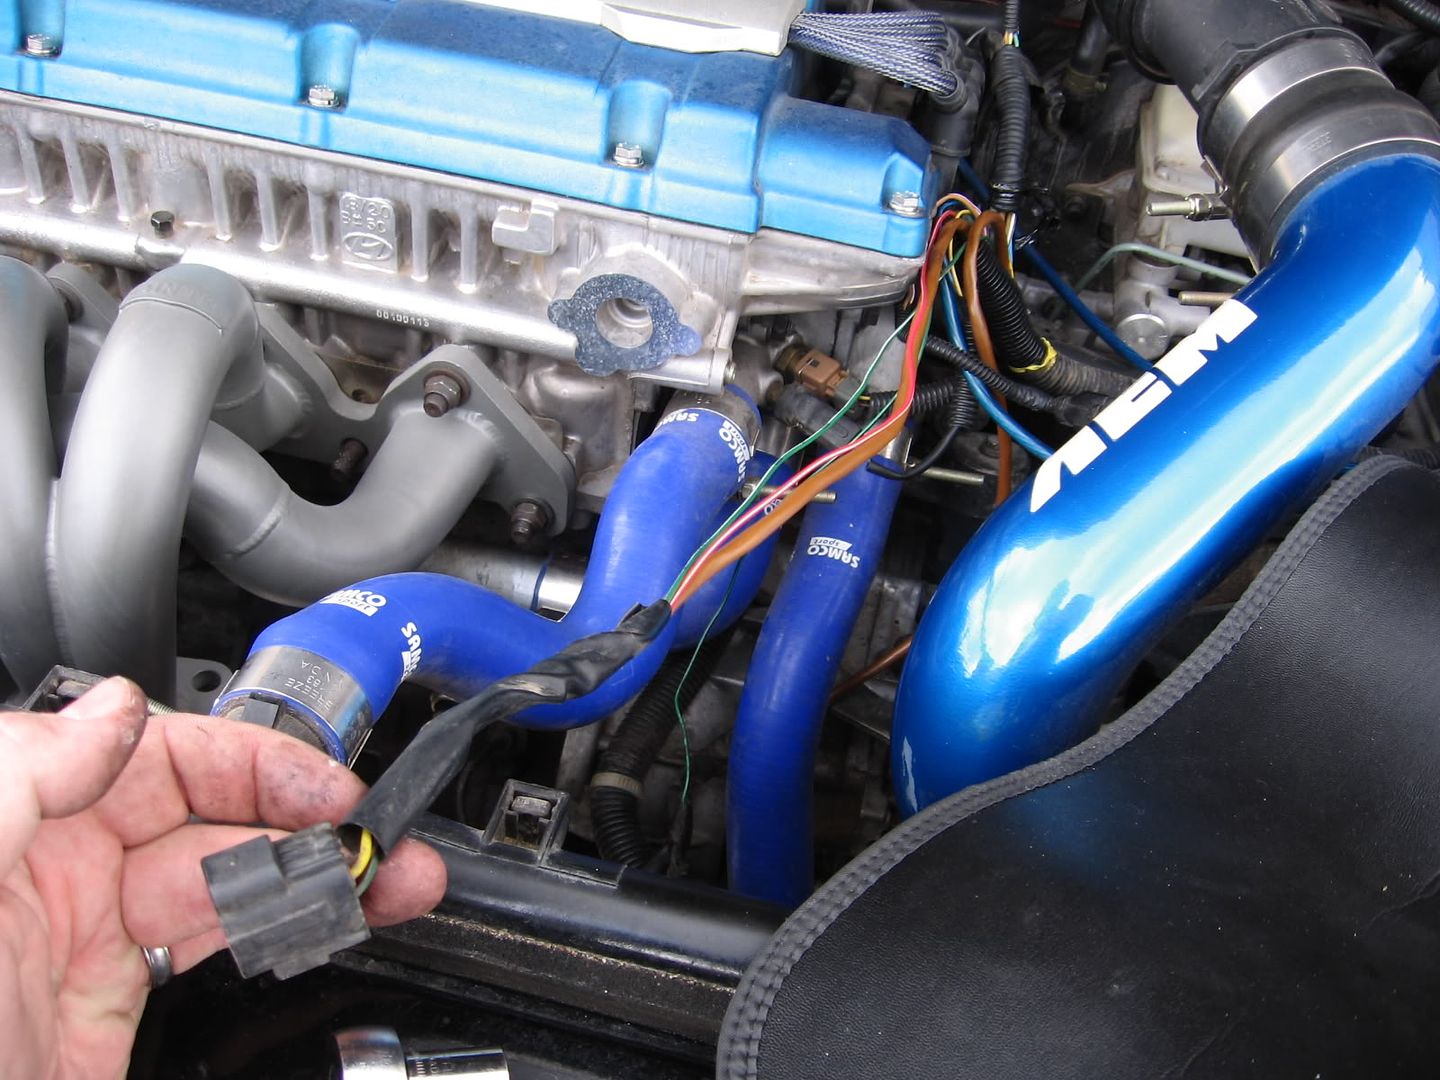
1. Unplug the primary o2 Sensor connector.
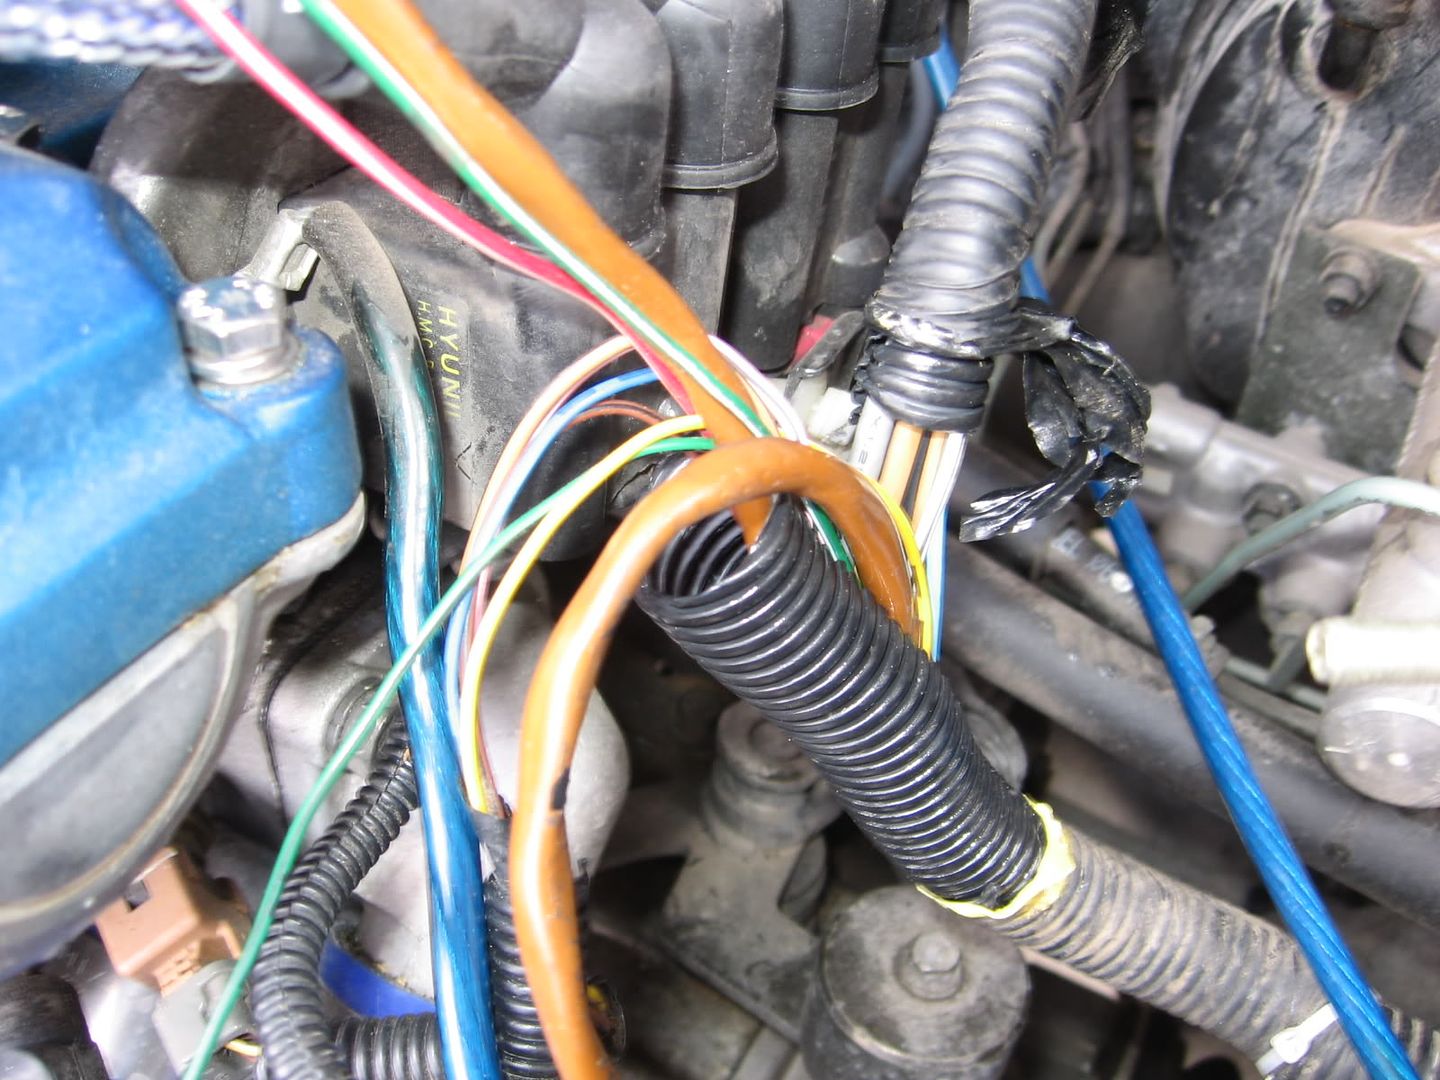
2. Either unwrap the electrical tape that is wound around the wire loom from the sensor connector, or cut it. If you cut it, BE VERY CAREFUL as there are some thin wires under there and you don't want to cut them. I used a combination of cutting and tearing the electrical tape wrap off. You also need to remove the crank position sensor harness and the temperature sending unit harness, this is fine as you can easily put them back.

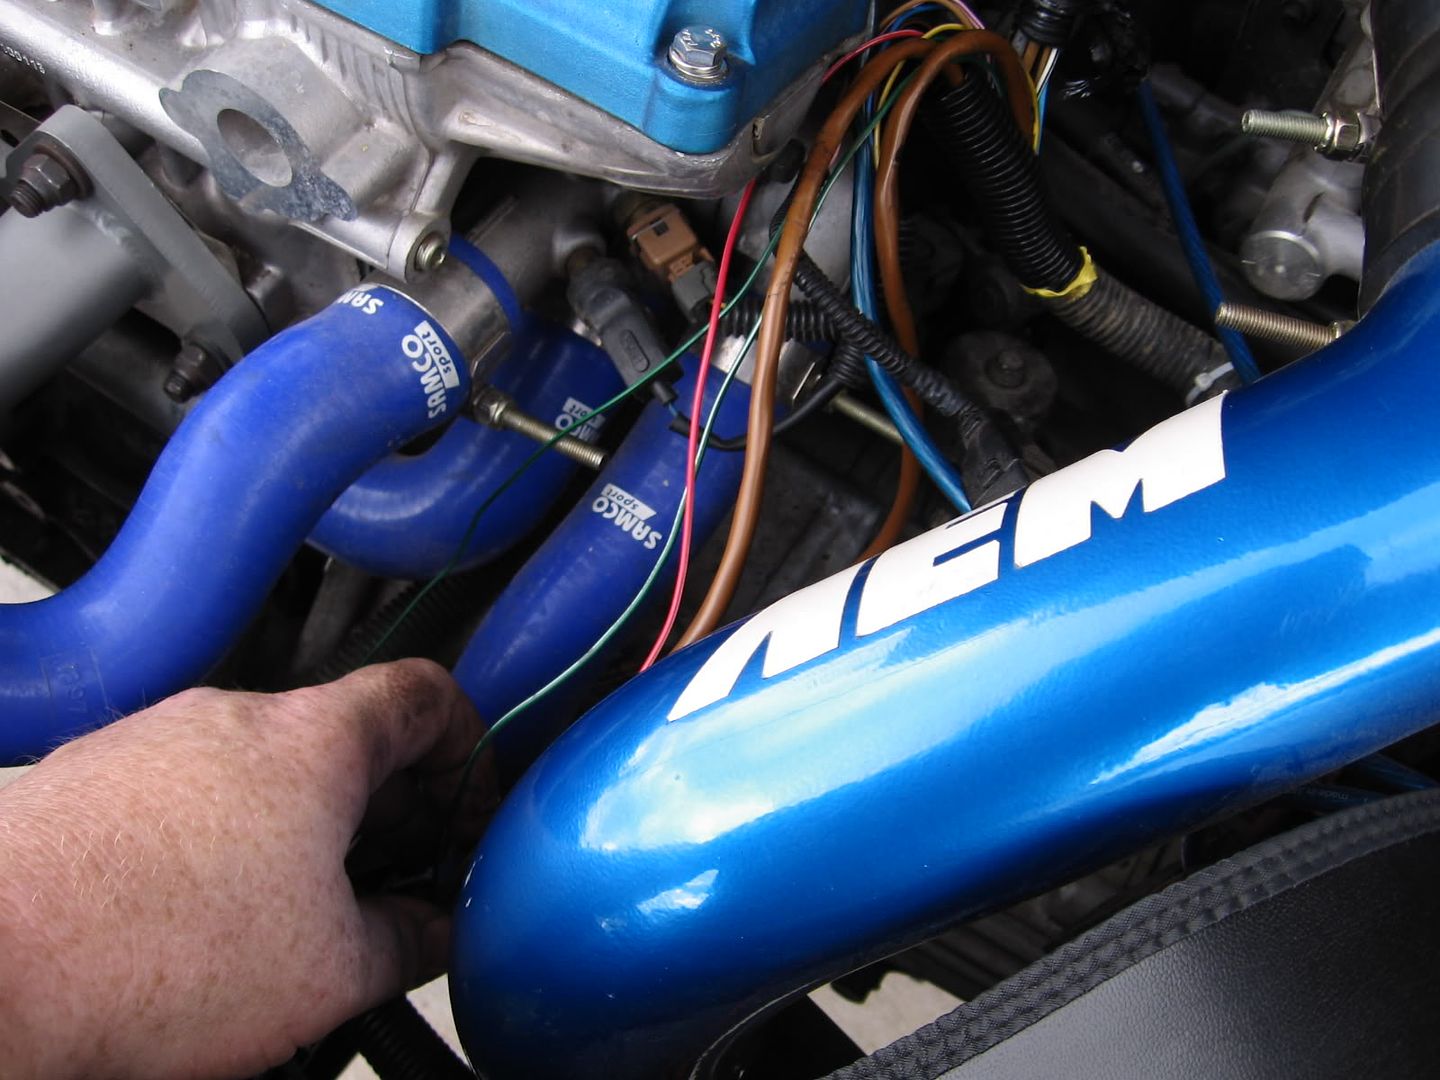
3. Unwrap the loom and remove it from the wiring all the way back to the first MAJOR junction in the engine harness. It should be back by the mount for your OEM airbox. Untangle and unwrap the wiring as best you can, it should get you an extra foot or so of harness that you couldn't otherwise. You can't go any further than this, because some of the wires inside the loom are wrapped around the o2 sensor wiring. This is fine, because this is the perfect length to go behind the engine. Untangle and unwrap the wiring as best you can, it should get you an extra foot or so of harness that you couldn't otherwise.


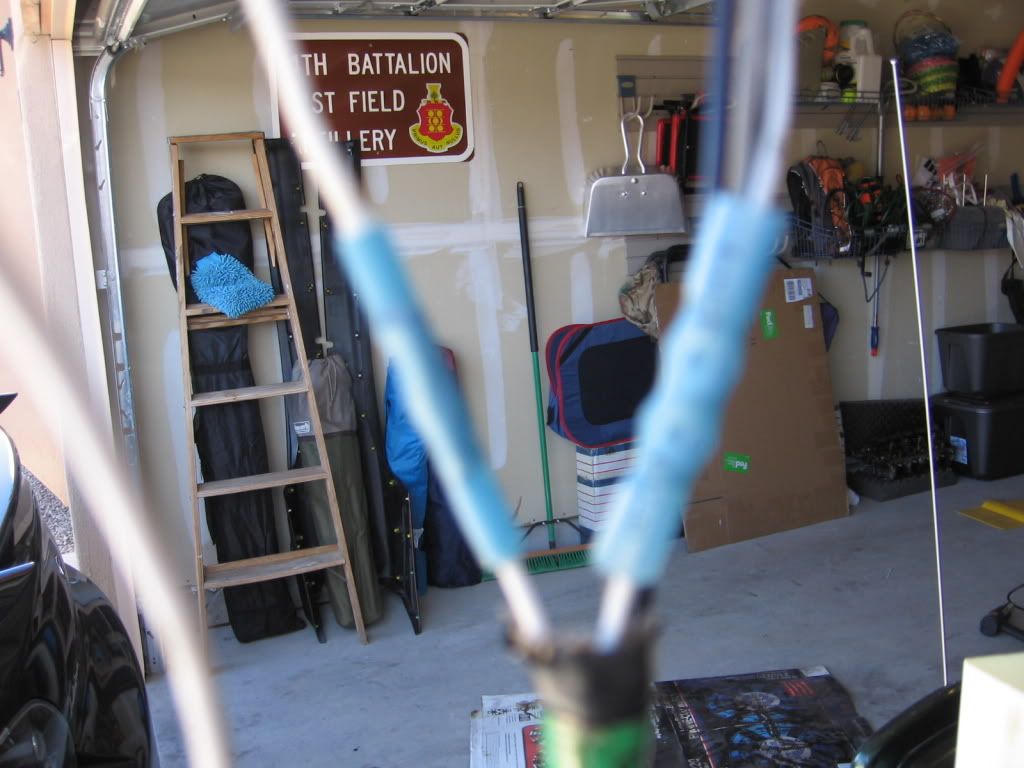
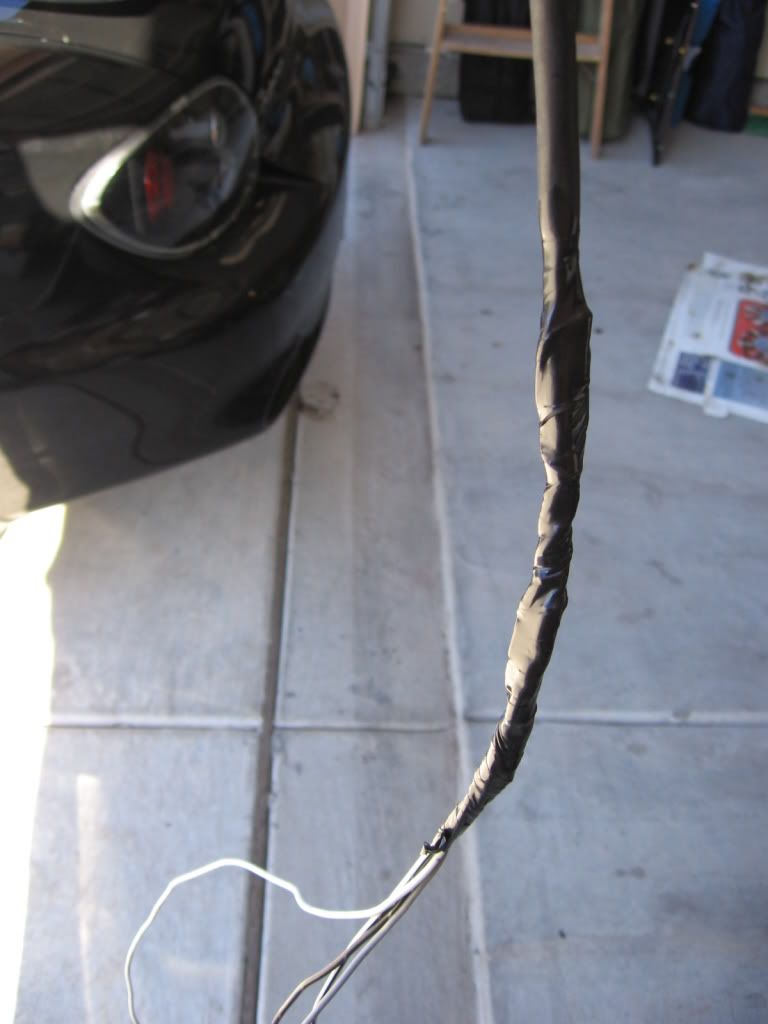
4. RE WRAP each bundle of wiring, with wire loom that is the right size for the wires. I suggest using new loom, as the old stuff can be hard to work with. Wrap the loom TIGHTLY using electrical tape, starting at the ends and making sure you go all the way around the junctions in each direction. Be patient, and make sure you cover everything.
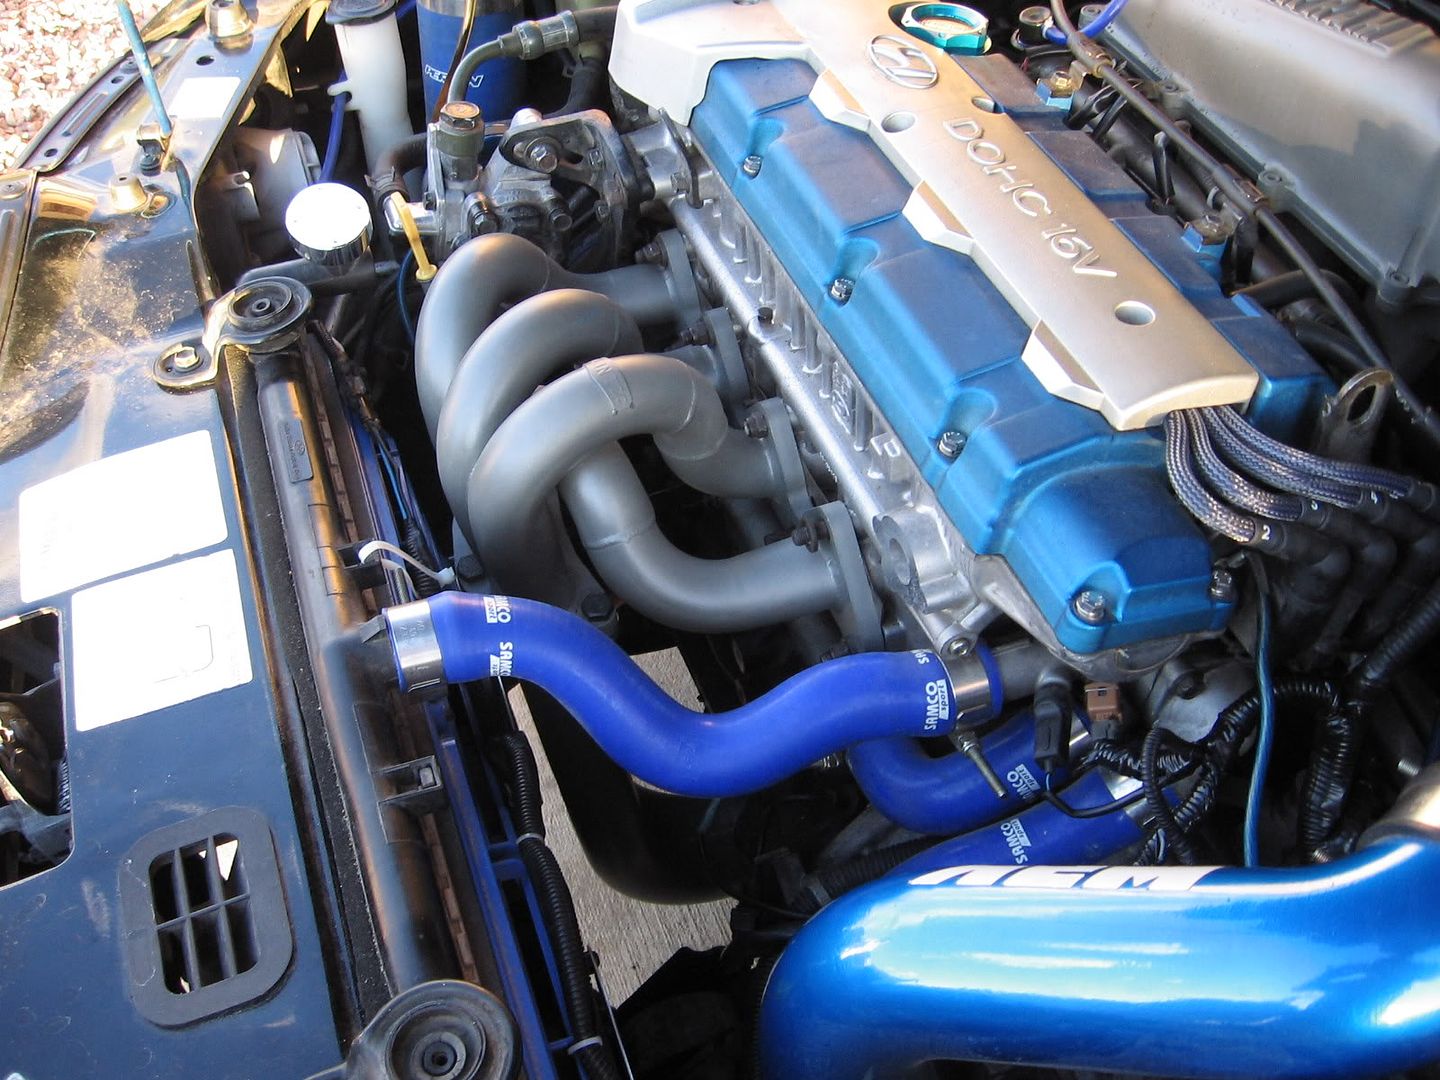
5. Re connect all the harnesses you disconnected, and run the new o2 sensor harness extension around the back of the engine. You may want to zip tie it to some brackets or areas on the firewall to ensure it doesn't touch anything. Connect the o2 sensor to the new location.

That's it. Start the engine and test it. Let me know if you need more pictures of the routing and after it's done, I can go snap them quick.
Now, the secondary harness.
This one is pretty easy.
Tools and supplies needed.
1. Wire cutters/crimpers.
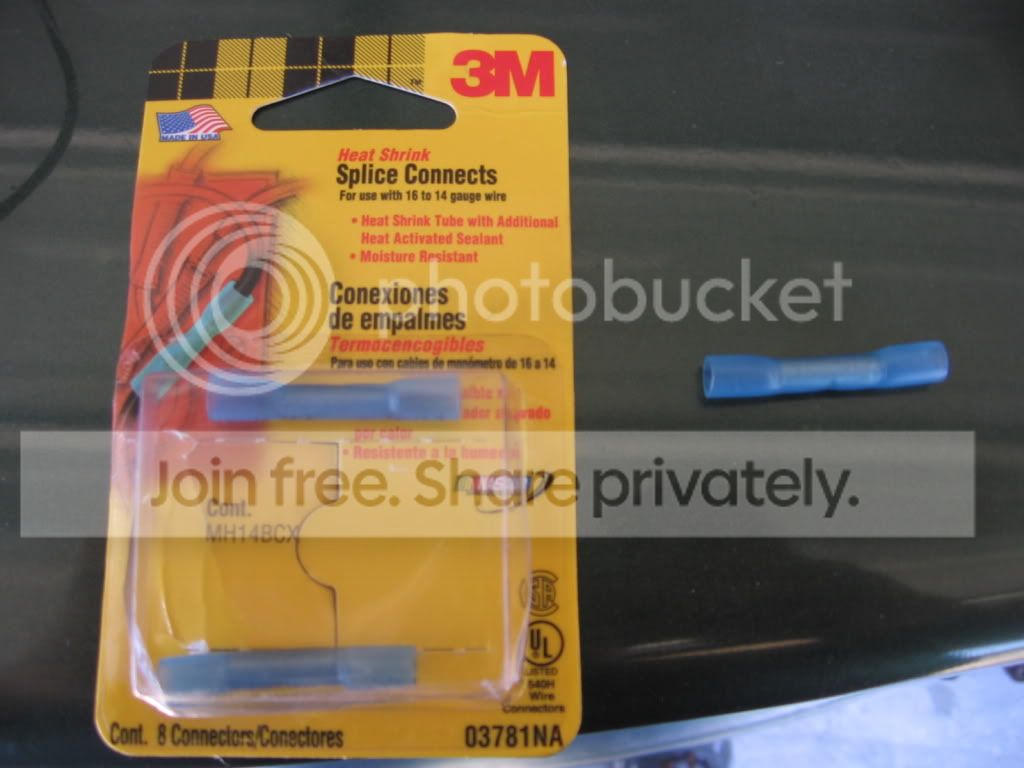
2. 8 heat shrink wire splices (USE THIS KIND ONLY!)
^^^
About $3.85 for 8 of them at Walmart
3. Heat gun or hair dryer.
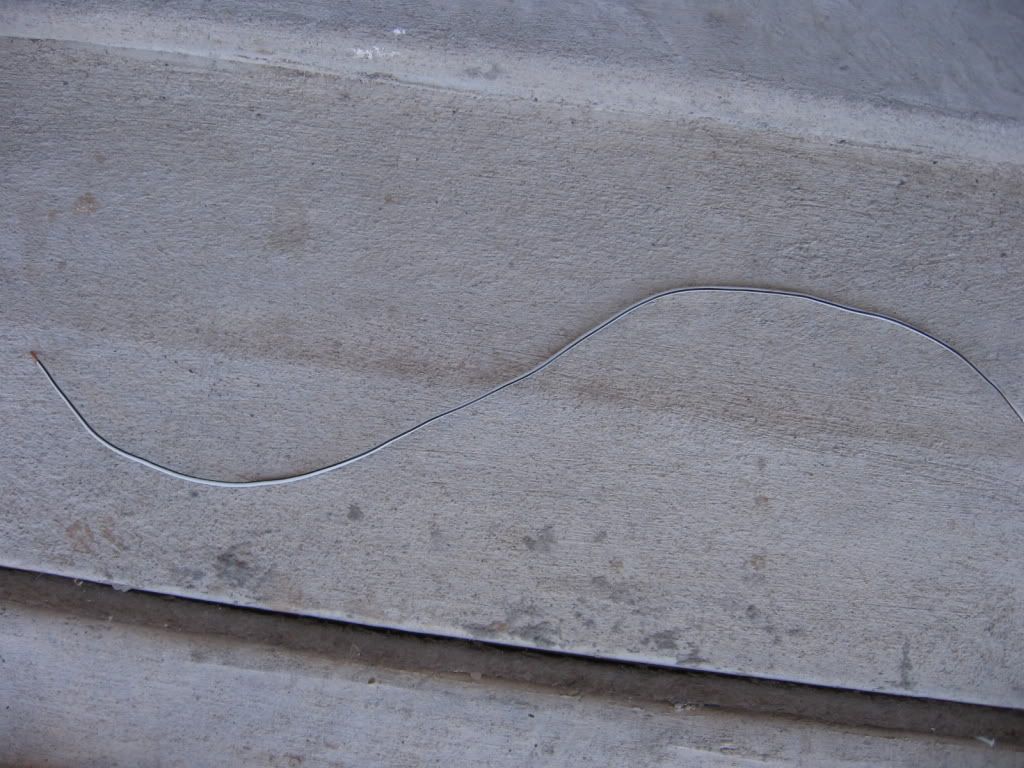
4. Approximately 4.5 feet of wire. Colors needed are Black, white, white with a stripe and grey/silver. About 14 inches of each.
5. Wire loom and electrical tape. Approximately .50 to .75 inch loom.
STEPS.
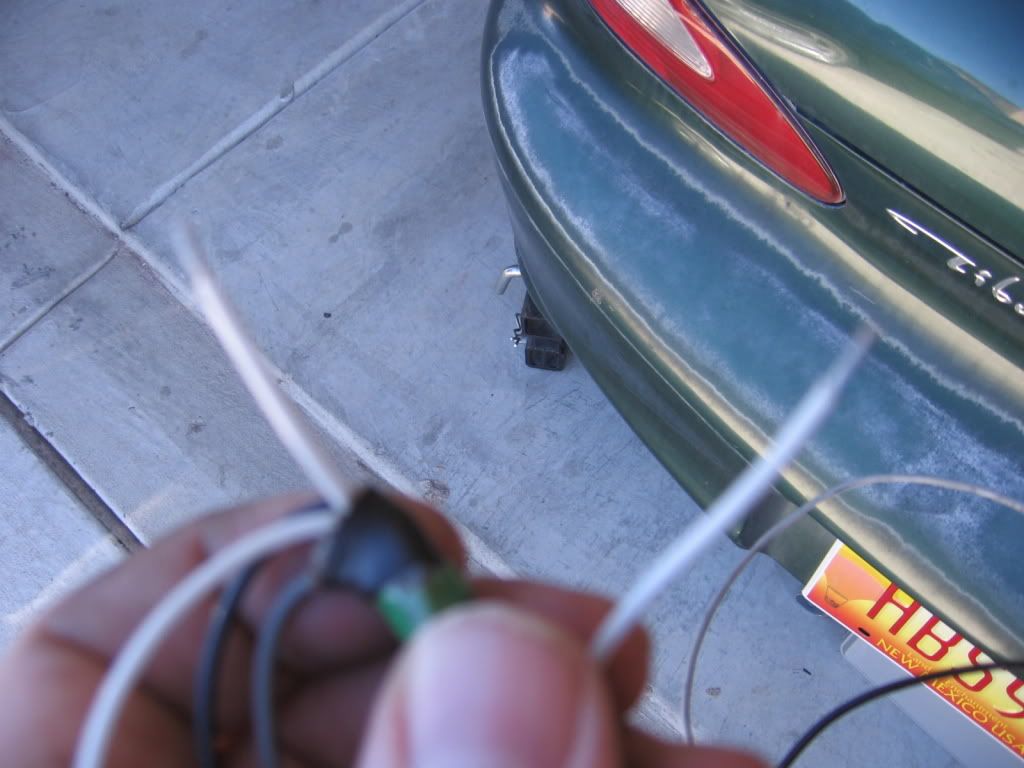
1. Remove your secondary o2 sensor and unclip the harness connector.
2. Leave the engine side of the harness alone. You ONLY want to cut the o2 sensor side of the harness. Why? If you mess up, it's cheaper to get a new o2 sensor from the dealer and start over than try to get a new engine harness.
3. Measure the distance you need to extend. Mine was approximately 6 to 8 inches, but I extended them 14 so I had enough harness to secure it away from the exhaust.
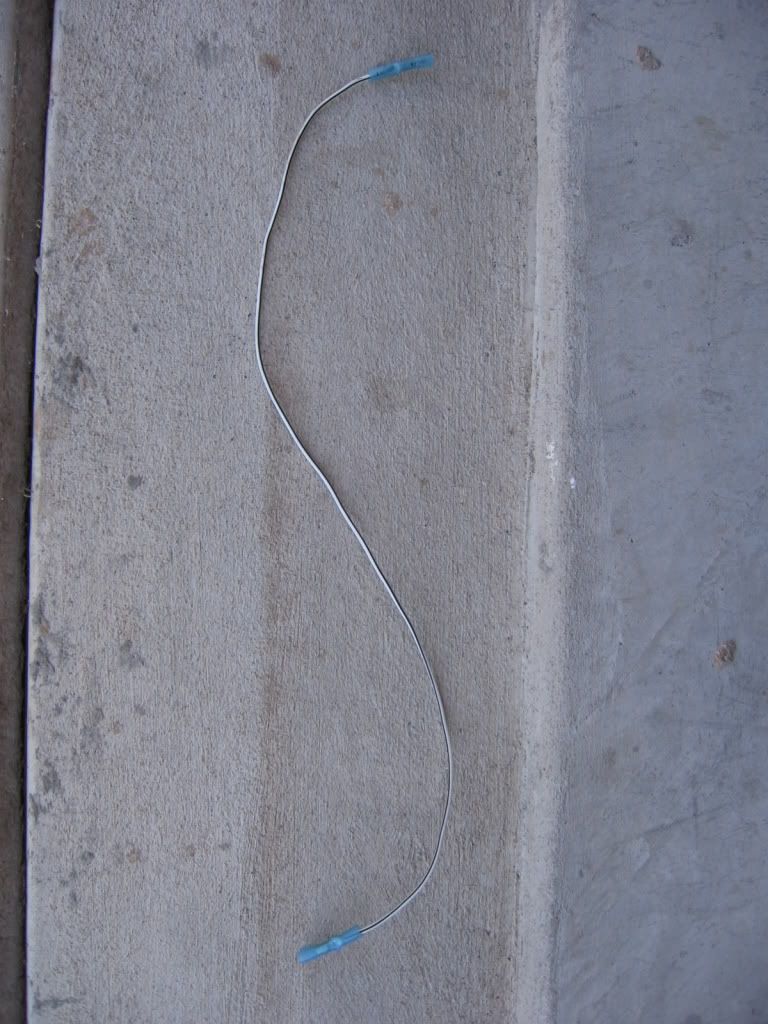
4. Cut the wiring you set aside to the proper length and prepare the ends with your wire stripper. Approximately .25 inch should be stripped away from BOTH ends of your new wire extensions.

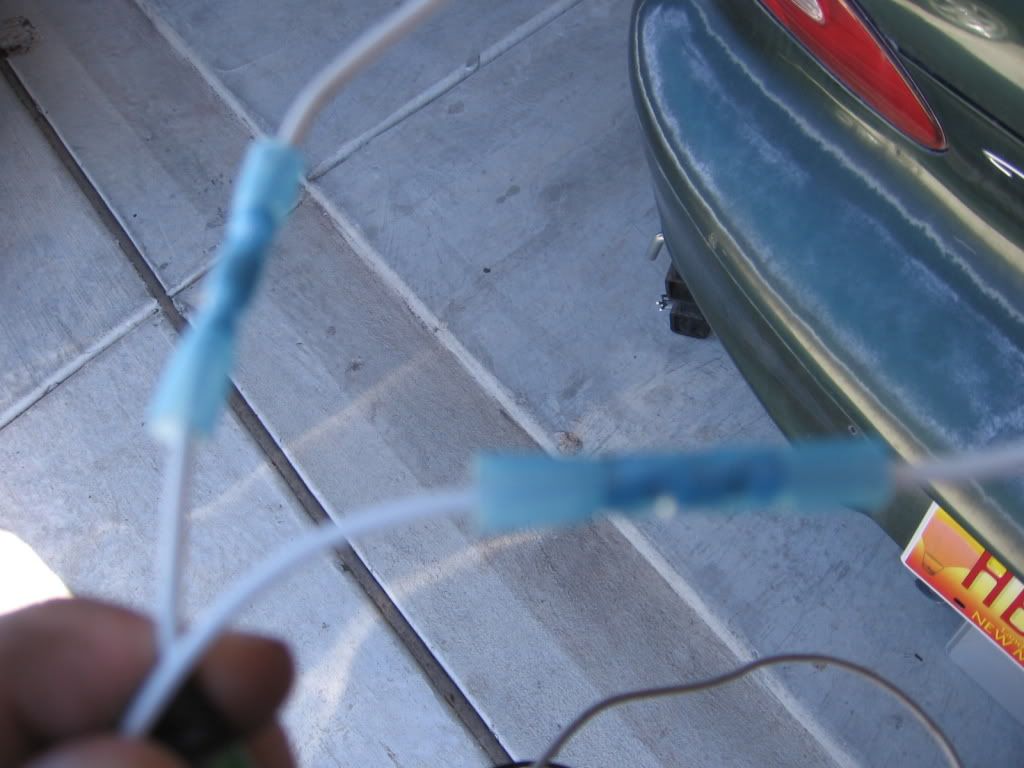
5. Crimp one of the Heat Shrink Splices to each end of each of these wires. You should end up with 4 wires looking like this. Ensure you have a good crimp and that nothing is loose.

6. Pay attention, because you don't wanna screw this up. You now need to pull back the sheathing on the o2 sensor harness and cut ONE WIRE. Give yourself about 2 inches of wiring to work with, but cut only ONE WIRE. Strip and prepare both ends of this cut wire.

7. Get the matching wire extension you made that color matches this wire. Crimp both ends in place and make sure you have a secure connection.

8. Repeat this process with ONE more wire at the same distance on the o2 sensor harness. This way, you only have 2 sets of splices in the same area (makes it MUCH easier to loom and wrap when done, you don't end up with a huge ball).
9. After completing two of these extensions, get your heat gun and set it on high. Turn it on and let it get nice and hot. Without burning the wiring, blow the hot air from the gun directly into the ends of the heat shrink, moving it around slowly to promote even heating. After about 10 seconds you should see it tighten up. Keep waving around until all of the air bubbles are gone, but ensure you aren't burning anything. Repeat for both sides of each splice (you can probably do one side of 2 splices at once, but I took my time). When you let it cool, you should see it is very air tight, and actually completely sealed (the shrink melts a tiny bit and puts out a sealant).
10. Repeat the same steps as above for the next 2 wires, ONE WIRE AT A TIME, but cut the o2 harness at about 2 inches from the OPPOSITE end from the previous extensons. So, if your first 2 extensions were at the sensor end, do the last 2 at the connector end.
11. After it all has cooled, wrap the wiring with high temp electrical tape. I wrapped it in tape, used wire loom, and taped that, to give it plenty of insulation.
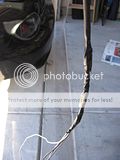
12. Put your o2 sensor back in place, route the harness away from the exhaust. You should have enough harness now to wrap it around one of the tranny mounts to keep it out of the way and the OEM connector away from the hot exhaust.
13. Reset your ECU, and enjoy the LACK of CEL
What you need for the primary o2 Sensor Extension...
1. Diagonal Cutters or very sharp scissors.
2. Electrical Tape (high heat)
3. Some .25 and .50 inch wire loom.
4. PATIENCE!!!
1. Unplug the primary o2 Sensor connector.
2. Either unwrap the electrical tape that is wound around the wire loom from the sensor connector, or cut it. If you cut it, BE VERY CAREFUL as there are some thin wires under there and you don't want to cut them. I used a combination of cutting and tearing the electrical tape wrap off. You also need to remove the crank position sensor harness and the temperature sending unit harness, this is fine as you can easily put them back.
3. Unwrap the loom and remove it from the wiring all the way back to the first MAJOR junction in the engine harness. It should be back by the mount for your OEM airbox. Untangle and unwrap the wiring as best you can, it should get you an extra foot or so of harness that you couldn't otherwise. You can't go any further than this, because some of the wires inside the loom are wrapped around the o2 sensor wiring. This is fine, because this is the perfect length to go behind the engine. Untangle and unwrap the wiring as best you can, it should get you an extra foot or so of harness that you couldn't otherwise.

4. RE WRAP each bundle of wiring, with wire loom that is the right size for the wires. I suggest using new loom, as the old stuff can be hard to work with. Wrap the loom TIGHTLY using electrical tape, starting at the ends and making sure you go all the way around the junctions in each direction. Be patient, and make sure you cover everything.
5. Re connect all the harnesses you disconnected, and run the new o2 sensor harness extension around the back of the engine. You may want to zip tie it to some brackets or areas on the firewall to ensure it doesn't touch anything. Connect the o2 sensor to the new location.
That's it. Start the engine and test it. Let me know if you need more pictures of the routing and after it's done, I can go snap them quick.
Now, the secondary harness.
This one is pretty easy.
Tools and supplies needed.
1. Wire cutters/crimpers.
2. 8 heat shrink wire splices (USE THIS KIND ONLY!)
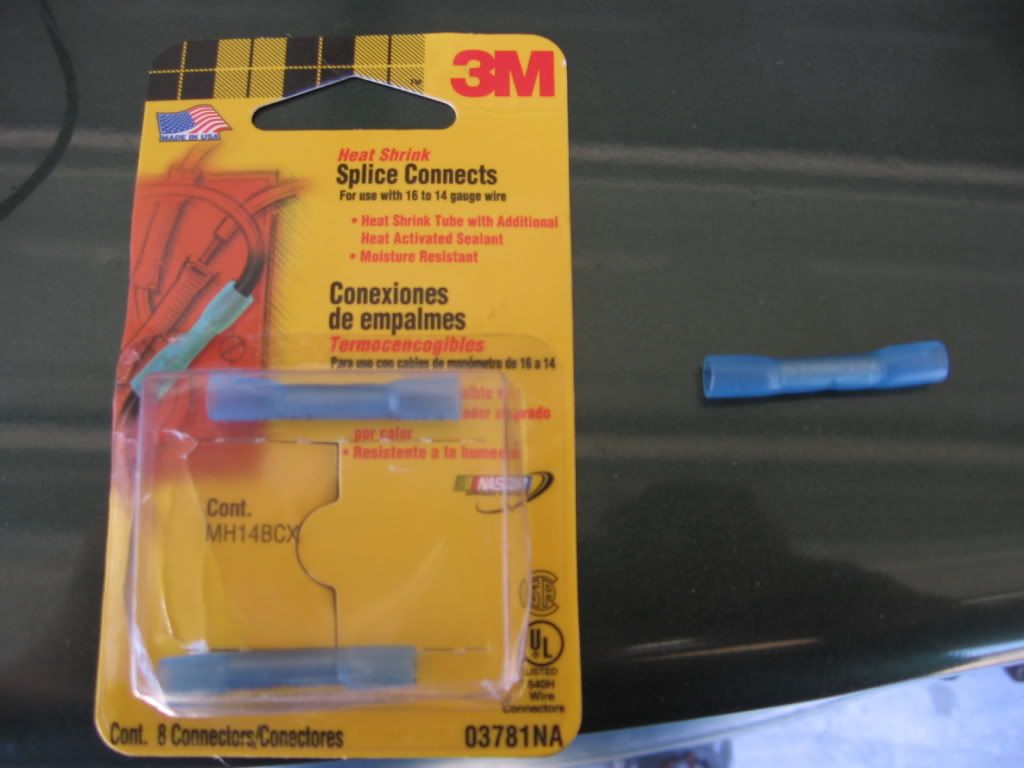
^^^
About $3.85 for 8 of them at Walmart
3. Heat gun or hair dryer.
4. Approximately 4.5 feet of wire. Colors needed are Black, white, white with a stripe and grey/silver. About 14 inches of each.
5. Wire loom and electrical tape. Approximately .50 to .75 inch loom.
STEPS.
1. Remove your secondary o2 sensor and unclip the harness connector.
2. Leave the engine side of the harness alone. You ONLY want to cut the o2 sensor side of the harness. Why? If you mess up, it's cheaper to get a new o2 sensor from the dealer and start over than try to get a new engine harness.
3. Measure the distance you need to extend. Mine was approximately 6 to 8 inches, but I extended them 14 so I had enough harness to secure it away from the exhaust.
4. Cut the wiring you set aside to the proper length and prepare the ends with your wire stripper. Approximately .25 inch should be stripped away from BOTH ends of your new wire extensions.
5. Crimp one of the Heat Shrink Splices to each end of each of these wires. You should end up with 4 wires looking like this. Ensure you have a good crimp and that nothing is loose.
6. Pay attention, because you don't wanna screw this up. You now need to pull back the sheathing on the o2 sensor harness and cut ONE WIRE. Give yourself about 2 inches of wiring to work with, but cut only ONE WIRE. Strip and prepare both ends of this cut wire.
7. Get the matching wire extension you made that color matches this wire. Crimp both ends in place and make sure you have a secure connection.
8. Repeat this process with ONE more wire at the same distance on the o2 sensor harness. This way, you only have 2 sets of splices in the same area (makes it MUCH easier to loom and wrap when done, you don't end up with a huge ball).
9. After completing two of these extensions, get your heat gun and set it on high. Turn it on and let it get nice and hot. Without burning the wiring, blow the hot air from the gun directly into the ends of the heat shrink, moving it around slowly to promote even heating. After about 10 seconds you should see it tighten up. Keep waving around until all of the air bubbles are gone, but ensure you aren't burning anything. Repeat for both sides of each splice (you can probably do one side of 2 splices at once, but I took my time). When you let it cool, you should see it is very air tight, and actually completely sealed (the shrink melts a tiny bit and puts out a sealant).
10. Repeat the same steps as above for the next 2 wires, ONE WIRE AT A TIME, but cut the o2 harness at about 2 inches from the OPPOSITE end from the previous extensons. So, if your first 2 extensions were at the sensor end, do the last 2 at the connector end.
11. After it all has cooled, wrap the wiring with high temp electrical tape. I wrapped it in tape, used wire loom, and taped that, to give it plenty of insulation.
12. Put your o2 sensor back in place, route the harness away from the exhaust. You should have enough harness now to wrap it around one of the tranny mounts to keep it out of the way and the OEM connector away from the hot exhaust.
13. Reset your ECU, and enjoy the LACK of CEL


Thread Starter
Senior Member
Joined: Mar 2002
Posts: 34,642
Likes: 0
From: Los Lunas, New Mexico, USA.
Vehicle: 2001 Hyundai Tiburon, 2004 Kia Sorento, 2010 Kia Soul
<div class='quotetop'>QUOTE (TopSpeedFX @ Mar 23 2007, 01:26 PM) <{POST_SNAPBACK}></div><div class='quotemain'>Cant you just cut the O2 sensor wires...Extend them to the right length? And then plug it into the harness instead? I think that would be easier to do.</div>
What?
Yeah, you can just hack shit up and add all the wire you want.
But that's why a lot of folks here have CEL's, from doing shitty work. Instead, you can easily extend the first one without cutting anything (In general, you don't want to cut into factory harness wiring). Why cut and hack when you have enough wire to do it right in the first place? Not to mention, every splice, every cut, is a chance for something to go wrong later. I just showed you a way to cut the amount of splicing in HALF, so you have 50% less chance of something going wrong later.
Take the time to do it right, or don't do it at all.
Senior Member
Joined: Mar 2006
Posts: 4,135
Likes: 0
From: NAS Patuxent River, MD
Vehicle: 2004 Volkswagen Jetta GLI
<div class='quotetop'>QUOTE (REDZMAN @ Mar 23 2007, 03:15 PM) <{POST_SNAPBACK}></div><div class='quotemain'>Sweet. Both? Sorry I didn't get it up sooner. I've been a bit sick since Nopi.</div>
Yeah both...did not take me that long either...about 1.5 hrs...would have got it done sooner but i was taking to my neighbor about his 240sx
Yeah both...did not take me that long either...about 1.5 hrs...would have got it done sooner but i was taking to my neighbor about his 240sx

Senior Member
Joined: Sep 2005
Posts: 562
Likes: 0
From: Marquette, MI (the U.P.)
<div class='quotetop'>QUOTE (tanc @ Mar 23 2007, 03:27 PM) <{POST_SNAPBACK}></div><div class='quotemain'>Good DIY, I hate how people complain and whine about CEL's when you get eliminate them sooo easily.</div>
I took the time and did this ~2 years ago and it didn't do anything for my CEL. sad.gif
Yes, everything is done correctly.
I checked several times, and again recently I dismantled the loom and tape and checked all wiring again. I also have a catalytic convertor and the 2nd O2 after the cat (of course). Still the annoying CEL.
I extended the main harness wire instead of the O2 sensor wire though. This way when new O2 sensors are needed there is no more extending/splicing to be done. Just unplug, unscrew, screw the new one in and plug it in and your done. Like factory.
Only thing I can think of is the Bosch O2 sensors are not functioning correct. I had Carquest order me another set (warranty) to make sure the first set was not faulty. Still the CEL is there.
Senior Member
Joined: Sep 2005
Posts: 562
Likes: 0
From: Marquette, MI (the U.P.)
<div class='quotetop'>QUOTE (daniel_depetro @ Mar 24 2007, 12:58 PM) <{POST_SNAPBACK}></div><div class='quotemain'>Yes, everything is done correctly.
I checked several times, and again recently I dismantled the loom and tape and checked all wiring again.</div>
I checked to make sure a few times. As I just posted, a couple weeks ago I removed all the wire loom and tape I used and made sure all the wires were run correctly to the correct wires. Everything is 100%.
This car is really quite cursed. It has been the most problematic vehicle I have ever owned. This is the Silver automatic Tibby that my wife drives.