Tom's single slammer - the piglet
 07-18-2012, 08:46 AM
#51
Senior Member

Thread Starter
Join Date: Dec 2008
Location: Floating around the AUDM
Posts: 3,837
Likes: 0
Received 0 Likes
on
0 Posts
Vehicle: X3 Sprint, S-Coupe Turbo
Well, I'm away from my smelly big garage, so I've been using my indoor hands. The pics can do all the talking for now.


Welp, I originally bought this afr monitor kit for the purpose of hypermiling. But even though I'm done with hypermiling, I wanted to build it anyways, so here we go! This is a practise run on my spare cluster... soldering onto the printed circuit is a major bastard. I originally intended to remote mount the circuit board and use a wiring harness to connect it, but it wasn't possible to connect pins to the circuit board with the components available to me in my apartment.
Anyway, I'm somewhat happy with how it has turned out. I'll probably use this frame and just swap the tach and printed circuit over from my GX cluster to save on time. I still need to wire the circuit into the car and see if my contraption even works before I invest any more time into it.
I'm booked in to get a muffler tomorrow. I'm aiming for a 2 or 2.25 inch mild steel 'axle-back' section, with a small, straight-through can muffler. More photos are certainly to come. Cheers for reading!
 07-19-2012, 01:55 AM
#52
Senior Member
Thread Starter
Join Date: Dec 2008
Location: Floating around the AUDM
Posts: 3,837
Likes: 0
Received 0 Likes
on
0 Posts
Vehicle: X3 Sprint, S-Coupe Turbo
I never knew that I was a ricer, but turns out that a hot dog produces the sounds that I like:


and from the outside,

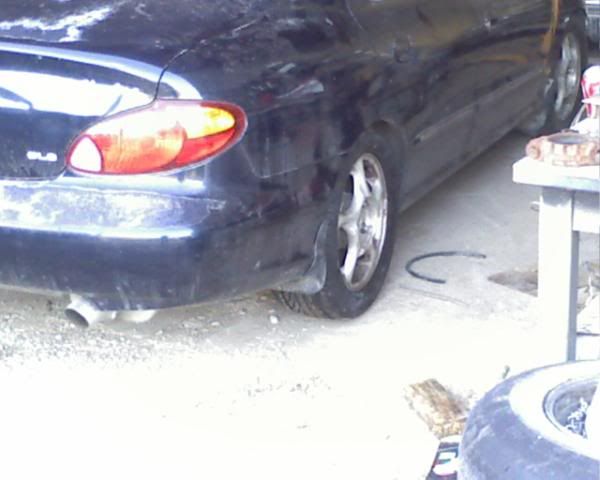
It's two inch, roll bent mild steel, and the muffler is a Berklee item. I was initially going to get a straight through can, but the Berklee items that they stocked there sounded like absolute shite. They somehow managed to combine being loud, with being tinny and high pitched. Grotty. Anyway, much to the chagrin of my fabricator, I got the can lopped off and tried a few different styles of muffler. This particular hot dog provided the best sound without being ear-splittingly loud like the straight pipe was. It cost $220 all up, plus you get to watch them make it and actually stand in the workshop. I would certainly recommend Mettam's mufflers Balcatta if y'all need some exhaust work done.
Anyhoo, I'm off to see if my afr gauge even works. If all goes well I'll have it swapped into the GX cluster by tomorrow, and all the ladies will be so impressed...
and from the outside,
It's two inch, roll bent mild steel, and the muffler is a Berklee item. I was initially going to get a straight through can, but the Berklee items that they stocked there sounded like absolute shite. They somehow managed to combine being loud, with being tinny and high pitched. Grotty. Anyway, much to the chagrin of my fabricator, I got the can lopped off and tried a few different styles of muffler. This particular hot dog provided the best sound without being ear-splittingly loud like the straight pipe was. It cost $220 all up, plus you get to watch them make it and actually stand in the workshop. I would certainly recommend Mettam's mufflers Balcatta if y'all need some exhaust work done.
Anyhoo, I'm off to see if my afr gauge even works. If all goes well I'll have it swapped into the GX cluster by tomorrow, and all the ladies will be so impressed...
07-19-2012, 02:36 PM
#53
Senior Member
Join Date: Jul 2008
Location: New Jersey
Posts: 1,072
Likes: 0
Received 0 Likes
on
0 Posts
Vehicle: 2000 Hyundai Tiburon
I would certainly recommend Mettam's mufflers Balcatta if y'all need some exhaust work done.
I'll keep that in mind next time I'm upside down.
AFR gauge looks pretty pimp! Hopefully it works the way you want it to.
07-20-2012, 06:46 AM
#54
Senior Member
Thread Starter
Join Date: Dec 2008
Location: Floating around the AUDM
Posts: 3,837
Likes: 0
Received 0 Likes
on
0 Posts
Vehicle: X3 Sprint, S-Coupe Turbo
I'll keep that in mind next time I'm upside down.
Enough of your sass, mister buddy boy.
Anyway, I've run out of spare wiring connectors, so instead of doing the difficult task of wiring the afr gauge in, I spent money on things instead.

Amassed from two seperate FX coupes, are these here wheels. Not pictured are the center caps. Filthy, I know. I've got three bridgestone turanzas and one ridiculous ling long 'sports' tyre. Anyhoo, I ran out of daylight today, but I shall clean them, bog up the mild scratches, and paint them white. I feel white wheels with teal paint will be fun, until brake dust spoils the fun.
Current wheel + tyre = 28.4 lbs
FX wheel + tyre = 34.1 lbs
So it's an unfortunate increase in unsprung weight, but it's a reasonable tradeoff considering the increase in contact patch area.

I swear I'll do some actual work on the car soon. Promise.
*edit* Forgot to include my pic. Sozzles.
07-20-2012, 07:40 AM
#55
Senior Member
Join Date: Jul 2008
Location: New Jersey
Posts: 1,072
Likes: 0
Received 0 Likes
on
0 Posts
Vehicle: 2000 Hyundai Tiburon
Current wheel + tyre = 28.4 lbs
FX wheel + tyre = 34.1 lbs
So it's an unfortunate increase in unsprung weight, but it's a reasonable tradeoff considering the increase in contact patch area.
FX wheel + tyre = 34.1 lbs
So it's an unfortunate increase in unsprung weight, but it's a reasonable tradeoff considering the increase in contact patch area.
Form over function my friend
Or in your case is that form under function?
2012-07-19_141842.jpg
LOLOLOLOLOLOLOL
 07-24-2012, 04:02 PM
#57
Senior Member
Thread Starter
Join Date: Dec 2008
Location: Floating around the AUDM
Posts: 3,837
Likes: 0
Received 0 Likes
on
0 Posts
Vehicle: X3 Sprint, S-Coupe Turbo
225s would be crazy man, but it's a good idea to balloon your tyres a bit. It makes them less sensitive to the huge camber changes that our ghetto suspensions create.
Anyhoo, I'm now blinging out on 15s. They were bloody FILTHY when I got them, so after a good dose of armorall wheel cleaner (it's the only decent wheel cleaner I've found so far) and an even gooderer dose of 280 grit wet n dry, it was time for taping and papering.

Bam!

I used an etch primer which ran super easily, and a generic white enamel paint from bunnings as a top coat. Anyway, in my super duper eagerness, I whacked them onto the car after only an hour of drying time.

My dirty hands scuffed up the finish on one of the wheels, so I used WHEEL CLEANER ON ONE HOUR OLD PAINT TO GET IT OFF... So I had to sand that wheel back and do it again. Also the centre caps look like dog shite up close, so I'll re-do them tomorrow. Hey, I forgot how much I suck at painting things.
Anyway, here are a couple of show-off pics. The only one I got with centercaps was with my cameraphone... first world problems... I'm honestly unsure whether to run the caps or not, It looks fine either way IMO.


On to the important thing, how does it fit/feel/drive? Well.
Fitting: These are the largest wheels that I'd consider sane for an X3. If you drive on smooth ground, you'd think it was stock. But if you are on full steering lock, and hit a bump? The tyre rubs. If you are under hard cornering load, and hit a bump? It scrubs in the back. But ordinarily, it's fine. The rolling diameter is the same so there's no worries about wheel arch fitment or speedometer correction.
Feel/drive: I don't even know what's going on with these. My first impression was 'whoa, these don't grip as well as the old tyres'. BUT, peak grip arrives with less steering input. So maybe it's a placebo affect? Maybe I'm just trying to justify my purchase? Maybe it's the dry rot on the outside of the tyre? Who even knows. Without actual acceleration data, I can't say for sure. But the car feels a lot less doughy, and the 30/55 mph speed wobble issue is now gone. Yay! The only downside here is the vaguest increase in road noise ever, but I have a loud exhaust and a short 5th gear already, so the passengers already have bleeding ears. No biggie.
In unrelated news, I finally tracked down a rattle that has been shitting me to tears. Turns out it was the rear speakers rattling inside their housings. A quick strip of foam in there solved the problem and prevented a future killing spree. Cheers for reading! I still need to get around to doing some wiring, eh?
Anyhoo, I'm now blinging out on 15s. They were bloody FILTHY when I got them, so after a good dose of armorall wheel cleaner (it's the only decent wheel cleaner I've found so far) and an even gooderer dose of 280 grit wet n dry, it was time for taping and papering.
Bam!
I used an etch primer which ran super easily, and a generic white enamel paint from bunnings as a top coat. Anyway, in my super duper eagerness, I whacked them onto the car after only an hour of drying time.
My dirty hands scuffed up the finish on one of the wheels, so I used WHEEL CLEANER ON ONE HOUR OLD PAINT TO GET IT OFF... So I had to sand that wheel back and do it again. Also the centre caps look like dog shite up close, so I'll re-do them tomorrow. Hey, I forgot how much I suck at painting things.
Anyway, here are a couple of show-off pics. The only one I got with centercaps was with my cameraphone... first world problems... I'm honestly unsure whether to run the caps or not, It looks fine either way IMO.
On to the important thing, how does it fit/feel/drive? Well.
Fitting: These are the largest wheels that I'd consider sane for an X3. If you drive on smooth ground, you'd think it was stock. But if you are on full steering lock, and hit a bump? The tyre rubs. If you are under hard cornering load, and hit a bump? It scrubs in the back. But ordinarily, it's fine. The rolling diameter is the same so there's no worries about wheel arch fitment or speedometer correction.
Feel/drive: I don't even know what's going on with these. My first impression was 'whoa, these don't grip as well as the old tyres'. BUT, peak grip arrives with less steering input. So maybe it's a placebo affect? Maybe I'm just trying to justify my purchase? Maybe it's the dry rot on the outside of the tyre? Who even knows. Without actual acceleration data, I can't say for sure. But the car feels a lot less doughy, and the 30/55 mph speed wobble issue is now gone. Yay! The only downside here is the vaguest increase in road noise ever, but I have a loud exhaust and a short 5th gear already, so the passengers already have bleeding ears. No biggie.
In unrelated news, I finally tracked down a rattle that has been shitting me to tears. Turns out it was the rear speakers rattling inside their housings. A quick strip of foam in there solved the problem and prevented a future killing spree. Cheers for reading! I still need to get around to doing some wiring, eh?

 07-29-2012, 05:24 PM
#60
Senior Member
Thread Starter
Join Date: Dec 2008
Location: Floating around the AUDM
Posts: 3,837
Likes: 0
Received 0 Likes
on
0 Posts
Vehicle: X3 Sprint, S-Coupe Turbo
Cheers lads. I might just leave the caps off anyway, it looks fine either way, but no caps is 1000x more practical.
So today, I managed to steal a few hours off and finally get around do this ricey cluster of mine. And, well, it was somewhat successful! The first step was to see if this sh*t even worked, so I found a magnificent power supply location. The deluxe X3 models came with power windows that were switched at the center console, just behind the gear lever. In my povvo pack X3, it's a really vague coin holder. The great part is though, that Hyundai still ran all the fat power and earth leads to the bottom of the coin holder... I pretty much wet my pants when I found such an easy source of switched 12v power with a fat lead to boot.
ANYway, I got it hooked up and it seems to be working okay. But I'm not sure about the oscillation frequency... I had been idling the engine for about five minutes by the time that the sensor warmed up and started cycling. Here is a needless photo mid-cycle.

The strange part it that the rich-lean-rich cycle took about 4.5-5 seconds, I'm not sure if this is normal but research will tell. To my knowledge, the mixture will cycle FAR faster than that, even at idle. Anyway, after establishing that it won't catch fire now, I started to build a rough wiring harness for the cluster.

Which is all done. So the car is ready to accept the gauge, I just have to go and swap all this stuff over into the GX cluster now. The only problem I could find with the board, is that the long/heavy wiring harness attaches directly to the PCB with little soldered pins, which makes the whole thing very delicate. Another wiring connector might be the key to making this thing a little more durable.
Ahhh, there's always more stuff to be done on this car. Thanks for reading along. Moar content soon, for your sorry eyes
So today, I managed to steal a few hours off and finally get around do this ricey cluster of mine. And, well, it was somewhat successful! The first step was to see if this sh*t even worked, so I found a magnificent power supply location. The deluxe X3 models came with power windows that were switched at the center console, just behind the gear lever. In my povvo pack X3, it's a really vague coin holder. The great part is though, that Hyundai still ran all the fat power and earth leads to the bottom of the coin holder... I pretty much wet my pants when I found such an easy source of switched 12v power with a fat lead to boot.
ANYway, I got it hooked up and it seems to be working okay. But I'm not sure about the oscillation frequency... I had been idling the engine for about five minutes by the time that the sensor warmed up and started cycling. Here is a needless photo mid-cycle.
The strange part it that the rich-lean-rich cycle took about 4.5-5 seconds, I'm not sure if this is normal but research will tell. To my knowledge, the mixture will cycle FAR faster than that, even at idle. Anyway, after establishing that it won't catch fire now, I started to build a rough wiring harness for the cluster.
Which is all done. So the car is ready to accept the gauge, I just have to go and swap all this stuff over into the GX cluster now. The only problem I could find with the board, is that the long/heavy wiring harness attaches directly to the PCB with little soldered pins, which makes the whole thing very delicate. Another wiring connector might be the key to making this thing a little more durable.
Ahhh, there's always more stuff to be done on this car. Thanks for reading along. Moar content soon, for your sorry eyes