
Tanc Build, Volume 2, Final Update Oct 25


Thread Starter
Senior Member

Joined: Mar 2006
Posts: 5,754
Likes: 0
Vehicle: 1997 Tiburon
Well, motor and all finished, it was time for bodywork.
Everything is just on there with 1-2 nuts just for alignment, fitment, and any issues.
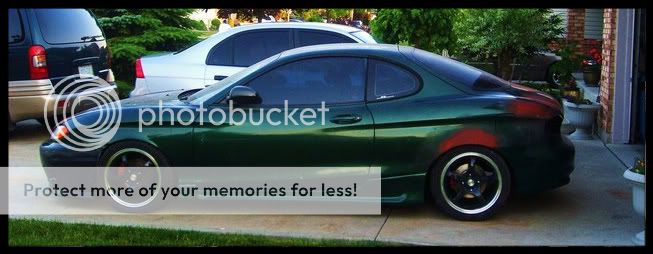
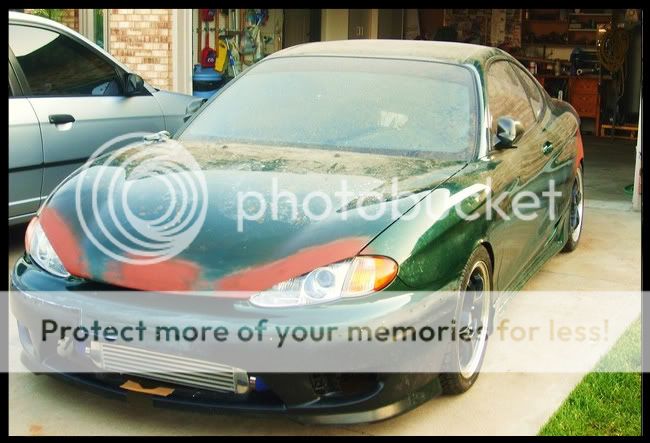
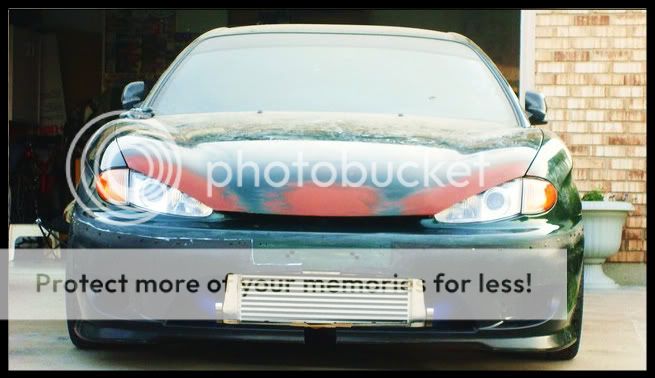
The front bumper is in the fitment stage, im doing it a bit different then the rest, because I have "some" prior TPO plastic experience. This is my first major automotive bodywork I'm doing. There is fresh sheetmetal welded in where you see the primer because I had huge rust spots. The rear quarters were a hard to do, spent many hours on those. Wish we could purchase rear quarter replacements.
Rockers were also very bad (can't see because of side skirt) but all new fresh metal is there, that extends from the rear wheel to above half way on the door. Because of our unibody frame, there are many layers of structural sheetmetal in our rockers. To keep everything rigid, I replaced each layer, layer by layer. Took many hours of forming, cutting, forming, cutting, welding, welding, cutting lol...you get the drift.
The front bumper is not finished yet, so don't yell at because the wheel well isn't to shape yet, or that there is tape holding it together! Soon I will take all the doors/hatch/hood/fenders/bumpers off to sand, spray the filler primer, spray the sealer, paint and clear. This has all been done, and will be finished in the garage. You'll see the last pic with the work horse for the paint.
PS. its not staying green.


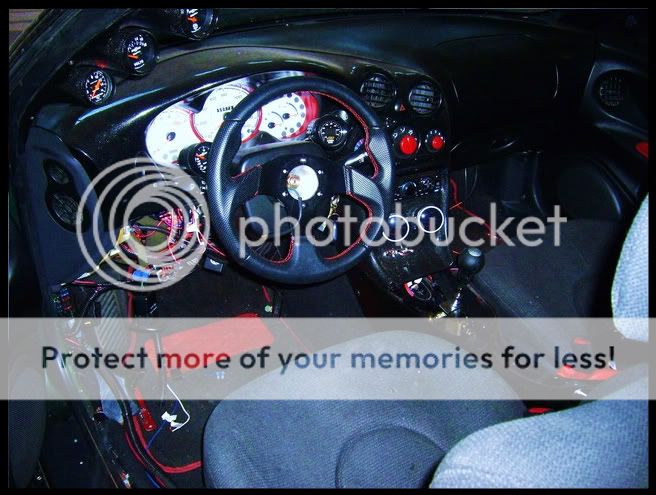
This is how far i've got on the interior. The red is going btw.
One of my workhorses.

Everything is just on there with 1-2 nuts just for alignment, fitment, and any issues.
The front bumper is in the fitment stage, im doing it a bit different then the rest, because I have "some" prior TPO plastic experience. This is my first major automotive bodywork I'm doing. There is fresh sheetmetal welded in where you see the primer because I had huge rust spots. The rear quarters were a hard to do, spent many hours on those. Wish we could purchase rear quarter replacements.
Rockers were also very bad (can't see because of side skirt) but all new fresh metal is there, that extends from the rear wheel to above half way on the door. Because of our unibody frame, there are many layers of structural sheetmetal in our rockers. To keep everything rigid, I replaced each layer, layer by layer. Took many hours of forming, cutting, forming, cutting, welding, welding, cutting lol...you get the drift.
The front bumper is not finished yet, so don't yell at because the wheel well isn't to shape yet, or that there is tape holding it together! Soon I will take all the doors/hatch/hood/fenders/bumpers off to sand, spray the filler primer, spray the sealer, paint and clear. This has all been done, and will be finished in the garage. You'll see the last pic with the work horse for the paint.
PS. its not staying green.
This is how far i've got on the interior. The red is going btw.
One of my workhorses.
Senior Member
Joined: Mar 2006
Posts: 4,135
Likes: 0
From: NAS Patuxent River, MD
Vehicle: 2004 Volkswagen Jetta GLI
<--- owned.gif
regardless it looks good...loving the molded eyelines to give an even more aggressive look
7 gauges freakig insane
I know you cant wait until this build is done, have you even got a chance to dyno the car yet?
regardless it looks good...loving the molded eyelines to give an even more aggressive look
7 gauges freakig insane
I know you cant wait until this build is done, have you even got a chance to dyno the car yet?
Thread Starter
Senior Member
Joined: Mar 2006
Posts: 5,754
Likes: 0
Vehicle: 1997 Tiburon
I like monitoring things I guess lol. I will probably get rid of the 3 gauge pillar and just mold a 2 gauge pillar.
Oh, and the oil pressure gauge is switched to 2 sensors. One at the turbo feed from the head and one at the sandwich plate. Mostly for experimental reasons.
Oh, and the oil pressure gauge is switched to 2 sensors. One at the turbo feed from the head and one at the sandwich plate. Mostly for experimental reasons.

