Bumper Repair
 10-30-2007, 10:18 PM
#1
Senior Member
Thread Starter

Join Date: Dec 2007
Location: home
Posts: 1,377
Likes: 0
Received 0 Likes
on
0 Posts
Vehicle: car
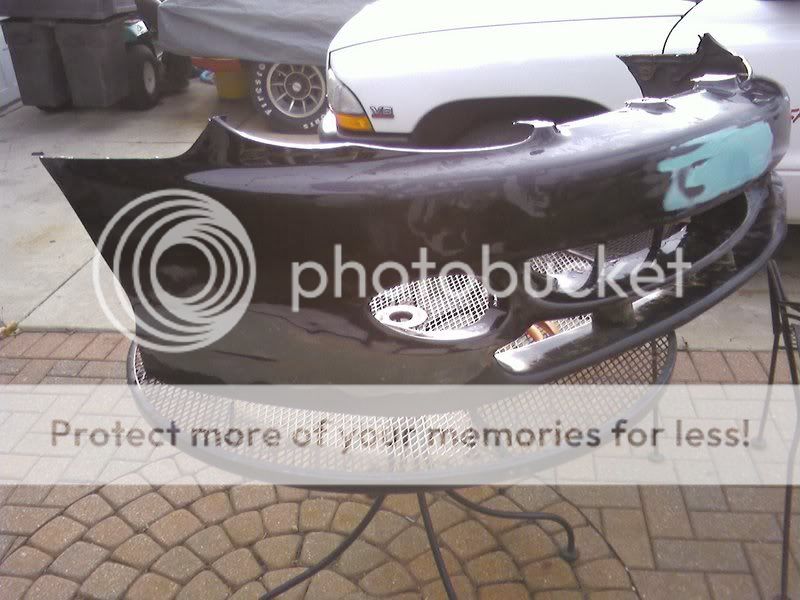
So some of you may have noticed in some of my pictures, but my bumper was fux0red on the drivers side. The previous owner hit something and left a fist sized amount of damage on it. Crack, hole, and rip. Luckily it was only in that area and didn't crack the bumper completely. Soooooo. Anyways, what I did was this. I bought some basically heavy duty industrial sized 2 part epoxy. They sell it at Harlem Auto Parts by my house. But it is special for fixing bumpers.
So what I did was took my heat gun, threw it on high, and heated the plastic until it was malleable. I reshaped it to the best of my ability, then slapped a bunch of this epoxy crap on it. It was dry in like 10 minutes, and it was heating itself to cure it! Weirdest thing ever! As of now I filled the holes where my license plate mounts and sanded it all down flush. I'm still working on sanding the hole/crack, but it will only probably take another 1/2 hour to fix. I love it! I've had to live with this crap since I bought the car last year, and I don't really have the money for a kit, nor the want to hang, modify, and paint it all. So I think I might get a lip kit, lower it, and maybe even do the home depot lip kit, and call it a day. Check it out!
So what I did was took my heat gun, threw it on high, and heated the plastic until it was malleable. I reshaped it to the best of my ability, then slapped a bunch of this epoxy crap on it. It was dry in like 10 minutes, and it was heating itself to cure it! Weirdest thing ever! As of now I filled the holes where my license plate mounts and sanded it all down flush. I'm still working on sanding the hole/crack, but it will only probably take another 1/2 hour to fix. I love it! I've had to live with this crap since I bought the car last year, and I don't really have the money for a kit, nor the want to hang, modify, and paint it all. So I think I might get a lip kit, lower it, and maybe even do the home depot lip kit, and call it a day. Check it out!
 10-31-2007, 05:10 AM
#2
Moderator


I've done this a few times. It works great on unpainted bumpers. I've saved my friends some money with just my heat gun and a wet rag alone! With tiburons we have to get them repainted if anything happens though 02.gif
Just a bit of advice though.. it works better with the heat gun on low. It takes more time, but it allows the material to become more plyable without risking burning the plastic.
Just a bit of advice though.. it works better with the heat gun on low. It takes more time, but it allows the material to become more plyable without risking burning the plastic.
 10-31-2007, 04:03 PM
#4
Moderator
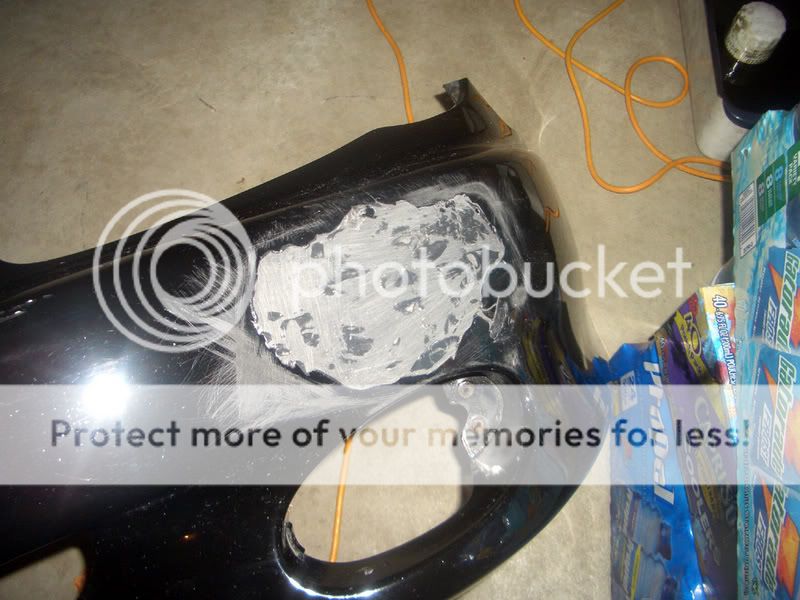
OOh... I just saw the pix. I caught the post at work first. You need to sand it down more until you get the paint off of the area around the repair. Only then will you not have a ridge around the repair.
It also helps to use a "plastic spreader" when you put the material on. It will make sure it comes out smooth. Then you just sand down the very top. I can see where your repair divots back into it.
I realize this is a WIP and you might know this already, but some people might think it's just that easy and mess their bumper up.
10-31-2007, 10:03 PM
#5
Senior Member
Thread Starter
Join Date: Dec 2007
Location: home
Posts: 1,377
Likes: 0
Received 0 Likes
on
0 Posts
Vehicle: car
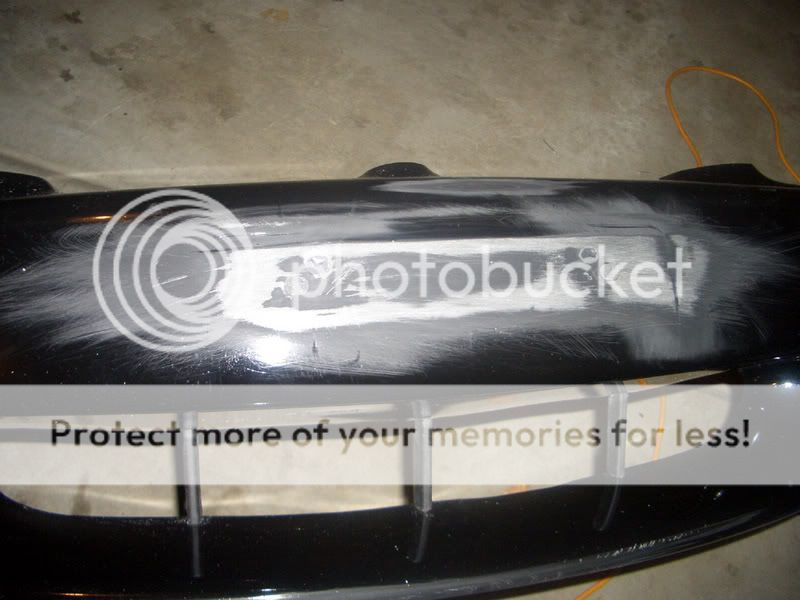
I know, like I said, it's a work in progress. I sanded the paint off where I applied it. You can't see it yet cause I used a lot of extra around it so I could make sure I got it all. There's still a slight dip in it, but I'm working on it. My car was egged tonight so I had other things to do, lol. owned.gif
Definitely not something to do if you are new to this sort of thing. I've done some body work with bondo and everything before, so I have a good idea of what I'm doing.
Definitely not something to do if you are new to this sort of thing. I've done some body work with bondo and everything before, so I have a good idea of what I'm doing.
11-04-2007, 04:36 PM
#6
Senior Member
Thread Starter
Join Date: Dec 2007
Location: home
Posts: 1,377
Likes: 0
Received 0 Likes
on
0 Posts
Vehicle: car
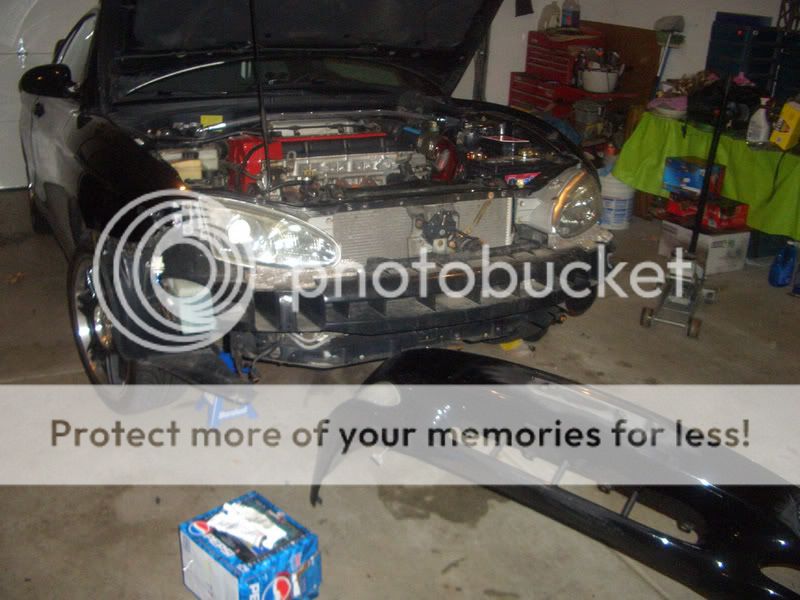
So I am in the finishing stages of it. I've worked the past 7 days straight, so it was hard to find time to balance my schedule, but here it is.

And I've heard from a few people not to use bondo on my bumper cause if I crash blah blah it'll break, but I figure I'll have bigger problems if I crash, lol.

I'm going to fix up my fender next, there is a spot of rust on it that I think the guy used that rustoleum crap on. Regardless, it is going to be history. After that I will be working on my large key mark spanning my whole passenger side, lol. I'll keep this thread updated on my progress. As you can tell, this will be the "I'm painting my own tibby!" Thread.
And I've heard from a few people not to use bondo on my bumper cause if I crash blah blah it'll break, but I figure I'll have bigger problems if I crash, lol.
I'm going to fix up my fender next, there is a spot of rust on it that I think the guy used that rustoleum crap on. Regardless, it is going to be history. After that I will be working on my large key mark spanning my whole passenger side, lol. I'll keep this thread updated on my progress. As you can tell, this will be the "I'm painting my own tibby!" Thread.