
Blue Bomber's Revival Thread


Thread Starter
Senior Member
Joined: Oct 2008
Posts: 605
Likes: 0
From: Canada
Vehicle: 2004 Tuscani Tiburon
Here is pics of my process for rebuilding my car after my accident.
First off, some pics of the accident damage:
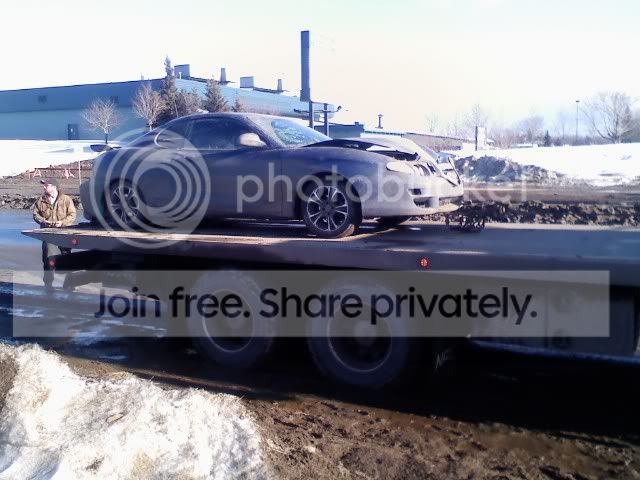


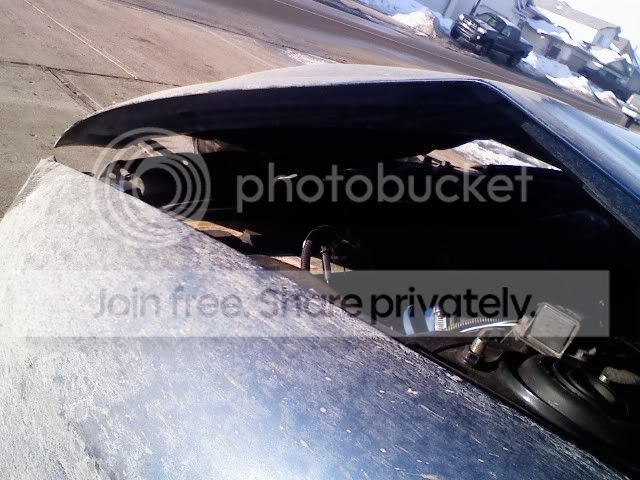

It got pretty messed up. I needed a new hood, rad support, bumper cover, left fender, all new lights, new radiator, new condensor, new A/C tubing, and then some other miscellaneous parts. Thankfully, I had a new radiator and bumper cover already that I picked up from a junkyard.
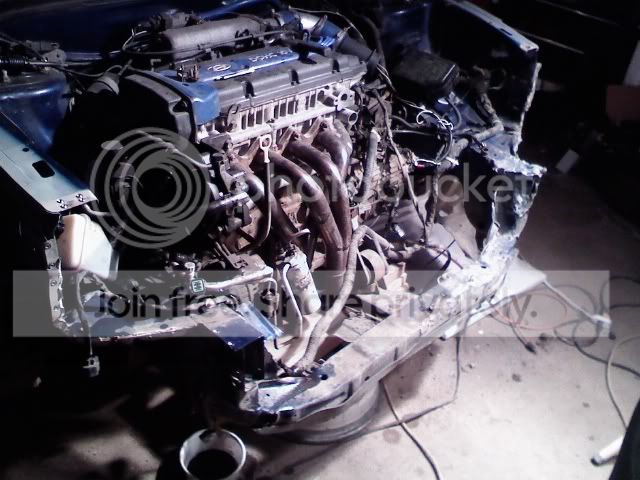
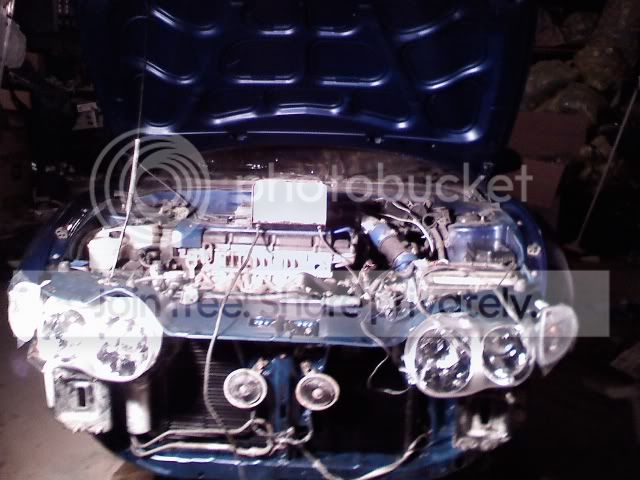
Here is pics of the rebuild. I did all my own work, taking it off and putting it back together. The only thing we got help on was the welding which our friend did. He was a professional so we figured we'd let him do it.

The Rad support is actually quite a PITA to remove for whoever has done it or is thinking of doing it.
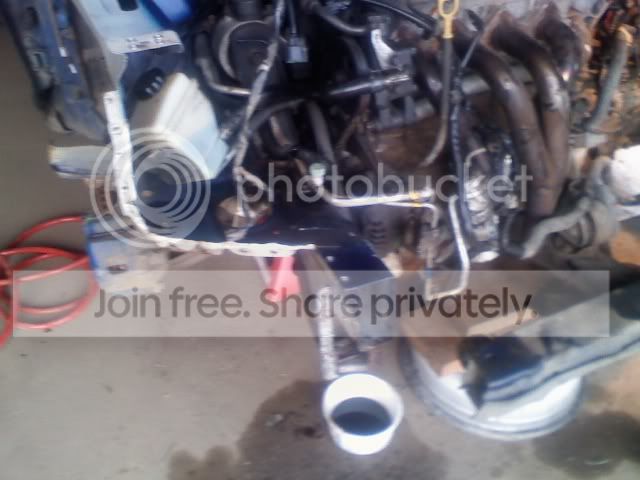

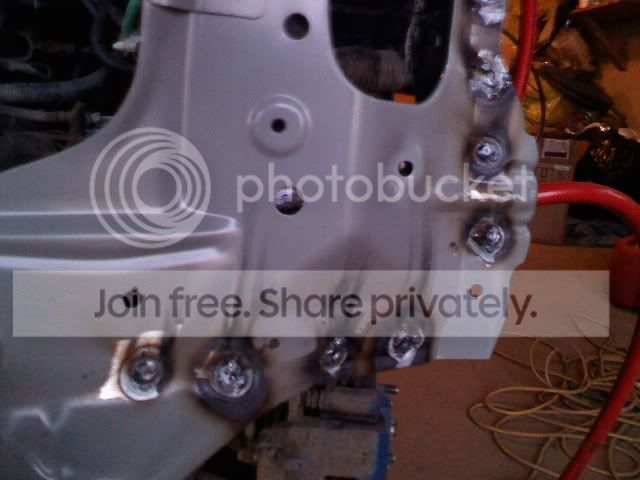
These welds were plug welds and is actually stronger than the factory welds on the rad support. It is more than the shop that would charge $10,000 for this job.
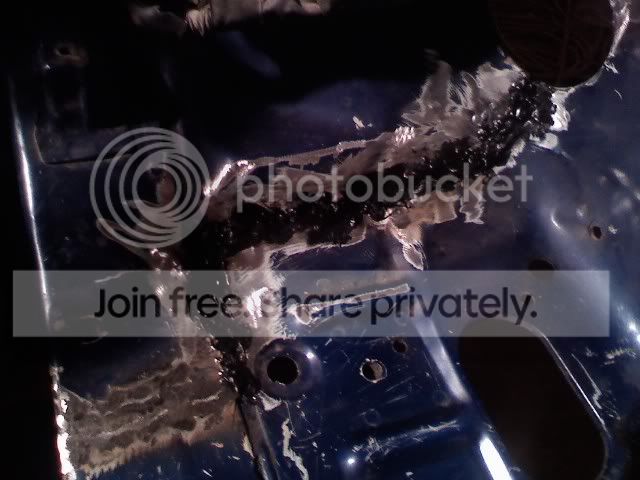
This is a corner of my cars frame. The A-Piller. Mine was slightly damaged so we cut the corner off of another tib we found and welded it onto my car. So my car is like frankensteined together kind of. Dont worry, we made sure it was perfectly aligned and sturdy so it wouldnt cause safety issues.

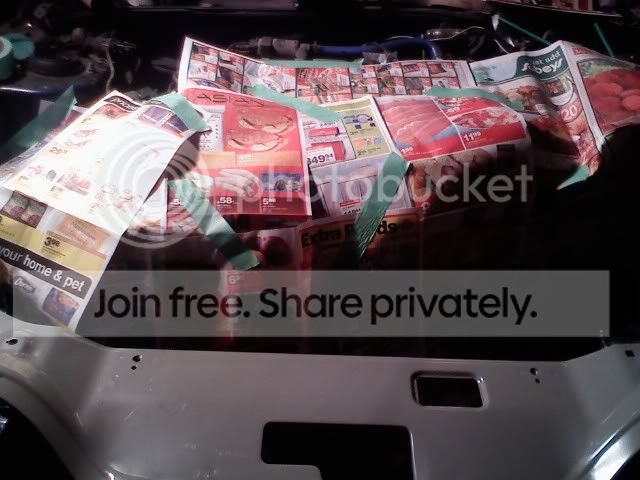
This is getting ready for paint. Had to cover things up to avoid over spray.

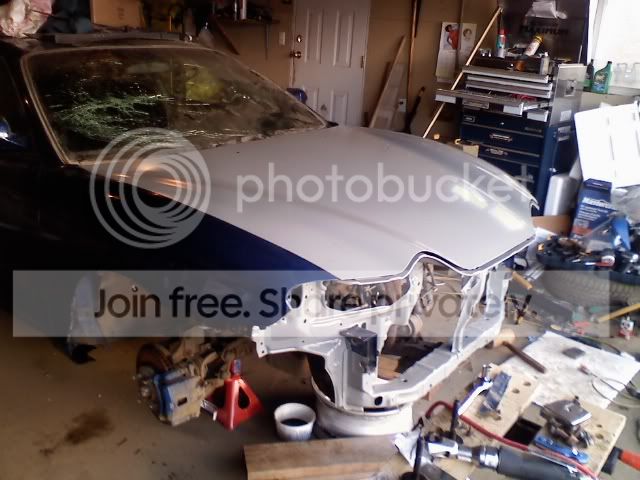
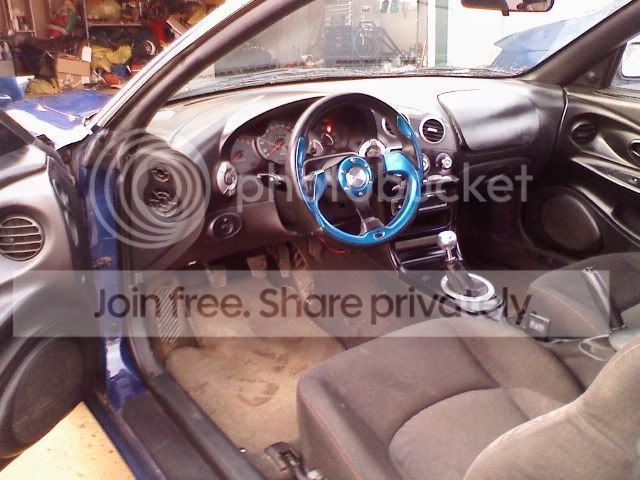
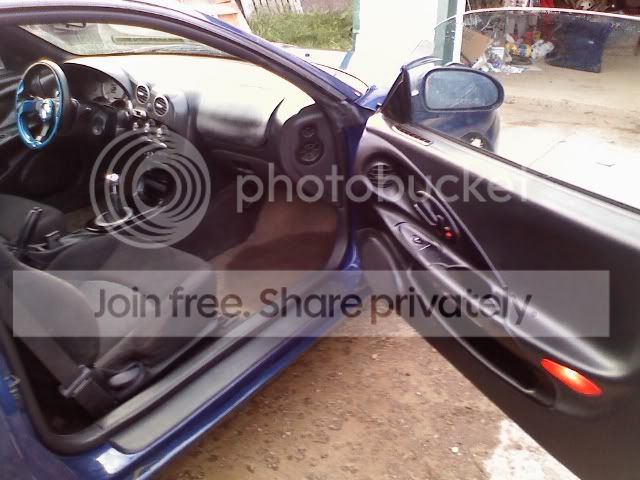
And Now.... The Finished project! I had it finished 2 weeks ago but finally got around to making this thread.


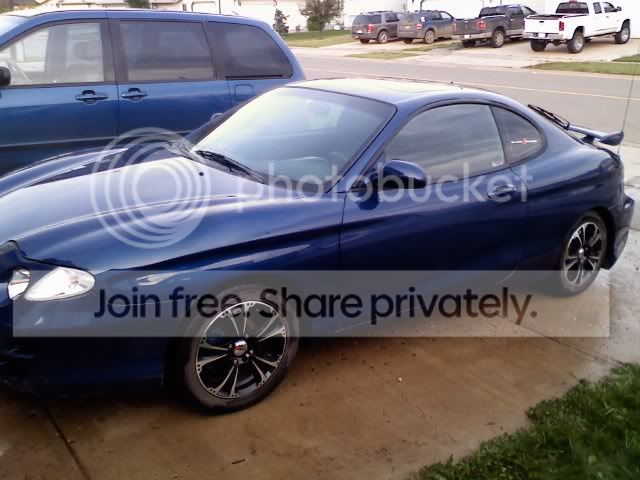


Enjoy! Let me hear your opinions! Just to say something, the bumper that is on right now is the one we got from the junkyard. It is slightly damaged but nothing too bad. I'm going to keep that on until after winter then put my Veilside one back on.
First off, some pics of the accident damage:
It got pretty messed up. I needed a new hood, rad support, bumper cover, left fender, all new lights, new radiator, new condensor, new A/C tubing, and then some other miscellaneous parts. Thankfully, I had a new radiator and bumper cover already that I picked up from a junkyard.
Here is pics of the rebuild. I did all my own work, taking it off and putting it back together. The only thing we got help on was the welding which our friend did. He was a professional so we figured we'd let him do it.
The Rad support is actually quite a PITA to remove for whoever has done it or is thinking of doing it.
These welds were plug welds and is actually stronger than the factory welds on the rad support. It is more than the shop that would charge $10,000 for this job.
This is a corner of my cars frame. The A-Piller. Mine was slightly damaged so we cut the corner off of another tib we found and welded it onto my car. So my car is like frankensteined together kind of. Dont worry, we made sure it was perfectly aligned and sturdy so it wouldnt cause safety issues.
This is getting ready for paint. Had to cover things up to avoid over spray.
And Now.... The Finished project! I had it finished 2 weeks ago but finally got around to making this thread.
Enjoy! Let me hear your opinions! Just to say something, the bumper that is on right now is the one we got from the junkyard. It is slightly damaged but nothing too bad. I'm going to keep that on until after winter then put my Veilside one back on.


Senior Member

Joined: Jun 2006
Posts: 624
Likes: 0
Vehicle: 1998 Hyundai Tiburon FX
Looks good. I'll be doing that with both my '97 and '98 soon. For the rad support, did you basically drill out the welds and then weld it back on?? Also where did you get the new one from?
Thread Starter
Senior Member
Joined: Oct 2008
Posts: 605
Likes: 0
From: Canada
Vehicle: 2004 Tuscani Tiburon
<div class='quotetop'>QUOTE (supry @ Aug 27 2009, 08:02 AM) <{POST_SNAPBACK}></div><div class='quotemain'>Looks good. I'll be doing that with both my '97 and '98 soon. For the rad support, did you basically drill out the welds and then weld it back on?? Also where did you get the new one from?</div>
I used a spot weld remover tool. Its a hollow circle with jagged edges that is slightly larger than the spot welds holding the rad support on. So basically just drill them out using that trying to only go through the first layer of metal and not the frame. They you basically clean and smooth out all the holes, sand and get rid of all the paint around where your welding, then you weld it on and grind the welds fairly smooth. Its not too difficult, but it is time consuming for sure. I do not envy you for doing this on 2 vehicles lol.
And I got the new one from the dealer because it wasn't very expensive at all from them. Only slightly more than internet prices but you knew what you were getting and it was free shipping. Its hard to find Canadian companies that sell these so the free shipping from the dealer really can save some good money.
<div class='quotetop'>QUOTE (Bullfrog @ Aug 27 2009, 08:23 AM) <{POST_SNAPBACK}></div><div class='quotemain'>I think Tibbychick is selling a passenger side air bag if you want to replace that one.</div>
Nah im good lol. I cut out that airbag and I dont have much interest in replacing it to be honest. Plus, im moving out this saturday and so ill have limited tools and no actual place to work on my car besides the parking lot of my condo complex.
What I do need however is a way to make that panel stick down. I've used 3M double sided tape and a hot glue gun and neither will hold it. Any ideas? I dont want to just tape the outside cause it would look horrible.
And just to let you guys know, the total cost of this fix was about $2300 Canadian. Thats including all parts, paint, tools, and the amount we paid the welder. I loved this car too much to get rid of it.