
Yet Another Rd With A Gk Bumper...


Thread Starter
Senior Member

Joined: Feb 2006
Posts: 977
Likes: 0
From: Hereford Az.
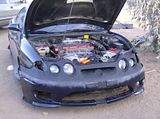
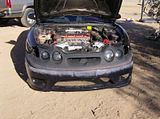
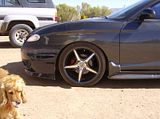
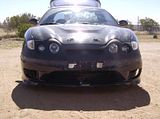
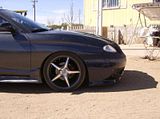
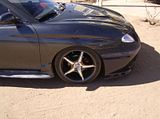
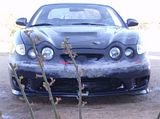
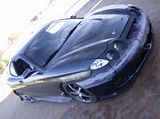
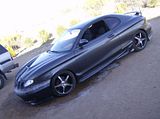
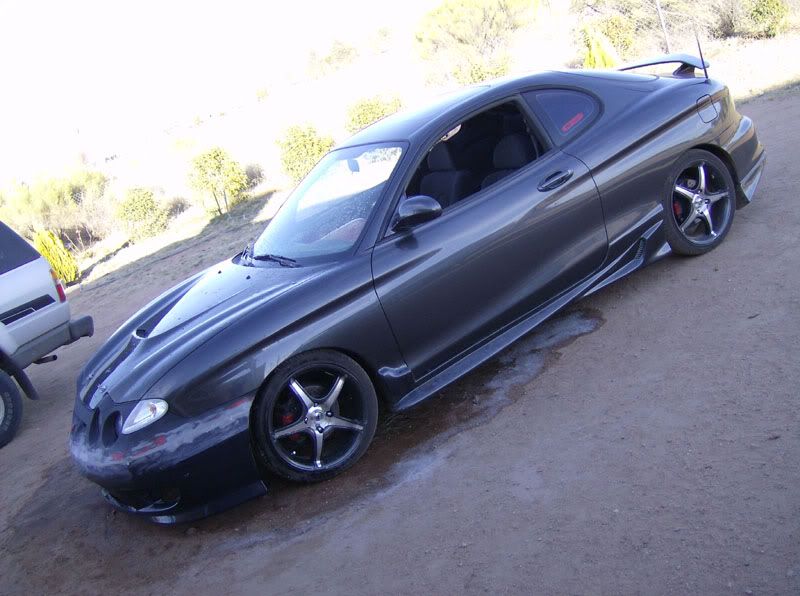
Hey what's up gang? Well here are the pics of my car with the GKII half front bumper.
I had to do a lot of cutting to get it to fit right and get rid of the nasty angle on the bottom of the bumper towards the wheel well, but alas it turned out sweat and now i dont have that nasty angle at the bottom that the Koreans leave behinde.
Anyway here are some pics also of what i used to cut and get it together. And if anybody else is gonna do this... remember patience is a virtue, specially if this is the first time you are doing it, talking about me heh ^^;;
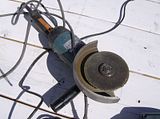
Buffer
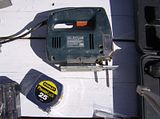
Jig Saw... puzzle? XP
Rivets and Rivet Gun
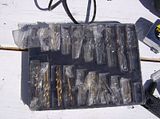
Drill bits

Set of Drills, makes it easier to make holes with one and to drill the bolts while templateing it on the car.
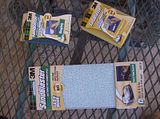
Sanding paper, sanding spunge, 60 grit, 200 grit, and 320 grit
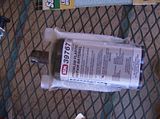
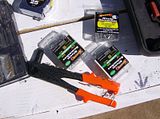
Well name is on there, bought it in my local bodyshop supplier. This was used to glue the bumper from the front side since this is sandable. This glue uses a special kind of gun like the silicone guns only this has to push thingies (dont know what they are called). This product comes with a tip that will mix both colors together to make the glue.
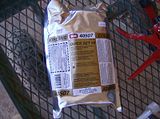
Name is also there, this is also to glue the bumper from the inside, this is NOT sandable and this thing dries very fast, dries in 50 sec and is great for extra rienforcement. Havent used it since i was doint the exterior part, will use it tommorrow. Thise also uses the special gun and comes with tips to mix the glue.
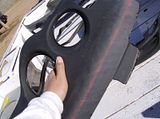
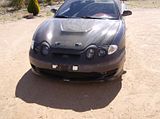
And here are the pics of the process that the bumpers had to go though.
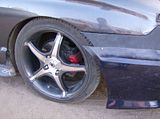
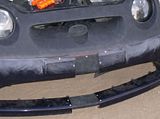
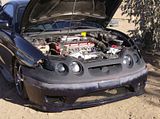
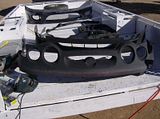
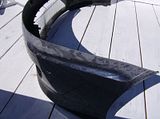
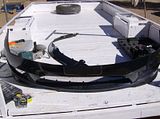
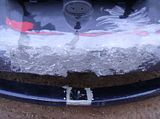
Pics with the bumper aready bolted on the car, license plate shaved and the excess of the GKII bumper wheel well cut off.
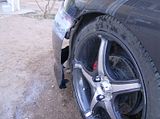
After i shaved off the license plate i riveted in some lil aluminum plates in the back so i would be able to put some FG on top and make it smooth...
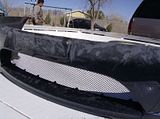
Fiberglassing and sanding.... not finished yet. will finish Tommorrow if i still live.
Hope you guys like how it's turning out.
Thanks again to gsasha for giving the idea with his thread and to SOCKS for passing the deal to me on the GKII bumper!!
I had to do a lot of cutting to get it to fit right and get rid of the nasty angle on the bottom of the bumper towards the wheel well, but alas it turned out sweat and now i dont have that nasty angle at the bottom that the Koreans leave behinde.
Anyway here are some pics also of what i used to cut and get it together. And if anybody else is gonna do this... remember patience is a virtue, specially if this is the first time you are doing it, talking about me heh ^^;;

Buffer

Jig Saw... puzzle? XP

Rivets and Rivet Gun

Drill bits

Set of Drills, makes it easier to make holes with one and to drill the bolts while templateing it on the car.

Sanding paper, sanding spunge, 60 grit, 200 grit, and 320 grit

Well name is on there, bought it in my local bodyshop supplier. This was used to glue the bumper from the front side since this is sandable. This glue uses a special kind of gun like the silicone guns only this has to push thingies (dont know what they are called). This product comes with a tip that will mix both colors together to make the glue.

Name is also there, this is also to glue the bumper from the inside, this is NOT sandable and this thing dries very fast, dries in 50 sec and is great for extra rienforcement. Havent used it since i was doint the exterior part, will use it tommorrow. Thise also uses the special gun and comes with tips to mix the glue.
And here are the pics of the process that the bumpers had to go though.


Pics with the bumper aready bolted on the car, license plate shaved and the excess of the GKII bumper wheel well cut off.
After i shaved off the license plate i riveted in some lil aluminum plates in the back so i would be able to put some FG on top and make it smooth...


Fiberglassing and sanding.... not finished yet. will finish Tommorrow if i still live.


Hope you guys like how it's turning out.
Thanks again to gsasha for giving the idea with his thread and to SOCKS for passing the deal to me on the GKII bumper!!


Senior Member
Joined: Dec 2006
Posts: 277
Likes: 0
From: Wilkes-Barre, Pa
Hey whats going on!!Nice to see it coming along nice, You dont really need to use the tips you can get a piece of card board and a bondo spreader and mix it that way, I htink those tips are a litte expensive....All that sem stuff must of cost a pretty penny did you also buy the gun, got mine for free lol!!!I used on the last bumper I did, it wasnt a tib tho but I used sem 1149? pretty sure dries in 5 minutes you can clamp it on and then let it cure for 12hrs and it is sandable like 30 bux too..
Thread Starter
Senior Member
Joined: Feb 2006
Posts: 977
Likes: 0
From: Hereford Az.
^^^ Well the tips came with the glues so i guess i payed for the whole set, and yeah, for the set it came out $75... oh and the gun is loaned by them, i have to return it on Monday.
The bumper i didnt have to clamp it cause before i did all the glueing i already had it rivited. XP
NO NO NO, it looks better on the RD2s!!! lol thanks.
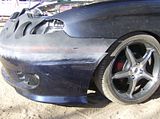
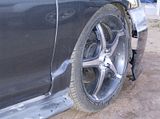
Thanks peter, and i really didnt like the old bumper from the bodykit cause it didnt fit right, you know same ol crappy fitment from ED and such. Anyway i also had a lil accident with it, i broke off one part of the flaps that go on the sides, and also broke and cracked part of the side skirt, you can see it in the pics.
The bumper i didnt have to clamp it cause before i did all the glueing i already had it rivited. XP
QUOTE (lilo shark @ Mar 3 2007, 09:08 PM)
i think it still looks better on the rd1 than the rd2. but good work! fing02.gif
NO NO NO, it looks better on the RD2s!!! lol thanks.
QUOTE (peter_2150 @ Mar 3 2007, 09:17 PM)
Wow that looks good. You dont like you other front end.
Thanks peter, and i really didnt like the old bumper from the bodykit cause it didnt fit right, you know same ol crappy fitment from ED and such. Anyway i also had a lil accident with it, i broke off one part of the flaps that go on the sides, and also broke and cracked part of the side skirt, you can see it in the pics.

Senior Member
Joined: Aug 2009
Posts: 11,992
Likes: 0
From: Washington D.C.
Vehicle: Hyundai Tiburon FX
oh my goodness, those are exactly the kind of photos i was expecting except members usually don't live up to these kinds of updates. it looks beautiful!!!! wow... i wasn't expecting you to go through all of that trouble but it looks like you have things under control. it should be straight from here on. can't wait for the finishing touches to be laid and the paint to go on. You'll be so happy with it.
great update by the way. this is the kind of stuff others need to see and inspire on.
great update by the way. this is the kind of stuff others need to see and inspire on.