
Bodywork


Thread Starter
Senior Member

Joined: Aug 2009
Posts: 11,992
Likes: 0
From: Washington D.C.
Vehicle: Hyundai Tiburon FX
How do you guys do your bodywork so it comes out spotless? I can never get it 100%!!!! Am I doing something wrong?
Tthe Elantra sits 3in from the ground. The bumper has been shattered 3 times over curbs. Each time I get better and better at filling and painting and spend about $30 total, when done it looks great but there's always little tiny discrepancies in the finished product.
1. glue broken pieces together tightly using industrial adhesive, let dry
2. glue metal bonding strips to hold broken pieces, let dry
3. clean entire surface with rubbing alcohol
4. mix and pat down body filler over entire back of cracked area (fiberglass sheets optional for maximum strength), let dry
5. sand smooth with 200 grit sanding machine
6. rubbing alcohol over smooth filler area
7. prime entire surface of bumper
8. fill in holes/spots with spackle or glazing putty, spackle is cheaper wink1.gif let dry or use heater (will cause cracks)
9. sand using 300 grit
10. rubbing alcohol to clean powder again
11. prime, let dry
12. fill holes again with spackle, let dry
13. sand using 300 grit
14. rubbing alcohol
15. paint entire bumper with light coat, let dry
16. fill in holes with spackle again
17. sand using 300 grit
18. prime, let dry
19. paint 3 coats or 2 cans of paint, let dry at 50-70 degrees
20. coat with 3 coats or 2 cans of clear coat, let dry
The brackets broke too, so I made my own. Everything holds like a champ. I even matched the color exactly now, so no expensive Hyundai brand paint.
Senior Member
Joined: Mar 2008
Posts: 709
Likes: 0
From: Pennsylvania
Vehicle: 2000 Hyundai Tiburon
QUOTE
8. fill in holes/spots with spackle or glazing putty, spackle is cheaper wink1.gif let dry or use heater (will cause cracks)
By spackle I hope you mean bondo or similar??
When I hear spackle I think of the white stuff used to patch drywall in a house.
QUOTE
18. prime, let dry
19. paint 3 coats or 2 cans of paint, let dry at 50-70 degrees
20. coat with 3 coats or 2 cans of clear coat, let dry
19. paint 3 coats or 2 cans of paint, let dry at 50-70 degrees
20. coat with 3 coats or 2 cans of clear coat, let dry
Should be more like:
18. prime. let dry
19. sand with 3-400 grit sand paper
20. paint 2-3 coats paint let dry
21. paint 2-3 light coats clear
Options after are to wetsand with a very fine sand paper then buff for a really smooth finish.
Do you use a high build sandable primer? It should fill in all the little tiny spots too small for the filler and should sand pretty smooth with 3-400 sand paper.

Moderator

Joined: Feb 2009
Posts: 11,732
Likes: 5
From: Leesville, Louisiana
Vehicle: 2001 Hyundai Tiburon
I always spray down a "finished" product with black high gloss spray paint and then inspect it. If it looks good, then it's ready for the real painting, otherwise it's back to the ol' grindstone. Black spray paint seems to work best for finding flaws. Darker colors show imperfections more then lighter when inspected at an angle under a light.
Use filler primer to build up layers, then sand them back off. Perfection takes time.
Use filler primer to build up layers, then sand them back off. Perfection takes time.
Administrator

Joined: Oct 2002
Posts: 13,943
Likes: 0
From: ɯooɹpǝq ɹnoʎ
Vehicle: ǝdnoɔ sısǝuǝƃ
by using more layers but thinner, and using a higher grit for the final finishing polish might help to avoid those blemish bumps/holes.
I use fiberglass to make the patch and bondo to fill in and sand the final few layers. Sand after each layer to make it smooth.
I use 600 grit for the final polishing and wet sand with a higher grit if available. I also do it by hand - no machine. I use a sanding block to prevent my fingers from putting indentations in (pressing harder with finger tips than palm). I wetstand by hand, no block, to feel for ridges or bumps
Post some pics showing the non-100% area, close up. Might be easier to see what's causing the problem
Moderator
Joined: Feb 2009
Posts: 11,732
Likes: 5
From: Leesville, Louisiana
Vehicle: 2001 Hyundai Tiburon
Sanding layers of fiberglass? That's wasteful and time consuming. FG never comes out flat. All the FG resin you've mixed dries out and you have to clean up or you'll need a new paint brush. You have to wait for the FG to dry to sand it. Also, FG changes slightly after it hardens, it takes a day to cure fully and you should not begin final work until it's cured. Just lay down all the layers, then sand. If you want to build on the fg, use bondoglass. It just takes time and patience to get a good job done. Check out my Fiberglassing in a Tib DIY in the DIY section.
Another thing, if you're filling more then just a pinhole, you need bondo, not glazing putty. Glazing putty is for making a glaze out of a slightly pitted surface, not for filling holes. Also, never touch glazing putty until it's dry after you've applied it. It will mess up the surface if you keep playing with it. Glazing putty melts stuff.
Another thing, if you're filling more then just a pinhole, you need bondo, not glazing putty. Glazing putty is for making a glaze out of a slightly pitted surface, not for filling holes. Also, never touch glazing putty until it's dry after you've applied it. It will mess up the surface if you keep playing with it. Glazing putty melts stuff.
Thread Starter
Senior Member
Joined: Aug 2009
Posts: 11,992
Likes: 0
From: Washington D.C.
Vehicle: Hyundai Tiburon FX
QUOTE
Options after are to wetsand with a very fine sand paper then buff for a really smooth finish.
see the wesanding part i don't do. i always do it dry. and the highest i use is 300 grit. this might be the problem. i also don't use a sanding block. it'll be smooth as a baby's skin, and when i prime it there are some lumps or patches that show in the light. i'll have some pictures. overall it looks great but i know there are some flaws.
QUOTE
By spackle I hope you mean bondo or similar??
i normally use bondo glazing putty, but this time the joint compound to cover up cracks or holes. spackle can be used, all has the same function. bending the bumper isn't enough to crack those small things.
i know i'm fudging something in the process up. i'm about to look at your DIY. i remember it from a lonnng time ago. are fiberglass resin and jelly the same thing? it's hard to sand once set hence why i use a machine. how do you fiberglass using a paint brush? do you have to make your own? i know at home depot you can make your own.
QUOTE
I always spray down a "finished" product with black high gloss spray paint and then inspect it. If it looks good, then it's ready for the real painting, otherwise it's back to the ol' grindstone. Black spray paint seems to work best for finding flaws. Darker colors show imperfections more then lighter when inspected at an angle under a light.
hmm, might give it a shot. i did forget to use primer sealer. grrr. ah well. i'll take some pictures. it's all done i just need light.
Moderator
Joined: Feb 2009
Posts: 11,732
Likes: 5
From: Leesville, Louisiana
Vehicle: 2001 Hyundai Tiburon
FG Jelly is pretty worthless stuff when you have bondo glass available. Always use FG resin/hardener, paint it on with a paint brush, then use fg mat or fg weave to build a layer, then tap it into the resin until it becomes a somewhat wet, sticky part of the resin, then repeat until you've built up enough layers.
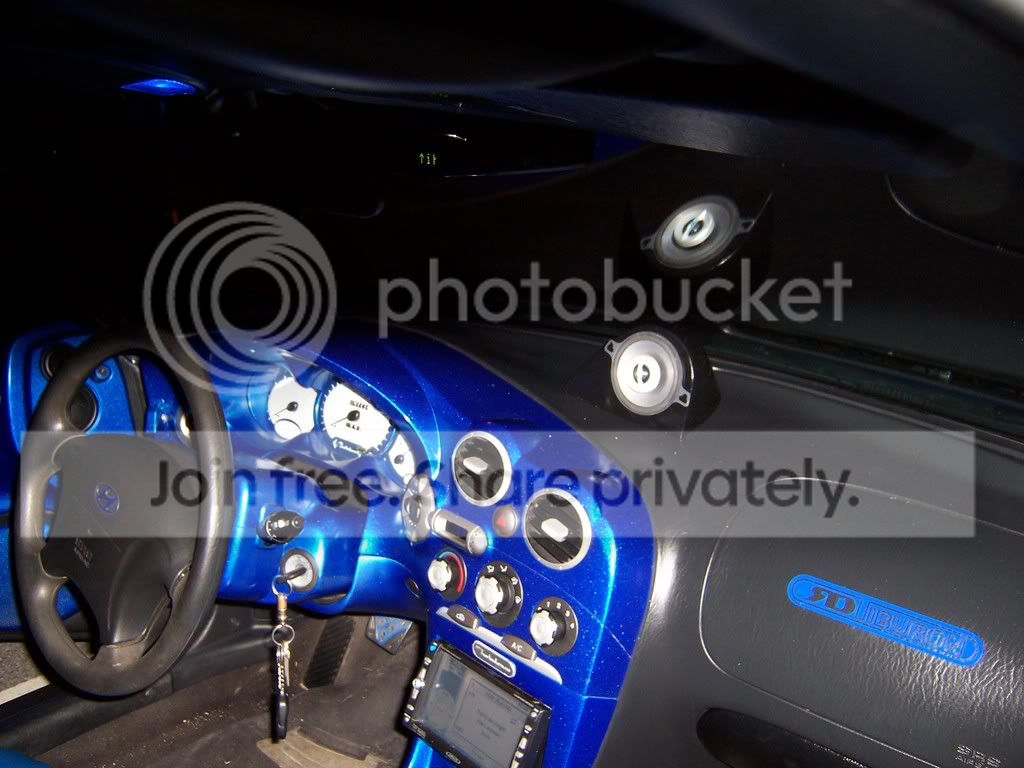
Here's some pictures i've never posted. This is how I do it.
build
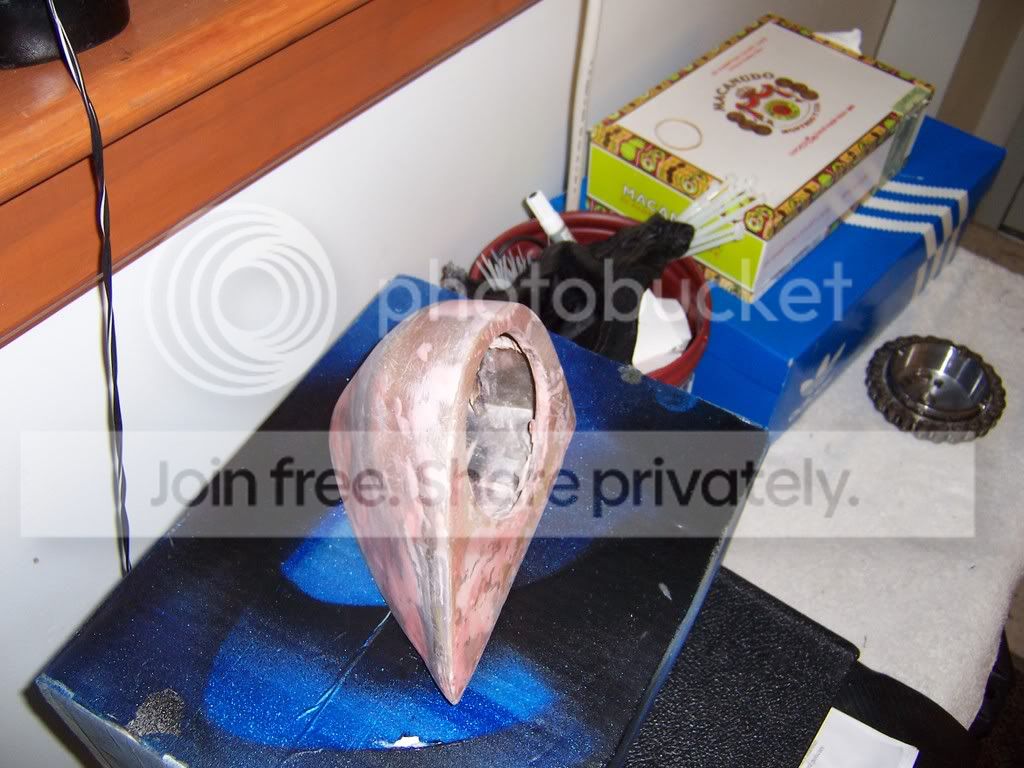
prime
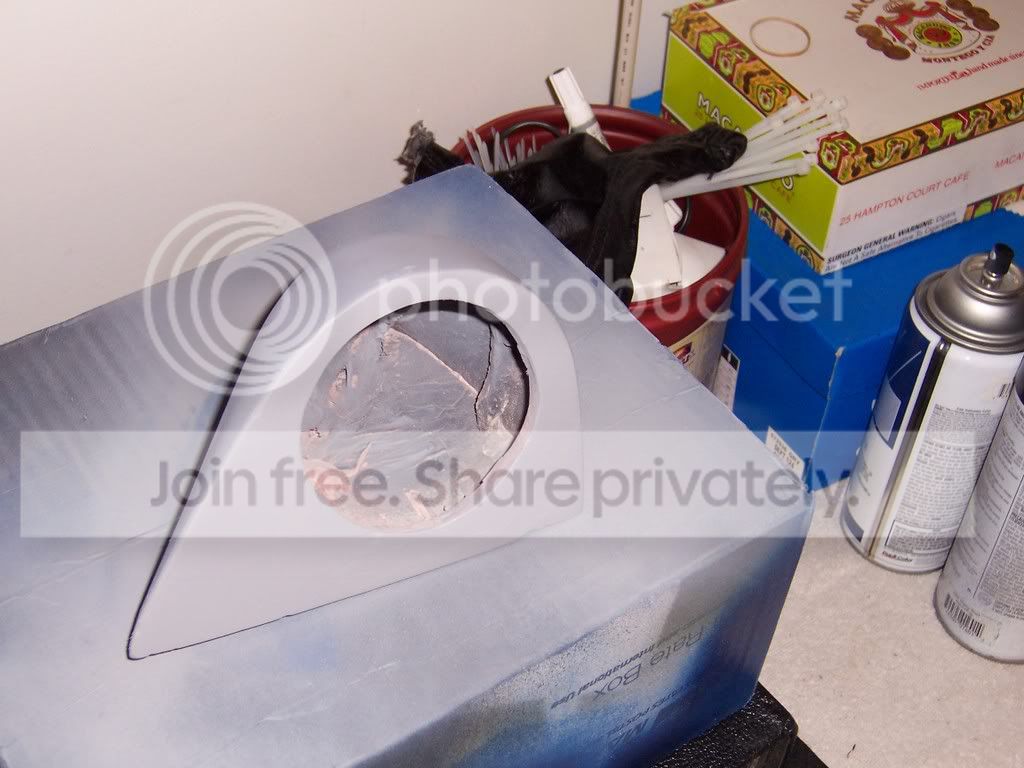
paint and inspect (you can see the flaw behind the main dome if you increase the size of the picture)
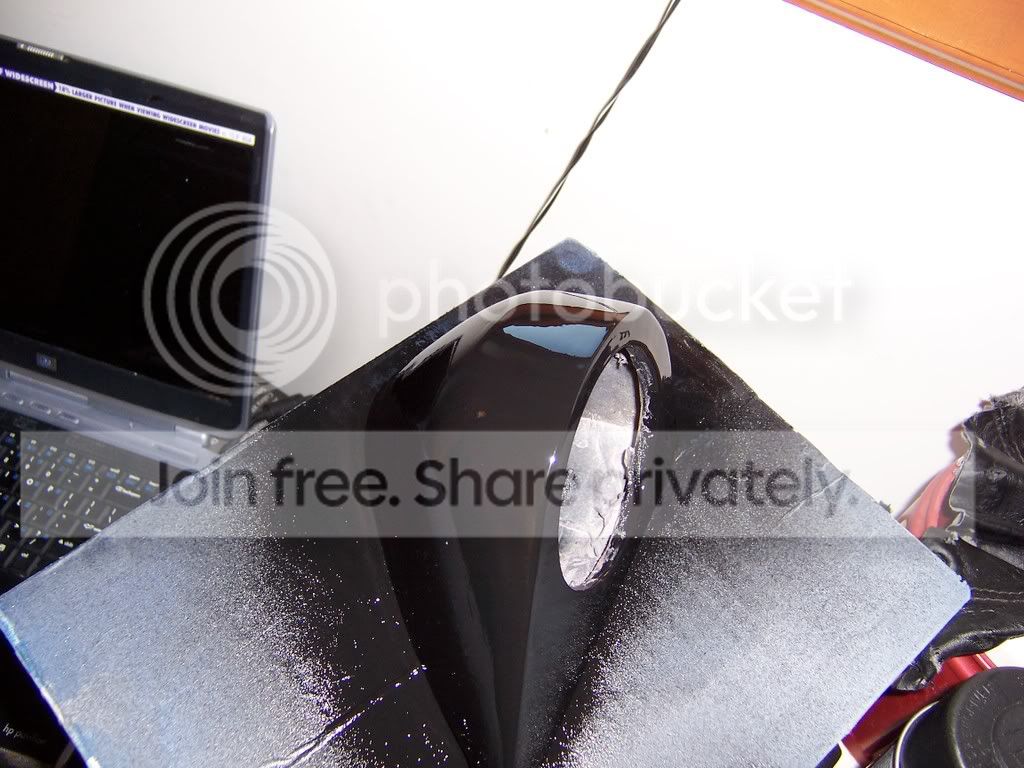
finish.(not quite finished, because I threw it away)
Here's some pictures i've never posted. This is how I do it.
build
prime
paint and inspect (you can see the flaw behind the main dome if you increase the size of the picture)
finish.(not quite finished, because I threw it away)
Senior Member
Joined: Mar 2008
Posts: 709
Likes: 0
From: Pennsylvania
Vehicle: 2000 Hyundai Tiburon
Wetsanding is probably going to be smoother. Add a drop or two of liquid soap in the water for lubrication.
Do a final sanding with a guide coat. Its pretty much a very light coating of paint that when sanding the paint will show the imperfections. If you sand until the guide coat is gone it should be very even. Guide coats work best when used with a sanding block or for curved surfaces use a sanding sponge.
Dtn's method of gloss is ok too but you have to rely on light being reflected in the gloss. The guide coat shows more and will be less sanding than trying to take off a coat of paint.
Use a flashlight or shop light and move it around your project to try and find the imperfections before you finish. Bumps will cast a small shadow and low spots might be easier to see. Did you ever see a paint booth where they have tons of lights on the wall and ceilings?
The only reason I wouldn't use spackle is because most of it is water based and can get soft when wet even after it sets.
You can use a flexible bumper filler. Use it as a top coat before painting, it goes on and sands alot smoother than bondo and flexes with the bumper a little to prevent cracks.
Do a final sanding with a guide coat. Its pretty much a very light coating of paint that when sanding the paint will show the imperfections. If you sand until the guide coat is gone it should be very even. Guide coats work best when used with a sanding block or for curved surfaces use a sanding sponge.
Dtn's method of gloss is ok too but you have to rely on light being reflected in the gloss. The guide coat shows more and will be less sanding than trying to take off a coat of paint.
QUOTE
when i prime it there are some lumps or patches that show in the light.
Use a flashlight or shop light and move it around your project to try and find the imperfections before you finish. Bumps will cast a small shadow and low spots might be easier to see. Did you ever see a paint booth where they have tons of lights on the wall and ceilings?
QUOTE
spackle can be used, all has the same function. bending the bumper isn't enough to crack those small things.
The only reason I wouldn't use spackle is because most of it is water based and can get soft when wet even after it sets.
You can use a flexible bumper filler. Use it as a top coat before painting, it goes on and sands alot smoother than bondo and flexes with the bumper a little to prevent cracks.
Administrator
Joined: Oct 2002
Posts: 13,943
Likes: 0
From: ɯooɹpǝq ɹnoʎ
Vehicle: ǝdnoɔ sısǝuǝƃ
reread my post DTN. I meant to sand after each of the final layers of bondo, when you're trying to finalize it and make it smooth and perfect. I didn't say to sand each layer of fiberglass. I also wasn't sure if he was using fiberglass resin or fiberglass mat/cloth, that also makes a difference, but I was talking about the final bondo.
QUOTE (majikTib @ Dec 7 2008, 01:40 PM)
I use fiberglass to make the patch and bondo to fill in and sand the final few layers. Sand after each layer to make it smooth.
QUOTE (DTN @ Dec 7 2008, 04:51 PM)
Sanding layers of fiberglass? That's wasteful and time consuming. FG never comes out flat. All the FG resin you've mixed dries out and you have to clean up or you'll need a new paint brush. You have to wait for the FG to dry to sand it. Also, FG changes slightly after it hardens, it takes a day to cure fully and you should not begin final work until it's cured. Just lay down all the layers, then sand. If you want to build on the fg, use bondoglass. It just takes time and patience to get a good job done. Check out my Fiberglassing in a Tib DIY in the DIY section.
Moderator
Joined: Feb 2009
Posts: 11,732
Likes: 5
From: Leesville, Louisiana
Vehicle: 2001 Hyundai Tiburon
^^ok, i see, I thought you were saying to sand between layers of fiberglass. My bad mang.
I usually use the filler primer as a guide coat. Filler primer builds up a large thick layer and once you start seeing FG, then you know you're down to where you need to be. That still leaves larger imperfections on a curved surface where the sanding sponge tends to dig into the peak of the curve. I use the glossy paint method to identify areas which might still need work. This allows you to spread some bondo on the blemish and work in a much smaller area to finish the job. It's difficult to work with FG using just a guide coat because the FG/bondoglass/glazing putty/bondo is multi-colored. The black also gives you a fresh starting point which you can identify as being sanded "enough". No need to remove all the paint as bondo really holds onto paint especially when it's less then 3 days old.
That looks like it's for rubber/plastic/ABS. Fiberglass is pretty hard compairitively. Are you sure that will work?
QUOTE (Tib001 @ Dec 7 2008, 08:49 PM)
Do a final sanding with a guide coat. Its pretty much a very light coating of paint that when sanding the paint will show the imperfections. If you sand until the guide coat is gone it should be very even. Guide coats work best when used with a sanding block or for curved surfaces use a sanding sponge.
I usually use the filler primer as a guide coat. Filler primer builds up a large thick layer and once you start seeing FG, then you know you're down to where you need to be. That still leaves larger imperfections on a curved surface where the sanding sponge tends to dig into the peak of the curve. I use the glossy paint method to identify areas which might still need work. This allows you to spread some bondo on the blemish and work in a much smaller area to finish the job. It's difficult to work with FG using just a guide coat because the FG/bondoglass/glazing putty/bondo is multi-colored. The black also gives you a fresh starting point which you can identify as being sanded "enough". No need to remove all the paint as bondo really holds onto paint especially when it's less then 3 days old.
QUOTE
You can use a flexible bumper filler. Use it as a top coat before painting, it goes on and sands alot smoother than bondo and flexes with the bumper a little to prevent cracks.
That looks like it's for rubber/plastic/ABS. Fiberglass is pretty hard compairitively. Are you sure that will work?