
Shifter Base Issue


Senior Member

Joined: Aug 2009
Posts: 11,992
Likes: 0
From: Washington D.C.
Vehicle: Hyundai Tiburon FX
all you need is some adequately thick aluminum brackets, bench grinder, table clamp, drills for metal, screws, and patience.
theoretically both methods are good. mines the first one:


haha @ my rugrats drawings, but you get the point.
theoretically both methods are good. mines the first one:
haha @ my rugrats drawings, but you get the point.

Senior Member
Joined: Mar 2002
Posts: 34,642
Likes: 0
From: Los Lunas, New Mexico, USA.
Vehicle: 2001 Hyundai Tiburon, 2004 Kia Sorento, 2010 Kia Soul
QUOTE (UrS0NvS @ May 8 2009, 08:04 PM)
^^^ or you could just give him your photobucket link, DUH!!!
http://smg.photobucket.com/albums/v131/REDZMAN/
http://smg.photobucket.com/albums/v131/REDZMAN/
Yeah, I just don't have the link memorized.
That's actually kinda disturbing that YOU have it memorized Lee...
LOL
Again, get PICTURES, then we can help more.
Thread Starter
Senior Member
Joined: Sep 2009
Posts: 267
Likes: 1
From: Northwest Arkansas, cue the banjos.
Vehicle: 2001 Tiburon 5spd
Sorry guys, I posted all of my results in my showroom thread and forgot to consider this one resolved. Here's some pics indicating what I did.
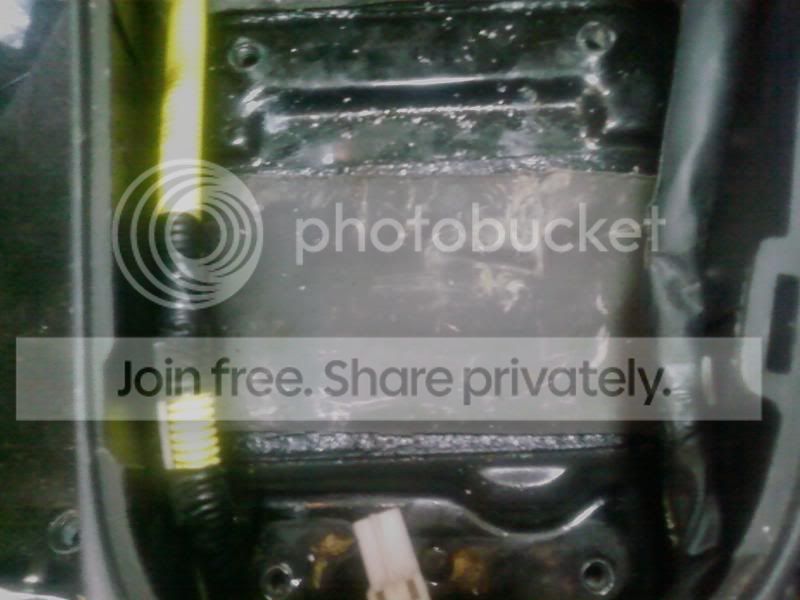
Here are the locations of the four bolt holes. The front two are too far forward and too far out.
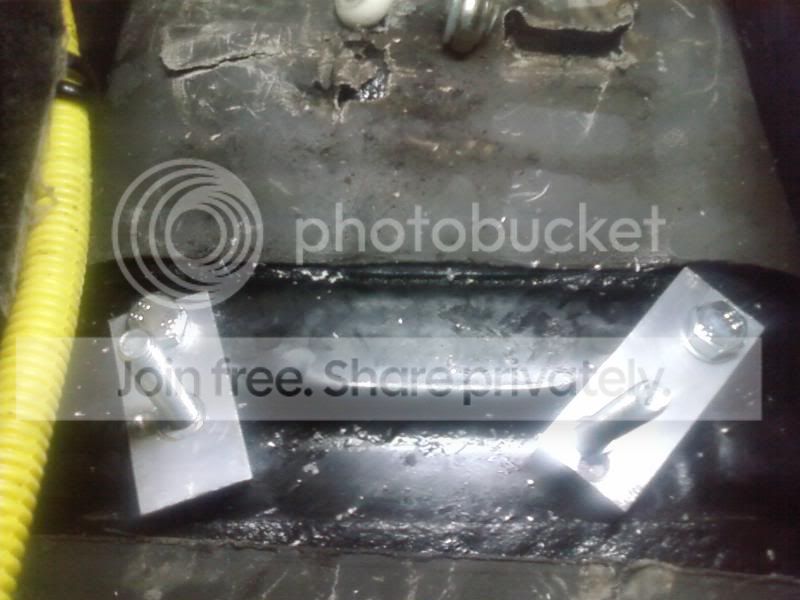
I headed over to home depot and got some bolts, nuts, washers, and a few feet of aluminum to work with. I cut a few small strips and drilled some holes in them, bolted them down, then installed the bracket. Looking through the front two holes, I aligned the metal strips, then marked them for drill holes. I took everything off again and drilled the holes and ran long bolts through them, getting this:
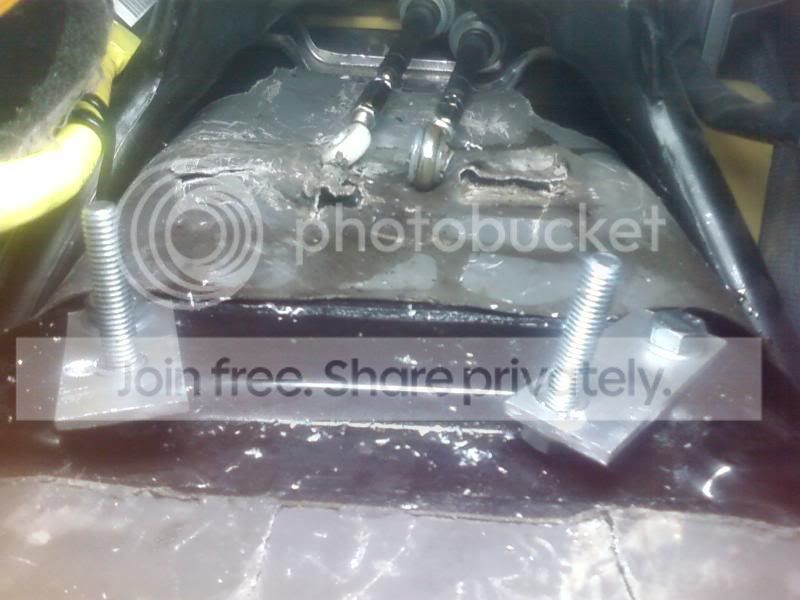
Next, test fit it with the bracket to make sure it was kosher.
It was all good, so I installed everything.
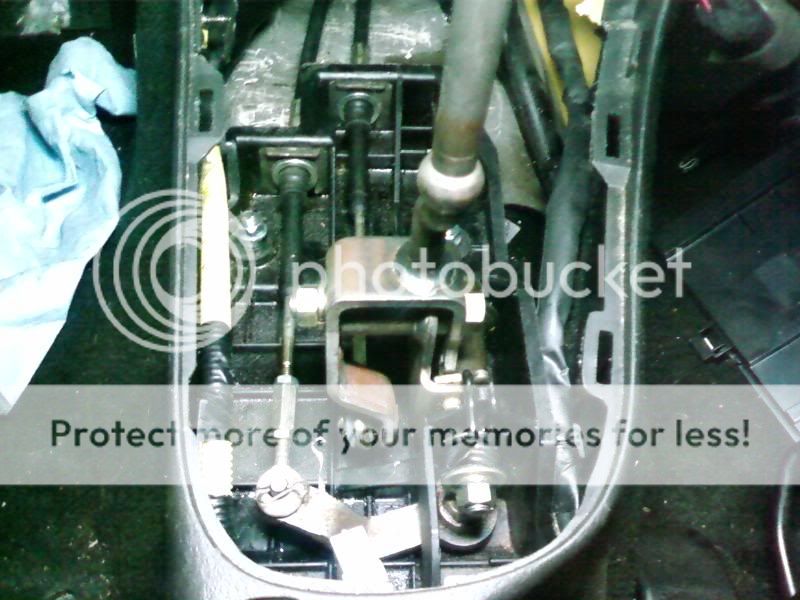
Note that the two metal spacers in the front two holes of the bracket were replaced with longer versions, this way everything sits flush with everything.
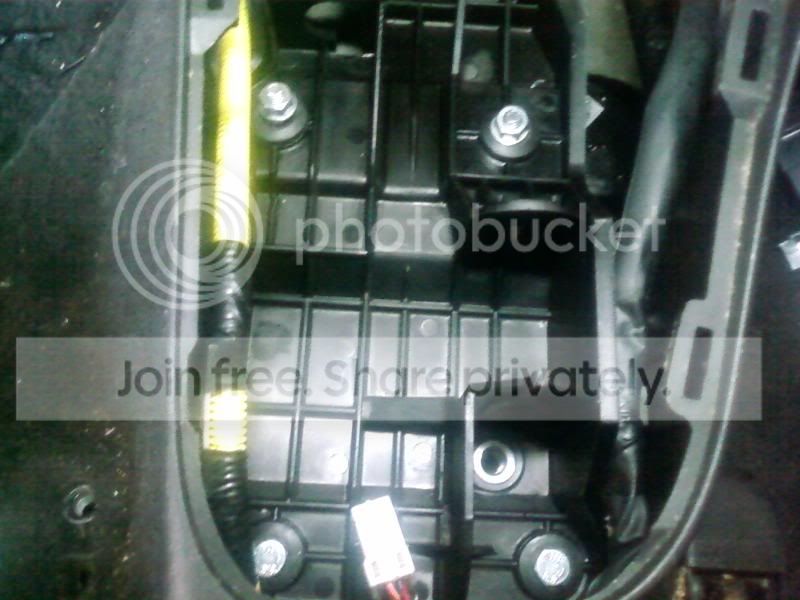
If I'd had a TIG welder and more time, I'd have made a really nice looking one-piece bracket, but I didn't so I didn't. In the future I may make one.
Hopefully this helps out the next person who does the auto->manual swap.
Here are the locations of the four bolt holes. The front two are too far forward and too far out.
I headed over to home depot and got some bolts, nuts, washers, and a few feet of aluminum to work with. I cut a few small strips and drilled some holes in them, bolted them down, then installed the bracket. Looking through the front two holes, I aligned the metal strips, then marked them for drill holes. I took everything off again and drilled the holes and ran long bolts through them, getting this:
Next, test fit it with the bracket to make sure it was kosher.
It was all good, so I installed everything.
Note that the two metal spacers in the front two holes of the bracket were replaced with longer versions, this way everything sits flush with everything.
If I'd had a TIG welder and more time, I'd have made a really nice looking one-piece bracket, but I didn't so I didn't. In the future I may make one.
Hopefully this helps out the next person who does the auto->manual swap.