
Tibby01's Glow needle DIY


Thread Starter
Senior Member
Joined: Mar 2006
Posts: 9,172
Likes: 0
Vehicle: 2001/Hyundai/Tiburon
Allrighty guys, here it is. i dont know how well this works with the stock bulbs(you can see why as you read), so i'd only recommend doing it if you're using EL gauge faces, or if you want to wait for me to write up my second part on how to led the tick marks and such. wink.gif ill do that one after i get some sleep.
Skill level:
I'd say moderate, but if you know a bit about electronics and can solder good, then id say easy, just a bit tedious.
Tools:
-regular sized philips screwdriver
-small philips screwdriver
-electric tape
-10 total 3mm leds already with 470 ohm resistors. color of your choice.
-some small insulated wire...i guess about 5 ft. total, just an approximation though. you may want to make it different colored too(for +and -).
-metallic paint(whatever color needles you want). i use a paint pen from my local hobby shop. heres a pic of it...http://ourworld.cs.com/Luigi3011/DSCN1029.JPG
-OOOPS!!!! its a stain remover type thing. you can find it at any grocery store. others would prolly work, but this stuff works fast, and leaves the needles crystal clear.
-Q-tips
-soldering iron...i HIGHLY reccomend this, anyone will work though. the hot knife attachment with this cuts through plastic like butter.

at the bottom here. http://atexelectronics.com/solderin.htm#Co...0Output%20Irons
-dremel tool. you will need a sanding peice, drill bit, and cutting peice(unless you use the HK attachment above). i think the standard dremel drill bit is like 3/8".
Steps:
1. Remove cluster. Use www.hmaservice.com/webtech if you don't know how.

2. Begin to disassemble cluster. there are clips around the thing. you dont have to take out the two screws on front, just remove the clear plastic and black peice as one.


3. Take off the needles. a fork works the best. slip it under and pry the needle off. be careful though.


4. remove the faces. i dont think the rd1 clusters have them, but i do think the rd2 clusters have little clips where the needle rests on those little black plastic needles. they will come off, just give them some "gentle force"...lol

5. remove these screws. be careful, stuff will start to fall out of the other end. AND....make sure to note how the water temp and fuel gauges sit in there. which color is where, and its orientation(which side the little resstor looking things stick out). im not sure if the picture has them in there correct(im pretty sure, but if someone want to clear it up, that would be great).

6. remove the clear peices from the assemblies. little black screws(careful, they strip easily) for the tach, temp., and fuel gauge. for the speedometer, there are two screws on the back to get it off.


7.(two 7s, cause im stupid and forgot a step)
to help with clearance on the speedo, there are two little parts you can sand down. they are labeled here.

Do not do this next step if you are planning on trying to use the stock bulbs with this needle mod. this step just clears room out for people with el gauges, its not necessary...just makes the job easier.
7. the little "light deflector things" as i so deemed them earlier can be cut as long as you have el gauges, or are planning to do my tick mark led DIY later. if you have bulbs and you do this, it will prolly make everything really uneven. i wouldnt even try this with the stock bulbs though, because you are melting the clear plastic, and it might mess up the reflection system in these clear plastic peices. anywho, yeah, cut these things off...

8. after they are cut off...break off those little clear rod things too. i believe they are only on the speedo and tach clear peices. you can barely see them in the first pic.


9. LED PREP...
take the 3mm leds and shave them down as much as possible. shave the sides, and the top, just dont break it.couldnt really get good pictures.

shaved vs. regular(hehehe)

after this, put two together right next to each other, then solder some wire to em. make sure the ground leads are on the inside, and the power ones(with resistors) are on the outside.
10. in the middle of the clear plastic peices, you can see where the light is reflected up to the needle. you will want to drill the holes in that part, and then aim a led up towards the needle. 4 holes for the speedo, and then two for all the other needles. space them out evenly across the reflector's range. make them a little bigger than the led too, so you can move the led around a little once you get it secured in there, for aiming it properly. sorry, no pics, but you can see where i put mine in the ones below.
11. bend the tops of the leds at a 90 degree angle. put them through the drilled holes, pointing towards where the needle would be. close to the led, push down the leads with the soldering iron. it will eventually melt the LED lead into the clear plastic, securing it in place, and providing clearance for the little bits that move the needles. do this a good ways down the led, untill you feel the thing is secure. you will have to make sure that the power and ground leads dont touch, and that you bend what you dont melt in around thing that might get in the way(there is a beige block that sticks out on the speedo thing). this is why you want to take out the individual assemblies too, so you can match it up to the clear plastic peices to make sure nothing is touching. the speedo has the biggest clearance problems, the other arent bad at all. here is a shot of one LED cluster in.


12. do the same to the other side of the speedo, then test.

13. here are shots of what the placement looks like on each peice.
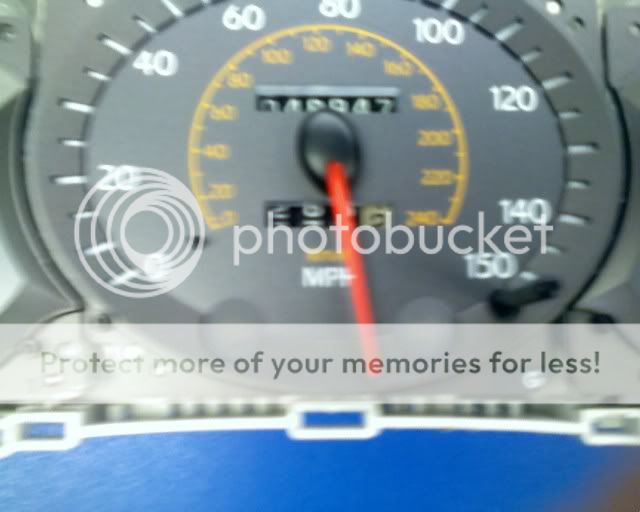
speedo.

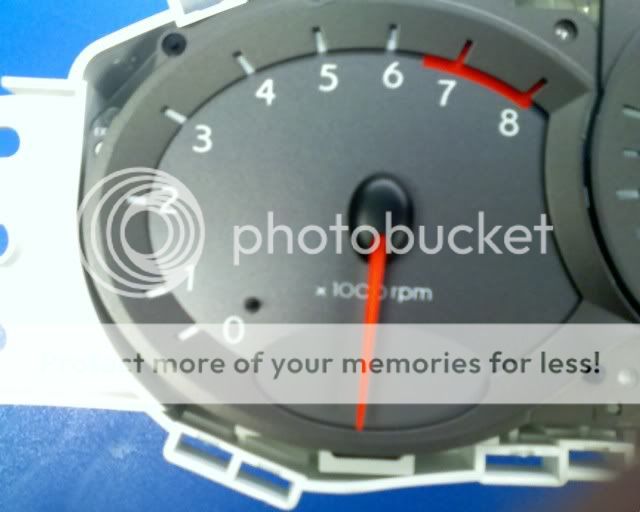
tach.

temp./fuel.

14. to power, you can
1.drill holes in the back of the cluster to run wires out. be sure not to drill through circuits though!!!
2. use a stock bulb housing and solder the wires in there. then just pop that in the bulb spot. if they dont turn on when you hit the headlights, turn the housing around and put it in that way. actually, somewhere on the circuit "board" there is a label for iluminations + or maybe -. follow that down, untill it gets to the bulb spot, then you'll know which is + and which is -.
3. solder the wires directly on the bulb spot. make sure to cover it with electric tape or liquid electric tape, you dont want things exposed.
OH YEAH,
to change the color of the needles(its already done, but you'll get the idea):
15. pick at the two little studs in the pic with a razorblade until you can take it apart.

16. once apart, dip the q-tip in ooops!!!, and wipe the stock color completely off the needle.
17. dab the paint pen on something first, to get the ink flowing. then dab the back and about a quarter of the way around the side. do not get it anywhere near the fronts of the needles. id say about 3 coats usually does it, just make sure the back is completely covered.

18. put the needles on, and use something flat to slightly bend the led if the needle doesnt stay completely lit through out its range.
19. install everything in the reverse direction.
Skill level:
I'd say moderate, but if you know a bit about electronics and can solder good, then id say easy, just a bit tedious.
Tools:
-regular sized philips screwdriver
-small philips screwdriver
-electric tape
-10 total 3mm leds already with 470 ohm resistors. color of your choice.
-some small insulated wire...i guess about 5 ft. total, just an approximation though. you may want to make it different colored too(for +and -).
-metallic paint(whatever color needles you want). i use a paint pen from my local hobby shop. heres a pic of it...http://ourworld.cs.com/Luigi3011/DSCN1029.JPG
-OOOPS!!!! its a stain remover type thing. you can find it at any grocery store. others would prolly work, but this stuff works fast, and leaves the needles crystal clear.
-Q-tips
-soldering iron...i HIGHLY reccomend this, anyone will work though. the hot knife attachment with this cuts through plastic like butter.
at the bottom here. http://atexelectronics.com/solderin.htm#Co...0Output%20Irons
-dremel tool. you will need a sanding peice, drill bit, and cutting peice(unless you use the HK attachment above). i think the standard dremel drill bit is like 3/8".
Steps:
1. Remove cluster. Use www.hmaservice.com/webtech if you don't know how.
2. Begin to disassemble cluster. there are clips around the thing. you dont have to take out the two screws on front, just remove the clear plastic and black peice as one.
3. Take off the needles. a fork works the best. slip it under and pry the needle off. be careful though.
4. remove the faces. i dont think the rd1 clusters have them, but i do think the rd2 clusters have little clips where the needle rests on those little black plastic needles. they will come off, just give them some "gentle force"...lol
5. remove these screws. be careful, stuff will start to fall out of the other end. AND....make sure to note how the water temp and fuel gauges sit in there. which color is where, and its orientation(which side the little resstor looking things stick out). im not sure if the picture has them in there correct(im pretty sure, but if someone want to clear it up, that would be great).
6. remove the clear peices from the assemblies. little black screws(careful, they strip easily) for the tach, temp., and fuel gauge. for the speedometer, there are two screws on the back to get it off.
7.(two 7s, cause im stupid and forgot a step)
to help with clearance on the speedo, there are two little parts you can sand down. they are labeled here.
Do not do this next step if you are planning on trying to use the stock bulbs with this needle mod. this step just clears room out for people with el gauges, its not necessary...just makes the job easier.
7. the little "light deflector things" as i so deemed them earlier can be cut as long as you have el gauges, or are planning to do my tick mark led DIY later. if you have bulbs and you do this, it will prolly make everything really uneven. i wouldnt even try this with the stock bulbs though, because you are melting the clear plastic, and it might mess up the reflection system in these clear plastic peices. anywho, yeah, cut these things off...
8. after they are cut off...break off those little clear rod things too. i believe they are only on the speedo and tach clear peices. you can barely see them in the first pic.
9. LED PREP...
take the 3mm leds and shave them down as much as possible. shave the sides, and the top, just dont break it.couldnt really get good pictures.
shaved vs. regular(hehehe)
after this, put two together right next to each other, then solder some wire to em. make sure the ground leads are on the inside, and the power ones(with resistors) are on the outside.
10. in the middle of the clear plastic peices, you can see where the light is reflected up to the needle. you will want to drill the holes in that part, and then aim a led up towards the needle. 4 holes for the speedo, and then two for all the other needles. space them out evenly across the reflector's range. make them a little bigger than the led too, so you can move the led around a little once you get it secured in there, for aiming it properly. sorry, no pics, but you can see where i put mine in the ones below.
11. bend the tops of the leds at a 90 degree angle. put them through the drilled holes, pointing towards where the needle would be. close to the led, push down the leads with the soldering iron. it will eventually melt the LED lead into the clear plastic, securing it in place, and providing clearance for the little bits that move the needles. do this a good ways down the led, untill you feel the thing is secure. you will have to make sure that the power and ground leads dont touch, and that you bend what you dont melt in around thing that might get in the way(there is a beige block that sticks out on the speedo thing). this is why you want to take out the individual assemblies too, so you can match it up to the clear plastic peices to make sure nothing is touching. the speedo has the biggest clearance problems, the other arent bad at all. here is a shot of one LED cluster in.
12. do the same to the other side of the speedo, then test.
13. here are shots of what the placement looks like on each peice.
speedo.
tach.
temp./fuel.
14. to power, you can
1.drill holes in the back of the cluster to run wires out. be sure not to drill through circuits though!!!
2. use a stock bulb housing and solder the wires in there. then just pop that in the bulb spot. if they dont turn on when you hit the headlights, turn the housing around and put it in that way. actually, somewhere on the circuit "board" there is a label for iluminations + or maybe -. follow that down, untill it gets to the bulb spot, then you'll know which is + and which is -.
3. solder the wires directly on the bulb spot. make sure to cover it with electric tape or liquid electric tape, you dont want things exposed.
OH YEAH,
to change the color of the needles(its already done, but you'll get the idea):
15. pick at the two little studs in the pic with a razorblade until you can take it apart.
16. once apart, dip the q-tip in ooops!!!, and wipe the stock color completely off the needle.
17. dab the paint pen on something first, to get the ink flowing. then dab the back and about a quarter of the way around the side. do not get it anywhere near the fronts of the needles. id say about 3 coats usually does it, just make sure the back is completely covered.
18. put the needles on, and use something flat to slightly bend the led if the needle doesnt stay completely lit through out its range.
19. install everything in the reverse direction.
Thread Starter
Senior Member
Joined: Mar 2006
Posts: 9,172
Likes: 0
Vehicle: 2001/Hyundai/Tiburon
Comments post...
~~~~~~~~~~~~~~~~
REDZMAN - Not too bad man.
A butane Soldering Iron?
Way too complex for me, soldering is for real men, I can't do it.
-----------------------------------------------------------------------------------
tibby01 - yeah, its a butane-powered soldering iron. it last forever, and performs great. have you ever tried soldering? i learned that a lot of times people have troubles, is that their gun sucks, and doesnt heat up enough. whenever i solder, i melt a little solder on the tip, then i push the tip on whatever joint im soldering. then with the joint and tip touching, i melt a little more solder on the tip. you might see it start to flow through the joint, which is good, it heats the joint up quick. eventually, get to the point where you are melting the solder directly on the joint, not the tip of the soldering iron.
if you want to learn, get this soldering gun. its great for beginners and experts. hmmm....maybe ill make up a soldering DIY, with a couple of pictures to help guide.
-----------------------------------------------------------------------------------
REDZMAN - If you can do a clear DIY on soldering, I'd give it a try. It can't be that hard.
Maybe I just do need a good gun. I know about tinning the iron and flux and such, I've watched my dad do it tons of times (Model Railroader).
Maybe I just need to cut up some wires and practice eh?
Good DIY BTW, this is an example on how they SHOULD be written.
------------------------------------------------------------------------------------
tibwrcsbj -
just thought i'd share if ne1 wants it..........
http://cgi.ebay.com/ebaymotors/ws/eBayI ... 6&rd=1
-------------------------------------------------------------------------------------
tibby01 - and this...
http://cgi.ebay.com/ebaymotors/ws/eBayI ... eName=WDVW
-------------------------------------------------------------------------------------
TiNsPoOn - Has anyone changed the color of the needles using the oem bulbs? If so, did the bulbs still light the entire needle through the paint?
------------------------------------------------------------------------------------
tibby01 - i just wanted to say, we tried this mod on my friend's eclipse cluster, which is very similiar in how it works to ours. we just used the stock bulbs and painted the needles, and it turned out like crap.
------------------------------------------------------------------------------------
TiNsPoOn - aight, i was just curious. thanks
Senior Member

Joined: Mar 2002
Posts: 34,642
Likes: 0
From: Los Lunas, New Mexico, USA.
Vehicle: 2001 Hyundai Tiburon, 2004 Kia Sorento, 2010 Kia Soul
No offence doode, it was a nice idea, but that hurts the eyes. Take it out please!!!
Specially the posts that have nothing to do with it. I did that on most of mine.
Specially the posts that have nothing to do with it. I did that on most of mine.

Senior Member
Joined: Jan 2002
Posts: 686
Likes: 0
From: New Zealand
Vehicle: FX Coupe
Hay 01
Whats Ooops? and what can be used as a substitute?
Also tibby have you had a chance to do the 2nd part of the DIY?
mang i would love to buy them off you but the whole shippingdifferent country is just a pain in the A$$
Great effort you've done tho.. wink.gif
Whats Ooops? and what can be used as a substitute?
Also tibby have you had a chance to do the 2nd part of the DIY?
mang i would love to buy them off you but the whole shippingdifferent country is just a pain in the A$$
Great effort you've done tho.. wink.gif
Thread Starter
Senior Member
Joined: Mar 2006
Posts: 9,172
Likes: 0
Vehicle: 2001/Hyundai/Tiburon
oops is like a paint thinner type acetone liquid. i dont really know what can be used as a substitute, but if you guys have a walmart over there, they should have some of the stuff.
yeah, i gotta get to making that second part. its not to hard, just a lot of work. im going to wait untill i make up a second cluster, so i can get some good pictures doing it.
yeah, i gotta get to making that second part. its not to hard, just a lot of work. im going to wait untill i make up a second cluster, so i can get some good pictures doing it.

Moderator

Joined: Feb 2009
Posts: 11,732
Likes: 5
From: Leesville, Louisiana
Vehicle: 2001 Hyundai Tiburon
if you rotate the pins where the needles sit clockwise, then wait 2 minutes for them to completely stop moving, this is the resting position. This should help for an aproximation calibration of these two needles. Can't really help for the coolant and the fuel because the fuel stays constant and the coolant rests below 0
Lighter fluid can be used instead of oops.
Lighter fluid can be used instead of oops.