
Side-view Mirror Rattle Fix


Thread Starter
Senior Member
Joined: Mar 2006
Posts: 9,172
Likes: 0
Vehicle: 2001/Hyundai/Tiburon
This DIY goes along with the rear-view mirror rattle fix we have.
Materials:
- Sound deadening
- 10mm socket and wrench
- screwdriver
- razorblade
Steps:
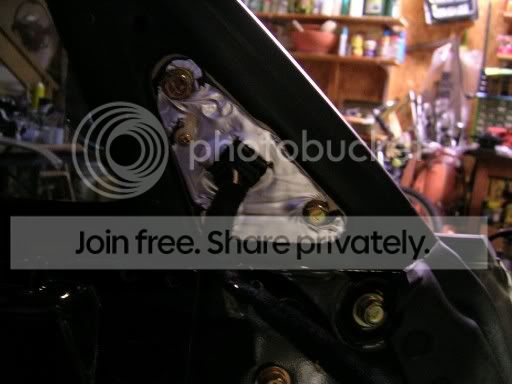
1. Remove door panel and triangular panel on inside of side-view mirror.
2. Remove the bolts, screws, and unplug the harness...
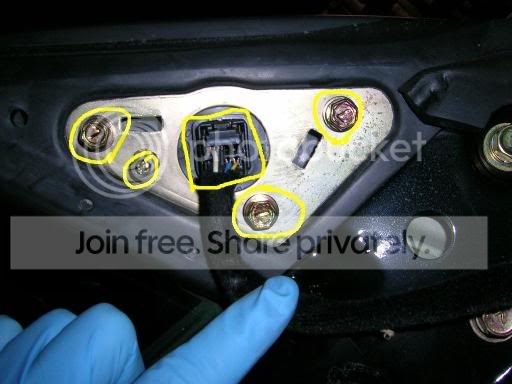
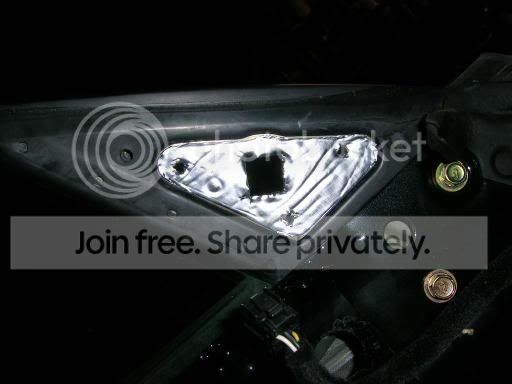
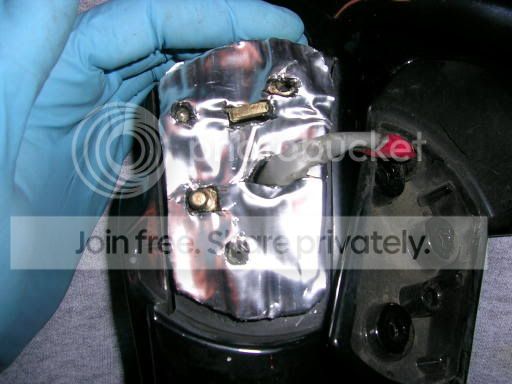
3. Lay down deadening on both sides of the metal that the mirror bolts on and make cut-outs for the things that will have to go back through. Its ok if the cutouts are not perfect.
4. On to the mirror. On the bottom, unscrew the screws circled...
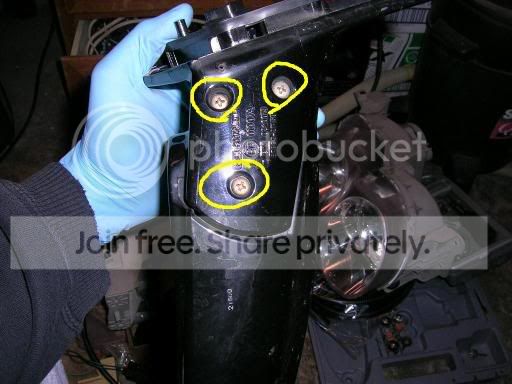
5. When the screws are out, DO NOT yank the peices apart. As you can see in this picture, there is a bundle of wires under a little clamp that you need to push into the open to get slack...
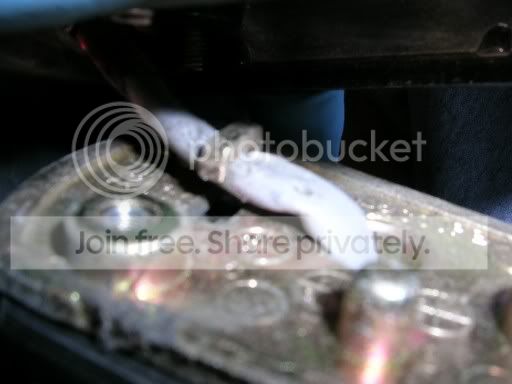
6. Lay down deadening on this peice as well. You will have to make some cuts on this too, but it is good to have the screw go through some of the deadening. It will make it hold better, and vibrate less...
7. Put everything back together and screw/bolt right through the deadening. Just be careful. I've noticed that putting on bolts through deadening gives you a tendency to overtighten, and ive snapped a couple of bolts elsewhere. owned.gif I would recommend just using a hand driver with the sockets if you have one.
Materials:
- Sound deadening
- 10mm socket and wrench
- screwdriver
- razorblade
Steps:
1. Remove door panel and triangular panel on inside of side-view mirror.
2. Remove the bolts, screws, and unplug the harness...
3. Lay down deadening on both sides of the metal that the mirror bolts on and make cut-outs for the things that will have to go back through. Its ok if the cutouts are not perfect.
4. On to the mirror. On the bottom, unscrew the screws circled...
5. When the screws are out, DO NOT yank the peices apart. As you can see in this picture, there is a bundle of wires under a little clamp that you need to push into the open to get slack...
6. Lay down deadening on this peice as well. You will have to make some cuts on this too, but it is good to have the screw go through some of the deadening. It will make it hold better, and vibrate less...
7. Put everything back together and screw/bolt right through the deadening. Just be careful. I've noticed that putting on bolts through deadening gives you a tendency to overtighten, and ive snapped a couple of bolts elsewhere. owned.gif I would recommend just using a hand driver with the sockets if you have one.

Member

Joined: Mar 2006
Posts: 50
Likes: 0
From: Fort Worth, Texas, USA
Vehicle: 2005 Hyundai Elantra GT 5-door
How can you tell if a rattle is coming from the mirror?
My Elantra seems to have a rattle in the area of the right side mirror, although I hadn't thought of the mirror as the cause until I saw this DIY. Is there way to tell definitively that the mirror is the problem?
My Elantra seems to have a rattle in the area of the right side mirror, although I hadn't thought of the mirror as the cause until I saw this DIY. Is there way to tell definitively that the mirror is the problem?
Moderator

Joined: Mar 2006
Posts: 6,976
Likes: 0
From: Arizona
Vehicle: N/A as in Not Applicable, not Naturally Aspirated
you could follow this DIY and see if it stops... shrug.gif
nice write-up tibby01, what? staring at your left-over sound deadening thinkin "such a waste, I will find a use for you..."
nice write-up tibby01, what? staring at your left-over sound deadening thinkin "such a waste, I will find a use for you..."
Member
Joined: Mar 2006
Posts: 50
Likes: 0
From: Fort Worth, Texas, USA
Vehicle: 2005 Hyundai Elantra GT 5-door
I could try that, but sometimes in taking things apart more rattles appear. I'm just trying to see if there is a definitive way to figure it out before tearing stuff apart.
Senior Member
Joined: Mar 2002
Posts: 34,642
Likes: 0
From: Los Lunas, New Mexico, USA.
Vehicle: 2001 Hyundai Tiburon, 2004 Kia Sorento, 2010 Kia Soul
Easiest way to find a rattle is to...
1. Note the instances it happens (Only at 3500 RPM's, from the center upper dash area on a Tib is actually rattling from the rear view mirror).
2. Recreate those factors from different areas of the car (Have a friend drive if it's on the passenger side and move your head around to triangulate the sound).
3. The loose part or assembly, try just putting a bit of pressure on it when recreating the "Rattle Factors" and see if it goes away.
If so, it's loose and you can tighten it up, or you can place some foam, rubber, gasket material, dynomat, ect, in between the rattling areas to get rid of it. If not, repeat the other steps and FIND THAT RATTLE!
Member
Joined: Mar 2006
Posts: 50
Likes: 0
From: Fort Worth, Texas, USA
Vehicle: 2005 Hyundai Elantra GT 5-door
Yeah, I've done most of that, which is why the passenger mirror is starting to sound like a possibility (since you can't lean on it with the windows up). The rattle that this DIY corrects: is it kind of a tick-tick-tickety-tick noise heard due to rough pavement? Cuz that's the best description I can come up with for the noise.
Maybe I'll just try the DIY and .
.
cool.gif
Maybe I'll just try the DIY and
.cool.gif