
Low Temperature Thermostat


Thread Starter
Senior Member

Joined: Mar 2009
Posts: 1,014
Likes: 0
From: Pa
Vehicle: 2000 Hyundai Tiburon
This diy will show you how to replace your oem thermostat with a new low temp unit. This will lower the temperature that your thermostat opens at by 20 degrees Fahrenheit (180 to 160); this will allow your engine to begin cycling the coolant at a lower temperature which will ease the stress on components and is reported to have mild performance boosts.
First, what you'll need:
12 mm wrench or socket and ratchet
you may need a new thermostat housing gasket if you mess yours up, mine came off and sealed back up fine
water/coolant to top off system
a bucket to catch the small amount that will drain when you open the thermostat housing
a new, low temp, thermostat, I used this one from autozone:
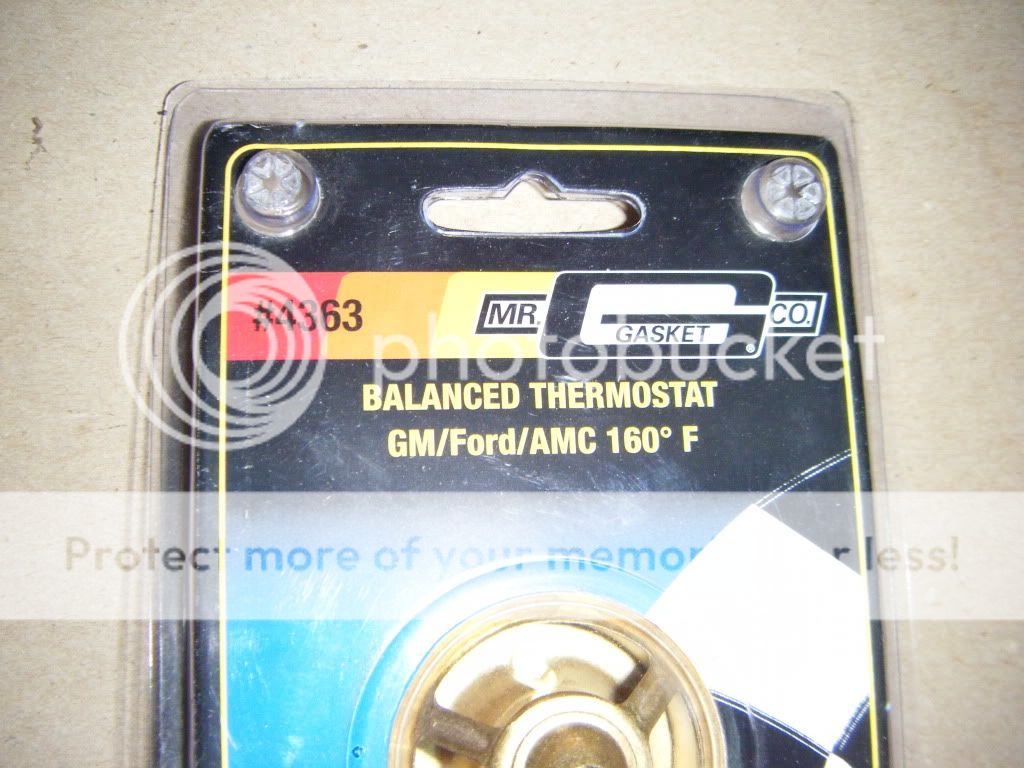
as you can see, it is a Mr. Gasket co thermostat, part number 4363; mine cost $9 and change.
Finally a six-pack of Iron City or Rolling Rock and if you're lucky, a pretty girl to open them for you. fing02.gif
Now, on to the work:
Step 1: Locate the thermostat housing, this is it; it is found on the driver's side of the cylinder head, slightly forward and below the coil:
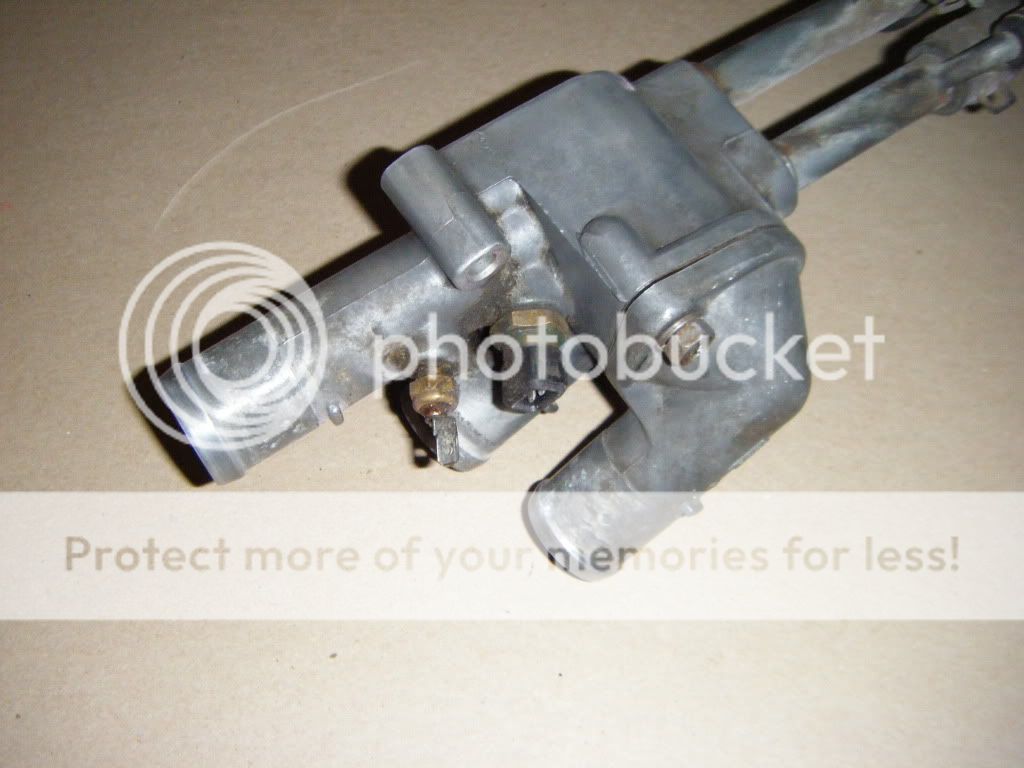
There is no need to remove the entire housing, mine was off for other reasons at the time.
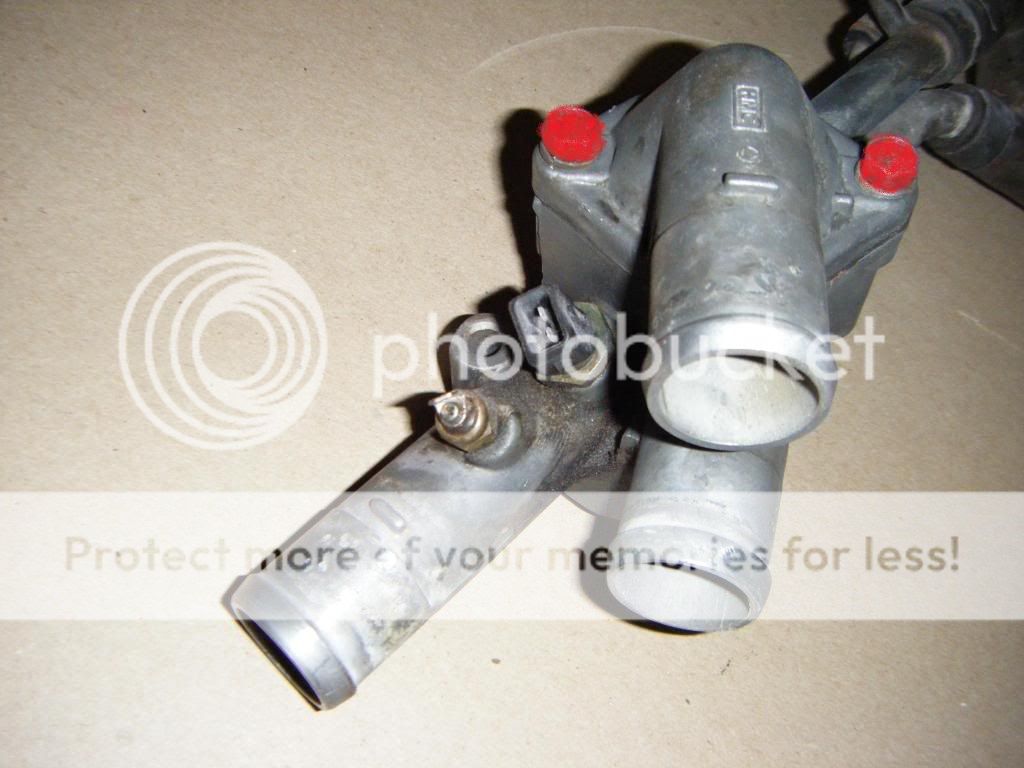
Step 2: Remove the two bolts holding the thermostat cover on, they are the ones highlighted in red
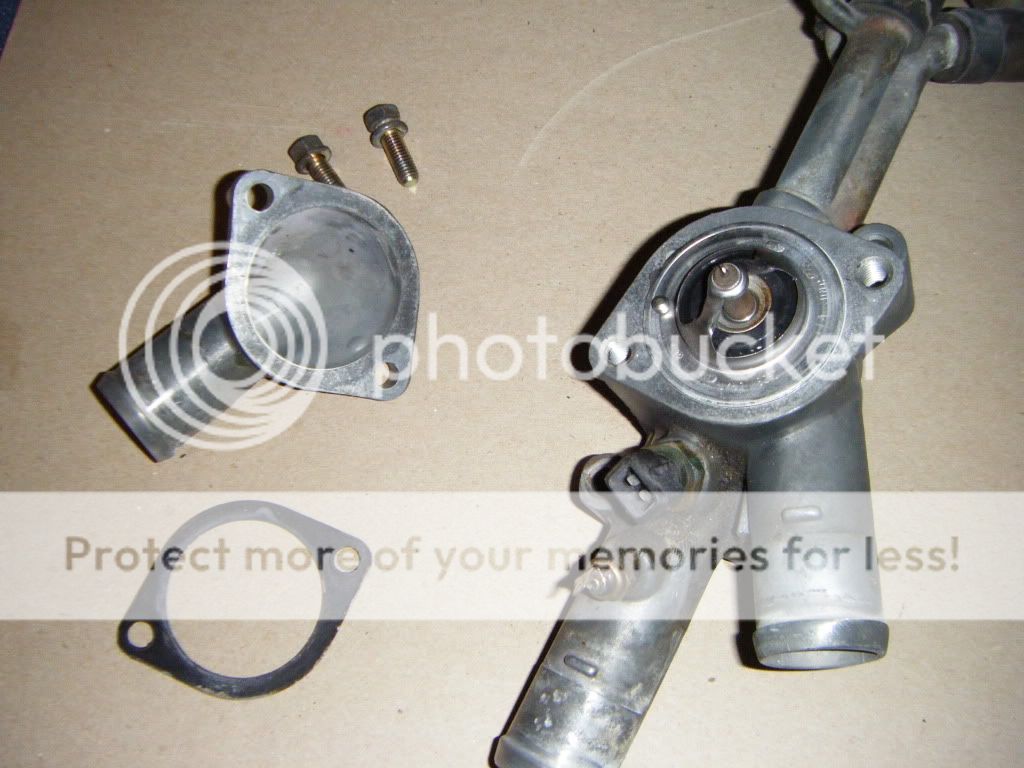
Step 3: Slowly remove the thermostat cover; this is the messy part where you're bound to lose some coolant unless you previously drained the system. As you remove the cover, take care not to damage the gasket in order to avoid buying a new one. The following is a picture of the unit as disassembled as is necessary for this mod:
Step 4: Remove the old thermostat, this is pretty easy, its just sitting there with nothing holding it in.
Step 5: Install the new thermostat, here is a picture of the new and old thermostats side by side:
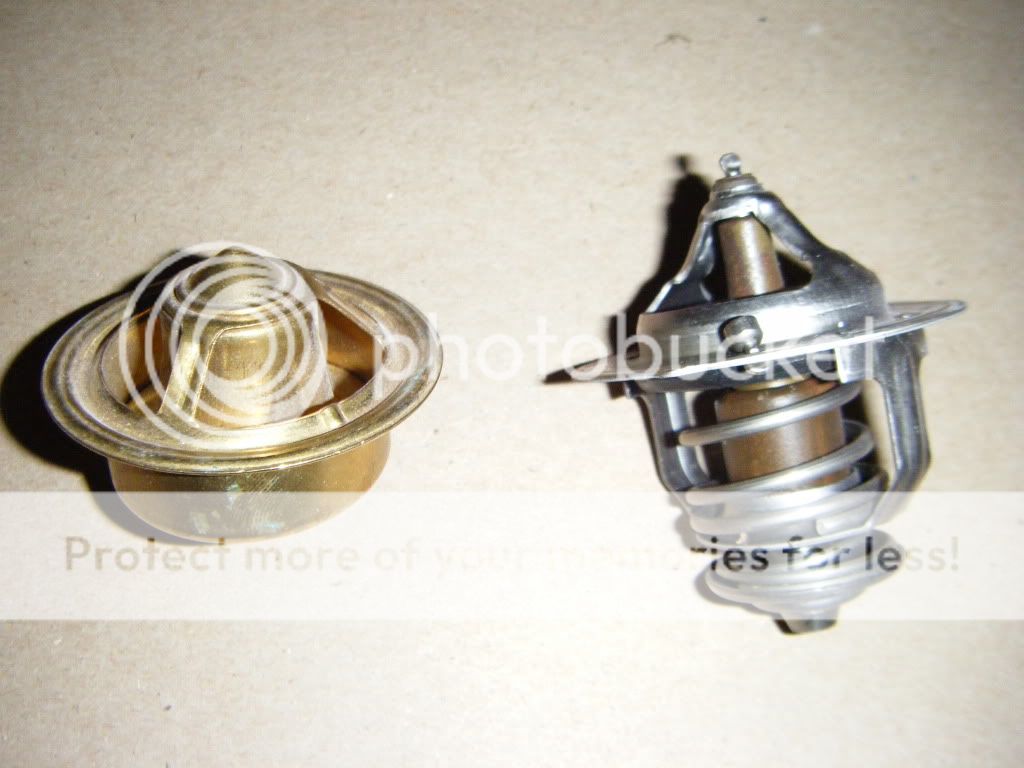
The cold colored one on the left is the new 160 degree unit and the silver one on the right is the 180 degree oem thermostat
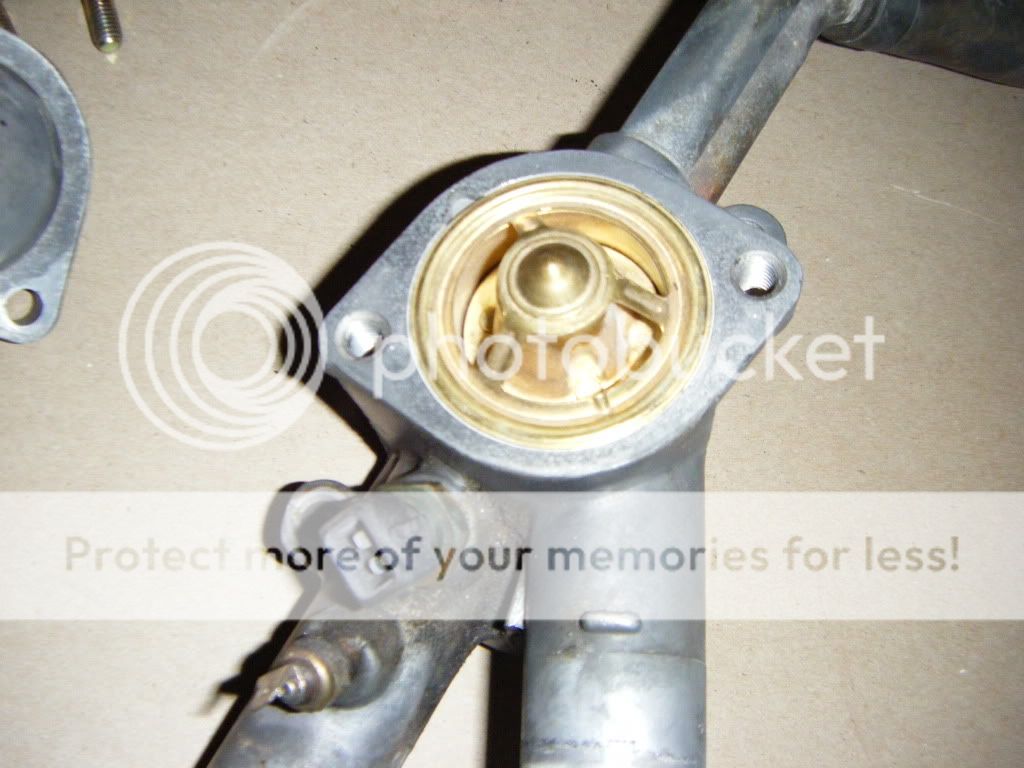
Here is a picture of the new thermostat placed in the housing:
To finish the assembly line up the thermostat gasket and cover, insert the bolts and tighten. Check to make sure you have all your tools, parts and bottle caps outside the engine.
When this is finished top off the coolant system and check for leaks, if none are found, start the car and again check for leaks and that the car doesn't begin to heat up excessively which could indicate inappropriate thermostat operation.
Step 6: Consume what should by now be the last beer and relax
First, what you'll need:
12 mm wrench or socket and ratchet
you may need a new thermostat housing gasket if you mess yours up, mine came off and sealed back up fine
water/coolant to top off system
a bucket to catch the small amount that will drain when you open the thermostat housing
a new, low temp, thermostat, I used this one from autozone:
as you can see, it is a Mr. Gasket co thermostat, part number 4363; mine cost $9 and change.
Finally a six-pack of Iron City or Rolling Rock and if you're lucky, a pretty girl to open them for you. fing02.gif
Now, on to the work:
Step 1: Locate the thermostat housing, this is it; it is found on the driver's side of the cylinder head, slightly forward and below the coil:
There is no need to remove the entire housing, mine was off for other reasons at the time.
Step 2: Remove the two bolts holding the thermostat cover on, they are the ones highlighted in red
Step 3: Slowly remove the thermostat cover; this is the messy part where you're bound to lose some coolant unless you previously drained the system. As you remove the cover, take care not to damage the gasket in order to avoid buying a new one. The following is a picture of the unit as disassembled as is necessary for this mod:
Step 4: Remove the old thermostat, this is pretty easy, its just sitting there with nothing holding it in.
Step 5: Install the new thermostat, here is a picture of the new and old thermostats side by side:
The cold colored one on the left is the new 160 degree unit and the silver one on the right is the 180 degree oem thermostat
Here is a picture of the new thermostat placed in the housing:
To finish the assembly line up the thermostat gasket and cover, insert the bolts and tighten. Check to make sure you have all your tools, parts and bottle caps outside the engine.
When this is finished top off the coolant system and check for leaks, if none are found, start the car and again check for leaks and that the car doesn't begin to heat up excessively which could indicate inappropriate thermostat operation.
Step 6: Consume what should by now be the last beer and relax
Senior Member
Joined: Mar 2002
Posts: 34,642
Likes: 0
From: Los Lunas, New Mexico, USA.
Vehicle: 2001 Hyundai Tiburon, 2004 Kia Sorento, 2010 Kia Soul
Dayum, nicely done, results?
I was looking at this a few years ago so, but didn't have a OEM thermostat to compare to the ones they had in stock.
I was looking at this a few years ago so, but didn't have a OEM thermostat to compare to the ones they had in stock.
Thread Starter
Senior Member
Joined: Mar 2009
Posts: 1,014
Likes: 0
From: Pa
Vehicle: 2000 Hyundai Tiburon
Thanks for the compliments, no results yet, I haven't been able to do more than run the car in the garage since installing it, hopefully itll be together and on the road soon though and I'll report back.
Senior Member
Joined: Mar 2002
Posts: 34,642
Likes: 0
From: Los Lunas, New Mexico, USA.
Vehicle: 2001 Hyundai Tiburon, 2004 Kia Sorento, 2010 Kia Soul
I'll really consider doing it after you confirm that it opens alright and that you don't have any temperature creep. I'm redoing my entire cooling system when i start rebuilding my car.
I'll really consider doing it after you confirm that it opens alright and that you don't have any temperature creep. I'm redoing my entire cooling system when i start rebuilding my car.
I'll really consider doing it after you confirm that it opens alright and that you don't have any temperature creep. I'm redoing my entire cooling system when i start rebuilding my car.


Junior Member
Joined: Apr 2010
Posts: 4
Likes: 0
Hi, I saw this topic and decided to do it on my 01 tiburon, since I am living in Arizona and it's summer time and super hot right now, anyway I installed the same exact part with my stock radiator. It keeps it cooler in the morning cuz the air is cooler but when it gets hot the rest of the day it is the same temperature that I had with my stock thermostat. I need a new bigger and lighter radiator.
Super Moderator

Joined: Dec 2001
Posts: 1,792
Likes: 0
From: Houston, Texas
Vehicle: 14 EGT 2.0
Unless the older tibs are different that coolant gauge is more like a dummy light. They will go to "normal" in a normal range. They are not staying at exactly the same temperature. Most car companies went to that when people made warranty claims when they noticed the car warming up a little like when idling on a hot freaking day with low air flow over the radiator, etc.

