
J2/RD Exhaust Camshaft On Intake Side Mod

Thread Starter
Senior Member

Joined: Jun 2012
Posts: 345
Likes: 3
From: NC
Vehicle: 2000 Hyundai Elantra GLS
Exhaust camshaft on intake side mod.
Why use two exhaust camshafts? The exhaust cam has more lift and longer duration than the factory intake camshaft which increases power. It does require some modification which I described in better detail below. Sorry for the blurry pictures.
I am writing this DIY for Beta 1 engines 1996-2000 Elantra, 1997-2001 Tiburon, 1.8 and 2.0 models. A couple people with Beta 2 non-cvvt engines have also done this. The steps should be mostly the same except the solid lifters will most likely need to be shimmed.
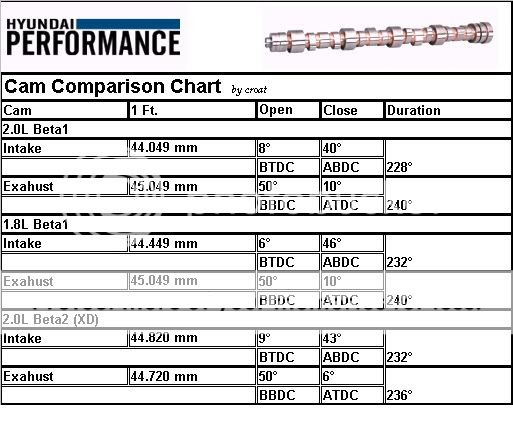
Camshaft chart:
Driving Impression: The car pulls a bit harder, mostly from about 3,000-5500rpm. I feel that it was worth the effort. There are no drawbacks that I know of.
So what modification is needed to the camshaft? A dowel pin for the cam sensor will need to be installed. The sprocket for the timing belt will need to be removed and the camshaft will have to be shortened. A new timing mark will also be needed.
What tools are needed? You will NEED a caliper for measuring. Basic hand tools/socket set. 22mm socket. Drill, 1/4" bit. Cutoff wheel, grinder. You will probably need access to a welder or know someone that does.
You NEED to get PRECISE measurements or you could end up with a check engine light. I do regret not writing all of the measurements down.
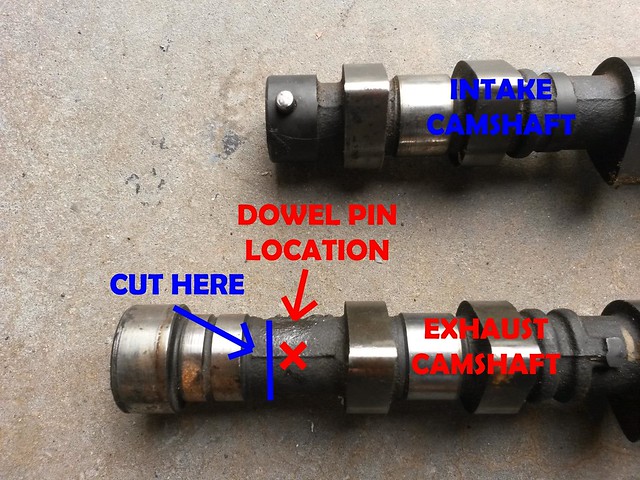
In the picture the timing sprocket has already been removed. Cut the end off of the camshaft.
For the dowel pin. I measured, marked the spot with a center punch. Drilled with an 1/8" bit and then 1/4" bit. I was expecting it to be tough to drill through but it's actually fairly soft metal.
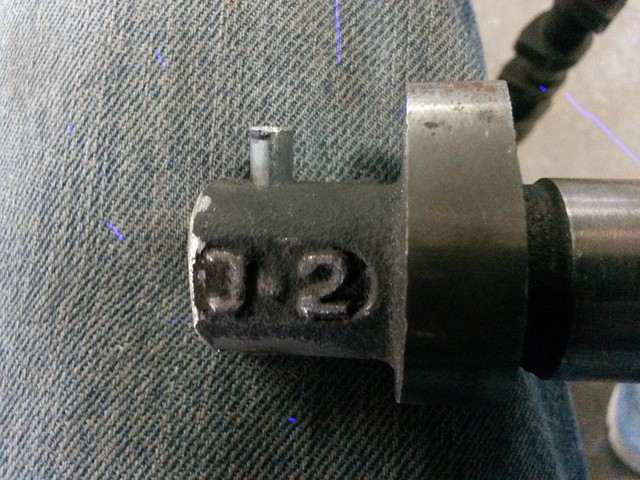
I bought a 1/4" x 3' steel dowel at home depot for like $2.00
I pressed it in with a rubber mallet. The fit was somewhat tight but didn't seem tight enough for something that spins up to 3375rpm.
So I drilled all the way through the cam and welded the back side of the cam to the dowel. It's a bit tough to weld cast to steel.
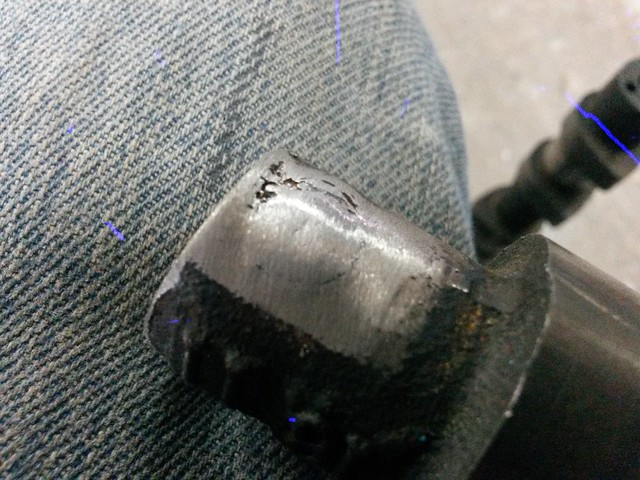
Grind it down to desired length. (note that the pictured dowel pin is still too long)
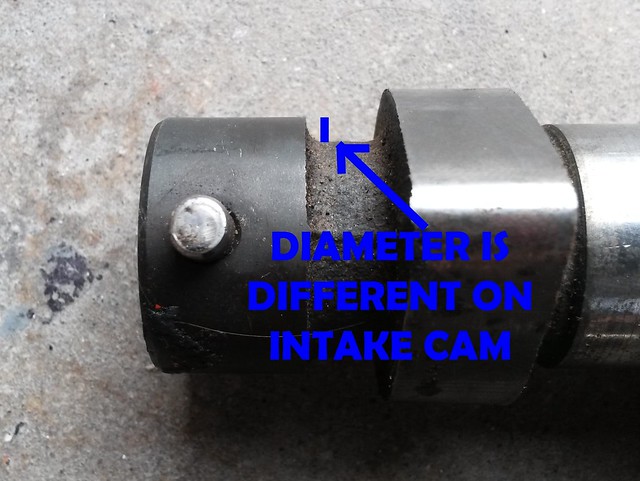
Remember that the intake cam has an enlarged section. This means that the dowel on your new exhaust cam will have be about 2.25mm longer than the one on your old intake cam.
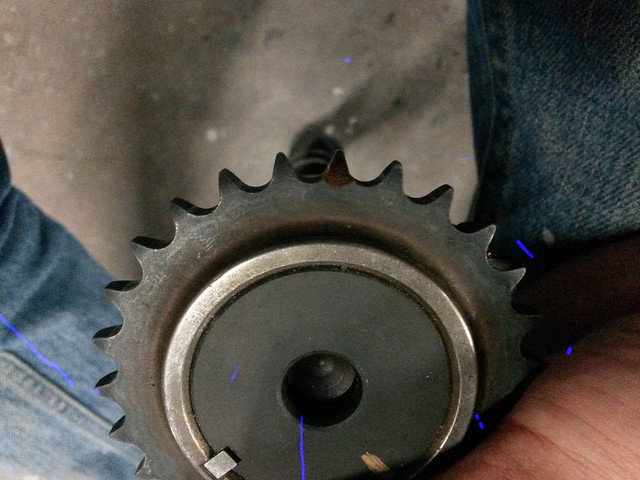
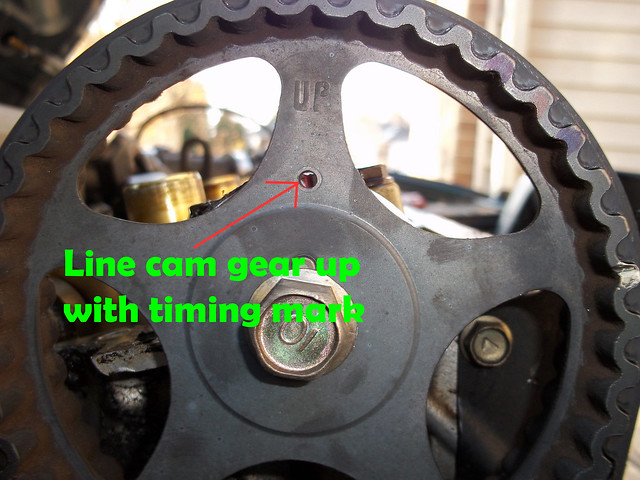
The camshaft will need a new timing mark. In this picture is the original intake cam. looking down the cam, the tip of the 3rd set of lobes lines up a half tooth left of the timing mark.
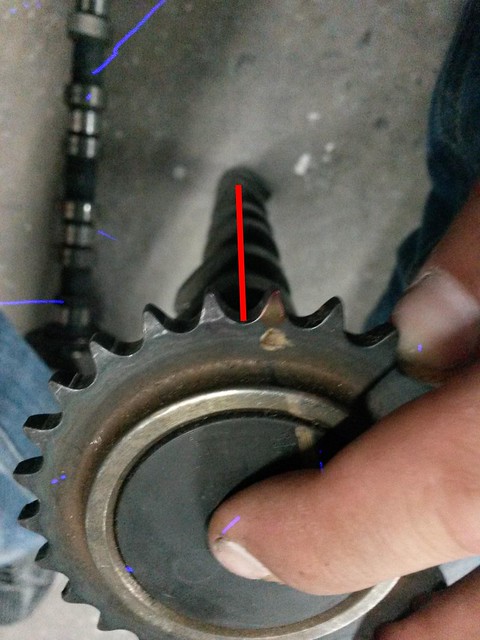
Marked the tooth with a marker and then cut a line into it.
Now for the install. I pulled the valve cover and spark plugs. Then turned the steering wheel all the way right for access to the crank pulley bolt. Turn the engine until it's in top dead center.
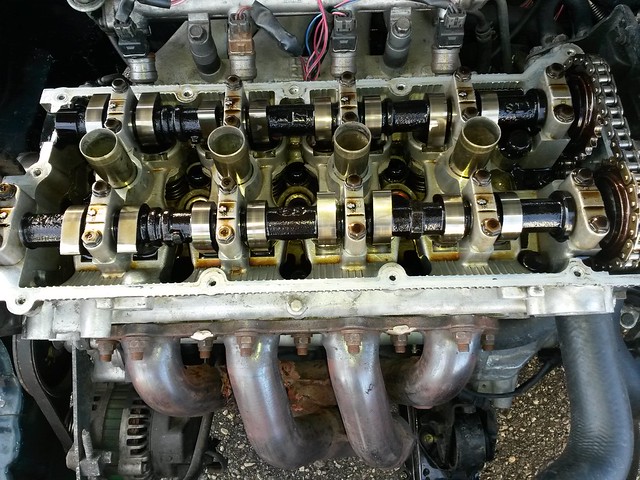
clean the camshaft thoroughly to remove any metal shavings. Remove the old intake camshaft. Keep the cam journals in the correct order. Lather the camshaft with oil.
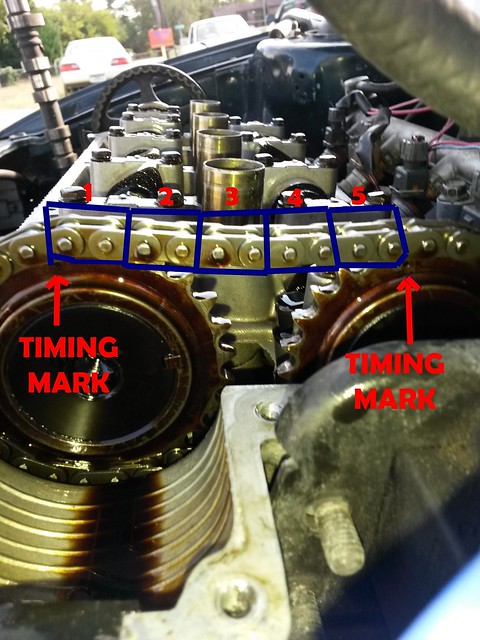
When installing make sure there are five links between the two timing marks. Torque the journal bolts to 9-10lbs
Rotate the engine a few times with the crank bolt to ensure everything spins freely.
Reinstall the valve cover. Clean up your mess.
The End
Why use two exhaust camshafts? The exhaust cam has more lift and longer duration than the factory intake camshaft which increases power. It does require some modification which I described in better detail below. Sorry for the blurry pictures.
I am writing this DIY for Beta 1 engines 1996-2000 Elantra, 1997-2001 Tiburon, 1.8 and 2.0 models. A couple people with Beta 2 non-cvvt engines have also done this. The steps should be mostly the same except the solid lifters will most likely need to be shimmed.
Camshaft chart:
Driving Impression: The car pulls a bit harder, mostly from about 3,000-5500rpm. I feel that it was worth the effort. There are no drawbacks that I know of.
So what modification is needed to the camshaft? A dowel pin for the cam sensor will need to be installed. The sprocket for the timing belt will need to be removed and the camshaft will have to be shortened. A new timing mark will also be needed.
What tools are needed? You will NEED a caliper for measuring. Basic hand tools/socket set. 22mm socket. Drill, 1/4" bit. Cutoff wheel, grinder. You will probably need access to a welder or know someone that does.
You NEED to get PRECISE measurements or you could end up with a check engine light. I do regret not writing all of the measurements down.
In the picture the timing sprocket has already been removed. Cut the end off of the camshaft.
For the dowel pin. I measured, marked the spot with a center punch. Drilled with an 1/8" bit and then 1/4" bit. I was expecting it to be tough to drill through but it's actually fairly soft metal.
I bought a 1/4" x 3' steel dowel at home depot for like $2.00
I pressed it in with a rubber mallet. The fit was somewhat tight but didn't seem tight enough for something that spins up to 3375rpm.
So I drilled all the way through the cam and welded the back side of the cam to the dowel. It's a bit tough to weld cast to steel.
Grind it down to desired length. (note that the pictured dowel pin is still too long)
Remember that the intake cam has an enlarged section. This means that the dowel on your new exhaust cam will have be about 2.25mm longer than the one on your old intake cam.
The camshaft will need a new timing mark. In this picture is the original intake cam. looking down the cam, the tip of the 3rd set of lobes lines up a half tooth left of the timing mark.
Marked the tooth with a marker and then cut a line into it.
Now for the install. I pulled the valve cover and spark plugs. Then turned the steering wheel all the way right for access to the crank pulley bolt. Turn the engine until it's in top dead center.
clean the camshaft thoroughly to remove any metal shavings. Remove the old intake camshaft. Keep the cam journals in the correct order. Lather the camshaft with oil.
When installing make sure there are five links between the two timing marks. Torque the journal bolts to 9-10lbs
Rotate the engine a few times with the crank bolt to ensure everything spins freely.
Reinstall the valve cover. Clean up your mess.
The End

Banned

Joined: Oct 2009
Posts: 522
Likes: 0
From: Bulgaria
Vehicle: 97' Hyundai Coupe
Great DIY brother 
I was thinking about this idea last year, but wasn't sure if it is worth it... My intake cam is from 1.8 , but as we can see from the chart it's not the best one
With my individual throttle bodies setup it might give me a little gain
I was thinking about this idea last year, but wasn't sure if it is worth it... My intake cam is from 1.8 , but as we can see from the chart it's not the best one
With my individual throttle bodies setup it might give me a little gain

Thread Starter
Senior Member
Joined: Jun 2012
Posts: 345
Likes: 3
From: NC
Vehicle: 2000 Hyundai Elantra GLS
Yeah man, go for it. I had the 1.8 cam before this and still felt a difference.
Junior Member
Joined: Mar 2024
Posts: 1
Likes: 0
Vehicle: Hyundai coupe 2.0 fx mud racer
Very sorry to revive this old threat but i have made the same mod on a spare exhaust cam and noticed that there is "half" a tooth of difference in the angle of the lobes when i line them both up.
I also see that difference in your picture above. That is no concern? Timing Will still be okay?
I also see that difference in your picture above. That is no concern? Timing Will still be okay?