


Full Angel Eyes Install/bumper Removal/wiring


Thread Starter
Senior Member
Joined: Apr 2004
Posts: 818
Likes: 0
From: Michigan
 Re: clutch adjustment
Link: http://www.tibathon.com/forums/viewtopic.php?p=48#48
Author: Joshuwa
Difficulty: Moderate
Time: +/- 3 Hours
Materials Needed: Angel Eyes, 10mm wrench, screwdriver (flat-head and phillips), and clear plastic ties or string.
Angel Eyes can be purchased from KSPEC or www.haloz.biz
<span style="font-size:24pt;line-height:100%">Angel Eyes Install (2nd Gen)</span>
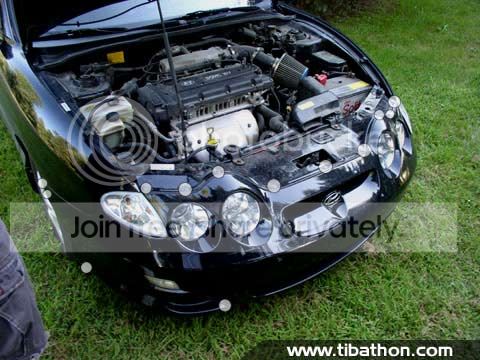
1. Preparing the bumper: Open the hood, and you will notice small plastic pins that line the bumper. Using a flat-head screwdriver, carefully pop each one out. Trace the edges of the bumper to find them all. Additionaly, there will be 4-6 10mm bolts you will need to remove. The pic above indicates the locations of all the pins/screws/bolts that need to be removed at this time.
Once all pins/screws/bolts are removed, you can remove the metal stripping at the top of the bumper.
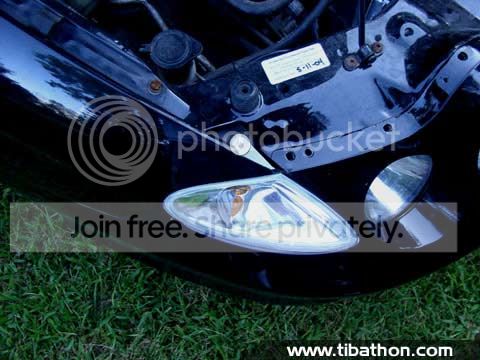
2. Removing the corner lights: Use a phillips screwdriver to remove the screw on top of the light. Carefully pull the light out of its position, and disconnect the attatched wire. Do this on both sides.
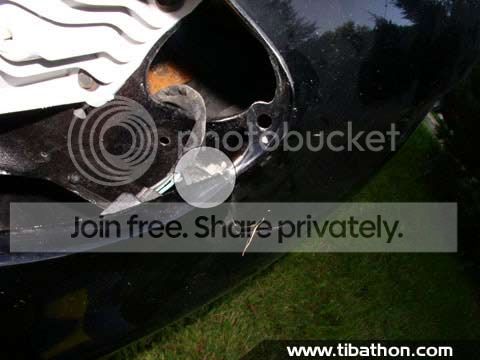
3. Removing the bumper: Once the corner lights are removed, you will find one more 10mm bolt on each side that needs to be removed. Take out each bolt, disconnect the wires to your parking lights, and carefully pull the bumper away.
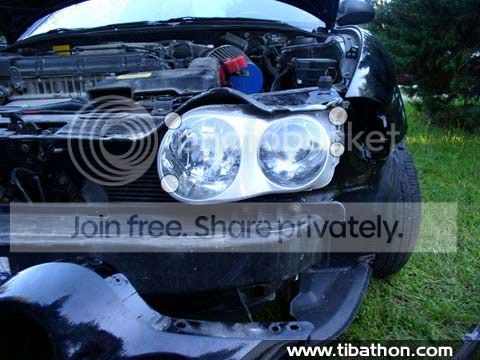
4. Removing the headlights: There are 4 10mm bolts holding the headlights in place. Remove them all and carefully disconnect the attatched wire, then pull the lights out of position.
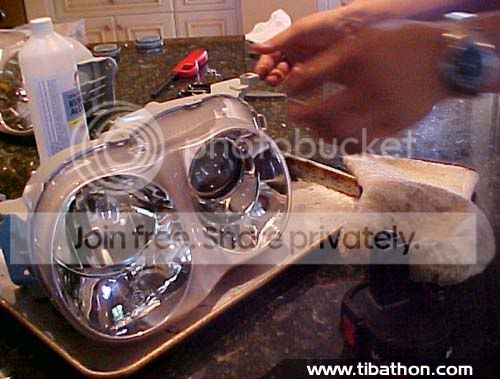
5. Preparing the headlights: Pre-heat the oven to 350* (no joke!). Once the oven is heated, place one light on a large cookie sheet and place it in the oven. Make sure that no metal from the oven is touching any part of the light. Leave the light in the oven for 5-6 minutes. BE CAREFUL! Your lights CAN melt if you leave them in too long!
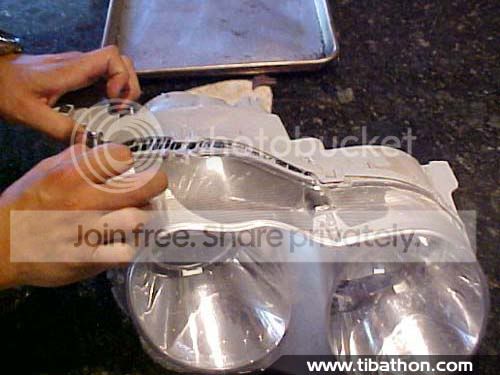
6. Openning the headlights: Carefully remove the light from the oven. WARNING: IT WILL BE HOT! Now, using a flat-head screwdriver, slowly lift up each tab on the edge of the lense. Using the screwdriver, gently help the lense seperate from the headlight. Pull the lense away, and use scissors to cut the stringy adhesive.
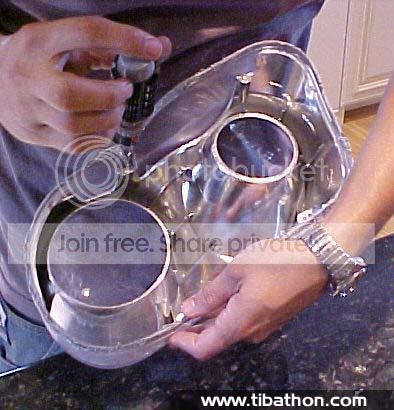
7. Removing the bezel: Once the light is cool, use a small screwdriver to remove all 4 screws connecting the bezel to the lense.
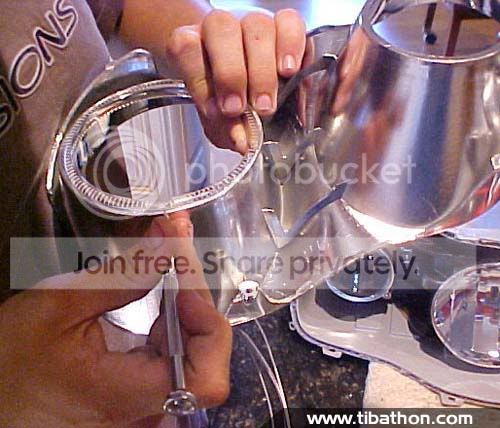
8. Adding the Angel Eyes: Place one Angel Eyes ring in the bezel, with the LED located at the very bottom. Mark a spot on the outside of the bezel where the LED is, and then mark another spot directly above that on the outside of the top of the bezel. These marks will let you know where to drill.
Heat the tiny drill bit over the stove. It is imperative that you heat the bit before drilling so you do not crack the bezel. The bit should easily melt right through it. Carefully drill a small hole at the mark you made on the TOP of the bezel. The hole only needs to be big enough for a clear plastic tie (or string) to fit through.
Now heat the 1/4" bit the same way, and drill at the mark you made at the bottom of the bezel. This is the hole the wires will go through.
Do this process for both sides of the bezel (for each ring).
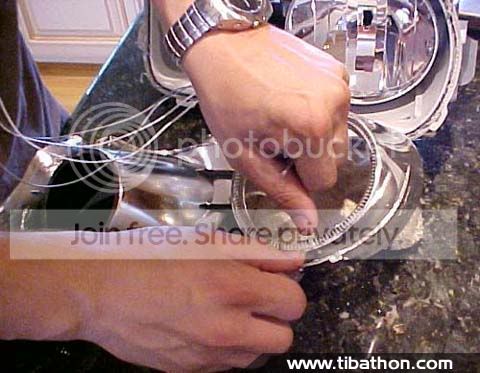
Once the holes have been made, place one Angel Eyes ring in its proper location, and slip the wires through the 1/4" hole. Using plastic ties or string, tie the top part of the Angel Eyes ring by fastening the string around it, then through the tiny hole above. Make sure the knot is strong, and the the ring is securely in place.
Using the 1/4" bit, heat once more, then drill a hole in the very center of the bottom part of the clear lense. This is where the wiring will come out.
Now is a good time to test everything to make sure it lights up. Touch the wires to your drill battery (positive to positive/negative to negative). Once everything lights up fine, screw the bezel back into the lense.
Push the lense back onto the headlight and make sure it seats up firmly. Place the assembly back into the oven for 5 more minutes. When you take the light out, make sure to press everything back together, and that all tabs are down and locked. Your light should now be sealed back together. You may use clear silicon to seal the outside of the light if you want to make sure its sealed.
Do this for each headlight.
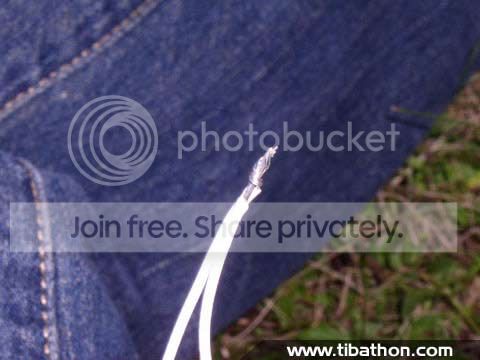
9. Preparing the wires: There will be two sets of wires coming from each headlight. Two power wires (white) and two ground wires (grey). Connect both white wires together but twisting their ends together. Do the same with the grey wires. Make sure to connect only white to white, and grey to grey.
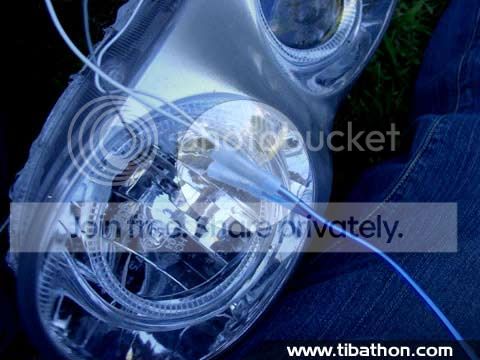
Now insert the two connected white wires into the connector on the blue wire with the white stripe, and pinch the connector closed to connect the wires. Insert the two connected grey wires into the solid blue wire, and do the same.
Do this for each headlight.
10. Putting the headlights in: Use the same method as in step 4 (in reverse) to put the headlights back in. Make sure your new wires go underneath and behind the metal bumper.
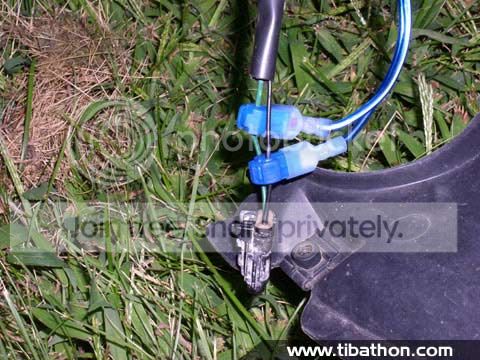
11. Finishing the wires:
Locate the wires to your parking lights that you previously disconnected. Use a knife to cut away about 2" of the plastic casing that hold the inner wires together. Now open up the blue C-Clamp of your power (white) wire and place it around the power wire of your parking lights. Firmly clamp it down. Do the same with your ground wire, connecting it to your parking light's ground wire. Remember: connect striped wire to striped wire, solid to solid. In some cases the wires may be different, but: Red= Power. Black=Ground.
12. Putting the bumper back on: Follow the same steps (1-3) that you used to remove the bumper to put it back on. Make sure that you connect your parking light wires to your parking lights on your bumper, and all other wires (headlights, corner lights). Be sure that all pins and screws are back firmly in place.
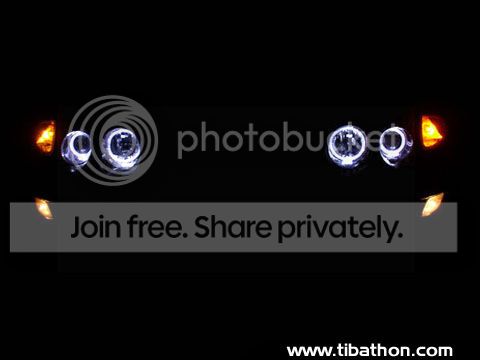
You are now finished! Flip on your parking lights, and your Angel Eyes will now be working! smile.gif
Author: Joshuwa
Difficulty: Moderate
Time: +/- 3 Hours
Materials Needed: Angel Eyes, 10mm wrench, screwdriver (flat-head and phillips), and clear plastic ties or string.
Angel Eyes can be purchased from KSPEC or www.haloz.biz
<span style="font-size:24pt;line-height:100%">Angel Eyes Install (2nd Gen)</span>
1. Preparing the bumper: Open the hood, and you will notice small plastic pins that line the bumper. Using a flat-head screwdriver, carefully pop each one out. Trace the edges of the bumper to find them all. Additionaly, there will be 4-6 10mm bolts you will need to remove. The pic above indicates the locations of all the pins/screws/bolts that need to be removed at this time.
Once all pins/screws/bolts are removed, you can remove the metal stripping at the top of the bumper.
2. Removing the corner lights: Use a phillips screwdriver to remove the screw on top of the light. Carefully pull the light out of its position, and disconnect the attatched wire. Do this on both sides.
3. Removing the bumper: Once the corner lights are removed, you will find one more 10mm bolt on each side that needs to be removed. Take out each bolt, disconnect the wires to your parking lights, and carefully pull the bumper away.
4. Removing the headlights: There are 4 10mm bolts holding the headlights in place. Remove them all and carefully disconnect the attatched wire, then pull the lights out of position.
5. Preparing the headlights: Pre-heat the oven to 350* (no joke!). Once the oven is heated, place one light on a large cookie sheet and place it in the oven. Make sure that no metal from the oven is touching any part of the light. Leave the light in the oven for 5-6 minutes. BE CAREFUL! Your lights CAN melt if you leave them in too long!
6. Openning the headlights: Carefully remove the light from the oven. WARNING: IT WILL BE HOT! Now, using a flat-head screwdriver, slowly lift up each tab on the edge of the lense. Using the screwdriver, gently help the lense seperate from the headlight. Pull the lense away, and use scissors to cut the stringy adhesive.
7. Removing the bezel: Once the light is cool, use a small screwdriver to remove all 4 screws connecting the bezel to the lense.
8. Adding the Angel Eyes: Place one Angel Eyes ring in the bezel, with the LED located at the very bottom. Mark a spot on the outside of the bezel where the LED is, and then mark another spot directly above that on the outside of the top of the bezel. These marks will let you know where to drill.
Heat the tiny drill bit over the stove. It is imperative that you heat the bit before drilling so you do not crack the bezel. The bit should easily melt right through it. Carefully drill a small hole at the mark you made on the TOP of the bezel. The hole only needs to be big enough for a clear plastic tie (or string) to fit through.
Now heat the 1/4" bit the same way, and drill at the mark you made at the bottom of the bezel. This is the hole the wires will go through.
Do this process for both sides of the bezel (for each ring).
Once the holes have been made, place one Angel Eyes ring in its proper location, and slip the wires through the 1/4" hole. Using plastic ties or string, tie the top part of the Angel Eyes ring by fastening the string around it, then through the tiny hole above. Make sure the knot is strong, and the the ring is securely in place.
Using the 1/4" bit, heat once more, then drill a hole in the very center of the bottom part of the clear lense. This is where the wiring will come out.
Now is a good time to test everything to make sure it lights up. Touch the wires to your drill battery (positive to positive/negative to negative). Once everything lights up fine, screw the bezel back into the lense.
Push the lense back onto the headlight and make sure it seats up firmly. Place the assembly back into the oven for 5 more minutes. When you take the light out, make sure to press everything back together, and that all tabs are down and locked. Your light should now be sealed back together. You may use clear silicon to seal the outside of the light if you want to make sure its sealed.
Do this for each headlight.
9. Preparing the wires: There will be two sets of wires coming from each headlight. Two power wires (white) and two ground wires (grey). Connect both white wires together but twisting their ends together. Do the same with the grey wires. Make sure to connect only white to white, and grey to grey.
Now insert the two connected white wires into the connector on the blue wire with the white stripe, and pinch the connector closed to connect the wires. Insert the two connected grey wires into the solid blue wire, and do the same.
Do this for each headlight.
10. Putting the headlights in: Use the same method as in step 4 (in reverse) to put the headlights back in. Make sure your new wires go underneath and behind the metal bumper.
11. Finishing the wires:
Locate the wires to your parking lights that you previously disconnected. Use a knife to cut away about 2" of the plastic casing that hold the inner wires together. Now open up the blue C-Clamp of your power (white) wire and place it around the power wire of your parking lights. Firmly clamp it down. Do the same with your ground wire, connecting it to your parking light's ground wire. Remember: connect striped wire to striped wire, solid to solid. In some cases the wires may be different, but: Red= Power. Black=Ground.
12. Putting the bumper back on: Follow the same steps (1-3) that you used to remove the bumper to put it back on. Make sure that you connect your parking light wires to your parking lights on your bumper, and all other wires (headlights, corner lights). Be sure that all pins and screws are back firmly in place.
You are now finished! Flip on your parking lights, and your Angel Eyes will now be working! smile.gif


Thread Starter
Senior Member
Joined: Apr 2004
Posts: 818
Likes: 0
From: Michigan
KSpec new 4-2-1 Headers
<div class='quotetop'>QUOTE (1997tibby)</div><div class='quotemain'>Just want to make sure, but the angel eyes that are sold on Haloz.biz, its just the ring, not the whole headlight assembly,correct?</div>
Correct.
It comes with the lighted ring, and you can select from different wiring options as well.
He DOES do full headlight assembly swaps, but you have to put down an extra deposit, and then send him your headlights, and hell send you another pair that include the AE's.
Correct.
It comes with the lighted ring, and you can select from different wiring options as well.
He DOES do full headlight assembly swaps, but you have to put down an extra deposit, and then send him your headlights, and hell send you another pair that include the AE's.