
Diy: Oem Bumper Mods

Thread Starter
Senior Member

Joined: Mar 2008
Posts: 709
Likes: 0
From: Pennsylvania
Vehicle: 2000 Hyundai Tiburon
A few people were interested in a DIY for my OEM bumper mods so I put one together.
This DIY will cover the four modifications I did to my OEM RD2 front bumper:
1. Removing fog light mounting tabs and smoothing the opening.
2. Removing the vertical bars and shortening the depth of the bottom center opening.
3. Removing H emblem and smoothing upper opening.
4. Filling License plate holes.
It should work for the RD1 bumper as well, but since I don't have a RD1 I can't say for sure.
<div align='center'>Equipment that is needed:
8"x8" plastic 1/8" thick
Epoxy ( 2 part epoxy from walmart works well)
Sandpaper 80, 150, and 300 grit
Sanding blocks (One large and one small)
3M green scrub pads or any similar pad ( 3M works best)
Files ( Rough and Fine)
Drill and drill bits (1/8" to 3/16" bits)
Heat Gun (or any other way to heat the plastic to bend it)
Clamps (C-clamps will work but the spring type is easier)
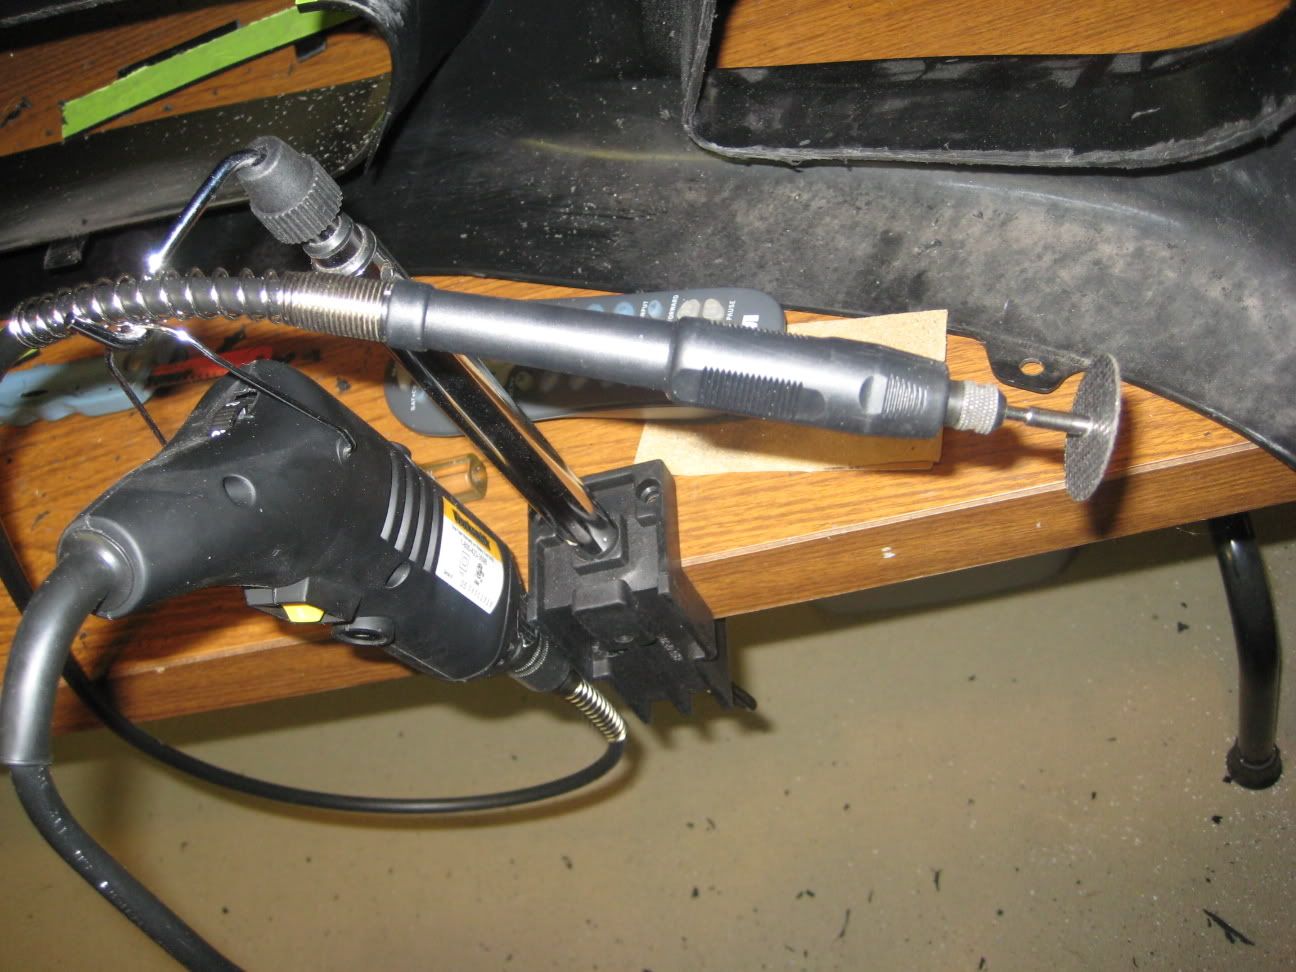
Cutting tools (I used a jigsaw and a dremel)
Old bath Towel and rags.
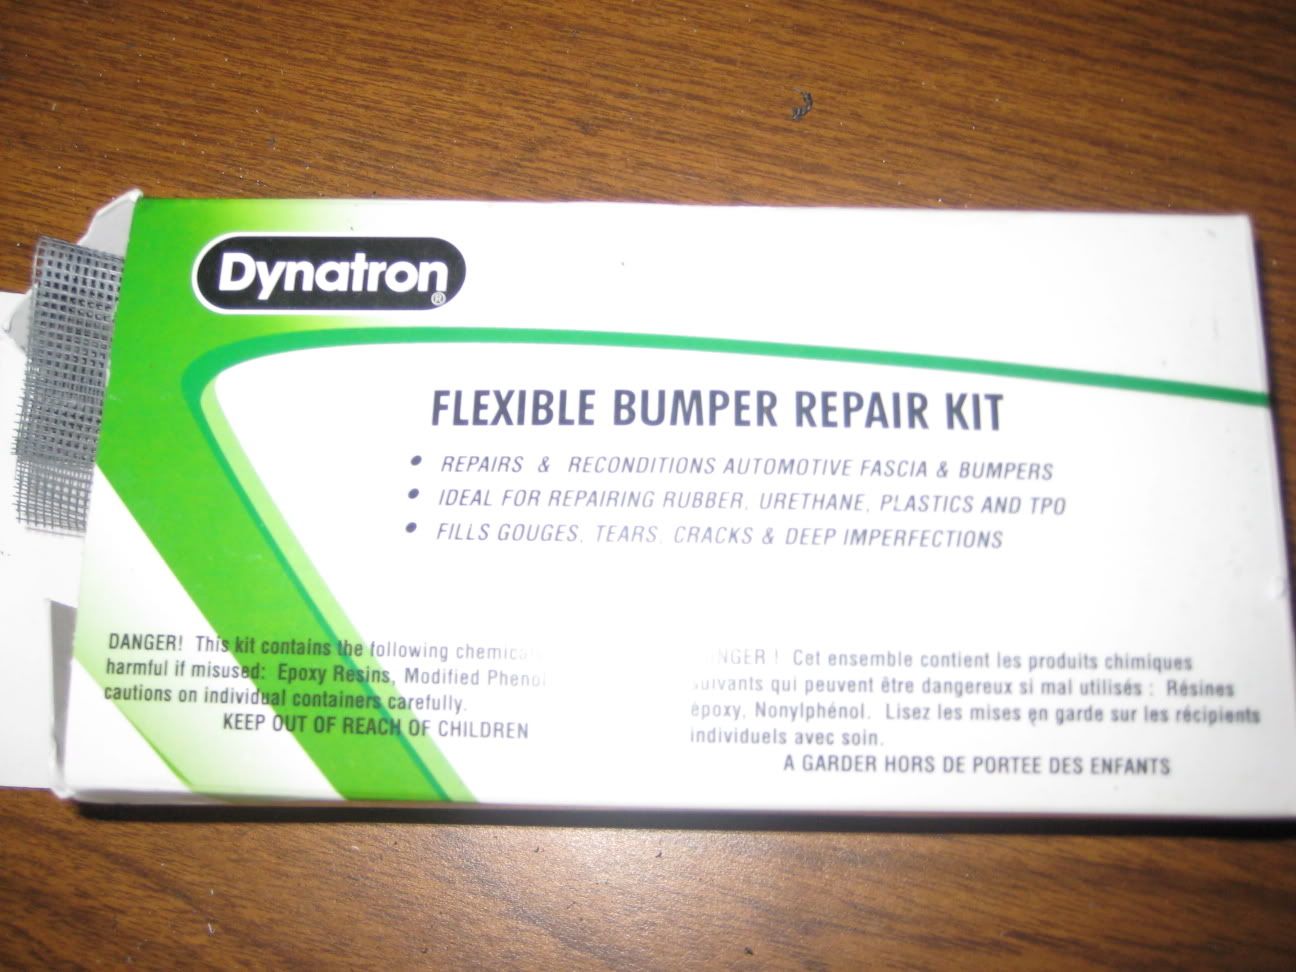
Plastic filler ( I used Dynatron filler ordered from bodyshop)
Masking Tape
Disposable Plastic Spreader
OEM Bumper
Optional equipment:
Dremel with flex shaft, cutting discs and sanding drums.
Extra lighting
Newspaper
Beverage of choice
Patience
Gloves
</div>
<div align='center'>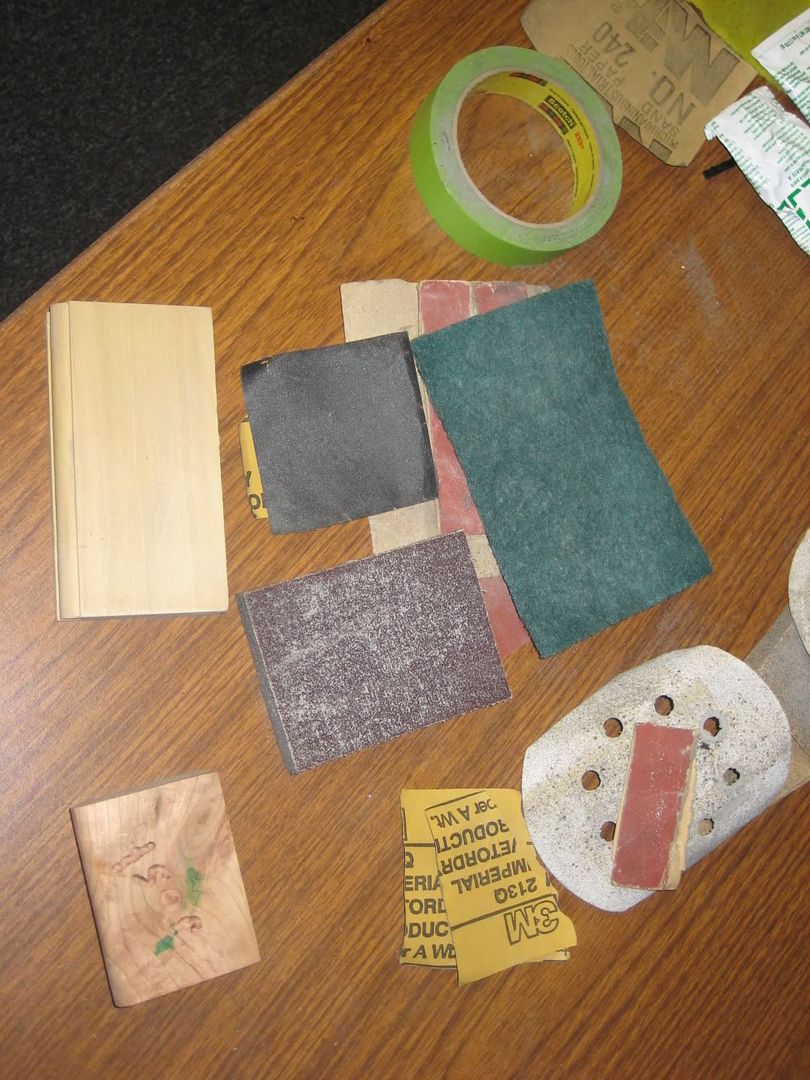
</div>
Before you start lay down the bath towel on you work area. From the cutting and sanding all the small pieces of plastic get ground between the table and bumper putting alot of scratches and marks in the bumper while it is moving around. The towel helps to stop this. I learned this the hard way and had to do alot of extra sanding.
Above I mentioned Cutting tools. I don't know what everybody has to use. I would suggest what I used but whatever you have if it does the job and your comfortable with it use whatever you like.
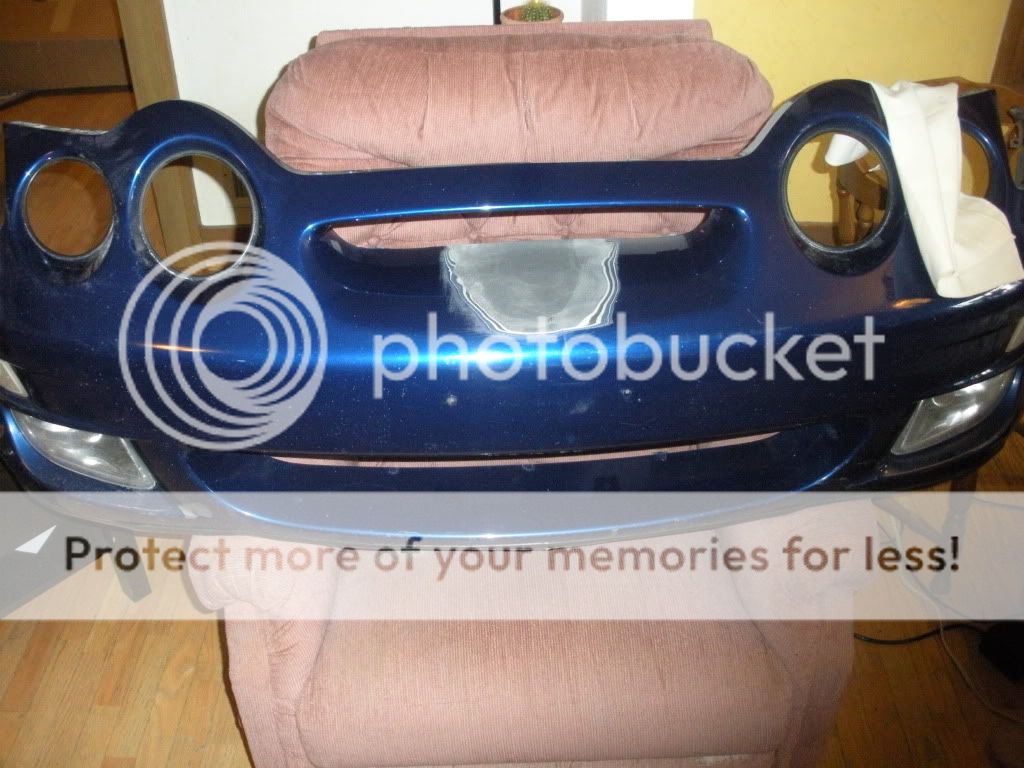
First mod: Fog light holes.
The mod for the fog light holes DOES NOT give you the option of reinstalling them (or the OEM grills if you don't have fog lights) without making a custom bracket to hold them in place. The shape of the hole stays the same so they will fit back in the hole fine but won't be able to be attached to the bumper.
<div align='center'>
</div>
<div align='center'>^^ Picture Above ^^
</div>Ok start by cutting or grinding off the smaller tab <span style="color:#006400">(green)</span>. This is where the dremel with the sanding drum works well. A 80 grit drum goes through the plastic pretty easy, but you can use whatever you have to cut it. Just try to cut off as much as possible the more you cut off the less you sand later.
Next Start cutting off the larger tab <span style="color:#000000">(black)</span>. I used the cutting wheel and sanding drum on my dremel again.
Make sure you cut it off even with the rest of the hole <span style="color:#0000ff">(blue line)</span>. And same as last time cut it off as close as you can for less sanding.
There is a small lip around the rest of the hole. <span style="color:#ff0000">(Red)</span>
Again I used the dremel with the sanding drum, but with a 120 grit drum this time.
The 80 grit drum is too rough for this because it is so close to the flat part of the bumper. If you slip you will get some nice 80 grit marks in the plastic. (Yes I did it so I know). This can be sanded by hand or can be filed off as well.
<div align='center'>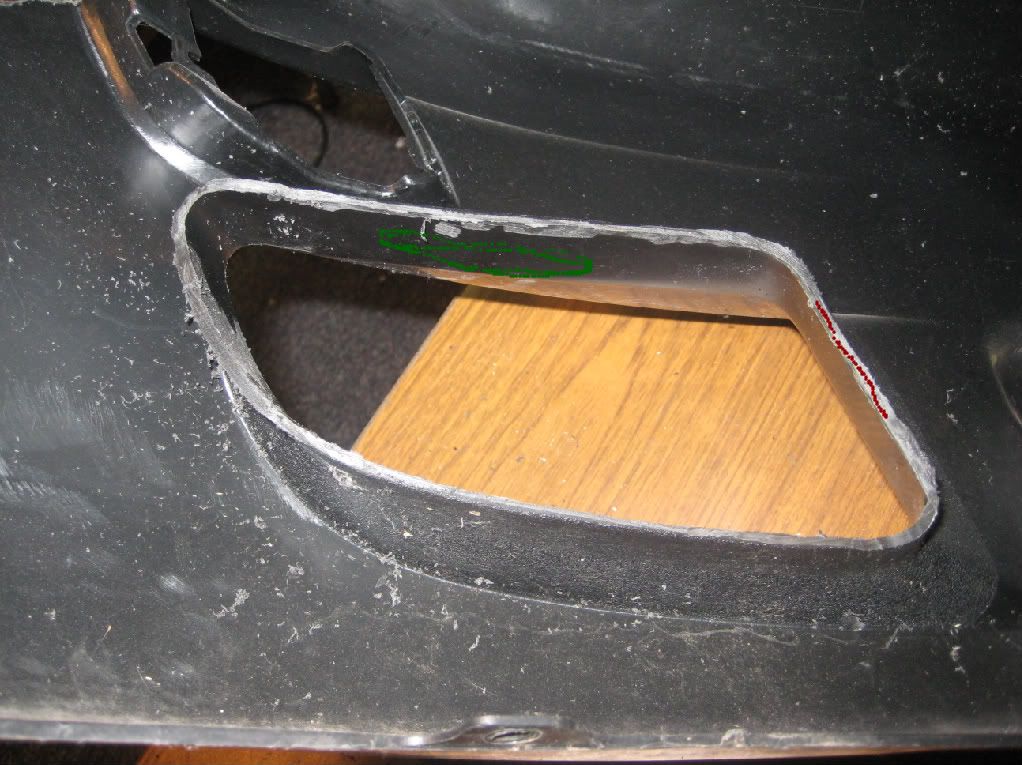
</div>
<div align='center'>^^ Picture Above ^^
</div>Lastly use your sanding blocks and files to sand the rear of the hole evenly. Also with your file and sand paper sand the inside of the hole <span style="color:#008000">(green)</span> going from roughest to finest then the 3m pad to make everything smooth and ready for paint.
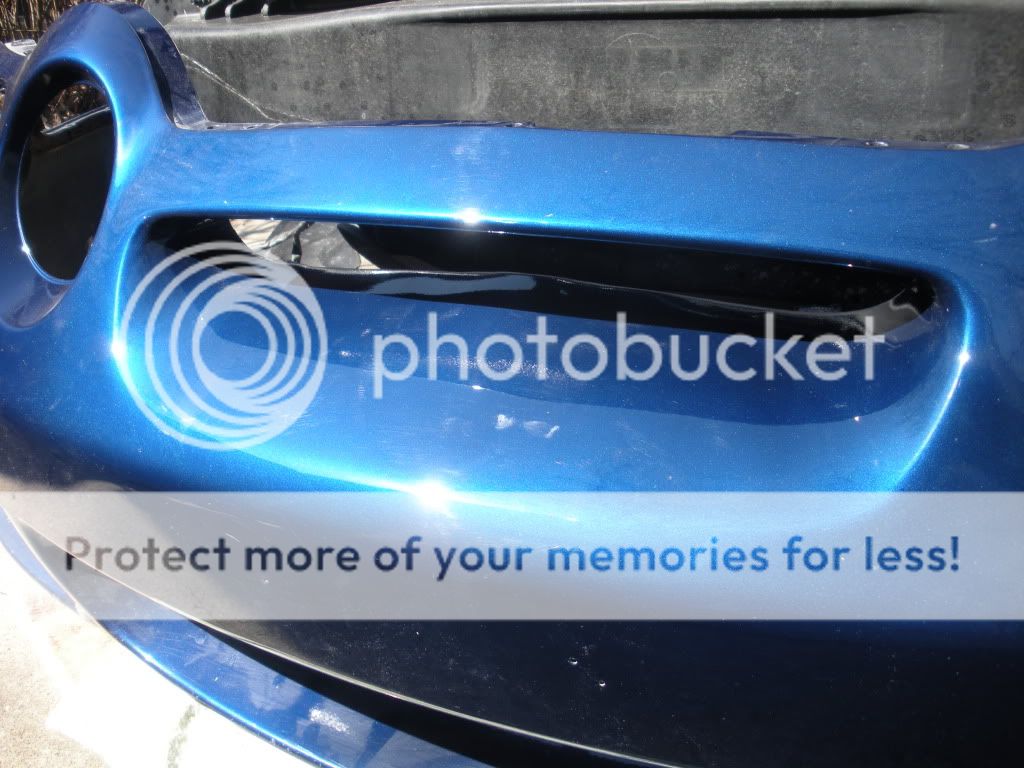
Second mod: Bottom center opening
You will lose the ability to mount your OEM mesh once this is done.
<div align='center'>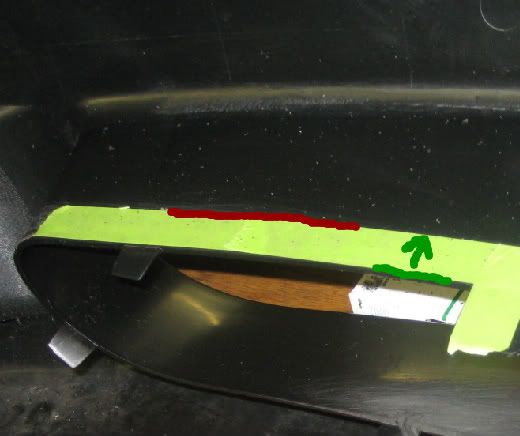
</div>
<div align='center'>^^ Pictures Above ^^
</div>I started by cutting out the vertical bars. These can be cut with anything.
Next put masking tape even with the back edge of the opening. The width of your masking tape will be how much you cut off. <span style="color:#008000">(green)</span> So make sure to put it down flat and even.
If you want to take more off use wider tape. The width of regular tape plus the cut and finish sanding it will be about an inch or so total removed. I used the tape because it makes a solid line that cant be rubbed off or covered by the dust from cutting, and it is also easy to see on the black bumper.
The inside edge of the tape <span style="color:#ff0000">(red)</span> is where you want to cut. I used my dremel with a cut off wheel. I did it in sections just to make it easier doing the top and bottom then the curves on the side.
<div align='center'>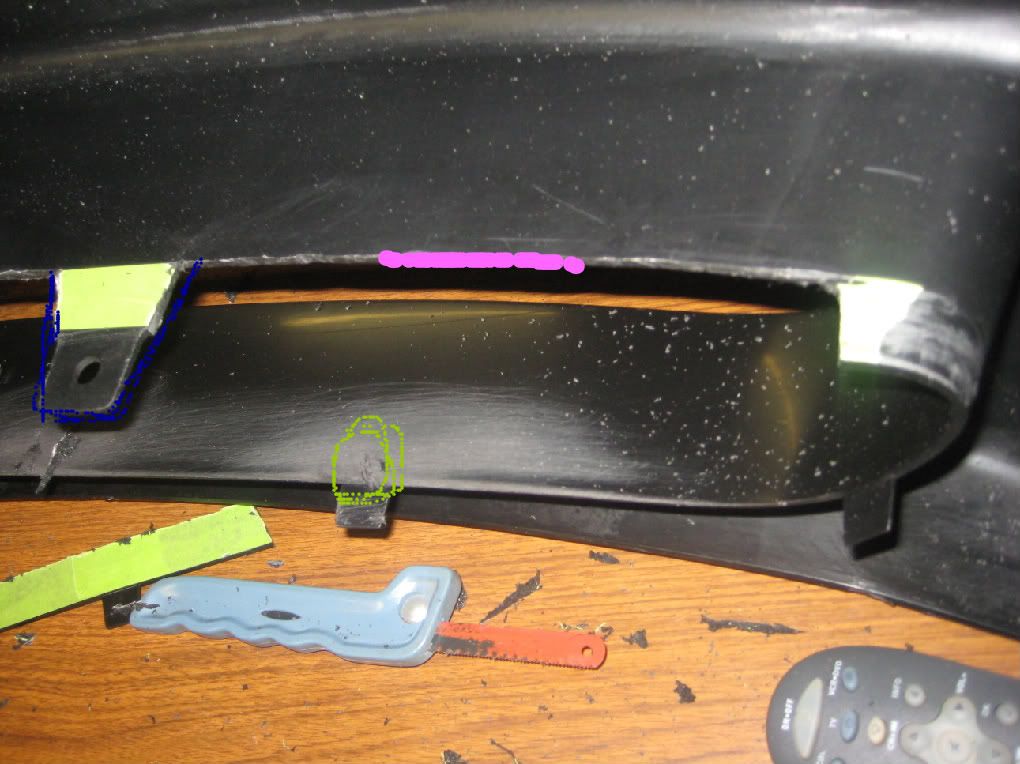
</div>
<div align='center'>^^ Picture Above ^^
</div>Make sure to leave the mounting tabs attached so you can use them when you remount it on the car.<span style="color:#0000ff">(Blue)</span>
Lastly use your sanding blocks and files to sand the rear lip of the hole evenly <span style="color:#ff00ff">(pink)</span>. Also with your file and sand paper sand the inside of the hole <span style="color:#ffff00">(yellow)</span> going from roughest to finest then the 3m pad to make everything smooth and ready for paint.
Third mod: Filling License Plate Holes
Some states require plates on the front so you may not be able to do the mod to your mounting holes.
As for shaving the emblem. It does Not require you to shave the OEM mesh mounting tabs. I did it for my own reasons, but if you cut them off you will not be able to remount your original grille.
Filling the plate holes is no big deal. Just make sure to drill through them to open them up. You should do this so when you fill the holes air doesn't get trapped inside. This could cause air bubbles which could be a pain later.
Also drilling through them will allow you to push the filler through the hole to help it hold better.
Sand around the holes with the 80 grit paper. Fill your holes. ( I used the same filler as I used for the emblem fill in)
Once the filler is set sand with 80 grit, move up to the 150 grit, then the 300 grit, and finally the 3m pad.
Not much to see for this mod just check out the pics below.
Fourth Mod: Shaving The Emblem
<div align='center'>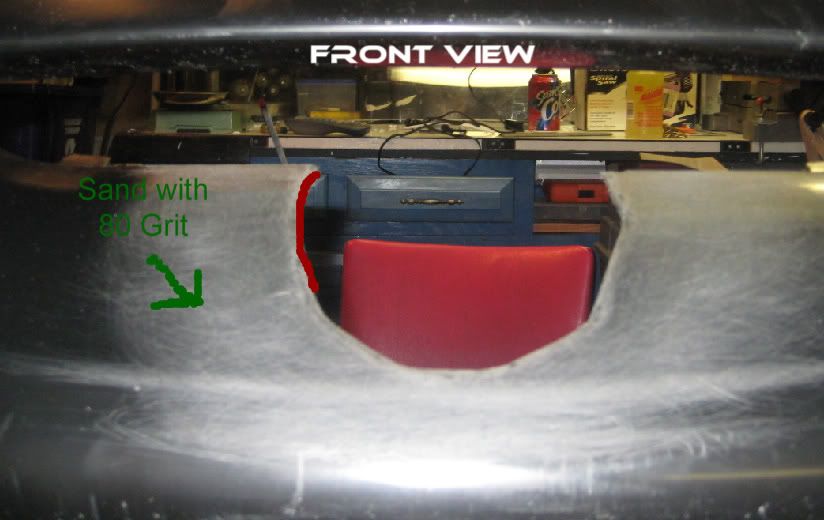
</div>
<div align='center'>^^ Picture above ^^
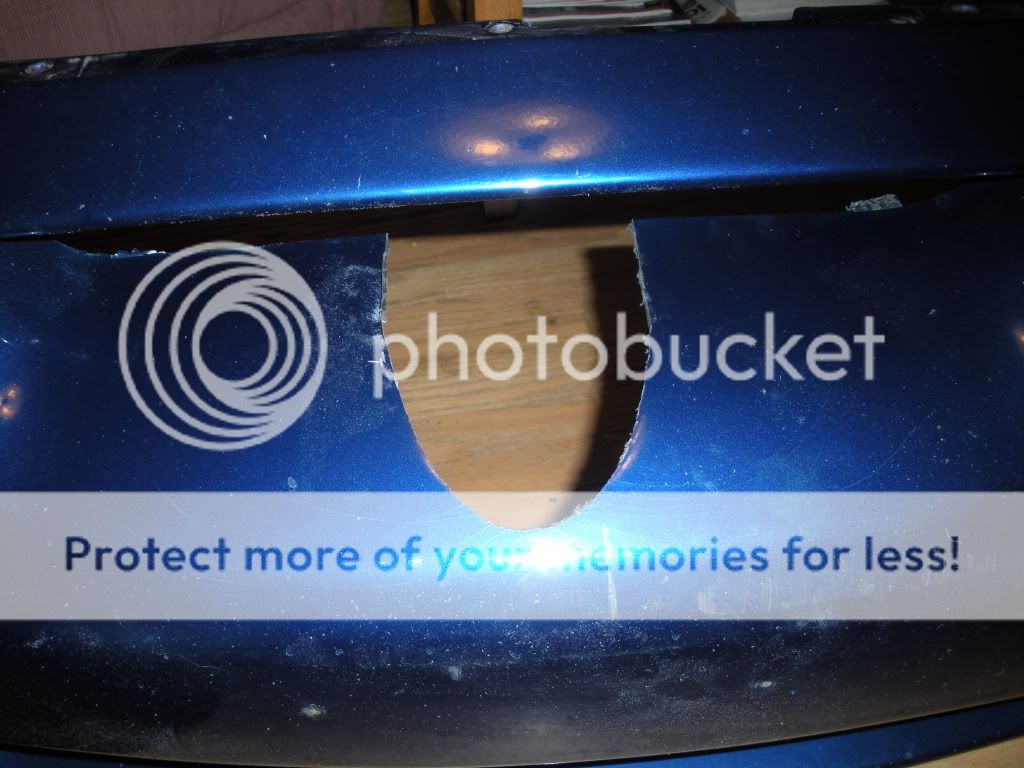
</div>Start by cutting the emblem out. Mark about a 1/8" around the the emblem and the indent. When you get to the front by the curve of the bumper stay as close to the indent as possible. You want to leave as much original bumper as you can.
I cut this with a jig saw and my dremel but you can use whatever you have.
It does not have to be a clean cut as rougher is better for the filler to stick to. Just get rid of any big pieces or chunks of plastic still hanging on.
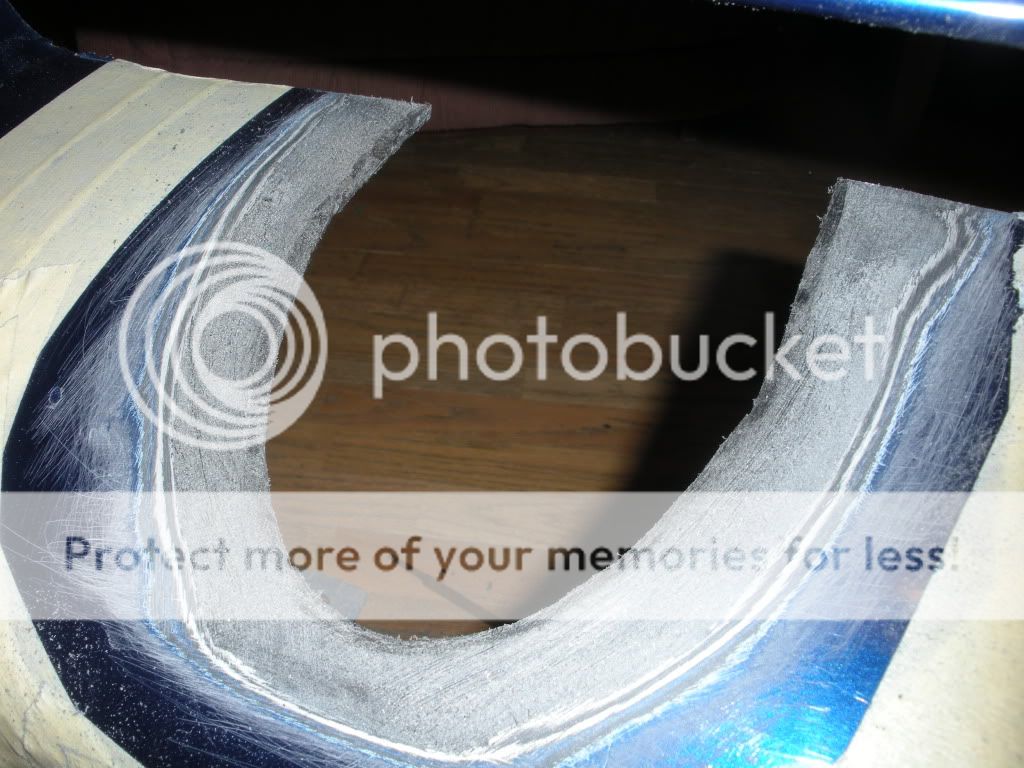
It is recommended to bevel the edges of the opening <span style="color:#ff0000">( red)</span> so there is a smoother transition between filler and bumper.
I beveled mine about 1/4" with my dremel and a file.
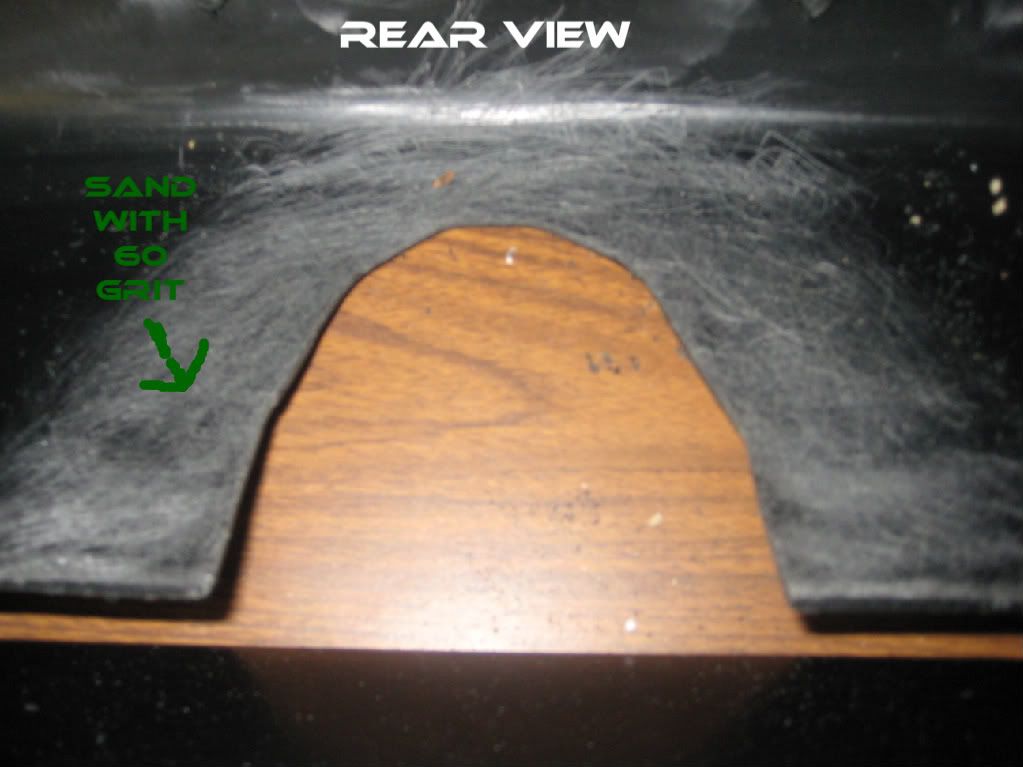
Next sand about two inches all the way around the opening front and back with 80 grit sandpaper. The rougher the better. Now rough up the back with 60 grit so the epoxy sticks. <span style="color:#008000">(green)</span>
Now that the bumper is ready we can start on the patch piece.
<div align='center'>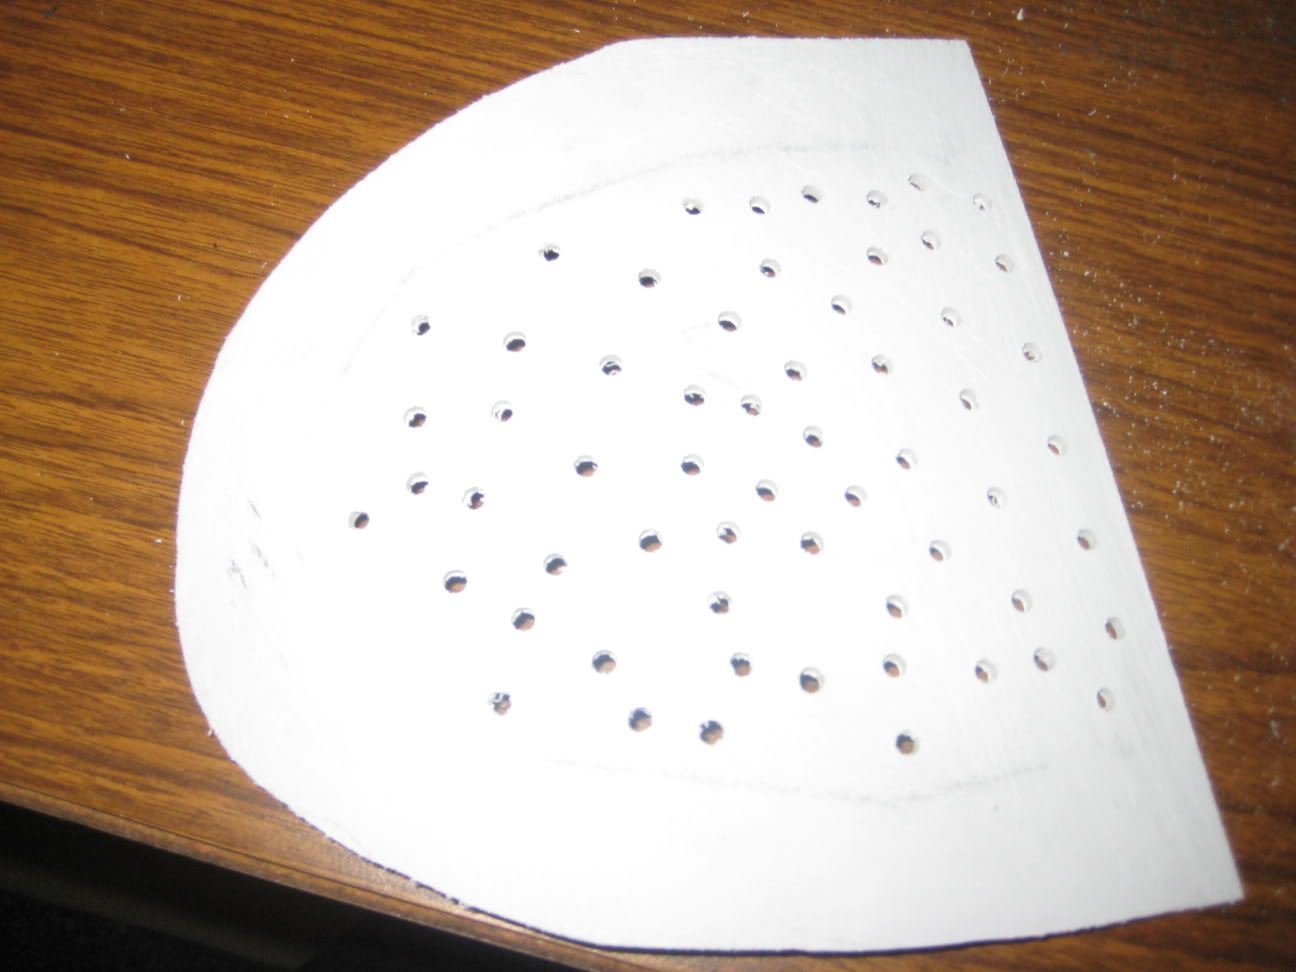
</div>
<div align='center'>^^ Picture Above ^^
</div>I already had this white plastic laying around its 1/8" thick. You can use whatever plastic you have as long as it will bend and hold its shape. This will be attached form the rear of the bumper.
Make a template out of paper or cardboard it should be even with the straight part of the opening in the rear and at least an inch bigger all the way around the rest of the cut out.
Once you have the template made cut it out of your plastic.
Now you want to drill a bunch of holes in the plastic about 1/8" to 3/16" these will allow the epoxy and the filler to go through and hold better. I just drilled random holes with my drill press but any drill will be fine. Don't drill too many or it may weaken the plastic.
Rough up the entire piece front and back with more 60 grit sandpaper. Again this will help it hold better.
Now you need to heat the plastic to bend it into shape. I recommend using gloves but its not required.
I used my heat gun but you could probably stick it in the over for a few minutes depending on the type of plastic.
I shouldn't have to warn you about plastic being hot or melting if heated too long but: IT WILL BE HOT AND IT MIGHT MELT!
Ok now that you have heated your plastic (hopefully without burning yourself) gently bend it to the shape of the inside of the bumper making sure to keep the straight part even with the rear of the opening.
<div align='center'>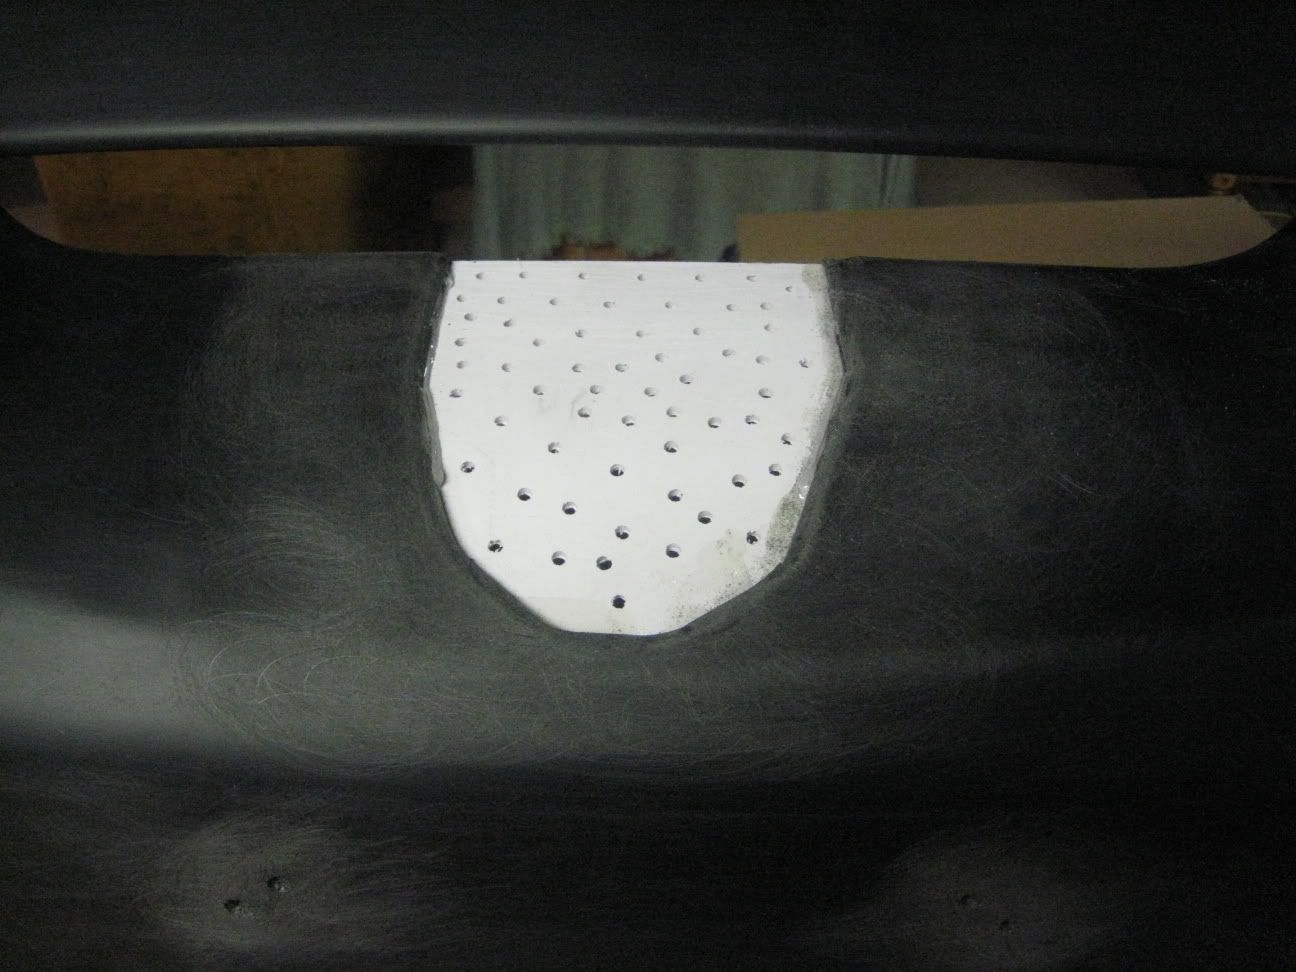
</div>
<div align='center'>^^ Picture Above ^^
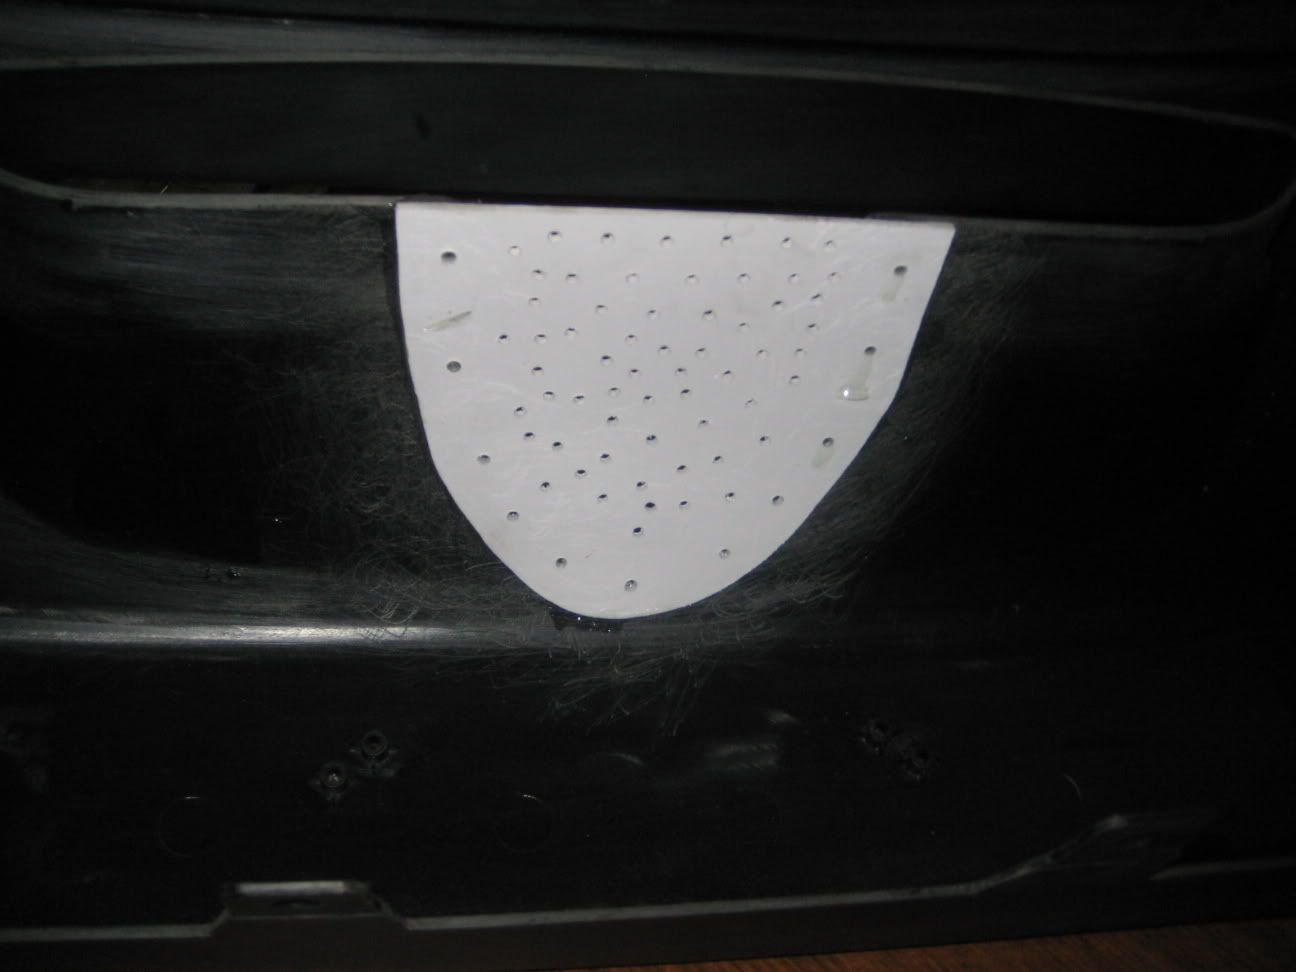
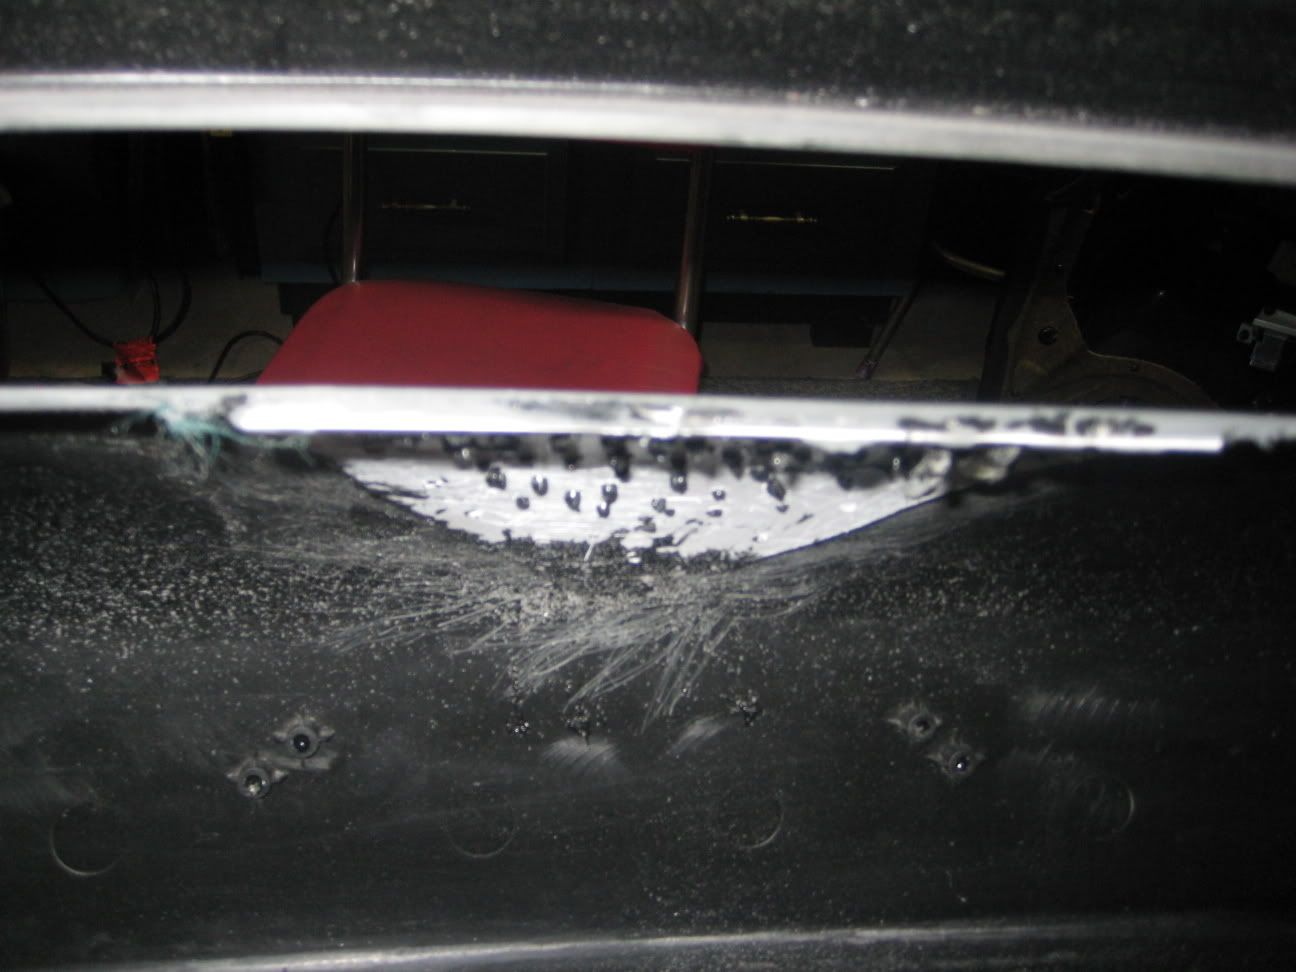
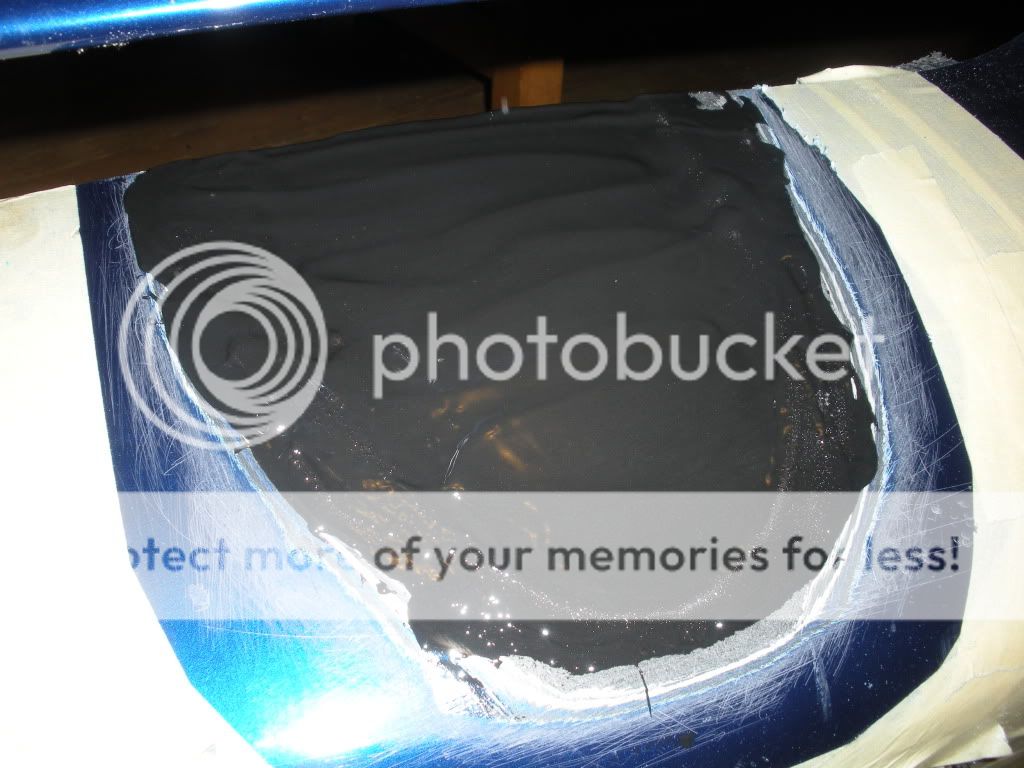
</div>After you plastic is cool and you have everything ready the piece can be glued on.
Mix epoxy and spread generous amount on the bumper around the opening. Set your patch in place and make sure it is even. Then clamp it and use some kind of weight where the clamps won't reach.
If you use a similar epoxy that I did this has to be done quickly because it sets up fast.
Time to fill it in. First sand or grind off and big drips of epoxy that came out the front.
By now everything should be roughed up and ready for filler. If not go over everything with some 80 grit sand paper.
<div align='center'>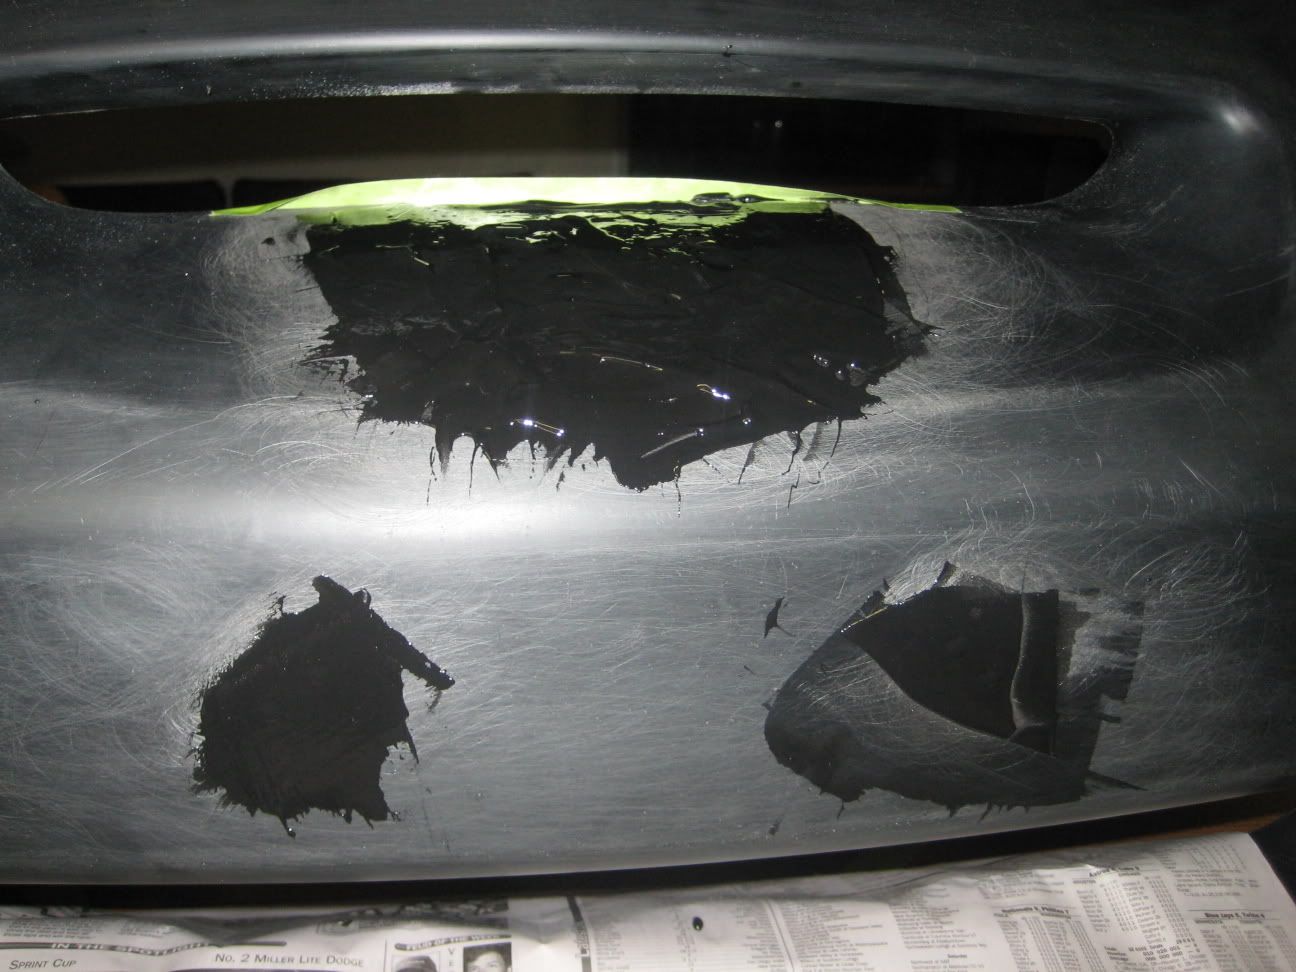

</div>
<div align='center'>^^ Pictures Above ^^
</div>
I used the Dynatron flexible bumper repair kit. This is a 1:1 mix and spreads like creamy peanut butter. It also sets up quick and sands well.
You will probably use 3-4 layers so start with a small amount and see how it covers. Using your plastic spreader smooth it evenly about 1 to 1 1/2 inches past the cut out.
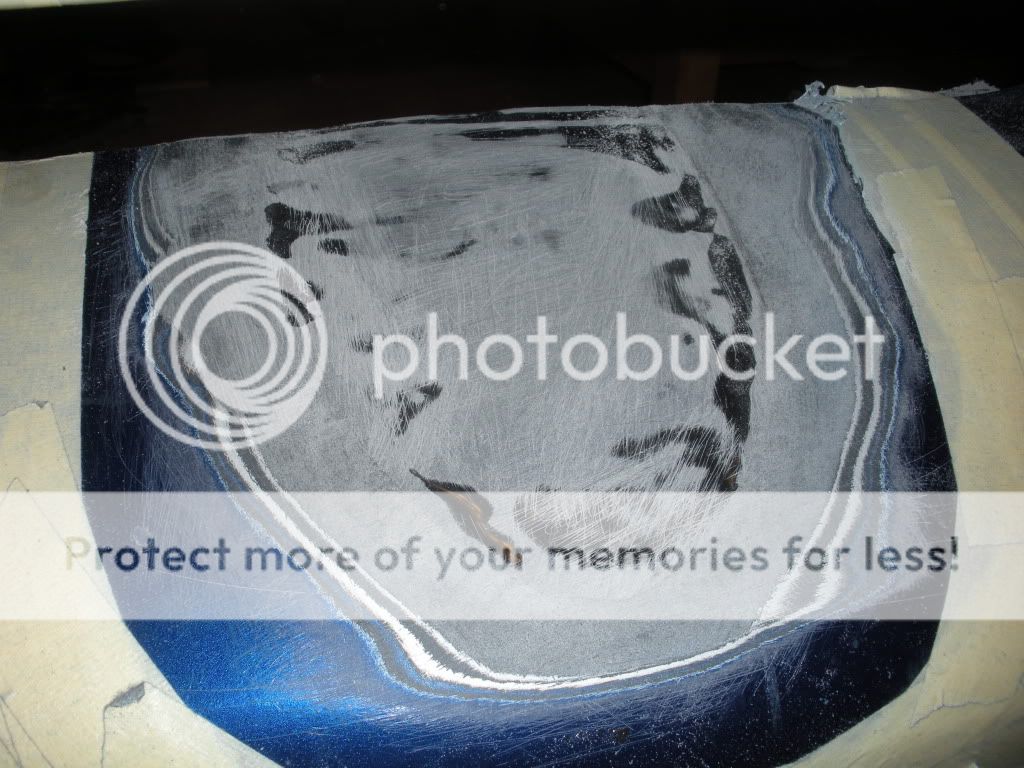
Once the first layer is set up go over it with 80 grit paper on a sanding block. This will knock down the high areas and show the low spots.
Make sure to rough up everything between layers with some 80 grit so it all sticks well.
Keep adding layers to fill in any low spots. You don't need to recover the whole area just over any low spots.
Sand or grind the rear edge even with the original edge. I used some tape to try and hold the filler while it set so it would be easier to get it straight later.
Once you are done filling and shaping it with the 80 grit paper and your sanding block move up to some 150 grit with your block and sand the whole area.
Then go up to the 300 grit and do the same followed by the 3m pad to smooth everything out.
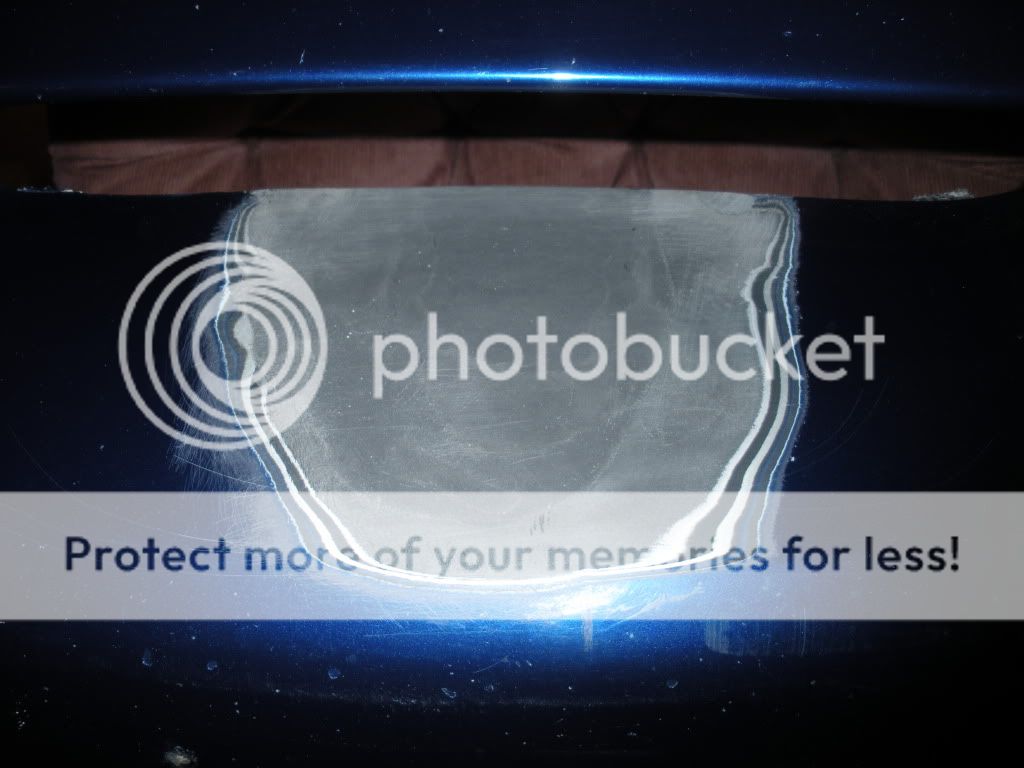
You now have no emblem and can prime and paint however you wish.
<div align='center'>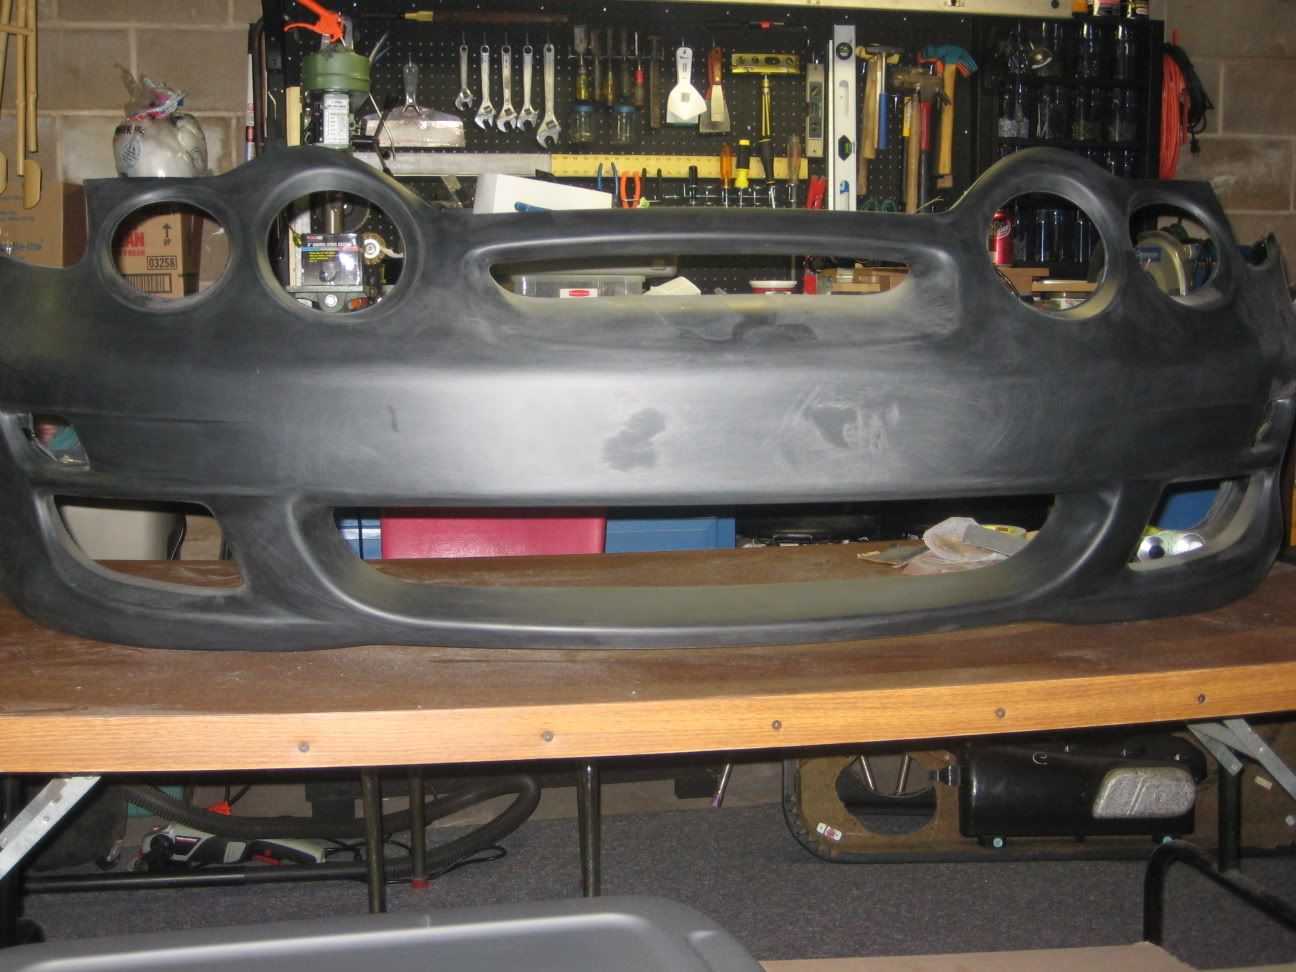
</div>
The 300 grit sand paper and 3M pad is a great way to rough up the rest of your bumper as well for prime and paint.
Here are all the before and after pictures I took while I was doing this:
http://s185.photobucket.com/albums/x...00/Car/Bumper/
Did I miss anything? Comments, suggestions, questions?
This DIY will cover the four modifications I did to my OEM RD2 front bumper:
1. Removing fog light mounting tabs and smoothing the opening.
2. Removing the vertical bars and shortening the depth of the bottom center opening.
3. Removing H emblem and smoothing upper opening.
4. Filling License plate holes.
It should work for the RD1 bumper as well, but since I don't have a RD1 I can't say for sure.
<div align='center'>Equipment that is needed:
8"x8" plastic 1/8" thick
Epoxy ( 2 part epoxy from walmart works well)
Sandpaper 80, 150, and 300 grit
Sanding blocks (One large and one small)
3M green scrub pads or any similar pad ( 3M works best)
Files ( Rough and Fine)
Drill and drill bits (1/8" to 3/16" bits)
Heat Gun (or any other way to heat the plastic to bend it)
Clamps (C-clamps will work but the spring type is easier)
Cutting tools (I used a jigsaw and a dremel)
Old bath Towel and rags.
Plastic filler ( I used Dynatron filler ordered from bodyshop)
Masking Tape
Disposable Plastic Spreader
OEM Bumper
Optional equipment:
Dremel with flex shaft, cutting discs and sanding drums.
Extra lighting
Newspaper
Beverage of choice
Patience
Gloves
</div>
<div align='center'>
</div>
Before you start lay down the bath towel on you work area. From the cutting and sanding all the small pieces of plastic get ground between the table and bumper putting alot of scratches and marks in the bumper while it is moving around. The towel helps to stop this. I learned this the hard way and had to do alot of extra sanding.
Above I mentioned Cutting tools. I don't know what everybody has to use. I would suggest what I used but whatever you have if it does the job and your comfortable with it use whatever you like.
First mod: Fog light holes.
The mod for the fog light holes DOES NOT give you the option of reinstalling them (or the OEM grills if you don't have fog lights) without making a custom bracket to hold them in place. The shape of the hole stays the same so they will fit back in the hole fine but won't be able to be attached to the bumper.
<div align='center'>
</div>
<div align='center'>^^ Picture Above ^^
</div>Ok start by cutting or grinding off the smaller tab <span style="color:#006400">(green)</span>. This is where the dremel with the sanding drum works well. A 80 grit drum goes through the plastic pretty easy, but you can use whatever you have to cut it. Just try to cut off as much as possible the more you cut off the less you sand later.
Next Start cutting off the larger tab <span style="color:#000000">(black)</span>. I used the cutting wheel and sanding drum on my dremel again.
Make sure you cut it off even with the rest of the hole <span style="color:#0000ff">(blue line)</span>. And same as last time cut it off as close as you can for less sanding.
There is a small lip around the rest of the hole. <span style="color:#ff0000">(Red)</span>
Again I used the dremel with the sanding drum, but with a 120 grit drum this time.
The 80 grit drum is too rough for this because it is so close to the flat part of the bumper. If you slip you will get some nice 80 grit marks in the plastic. (Yes I did it so I know). This can be sanded by hand or can be filed off as well.
<div align='center'>
</div>
<div align='center'>^^ Picture Above ^^
</div>Lastly use your sanding blocks and files to sand the rear of the hole evenly. Also with your file and sand paper sand the inside of the hole <span style="color:#008000">(green)</span> going from roughest to finest then the 3m pad to make everything smooth and ready for paint.
Second mod: Bottom center opening
You will lose the ability to mount your OEM mesh once this is done.
<div align='center'>
</div>
<div align='center'>^^ Pictures Above ^^
</div>I started by cutting out the vertical bars. These can be cut with anything.
Next put masking tape even with the back edge of the opening. The width of your masking tape will be how much you cut off. <span style="color:#008000">(green)</span> So make sure to put it down flat and even.
If you want to take more off use wider tape. The width of regular tape plus the cut and finish sanding it will be about an inch or so total removed. I used the tape because it makes a solid line that cant be rubbed off or covered by the dust from cutting, and it is also easy to see on the black bumper.
The inside edge of the tape <span style="color:#ff0000">(red)</span> is where you want to cut. I used my dremel with a cut off wheel. I did it in sections just to make it easier doing the top and bottom then the curves on the side.
<div align='center'>
</div>
<div align='center'>^^ Picture Above ^^
</div>Make sure to leave the mounting tabs attached so you can use them when you remount it on the car.<span style="color:#0000ff">(Blue)</span>
Lastly use your sanding blocks and files to sand the rear lip of the hole evenly <span style="color:#ff00ff">(pink)</span>. Also with your file and sand paper sand the inside of the hole <span style="color:#ffff00">(yellow)</span> going from roughest to finest then the 3m pad to make everything smooth and ready for paint.
Third mod: Filling License Plate Holes
Some states require plates on the front so you may not be able to do the mod to your mounting holes.
As for shaving the emblem. It does Not require you to shave the OEM mesh mounting tabs. I did it for my own reasons, but if you cut them off you will not be able to remount your original grille.
Filling the plate holes is no big deal. Just make sure to drill through them to open them up. You should do this so when you fill the holes air doesn't get trapped inside. This could cause air bubbles which could be a pain later.
Also drilling through them will allow you to push the filler through the hole to help it hold better.
Sand around the holes with the 80 grit paper. Fill your holes. ( I used the same filler as I used for the emblem fill in)
Once the filler is set sand with 80 grit, move up to the 150 grit, then the 300 grit, and finally the 3m pad.
Not much to see for this mod just check out the pics below.
Fourth Mod: Shaving The Emblem
<div align='center'>
</div>
<div align='center'>^^ Picture above ^^
</div>Start by cutting the emblem out. Mark about a 1/8" around the the emblem and the indent. When you get to the front by the curve of the bumper stay as close to the indent as possible. You want to leave as much original bumper as you can.
I cut this with a jig saw and my dremel but you can use whatever you have.
It does not have to be a clean cut as rougher is better for the filler to stick to. Just get rid of any big pieces or chunks of plastic still hanging on.
It is recommended to bevel the edges of the opening <span style="color:#ff0000">( red)</span> so there is a smoother transition between filler and bumper.
I beveled mine about 1/4" with my dremel and a file.
Next sand about two inches all the way around the opening front and back with 80 grit sandpaper. The rougher the better. Now rough up the back with 60 grit so the epoxy sticks. <span style="color:#008000">(green)</span>
Now that the bumper is ready we can start on the patch piece.
<div align='center'>
</div>
<div align='center'>^^ Picture Above ^^
</div>I already had this white plastic laying around its 1/8" thick. You can use whatever plastic you have as long as it will bend and hold its shape. This will be attached form the rear of the bumper.
Make a template out of paper or cardboard it should be even with the straight part of the opening in the rear and at least an inch bigger all the way around the rest of the cut out.
Once you have the template made cut it out of your plastic.
Now you want to drill a bunch of holes in the plastic about 1/8" to 3/16" these will allow the epoxy and the filler to go through and hold better. I just drilled random holes with my drill press but any drill will be fine. Don't drill too many or it may weaken the plastic.
Rough up the entire piece front and back with more 60 grit sandpaper. Again this will help it hold better.
Now you need to heat the plastic to bend it into shape. I recommend using gloves but its not required.
I used my heat gun but you could probably stick it in the over for a few minutes depending on the type of plastic.
I shouldn't have to warn you about plastic being hot or melting if heated too long but: IT WILL BE HOT AND IT MIGHT MELT!
Ok now that you have heated your plastic (hopefully without burning yourself) gently bend it to the shape of the inside of the bumper making sure to keep the straight part even with the rear of the opening.
<div align='center'>
</div>
<div align='center'>^^ Picture Above ^^
</div>After you plastic is cool and you have everything ready the piece can be glued on.
Mix epoxy and spread generous amount on the bumper around the opening. Set your patch in place and make sure it is even. Then clamp it and use some kind of weight where the clamps won't reach.
If you use a similar epoxy that I did this has to be done quickly because it sets up fast.
Time to fill it in. First sand or grind off and big drips of epoxy that came out the front.
By now everything should be roughed up and ready for filler. If not go over everything with some 80 grit sand paper.
<div align='center'>
</div>
<div align='center'>^^ Pictures Above ^^
</div>
I used the Dynatron flexible bumper repair kit. This is a 1:1 mix and spreads like creamy peanut butter. It also sets up quick and sands well.
You will probably use 3-4 layers so start with a small amount and see how it covers. Using your plastic spreader smooth it evenly about 1 to 1 1/2 inches past the cut out.
Once the first layer is set up go over it with 80 grit paper on a sanding block. This will knock down the high areas and show the low spots.
Make sure to rough up everything between layers with some 80 grit so it all sticks well.
Keep adding layers to fill in any low spots. You don't need to recover the whole area just over any low spots.
Sand or grind the rear edge even with the original edge. I used some tape to try and hold the filler while it set so it would be easier to get it straight later.
Once you are done filling and shaping it with the 80 grit paper and your sanding block move up to some 150 grit with your block and sand the whole area.
Then go up to the 300 grit and do the same followed by the 3m pad to smooth everything out.
You now have no emblem and can prime and paint however you wish.
<div align='center'>
</div>
The 300 grit sand paper and 3M pad is a great way to rough up the rest of your bumper as well for prime and paint.
Here are all the before and after pictures I took while I was doing this:
http://s185.photobucket.com/albums/x...00/Car/Bumper/
Did I miss anything? Comments, suggestions, questions?

Thread Starter
Senior Member
Joined: Mar 2008
Posts: 709
Likes: 0
From: Pennsylvania
Vehicle: 2000 Hyundai Tiburon
^^ Not really, but I haven't been there in a while though.
<div class='quotetop'>QUOTE </div><div class='quotemain'>Fabulous writeup! Great look after the shaving too, looks really good.</div>
Thanks!
<div class='quotetop'>QUOTE </div><div class='quotemain'>Fabulous writeup! Great look after the shaving too, looks really good.</div>
Thanks!
Senior Member
Joined: Mar 2006
Posts: 4,244
Likes: 0
From: Ashland, KY
Vehicle: 2001/Hyundai/Tiburon
looks good, I've done it already besides the H shaving.. which I actually really like. I didn't think it would look good! I was making room for the intercooler though.
I think I might shave off the marker lights as well, I think it'll make the busy front bumper a little cleaner.
I think I might shave off the marker lights as well, I think it'll make the busy front bumper a little cleaner.
Senior Member
Joined: May 2007
Posts: 199
Likes: 0
From: Ames, IA
Vehicle: 1998 & 2001 Tiburon
Thank you so much for this DIY Tib001!!!
I've been meaning to post in here for about a year. My car was backed into by a little old lady(her insurance covered it luckily). When I was getting an estimate the body shop told me they could spray the top of the bumper for free so I decided to go for it. I copied your DIY exactly. It was really easy to do, took about 3 hours total. I would definitely recommend this because it makes the front look much cleaner!
Here are some pics of mine.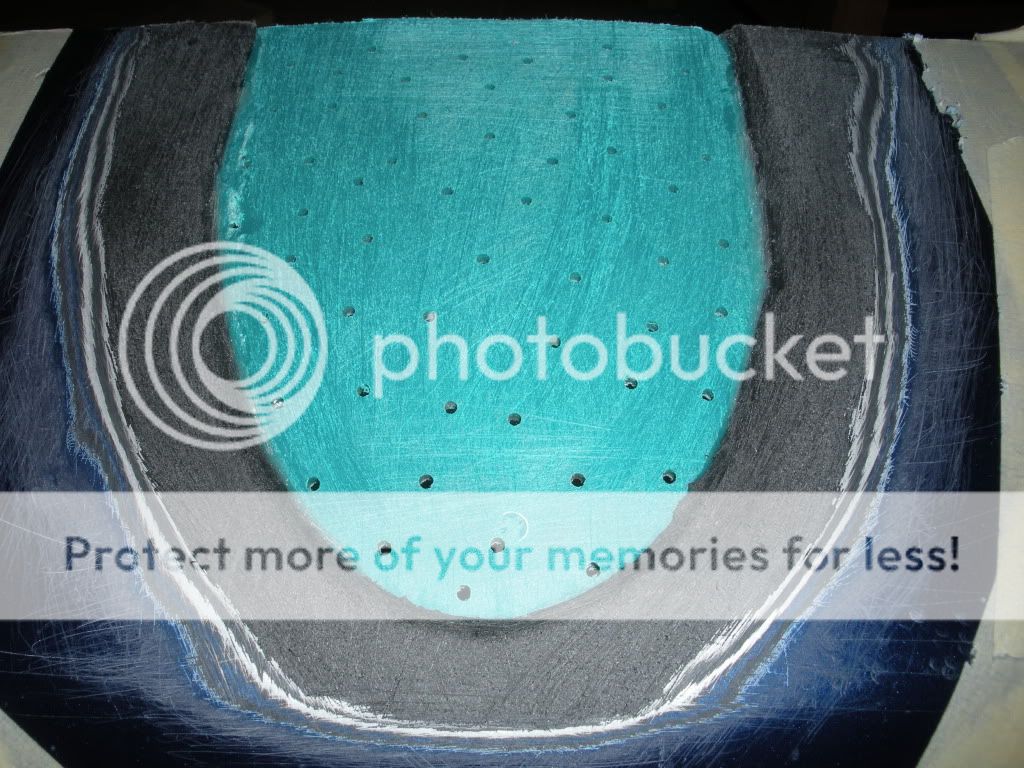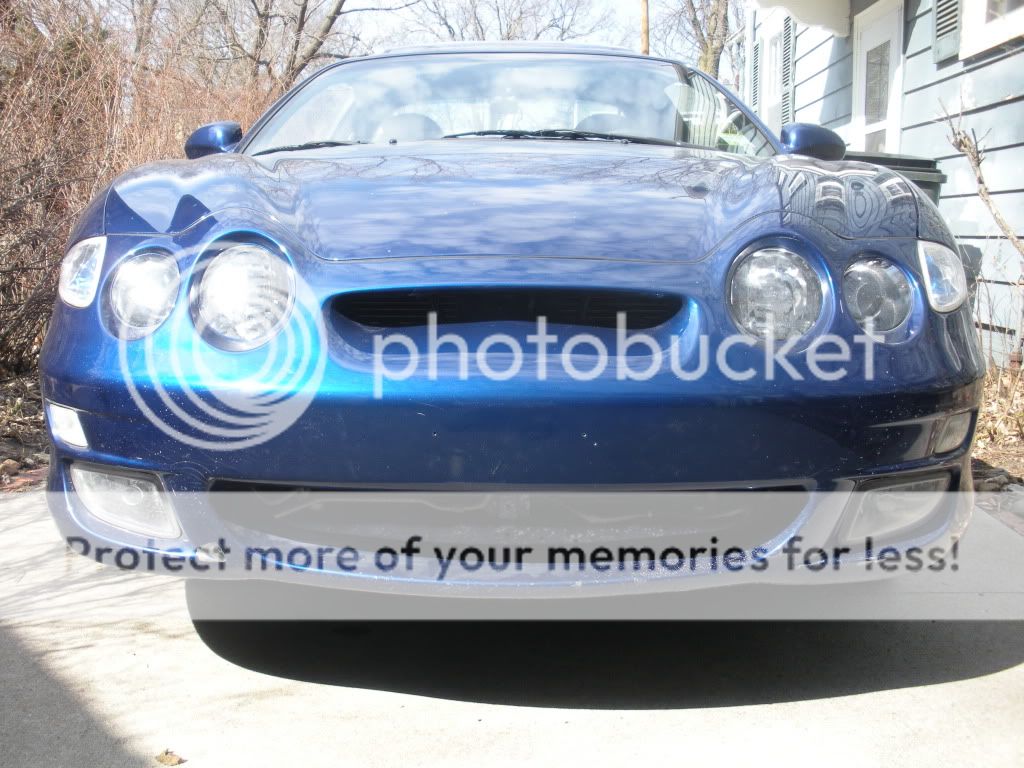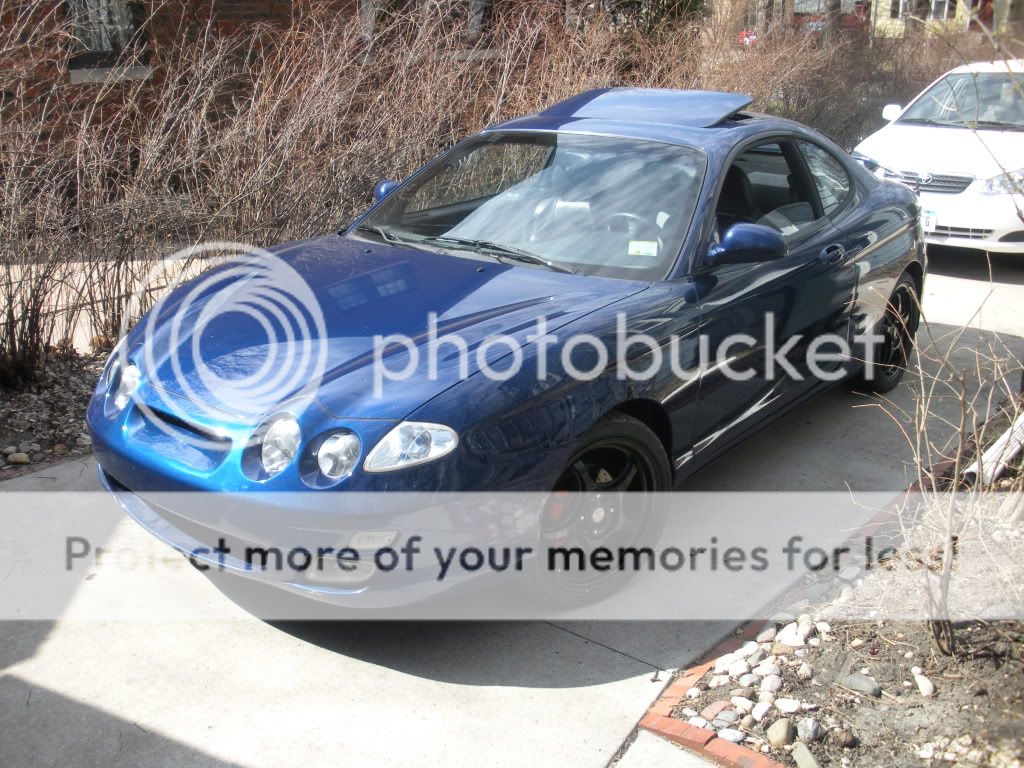
Thread Starter
Senior Member
Joined: Mar 2008
Posts: 709
Likes: 0
From: Pennsylvania
Vehicle: 2000 Hyundai Tiburon
Wow! That looks great.
Really glad the DIY was useful to someone!! 3 Hours is not bad at all for the whole thing, it took me a while longer to figure it all out the first time and to get the nerve to cut up a brand new bumper LOL. It is worth the work though it does make it really clean!
I sadly still have that bumper in storage here in my shed. But I'm glad to report that it looks the same and is as flexible as the day I did the DIY! So it seems to hold up well.
Oh BTW this is my first official post on HA after being a member like a year or more LMAO.