Diy - Halo Hid Headlight Setup
 01-16-2006, 09:25 PM
#1
Administrator

Thread Starter
Join Date: Oct 2002
Location: ɯooɹpǝq ɹnoʎ
Posts: 13,943
Likes: 0
Received 0 Likes
on
0 Posts
Vehicle: ǝdnoɔ sısǝuǝƃ
Alright, it's probably one of the easiest things I've ever done. Took me 10 minutes to do both headlights... outside, in the cold windy darkness. Holding a flashlight. I didn't time how long it took to drill the holes, because I did that while "working" using the company drill press. Probably took 20 seconds total wink1.gif Complete install was done on my 15 minute dinner break (night shift).
First - drill a hole in your headlight cover. About 1/4 inch... make sure the grommet will fit in there.
I had to drill a second hole for the red and blue wires to go through. You may not have to, it depends on your setup.
These pictures will pretty much explain everything else. The hardest part was latching the bulbs in with that stupid metal clamp thingie we have. It's always a PITA for me changing bulbs. Just force it in and it'll be fine.
In the first picture, I put a label on pretty much everything. I can't explain it any more than that really.

In the second picture, pay attention to where the holes are drilled. Not a big deal really. Follow the wires to where they connect to the ballast. It's really very easy, just plug the connectors in the only place they can connect.
http://home.comcast.net/~majiktib/halosetup1.jpg - HIGH RESOLUTION, 2160 x 1440 so you can see what you need to
In the last picture, it shows the ballast behind the battery. I bolted it to a hole left open from when I removed my factory intake boxes. It works perfect. The wires run around my battery to the headlights with no problem.
http://home.comcast.net/~majiktib/halosetup5.jpg - HIGH RESOLUTION, 2160 x 1440 so you can see what you need to
First - drill a hole in your headlight cover. About 1/4 inch... make sure the grommet will fit in there.
I had to drill a second hole for the red and blue wires to go through. You may not have to, it depends on your setup.
These pictures will pretty much explain everything else. The hardest part was latching the bulbs in with that stupid metal clamp thingie we have. It's always a PITA for me changing bulbs. Just force it in and it'll be fine.
In the first picture, I put a label on pretty much everything. I can't explain it any more than that really.
In the second picture, pay attention to where the holes are drilled. Not a big deal really. Follow the wires to where they connect to the ballast. It's really very easy, just plug the connectors in the only place they can connect.
http://home.comcast.net/~majiktib/halosetup1.jpg - HIGH RESOLUTION, 2160 x 1440 so you can see what you need to
In the last picture, it shows the ballast behind the battery. I bolted it to a hole left open from when I removed my factory intake boxes. It works perfect. The wires run around my battery to the headlights with no problem.
http://home.comcast.net/~majiktib/halosetup5.jpg - HIGH RESOLUTION, 2160 x 1440 so you can see what you need to
 01-16-2006, 09:28 PM
#2
Moderator


dude, you didn't explain anything. Can you at least tell us how you got the fuxors in there, or what it looks like on the other side of the cover, or where you got them?
01-16-2006, 09:31 PM
#3
Administrator
Thread Starter
Join Date: Oct 2002
Location: ɯooɹpǝq ɹnoʎ
Posts: 13,943
Likes: 0
Received 0 Likes
on
0 Posts
Vehicle: ǝdnoɔ sısǝuǝƃ
I got them from uneek... they are HALO HID's if you didn't recognize the ballasts.
On the other side of the cover is the bulb. It goes in just like any other bulb. The wires come out through the big hole.
The smaller hole is where the red/blue wires go through. Plug the wires into the plugs that the regular headlight bulbs usually plug into. That's all there is to do. I wrote all that in the first pic.
01-16-2006, 09:35 PM
#5
Administrator
Thread Starter
Join Date: Oct 2002
Location: ɯooɹpǝq ɹnoʎ
Posts: 13,943
Likes: 0
Received 0 Likes
on
0 Posts
Vehicle: ǝdnoɔ sısǝuǝƃ
honestly, I don't know how to make it any easier. It's as easy as drilling 2 holes and changing a light bulb.
How many hyundai owners does it take to change a headlight bulb?
nana.gif
look at the first picture and think about it. You plug one plug into another (the plugs don't allow you to plug the wrong one in). Run the red and blue wires to the plug that your bulb usually plugs into. Put the bulb in the socket. Done.
01-16-2006, 09:38 PM
#6
Moderator
ok, halo HID! I didn't know that was all there was to the HID kit. I thought you were talking about halos as in you found a new way to put the glowing rings in without removing the plastic headlamp cover from the front of the enclosure.
01-16-2006, 10:31 PM
#7
Senior Member

Join Date: Mar 2006
Posts: 9,172
Likes: 0
Received 0 Likes
on
0 Posts
Vehicle: 2001/Hyundai/Tiburon
changed the title a bit to clear things up. i thought it was for angel eyes too, and then i looked at the pictures. owned.gif lmao.gif
you did bolt both those ballasts down, right?
heres something to add....
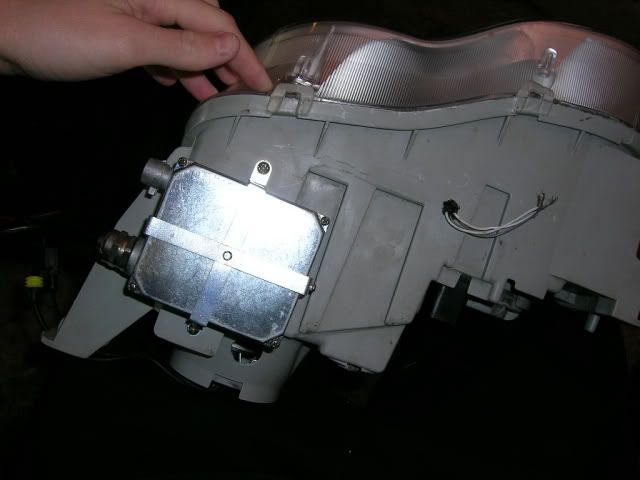
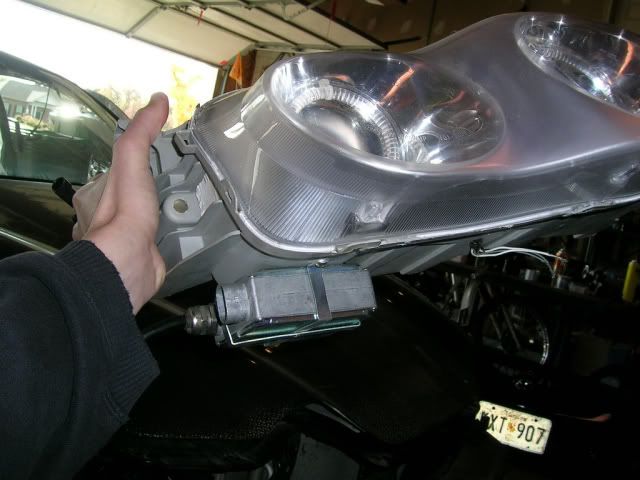
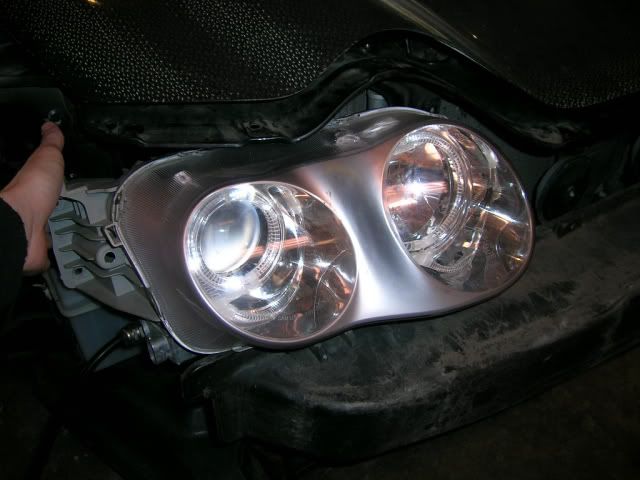
If you want the superclean install, there is a perfect spot to hide the ballasts. it does require taking off your front bumper though. just about every modern ballast ive seen is near identical in size, so it should be good for a number of kits. it utilizes a tiny pocket right underneath the headlight. here are some pictures that are pretty much self-explanatory...
CLICK for bigger pictures

Great DIY though, im adding it to the listing.
you did bolt both those ballasts down, right?
heres something to add....
If you want the superclean install, there is a perfect spot to hide the ballasts. it does require taking off your front bumper though. just about every modern ballast ive seen is near identical in size, so it should be good for a number of kits. it utilizes a tiny pocket right underneath the headlight. here are some pictures that are pretty much self-explanatory...
CLICK for bigger pictures
Great DIY though, im adding it to the listing.
01-16-2006, 11:12 PM
#8
Administrator
Thread Starter
Join Date: Oct 2002
Location: ɯooɹpǝq ɹnoʎ
Posts: 13,943
Likes: 0
Received 0 Likes
on
0 Posts
Vehicle: ǝdnoɔ sısǝuǝƃ
sorry, what was the original thread title? Sorry for being confusing....
thanks for the extra pics Tibby01
No, I didn't bolt BOTH down. The one on the passenger side sits easily in the corner next to the washer fluid resevior. It never really moves, just make sure you're careful of the wires and don't let them get caught by the belts and pulleys. .
thanks for the extra pics Tibby01
No, I didn't bolt BOTH down. The one on the passenger side sits easily in the corner next to the washer fluid resevior. It never really moves, just make sure you're careful of the wires and don't let them get caught by the belts and pulleys. .
01-17-2006, 08:24 AM
#9
Senior Member
Join Date: Mar 2006
Posts: 9,172
Likes: 0
Received 0 Likes
on
0 Posts
Vehicle: 2001/Hyundai/Tiburon
you originally had "halo setup"...lol
i really liked the one pic i saw of his kit that had the +12v wires for the ballast running through the rubber grommet, along with the high voltage bulb wires. makes the install a bunch cleaner, and seals it better. you might get some condensation issues with the wires like that. i would get some black(exterior) rtv sealant and glob it up around those holes just to make sure.
also on the ballasts, you should atleast get some double stick tape, clean off a spot where the ballast is sitting right now, and stick it down. im sure the wires wont get anywhere near the belts, but the vibration and bouncing could kill the ballasts quick. the box can be as durable as it wants, but it still contains relatively fragile electronic components that can only put up with so much shaking until they break.
01-17-2006, 09:33 AM
#10
Senior Member
Join Date: Mar 2002
Location: Los Lunas, New Mexico, USA.
Posts: 34,642
Likes: 0
Received 0 Likes
on
0 Posts
Vehicle: 2001 Hyundai Tiburon, 2004 Kia Sorento, 2010 Kia Soul
Uneek said that most of the HID sets have them all through the grommet. if it's a SPLIT grommet, you can do it yourself, if it's not, you could always cut a slot in the grommet and just put them through.
I totally agree with mounting and sealing though.
I totally agree with mounting and sealing though.