
DIY Gk Tiburon Pedal Covers, Without Using Glue.

Thread Starter
Senior Member

Joined: Mar 2002
Posts: 34,642
Likes: 0
From: Los Lunas, New Mexico, USA.
Vehicle: 2001 Hyundai Tiburon, 2004 Kia Sorento, 2010 Kia Soul
Okay, I'd heard this rumor once or twice, maybe in the last 2 years, that you could mount a GK pedal cover set on the RD Tiburon, without gluing or otherwise attaching the gas pedal cover with epoxy or the like.
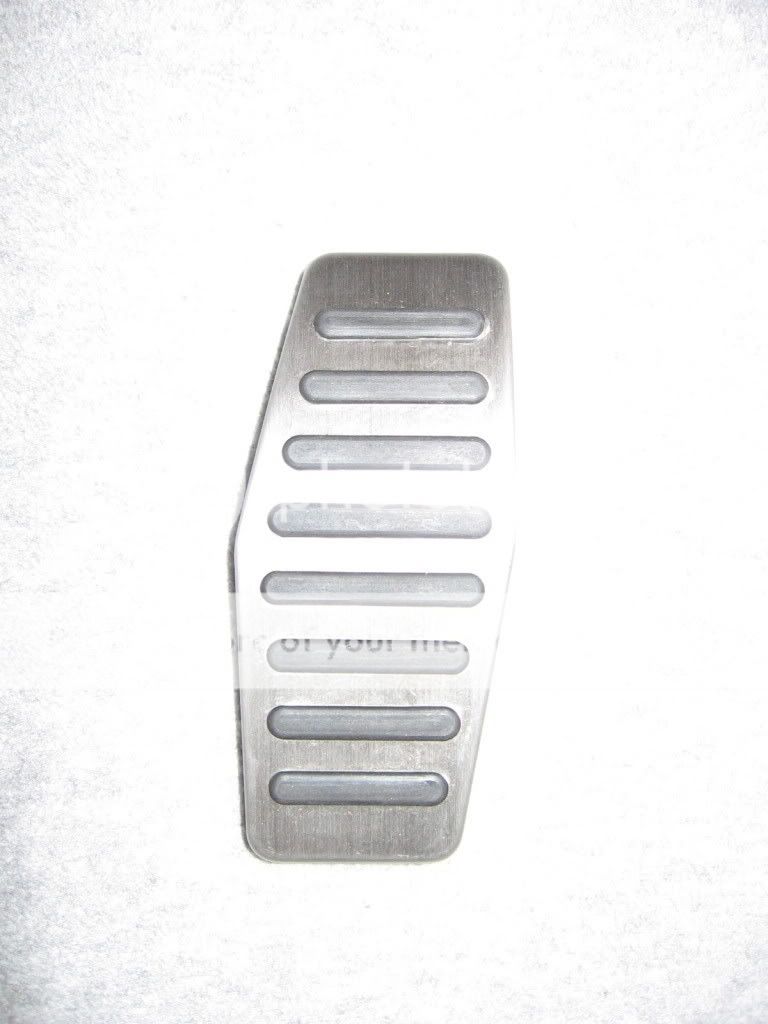
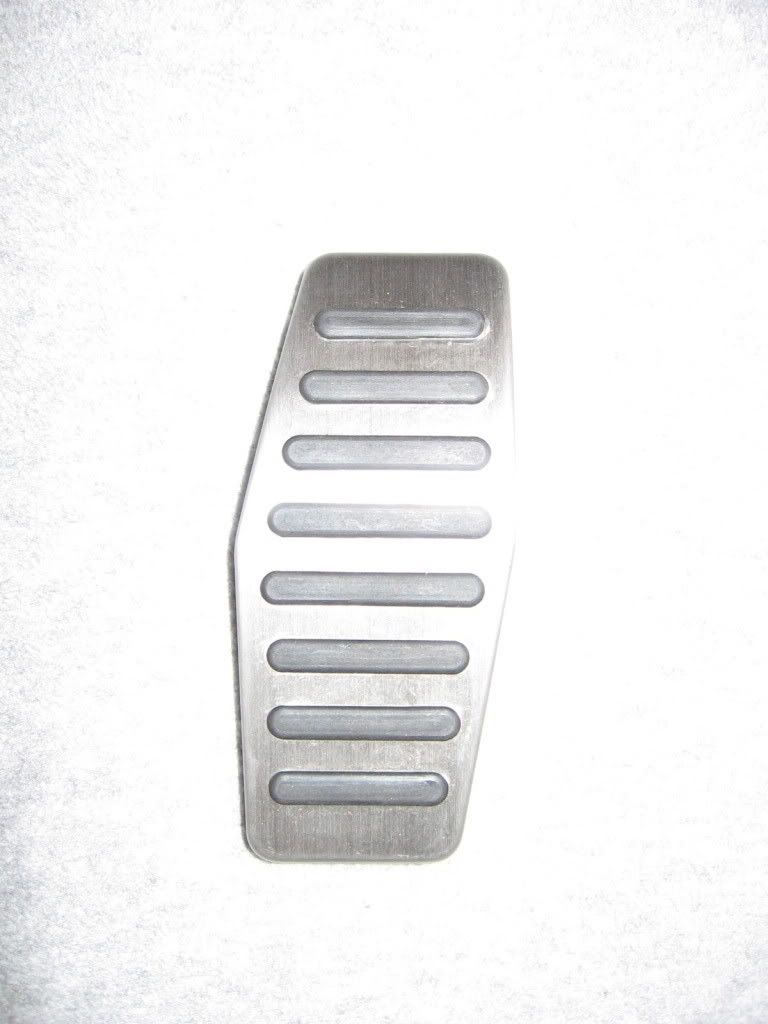
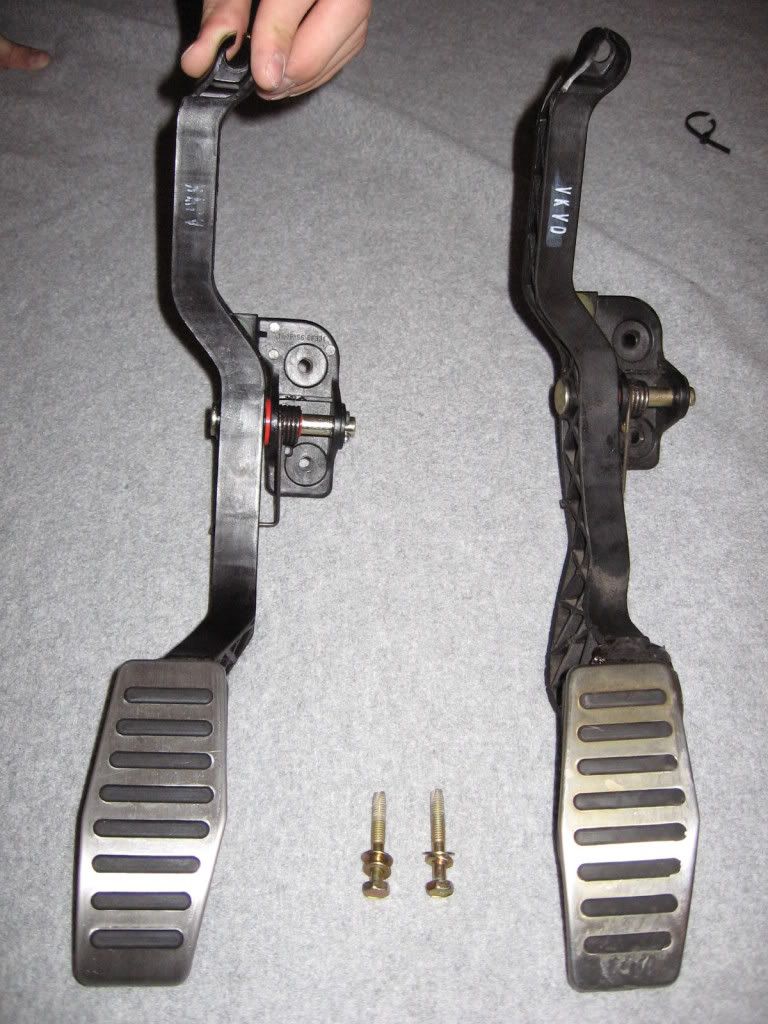
Pedal Cover.
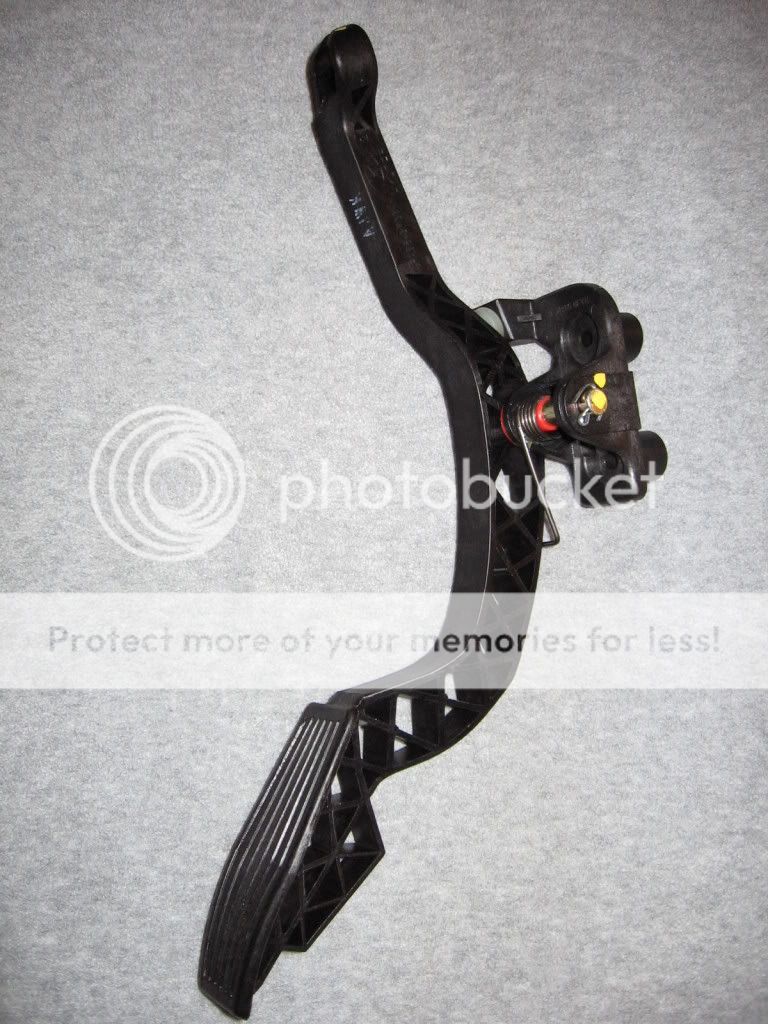
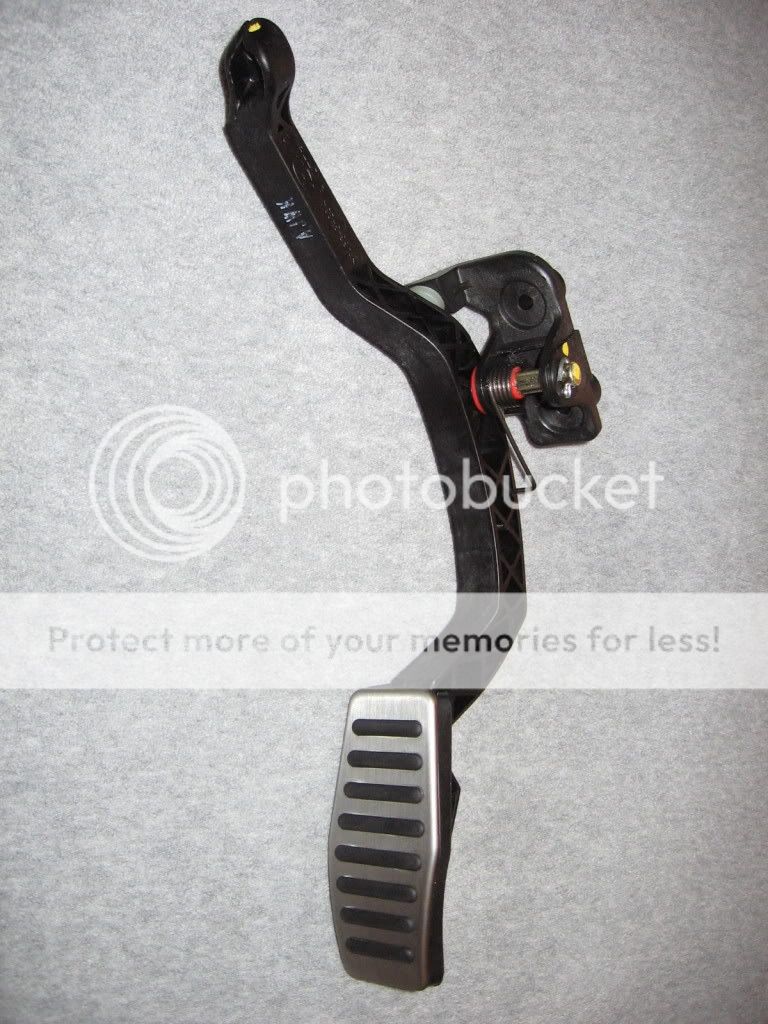
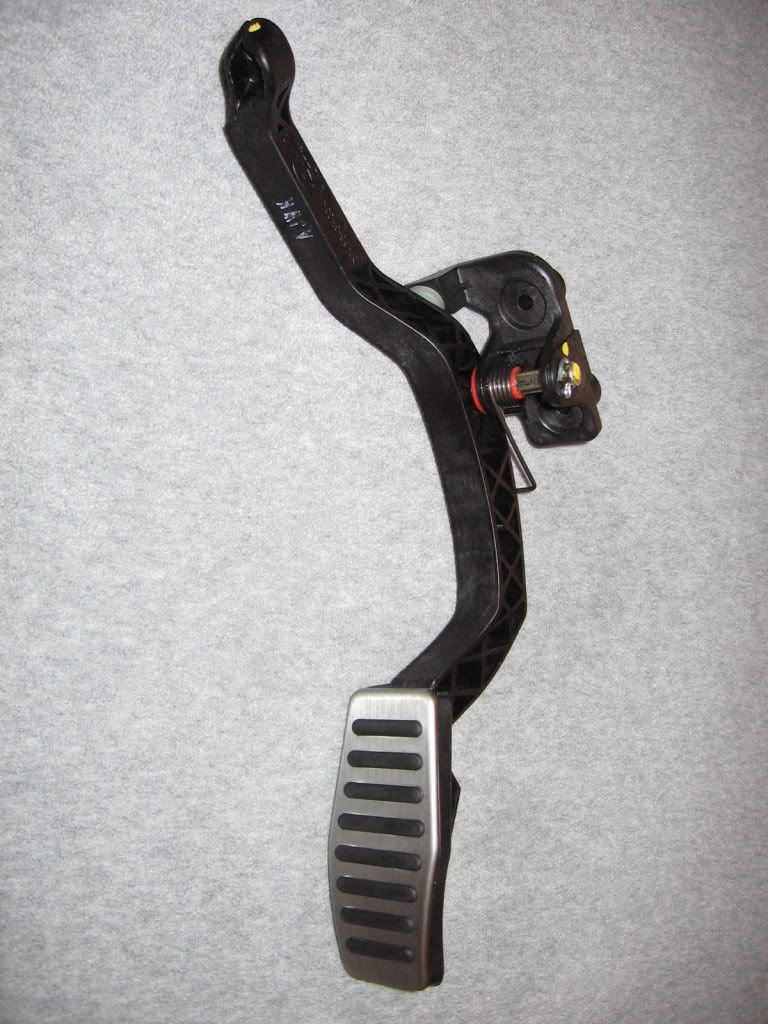
New Pedal Assembly and with Cover installed.
Doing some research, and with some info I found here and there (Javageek, a few others), the rumor appeared to be founded. So, I went out on a limb, ordered the part, and what do you know, it worked GREAT.
Actually, it works better than great. The GK pedal arm assembly seems to have a better angle, and is a bit more away from the firewall than the OEM one. The kicker? The entire assembly swaps. You can buy one of 2 parts, either just the arm, or the whole assembly. After installing mine, I'd suggest to anyone to buy the whole assembly. The price difference is about $6, but if you buy the arm, you have to take out the entire assembly anyways to get to the cotter pin that keeps the arm on the pivot point. There's just to 10MM bolts to remove, and pop the throttle cable out, then swap. That's it.
On the new arm, the pedal cover just slips right on. What's the difference?
1. No epoxy or glue getting all over the interior when you attach it.
2. No zip ties.
3. When the pedal cover wears, you can easily replace it now.
4. If the metal changes color due to the heater, you can easily replace it.
5. At least for me, no chance of the pedal getting caught on my floormats anymore.
The best news is, Seoulfulracing.com will be offering a package deal on the pedal covers and the GK Arm for a full kit. We are just waiting on pricing info, and this will be offered, right up next to the RD2 KDM Dash Swap kit.
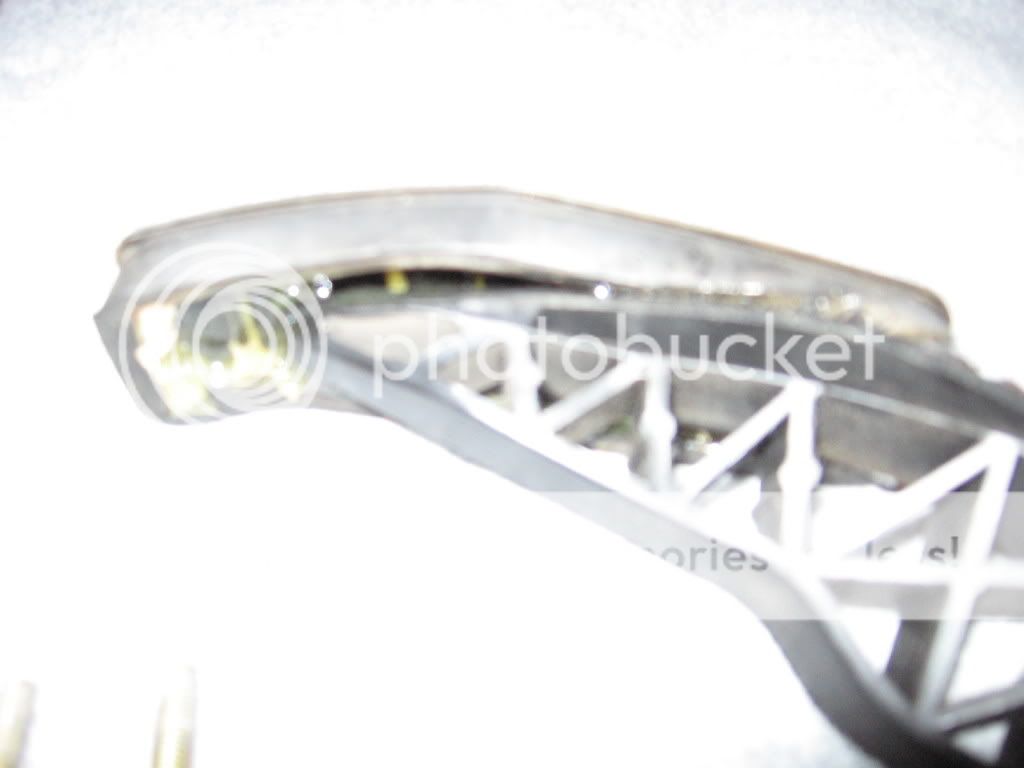
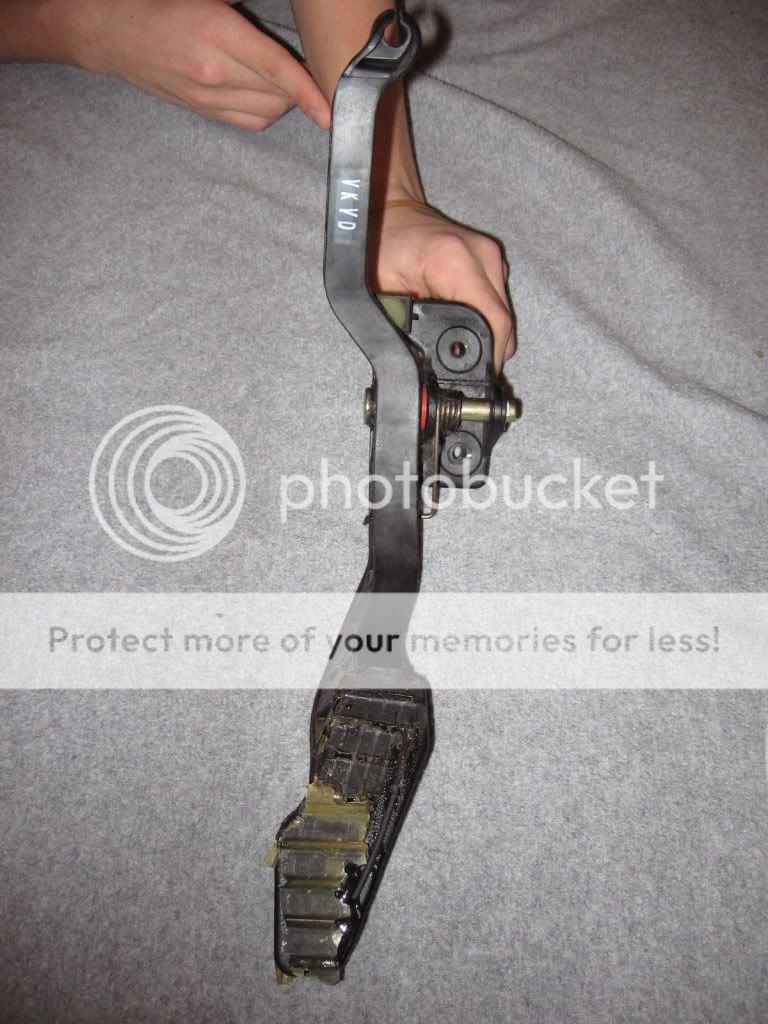
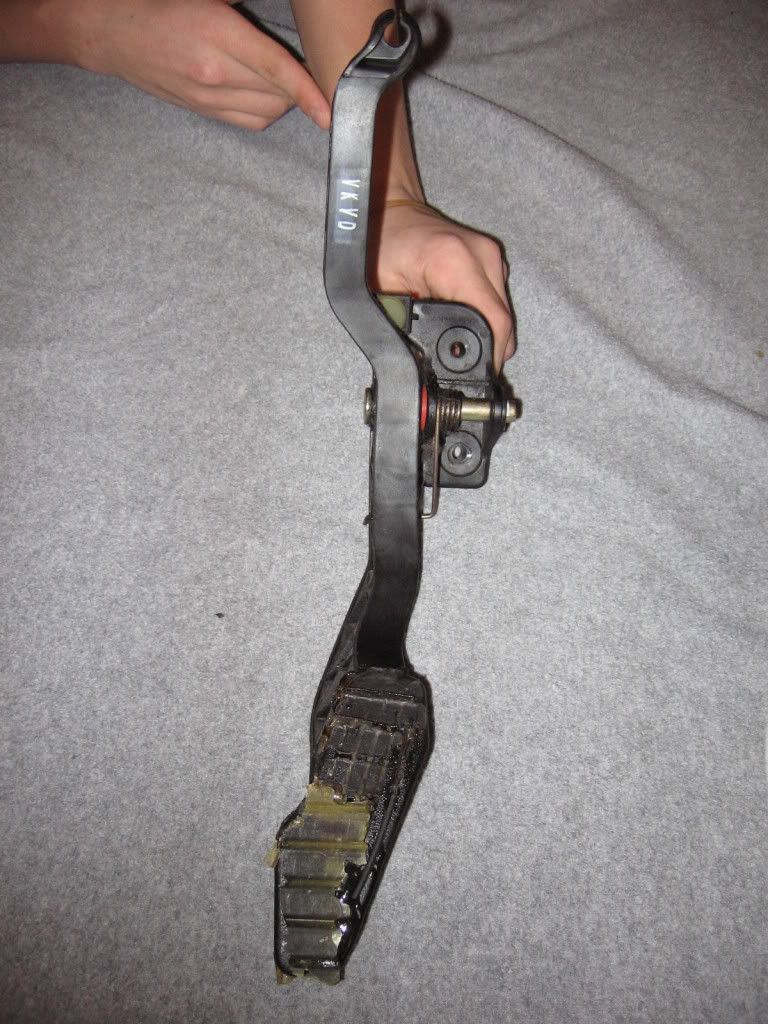
Here is a picture of my OEM arm when I took it off. You can see the epoxy/mess that is in there. I forgot to get some pics of the epoxy on my diamond plate.
Tools Needed
1 10MM Socket and Ratchet w/extension.
1 Thick pad or mat to keep from hurting your back
2 portions of patience
1 assistant
Parts Needed
1 Set of Pedal Covers, or just the Gas Cover (Seoulfulracing.com)
1 Pedal Assembly PN (32700 2D000) $26 from your dealer, cheaper from Seoulfulracing.com
Open your hood and show your assistant how the TB rotor works. This person will give you some slack so you can easily remove the cable.
Open the drivers door fully and put the drivers seat bottom all the way back. Put a thick mat or pad over the door sill/jamb and lay down on your back, sliding in under the dash so you can see the gas cable assembly.
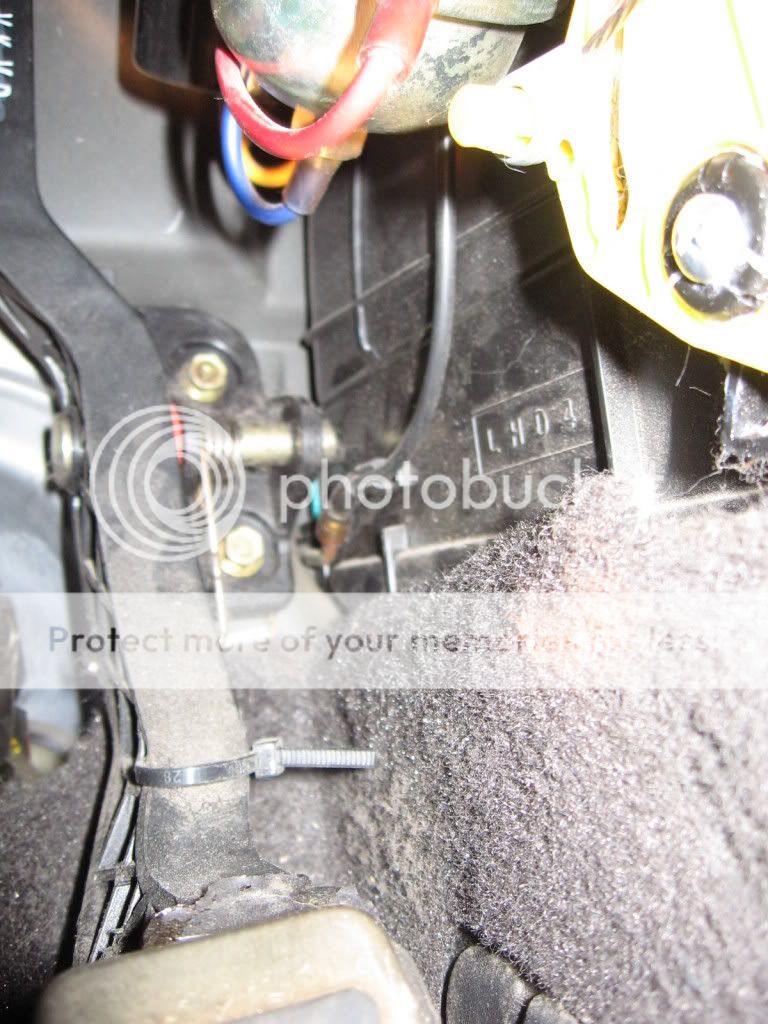
Use the ratchet to remove the 2 long brass colored bolts shown in the picture. They are about 2 inches long, and with the cramped quarters, they can take some time to get out.
Once both screws are out, have your assistant fully turn the TB to give you slack. Let the end of the gas cable come loose from the assembly about an inch, and push behind the assembly (where the cable goes through) to pop out the little white plastic lock. This can be a bit difficult, but when you see it, you'll understand.
Slide the cable out, pull the assembly out, and go see your chiropractor.
LOL
Only thing you have to do now is go and reverse the process with the new assembly, making sure the white plastic portion snaps in place. That's it. You might want slack on the assembly so you can get the bolts started.
Here's some comparison shots.
^^^
The old pedal assembly. Note the MELTED PLASTIC from the epoxy.
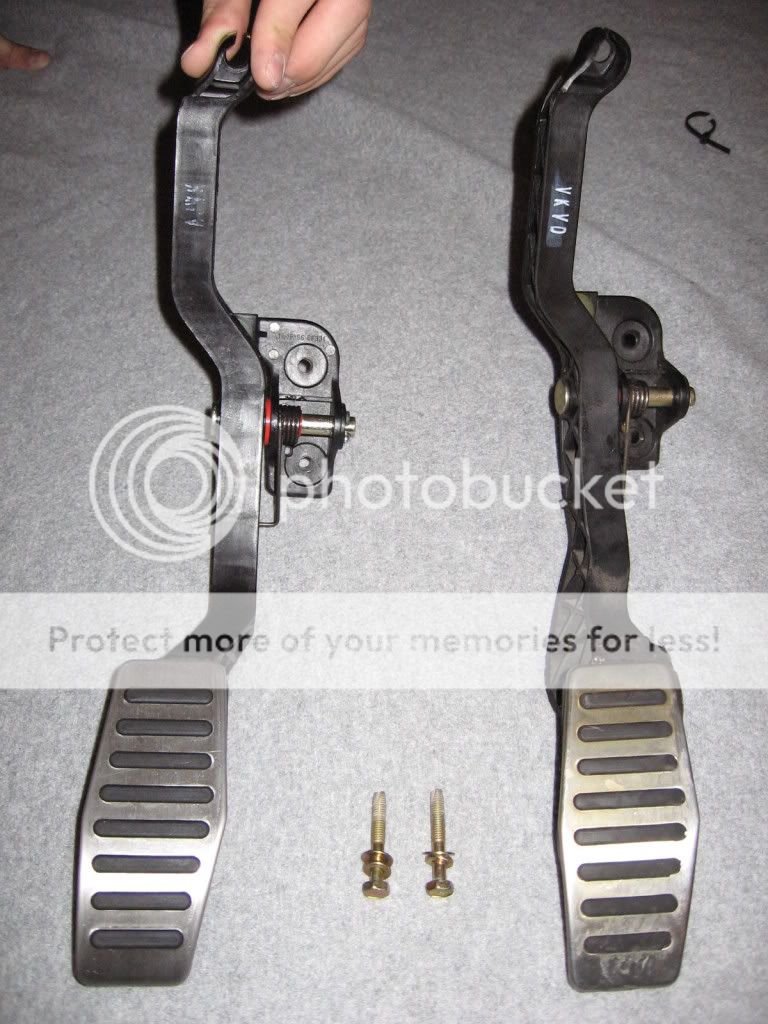
Comparison, side by side, of both assemblies.
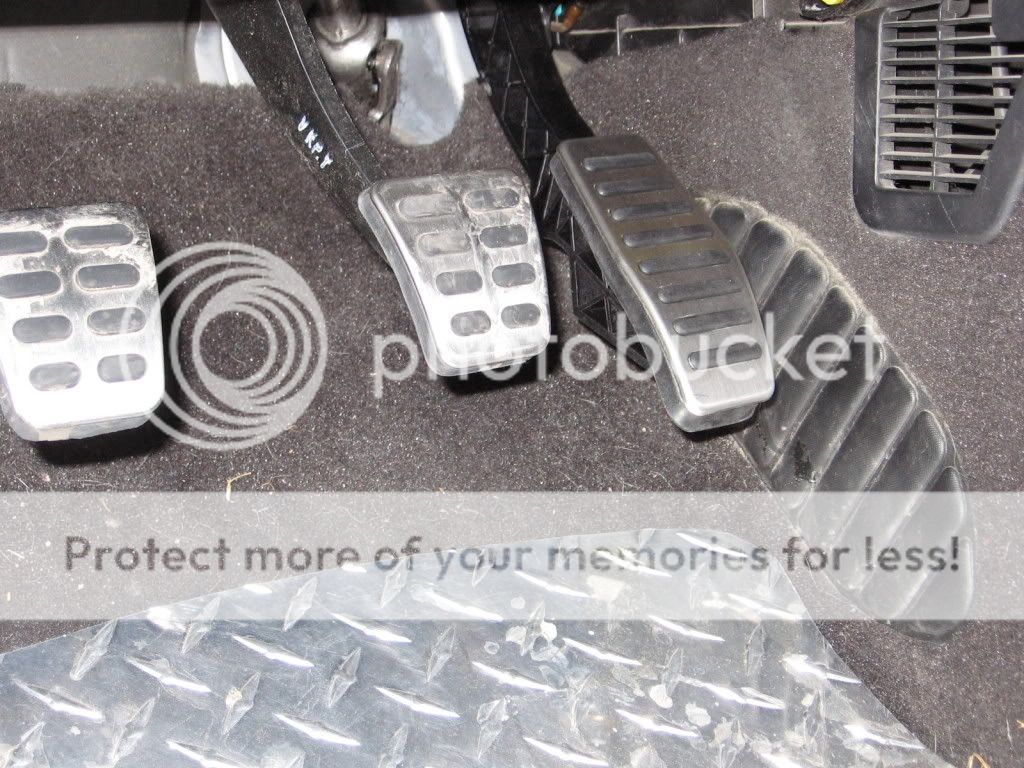
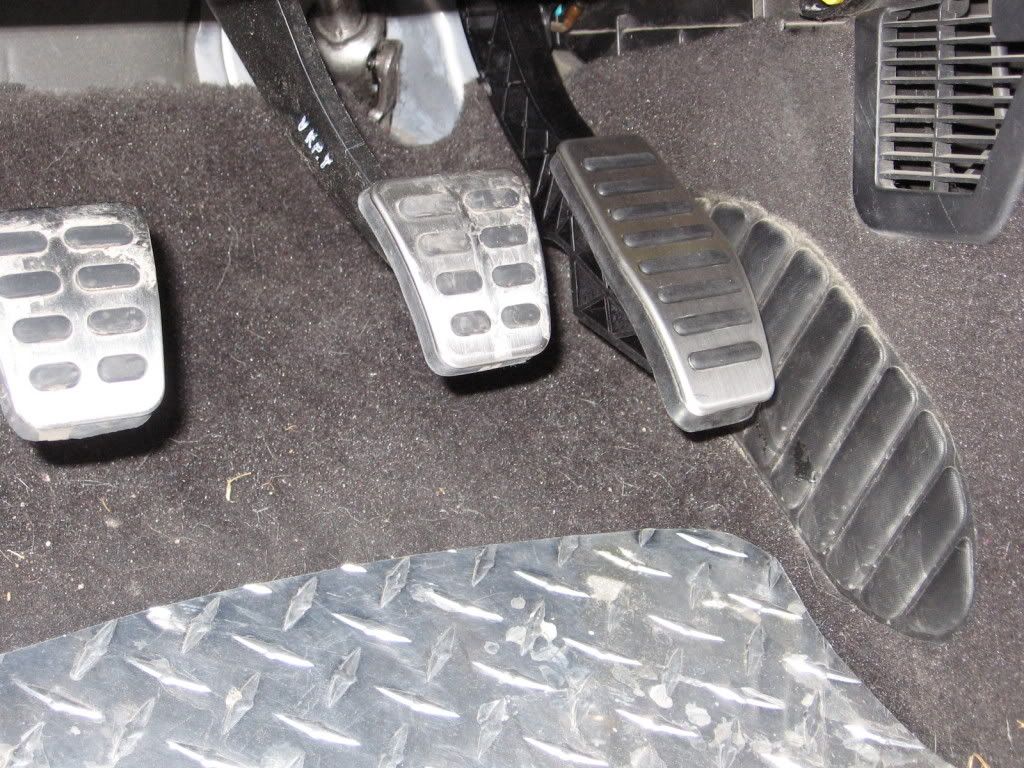
New assembly installed.
As you can see from the pictures above, the cotter pin that holds the assembly in place is on the right side, and when installed, it's RIGHT next to the center console, so you can't get to it and take it out that way. Or if you can, you have tiny hands, and no life. Pay the extra few dollars, get a brand new part, and don't lose skin off our fingers.
Pedal Cover.
New Pedal Assembly and with Cover installed.

Doing some research, and with some info I found here and there (Javageek, a few others), the rumor appeared to be founded. So, I went out on a limb, ordered the part, and what do you know, it worked GREAT.
Actually, it works better than great. The GK pedal arm assembly seems to have a better angle, and is a bit more away from the firewall than the OEM one. The kicker? The entire assembly swaps. You can buy one of 2 parts, either just the arm, or the whole assembly. After installing mine, I'd suggest to anyone to buy the whole assembly. The price difference is about $6, but if you buy the arm, you have to take out the entire assembly anyways to get to the cotter pin that keeps the arm on the pivot point. There's just to 10MM bolts to remove, and pop the throttle cable out, then swap. That's it.
On the new arm, the pedal cover just slips right on. What's the difference?
1. No epoxy or glue getting all over the interior when you attach it.
2. No zip ties.
3. When the pedal cover wears, you can easily replace it now.
4. If the metal changes color due to the heater, you can easily replace it.
5. At least for me, no chance of the pedal getting caught on my floormats anymore.
The best news is, Seoulfulracing.com will be offering a package deal on the pedal covers and the GK Arm for a full kit. We are just waiting on pricing info, and this will be offered, right up next to the RD2 KDM Dash Swap kit.
Here is a picture of my OEM arm when I took it off. You can see the epoxy/mess that is in there. I forgot to get some pics of the epoxy on my diamond plate.

Tools Needed
1 10MM Socket and Ratchet w/extension.
1 Thick pad or mat to keep from hurting your back
2 portions of patience
1 assistant
Parts Needed
1 Set of Pedal Covers, or just the Gas Cover (Seoulfulracing.com)
1 Pedal Assembly PN (32700 2D000) $26 from your dealer, cheaper from Seoulfulracing.com
Open your hood and show your assistant how the TB rotor works. This person will give you some slack so you can easily remove the cable.
Open the drivers door fully and put the drivers seat bottom all the way back. Put a thick mat or pad over the door sill/jamb and lay down on your back, sliding in under the dash so you can see the gas cable assembly.
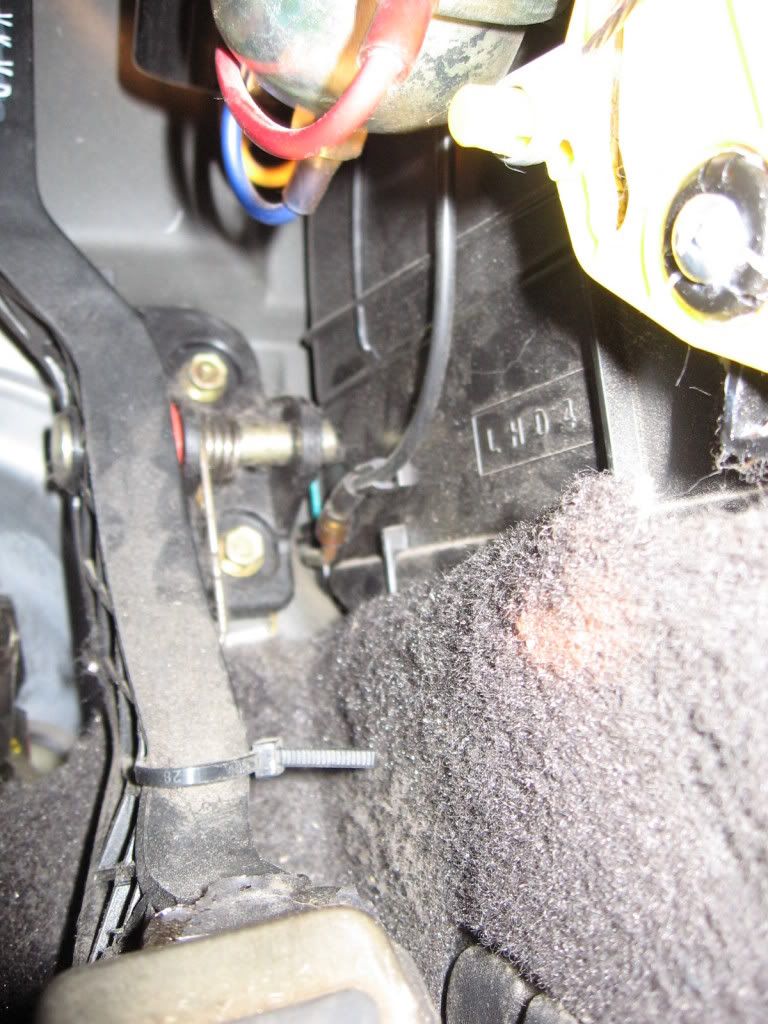
Use the ratchet to remove the 2 long brass colored bolts shown in the picture. They are about 2 inches long, and with the cramped quarters, they can take some time to get out.
Once both screws are out, have your assistant fully turn the TB to give you slack. Let the end of the gas cable come loose from the assembly about an inch, and push behind the assembly (where the cable goes through) to pop out the little white plastic lock. This can be a bit difficult, but when you see it, you'll understand.
Slide the cable out, pull the assembly out, and go see your chiropractor.
LOL
Only thing you have to do now is go and reverse the process with the new assembly, making sure the white plastic portion snaps in place. That's it. You might want slack on the assembly so you can get the bolts started.
Here's some comparison shots.
^^^
The old pedal assembly. Note the MELTED PLASTIC from the epoxy.
Comparison, side by side, of both assemblies.
New assembly installed.
As you can see from the pictures above, the cotter pin that holds the assembly in place is on the right side, and when installed, it's RIGHT next to the center console, so you can't get to it and take it out that way. Or if you can, you have tiny hands, and no life. Pay the extra few dollars, get a brand new part, and don't lose skin off our fingers.

Thread Starter
Senior Member
Joined: Mar 2002
Posts: 34,642
Likes: 0
From: Los Lunas, New Mexico, USA.
Vehicle: 2001 Hyundai Tiburon, 2004 Kia Sorento, 2010 Kia Soul
^^^
Thanks for sharing the info focker.
LOL
This is why I do DIY's, so everyone can learn and use them. Someone mentioned your name, and Loneshark's name in my research.
<div class='quotetop'>QUOTE (Caj Darkmoon @ Feb 23 2007, 08:36 AM) <{POST_SNAPBACK}></div><div class='quotemain'>Wow, get that up on seoulfulracing. Cheaper then $26 is a darn good price.
Edit: Oh boo, plus another $48, not as impressive</div>
It's only 48 if you want the dead pedal. You can buy them seperately and it'll be like $40 total.
<div class='quotetop'>QUOTE (funkypc @ Feb 23 2007, 09:52 AM) <{POST_SNAPBACK}></div><div class='quotemain'>Redz, looks like it's closer to the brake pedal. Do you have a before and after pic of that? I wonder if it would be less comfortable to drive with it being closer like that...</div>
It does move it a bit closer, but I have LESS problems now than I did before. I don't hit the brakes accidentally by my foot slipping off the gas anymore.

Senior Member
Joined: Mar 2006
Posts: 721
Likes: 0
Vehicle: 2000 Hyundai Tiburon
Loneshark or Landshark? tongue.gif No epoxy is so nice! But its good that everyone has this information now. Didn't think about it at the time when I did it. I was just excited to put it on. Good job though.


Senior Member
Joined: Sep 2002
Posts: 2,236
Likes: 0
i allreqady have my GK pedals apoxied in place with no issues.
if for any reason in the future i have any issues with the pedals coming off or such, ill probably try this. price isnt too bad so its worth it i think. i definitly would have done this when i installed my pedals if id have known about it.
if for any reason in the future i have any issues with the pedals coming off or such, ill probably try this. price isnt too bad so its worth it i think. i definitly would have done this when i installed my pedals if id have known about it.