
Diy: Changing Clutch Fluid


Thread Starter
Senior Member
Joined: Jul 2007
Posts: 276
Likes: 0
From: Kingsland, GA
So here's my way of changing the clutch fluid in your car. Many people have different ways, but this one is quite easy, and is very effective. You should really change the clutch and brake fluid every 2 years. Brake fluid is "hygroscopic," which means it absorbs water. Moisture in a brake system is bad, since water boils at 212F, at atmospheric pressure. Brake fluid has a high boiling point, so any moisture in the air getting into the brake system is bad.
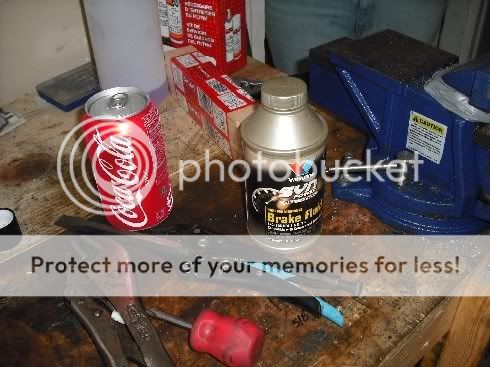
Step 1: Get some DOT 3 brake fluid. This stuff says it exceeds DOT 3 & 4. Whatever, just use DOT 3. I don't know much about DOT 4, but don't use DOT 5, since it's silicone based, and will be useless in no time, so you have to change it quite often. Don't forget the beverage of choice.
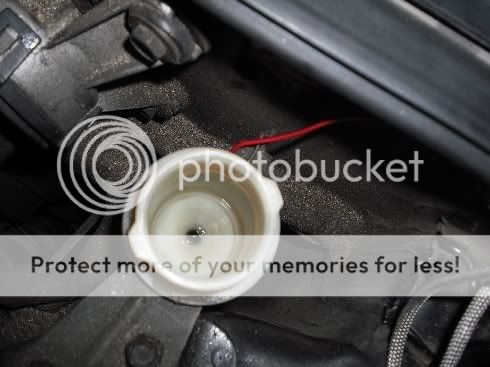
Step 2: Start here. This is the clutch master cylinder reservior. Pop the cap off. You'll probably find fluid that's going to look like coffee. It's supposed to look like iced tea... without the ice.
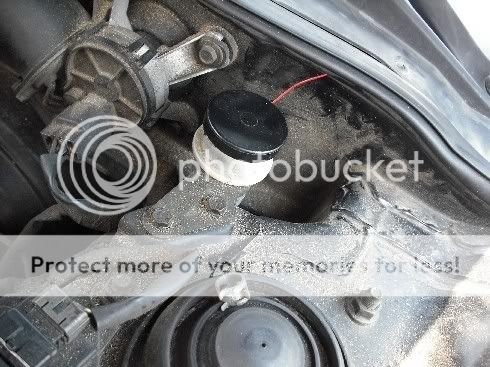
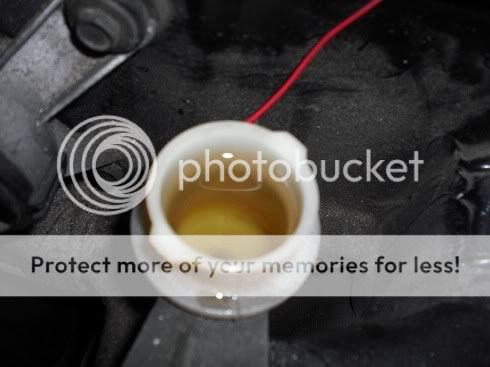
Using a mityvac, or even a turkey baster, suck out all the fluid in the reservior.

^ Notice how gross the clutch fluid is.
Stick a rag in there and get all the grime at the bottom of the reservior.
Step 3: Fill the reservoir with clean fluid.
Aaaah. Much better.
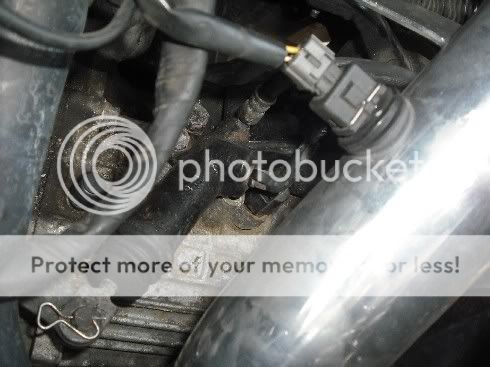
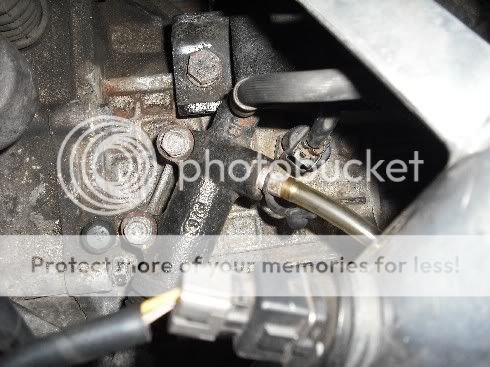
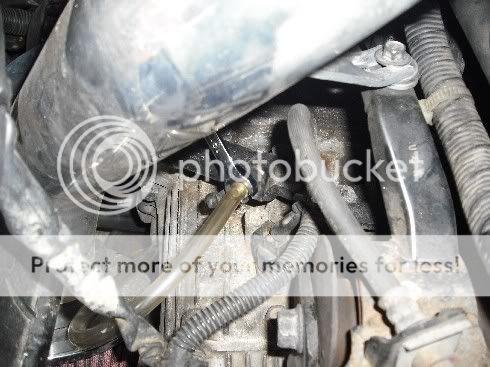
Step 4: You'll want to go here next. This is the slave cylinder. It's right on top of the transmission, underneath the intake.
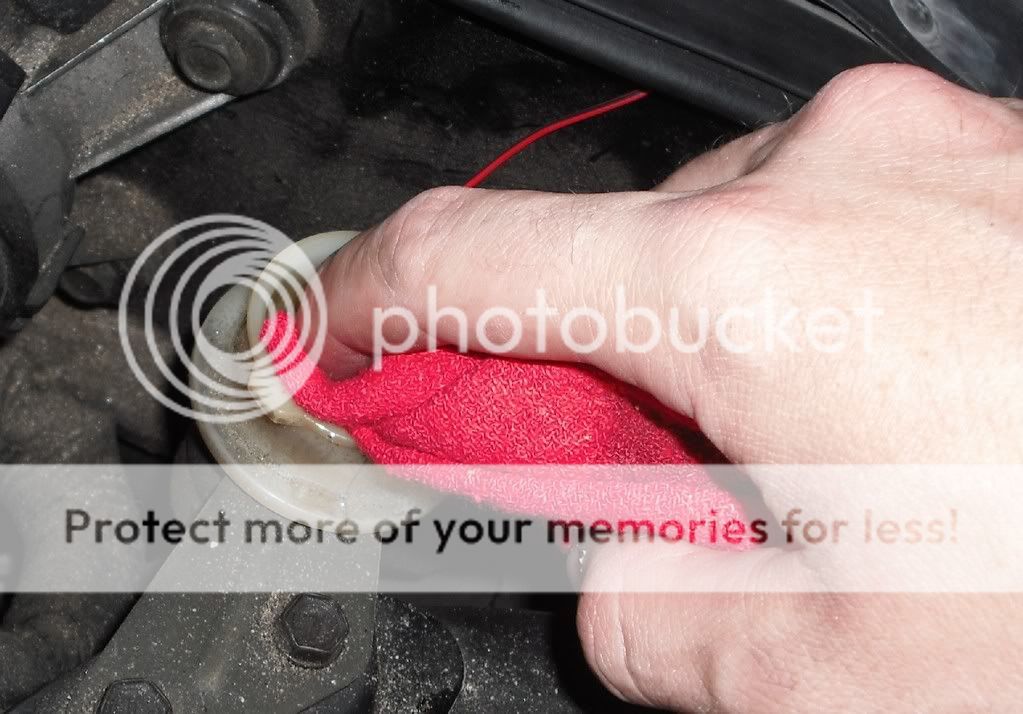
Pop the dust cap off. It's important that you put this back on. Dirt gets in there and makes future flushing difficult.
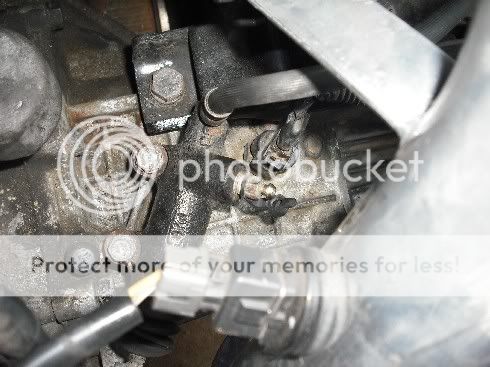
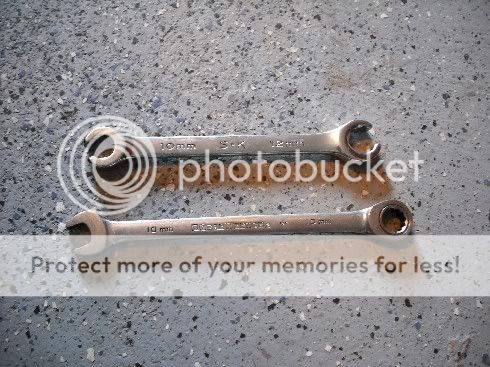
GET A LINE WRENCH!!! I don't know how many people screw these things up, but it makes me so mad when I have to get my vise grips out because someone overtorqued the bleeder with an open end wrench. If you don't have a line wrench, you can use a box-end wrench, but try to get a 6-point box, not a 12 point. These fittings some times get very tight, and you'll have to end up replacing the fitting if you round it off... or deal with using vise grips each time.
The top one's a line wrench, the bottom is not.
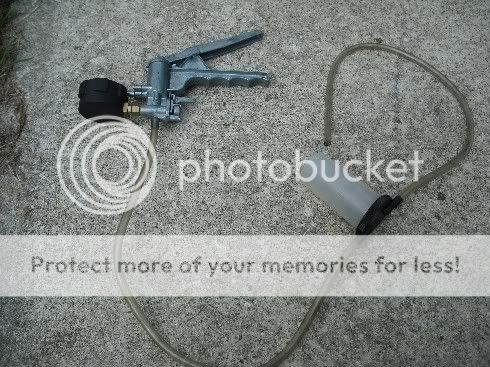
Step 5: Pop a hose on the end of the bleeder screw, and place a bucket under the car to catch the fluid. We're going to use good ol' gravity to bleed/flush the system this time, since it's so much easier.
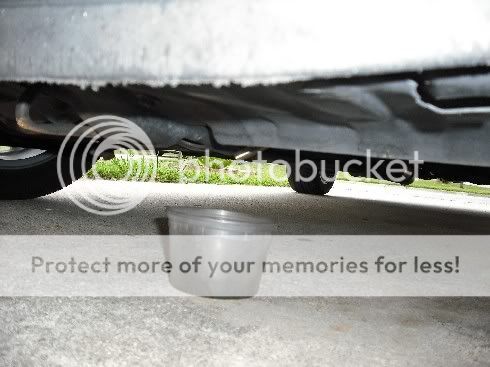
Step 6: Crack the bleeder open about 1/4 turn. You'll see nasty fluid come out.
WATCH THE RESERVOIR!!!! If it empties, you'll have to go through a bleeding procedure, which isn't really hard, but a little more work than you want to do. So don't let the reservoir go dry. As the level goes down, add some more. When clean fluid comes out of the bleeer screw, tighten that sucka back down (Put the boot back on too) , top off the clutch fluid, and put the cap back on the reservoir. Now you're done!!
Step 1: Get some DOT 3 brake fluid. This stuff says it exceeds DOT 3 & 4. Whatever, just use DOT 3. I don't know much about DOT 4, but don't use DOT 5, since it's silicone based, and will be useless in no time, so you have to change it quite often. Don't forget the beverage of choice.
Step 2: Start here. This is the clutch master cylinder reservior. Pop the cap off. You'll probably find fluid that's going to look like coffee. It's supposed to look like iced tea... without the ice.
Using a mityvac, or even a turkey baster, suck out all the fluid in the reservior.
^ Notice how gross the clutch fluid is.
Stick a rag in there and get all the grime at the bottom of the reservior.
Step 3: Fill the reservoir with clean fluid.
Aaaah. Much better.
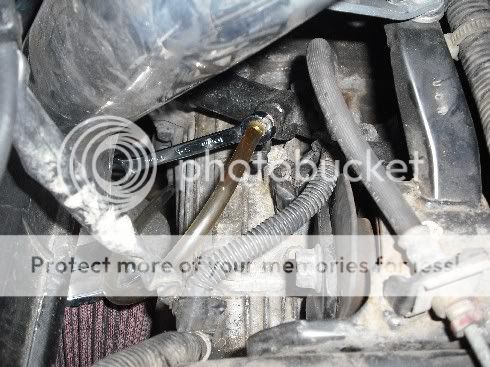
Step 4: You'll want to go here next. This is the slave cylinder. It's right on top of the transmission, underneath the intake.
Pop the dust cap off. It's important that you put this back on. Dirt gets in there and makes future flushing difficult.
GET A LINE WRENCH!!! I don't know how many people screw these things up, but it makes me so mad when I have to get my vise grips out because someone overtorqued the bleeder with an open end wrench. If you don't have a line wrench, you can use a box-end wrench, but try to get a 6-point box, not a 12 point. These fittings some times get very tight, and you'll have to end up replacing the fitting if you round it off... or deal with using vise grips each time.
The top one's a line wrench, the bottom is not.
Step 5: Pop a hose on the end of the bleeder screw, and place a bucket under the car to catch the fluid. We're going to use good ol' gravity to bleed/flush the system this time, since it's so much easier.
Step 6: Crack the bleeder open about 1/4 turn. You'll see nasty fluid come out.
WATCH THE RESERVOIR!!!! If it empties, you'll have to go through a bleeding procedure, which isn't really hard, but a little more work than you want to do. So don't let the reservoir go dry. As the level goes down, add some more. When clean fluid comes out of the bleeer screw, tighten that sucka back down (Put the boot back on too) , top off the clutch fluid, and put the cap back on the reservoir. Now you're done!!

Thread Starter
Senior Member
Joined: Jul 2007
Posts: 276
Likes: 0
From: Kingsland, GA
Damn dude, thanks for pointing out the one thing I forgot owned.gif
Using the same hose and bucket, fill the reservoir full of fluid. Make sure the bleeder screw is closed, and slowly pump the clutch pedal all the way to the floor several times. (The pedal may get stuck to the floor while pumping, so pop it back up with your foot if it does.) You'll need a buddy to help with this. While holding the clutch to the floor, loosen the bleeder, and let the air out. Tighten the screw and let the pedal come up slowly. This creates a suction in the slave cylinder, and draws in fluid from the reservoir. You want to do it slowly to prevent intrusion of air. Bubbly fluid would be pretty much counter-productive for bleeding air.
Repeat this procedure, keeping an eye on the reservoir level each time the bleeder is opened. When fluid comes out of the bleeder screw with no air pockets, you're done. Tighten the bleeder again and let the pedal come out slowly again. Top off the clutch fluid, and check the stiffness of the pedal. If there is air, it will feel spongy, and may stick to the floor. Start the car in neutral for safety's sake, and shift into reverse. If there is no grinding, and the car doesn't move on its own with the clutch pressed, it's been successfully bled.