
Diy : Captive Hub/rotor Swap.

Thread Starter
Senior Member

Joined: Mar 2002
Posts: 34,642
Likes: 0
From: Los Lunas, New Mexico, USA.
Vehicle: 2001 Hyundai Tiburon, 2004 Kia Sorento, 2010 Kia Soul
Okay, one of the first things I've done in the new garage, the Captive Hub and Rotor Swap.
Ease? Ehh, I'd give it a difficulty of 2 on a scale of 1 to 5, with 5 being HARD AS HELL, but only if you have no rust. If you have some rust, I raise the difficulty to 3.5 out of 5, because it can be VERY hard to get the hub out of the ball joints. I had one VERY easy, the other VERY hard.
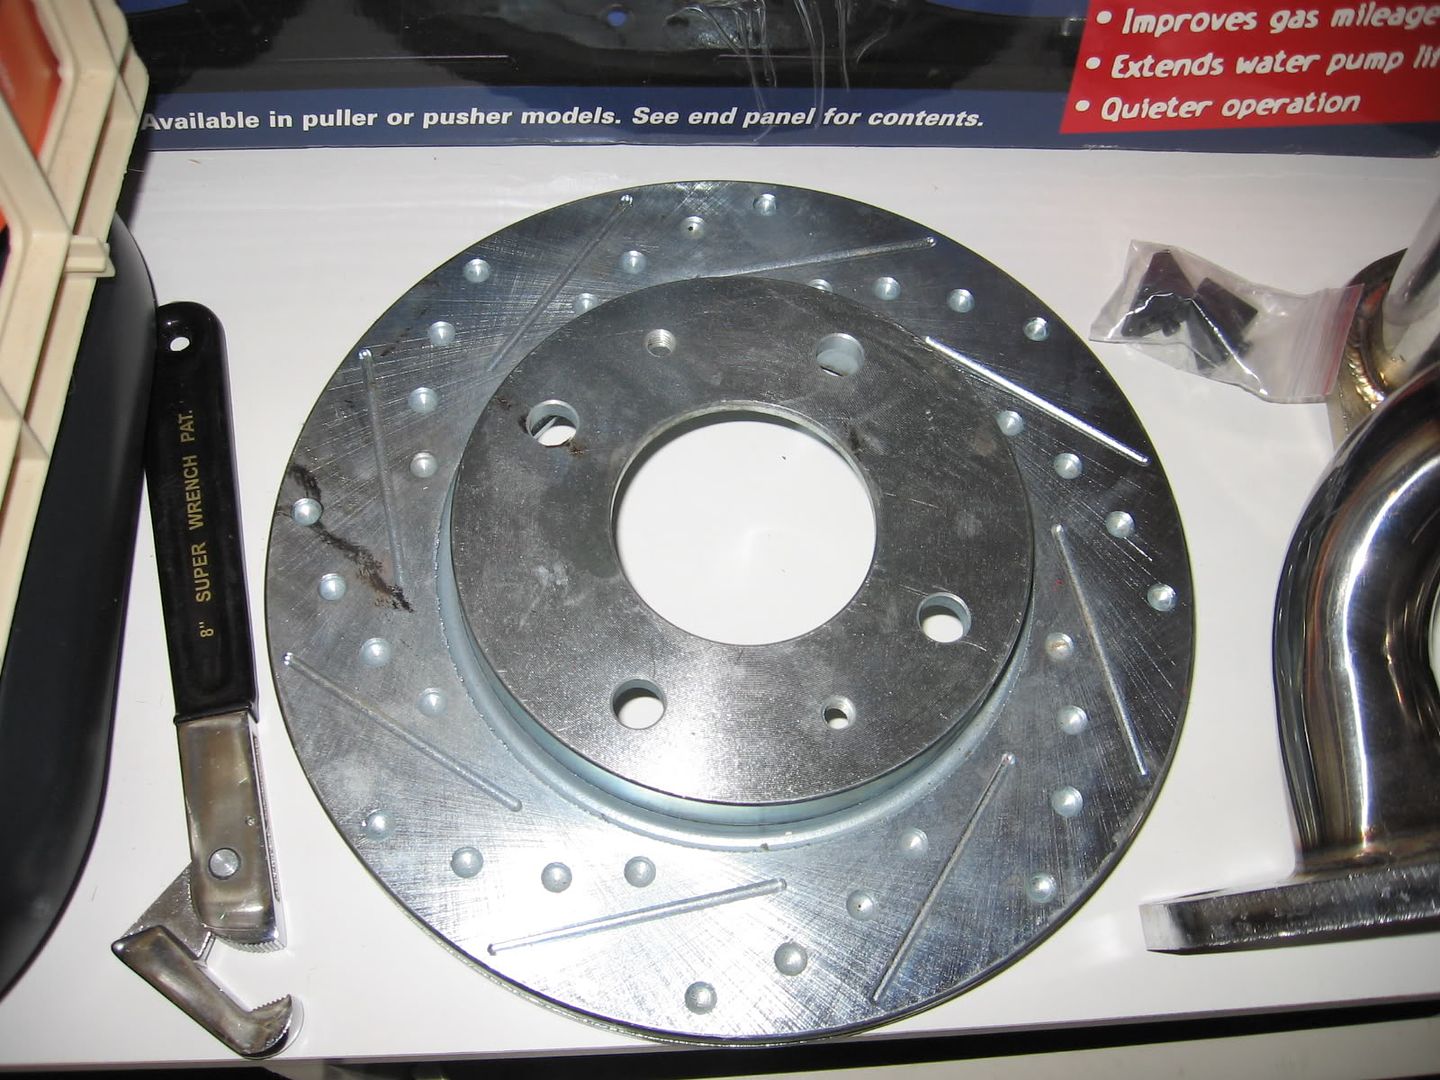
I also thought this would be a good chance to play with a new digital scale I got. I weighed the Captive hub/rotor combo (118,000 miles on it), and it weighed 23.4 Lbs. The non captive hub weighed 12.65 lbs and the new dimpled/slotted rotor weighed 12.85.
This means that the new setup is slightly heavier, but not much. With the wear on the old disks, it could easily have been the same if they were new.
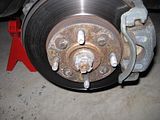
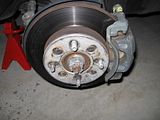
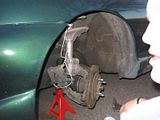
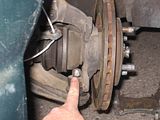
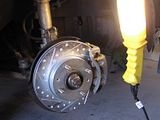
First, we'll start with pictures of the 2 different setups. I've noticed there's not one good full set of comparison pics for the folks that have no clue.
Here you go.
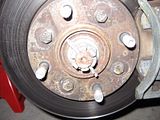
Captive in the pic on the left, NON CAPTIVE on the right. Note the 4 BOLT HEADS on the rotor hat. That's captive.

<u>TOOLS NEEDED</u>
Jack and Stand or Stands.
Wheel chocks.
Metric sockets and wrenches, size 10, 14, 17, 19mm and 1 1/4 inch (32MM).
1/2 Inch drive ratchet with a cheater bar would be helpful.
High Temp Automotive Grease.
C Clamp or Bar Clamp.
Thin block of wood or rubber handled tool.
Papertowels, rags.
3 LB Sledge hammer. LOL I needed it.
Wire coat hanger.
Large Phillips head screwdriver.
Replacement cotter pins, if yours are toast. I used these...
1/8 X 1 1/2 (Napa Part # 81377) and 5/32 X 1 1/2 (Napa Part # 81382)
<u>PARTS NEEDED</u>
Left and right hand front hub assembly from a non captive donor car (Junkyard, ect.)
Front Rotors for the same, get new ones.
New brake pads (Optional, but HIGHLY recommended).
Brake grease.
<u>PROCEDURE</u>
1. Find a flat parking spot, preferrably in a garage. Turn wheels straight, pull e brake tight, and set in a gear. Chock a rear wheel on both sides to ensure nothing moves.
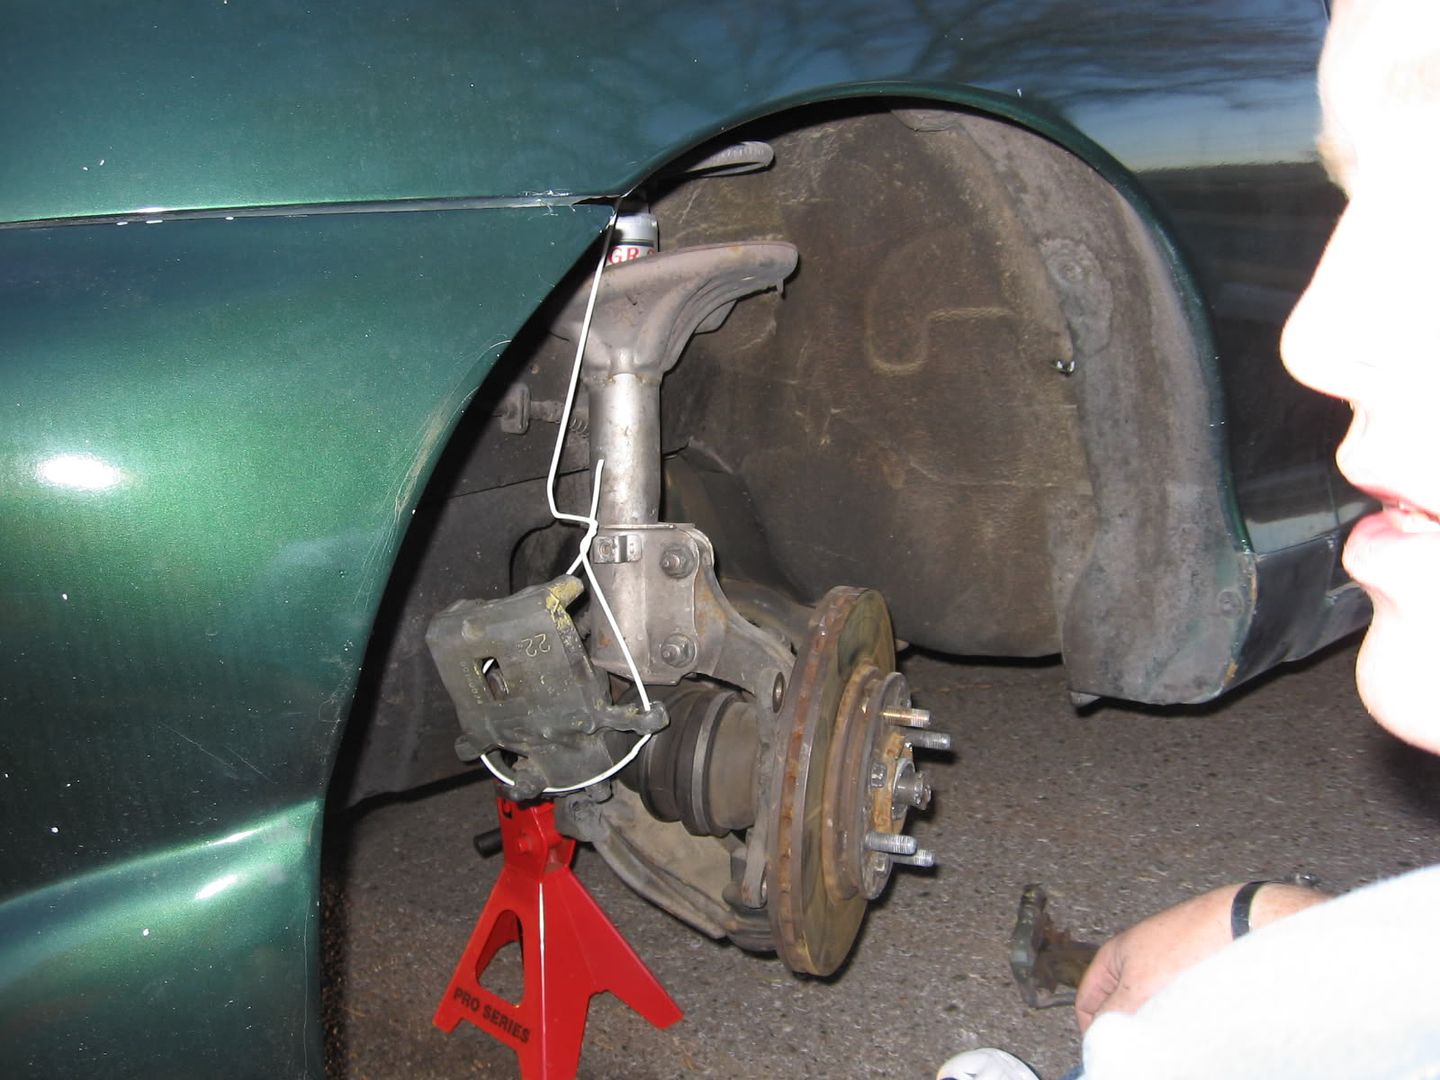
2. Jack car up on the first side you want to replace. USE A JACKSTAND, JACKASS.
3. Remove the wheel on the side you are working on. If you have aftermarket wheels, you should have some of these spacers on in this pic. Take them off.
^^^
For those of you that haven't seen them before, those are the spacers you need to put aftermarket wheels on with captive rotors.
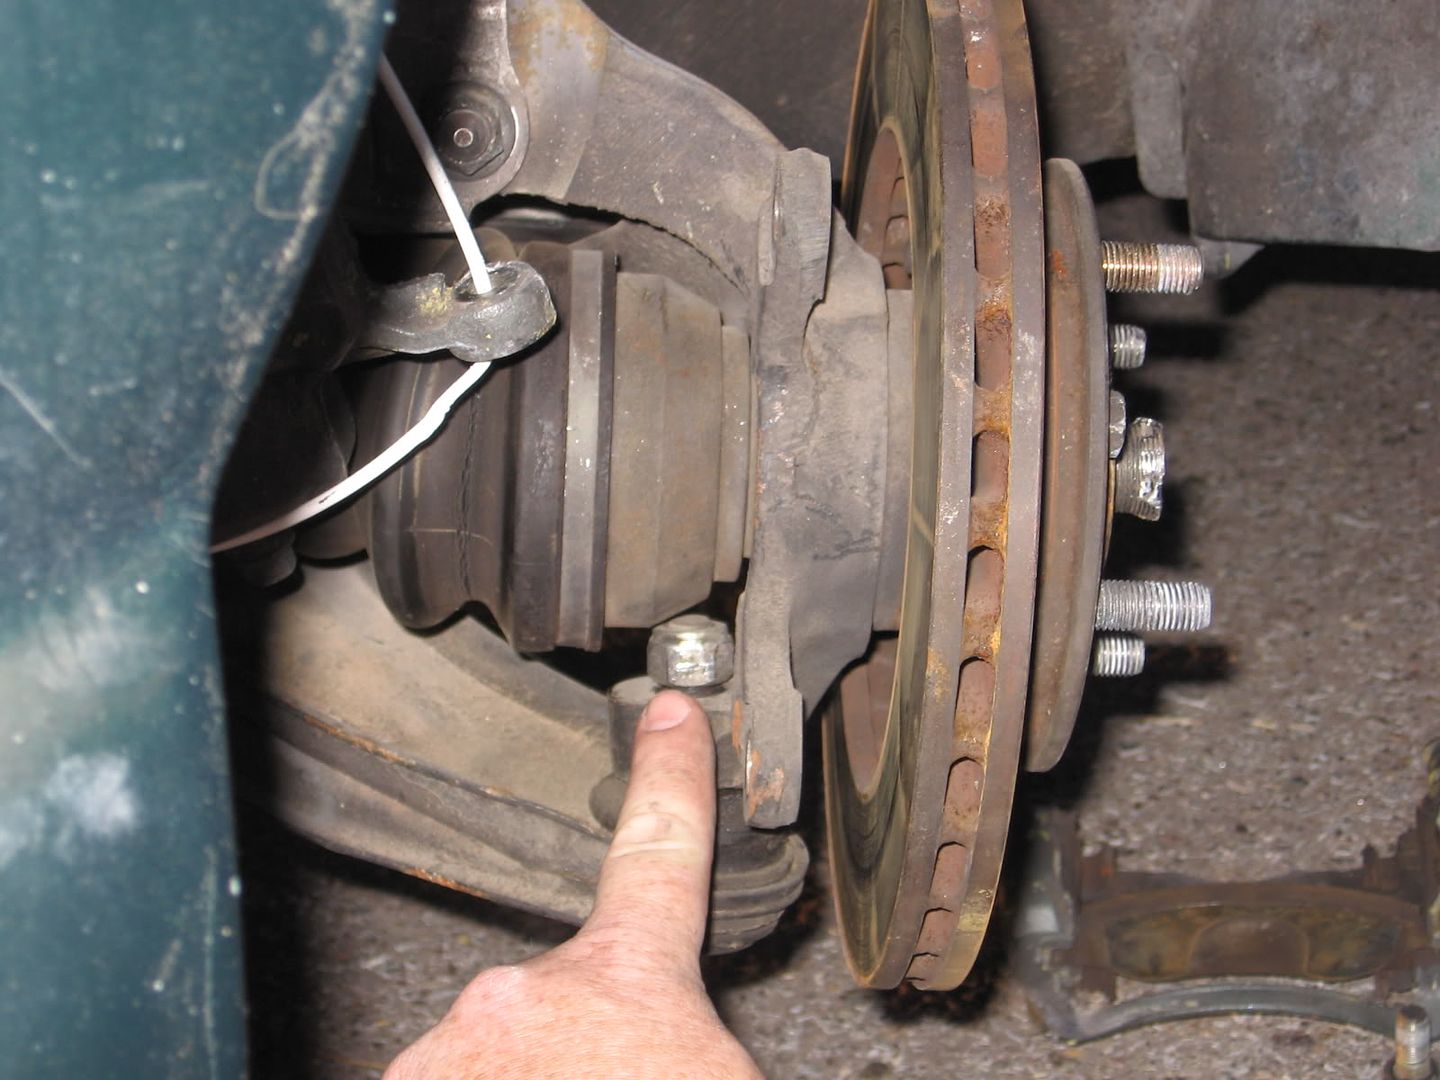
4. Remove the cotter pin in the center of the castle nut in the center of the hub. Straigten the pin after removal and clean. Determine if it can be reused or not. If not, replace with a similar sized pin.
5. Remove cotter pin in small castle nut on end of tie rod arm. Straighten the pin after removal and clean. Determine if it can be reused or not, if not, replace with a similar sized pin.
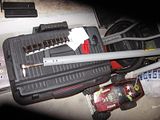
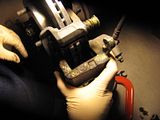
6. With someone in the car holding the brakes on (You may need the car started to get the extra boost from the power brakes, if so, ensure your garage door is open for ventilation), remove the large castle nut in the center of the rotor using the 1 1/4 inch (32MM) socket and the largest ratchet you have access to. You may need to use a cheater bar to gain extra torque, be careful, that sucker can be tighter than Mother Teresa. Picture of a sample cheater bar.
7. Remove small castle nut, 14MM shown in #5 above.
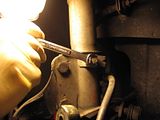
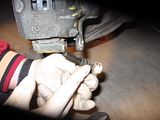
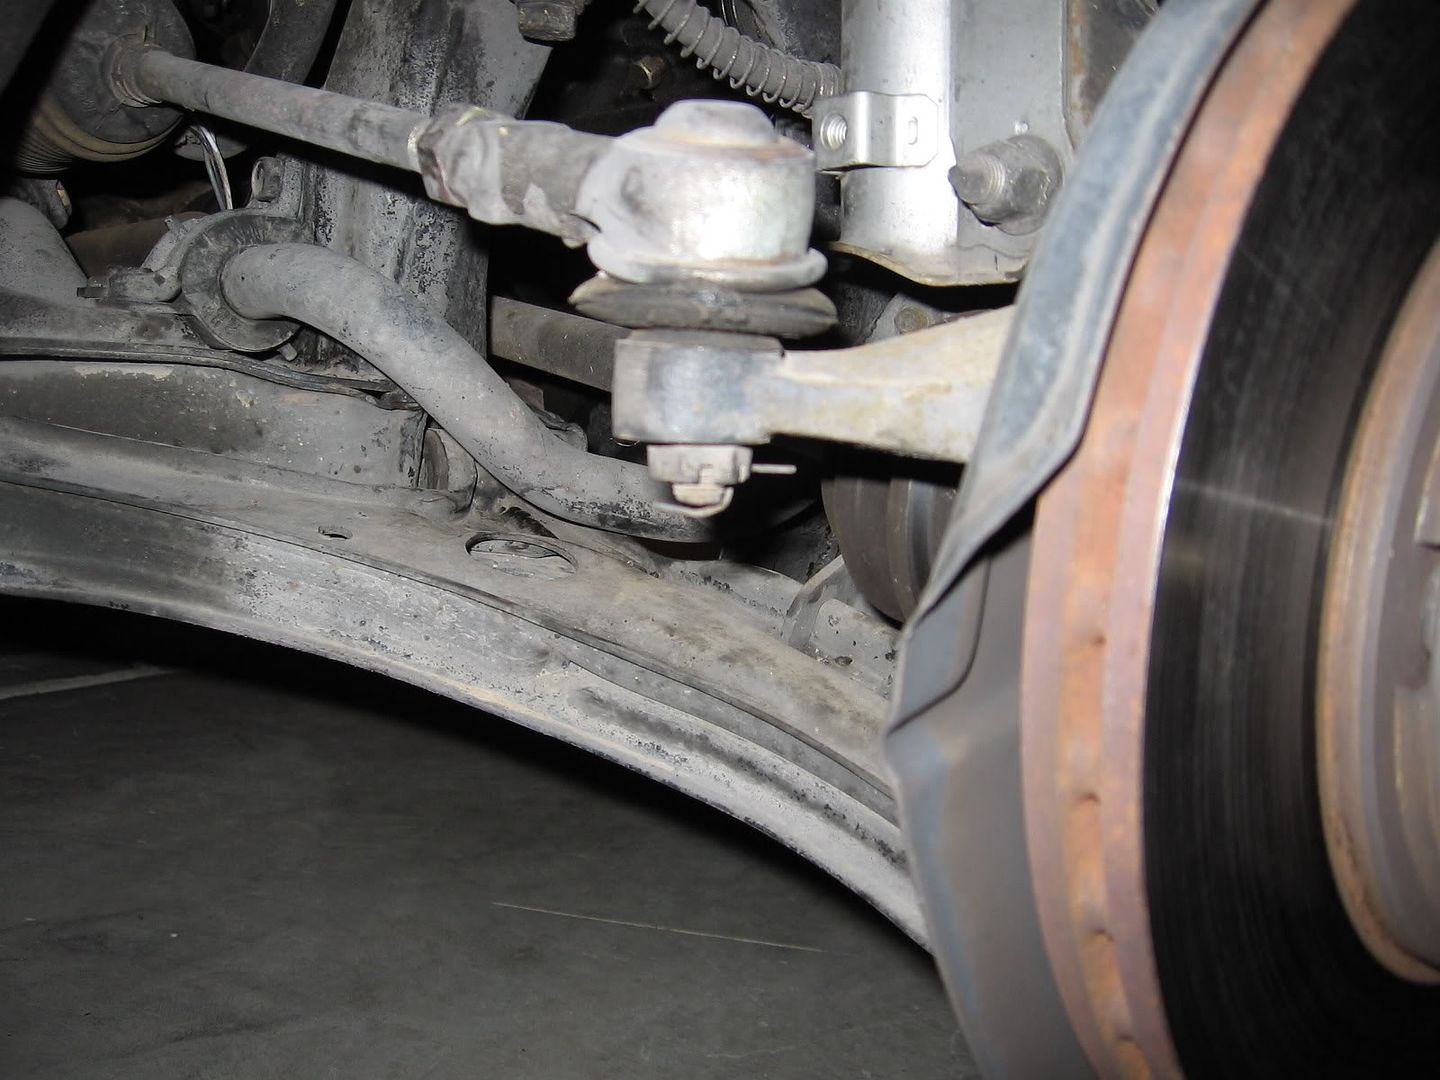
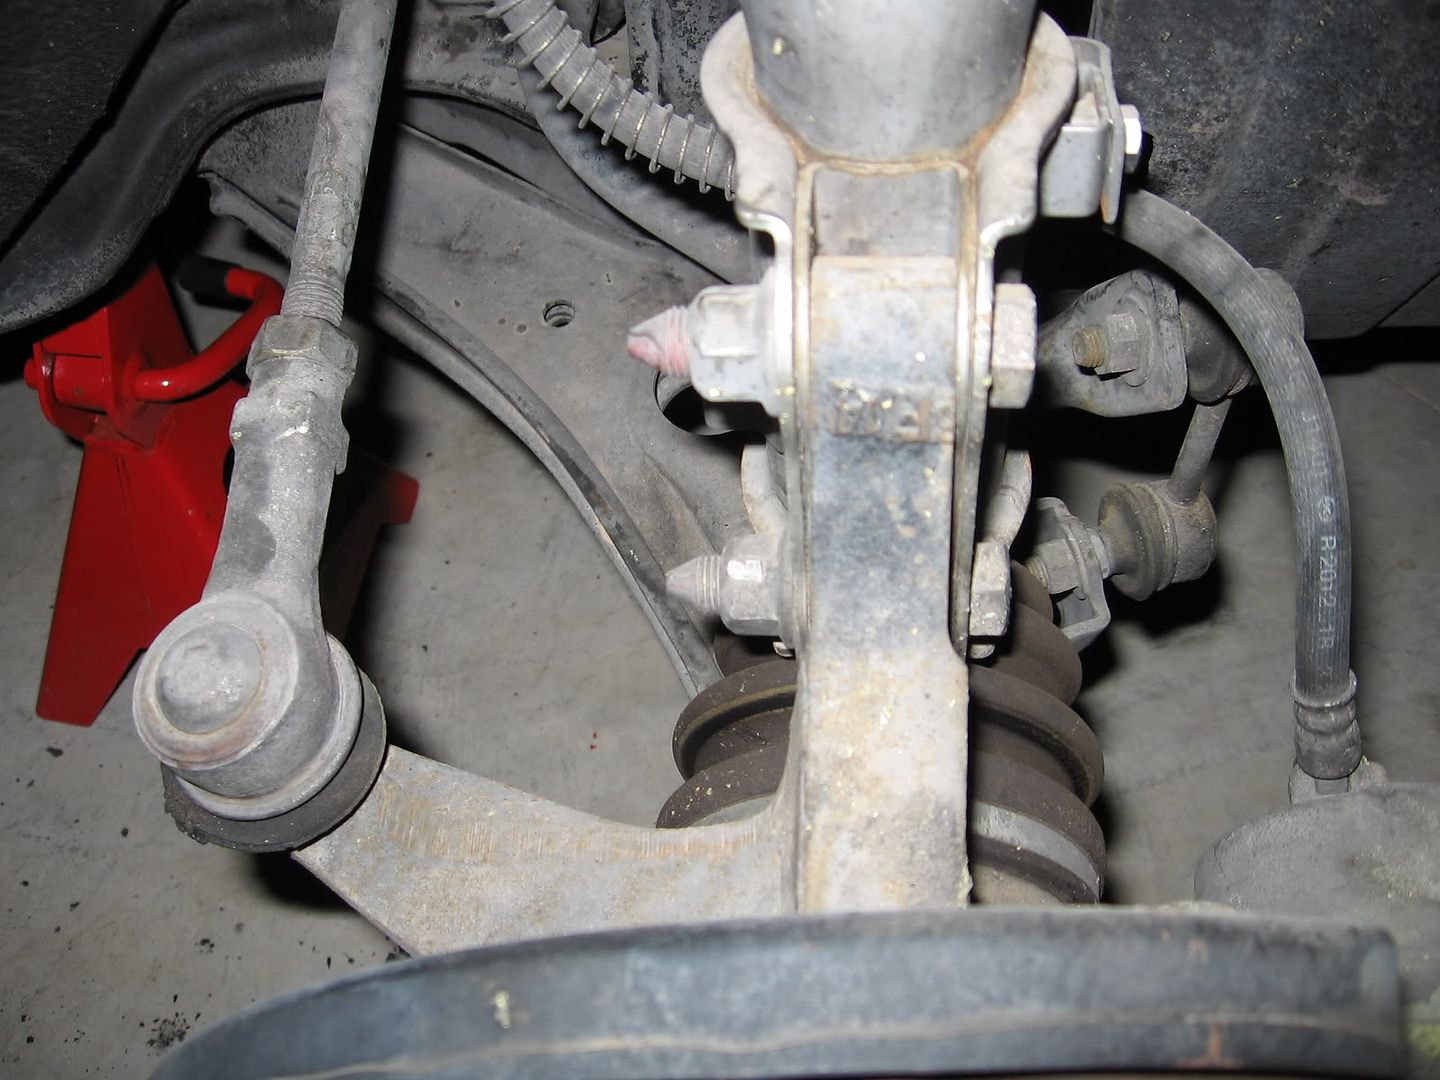
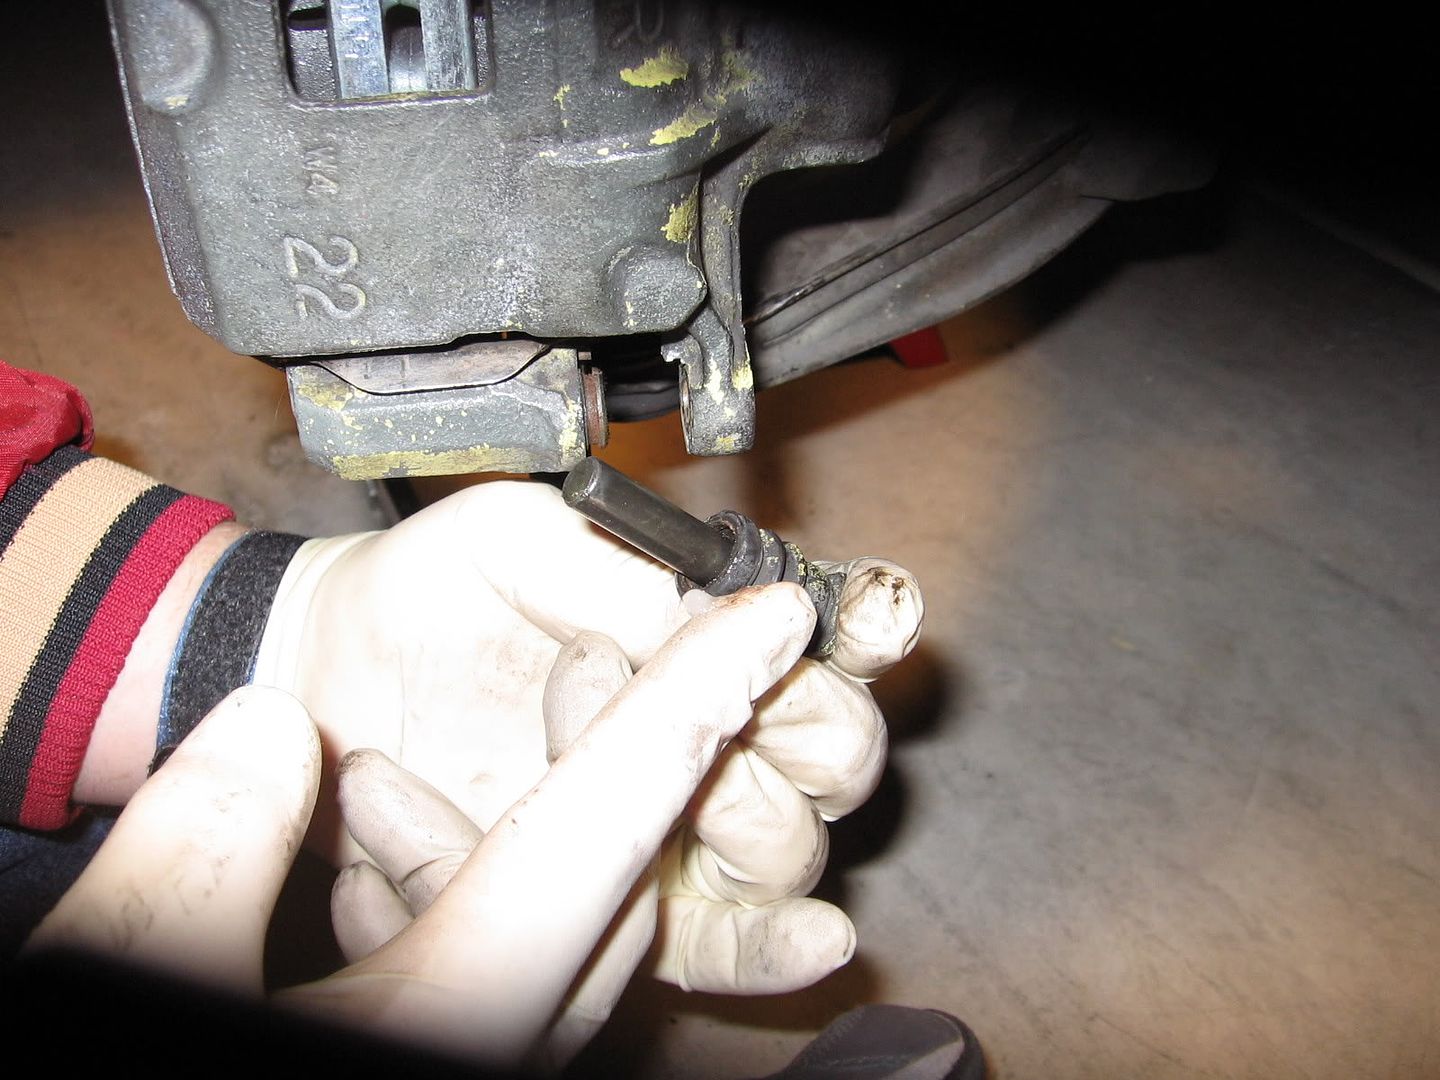
8. Pull tie rod arm ball joint out from the hub. If you are having trouble, you can hit the side of the HUB ARM with a sledge to try to shock it out. It worked for me. Be careful if you decide to try to knock the ball joint out, you can easily break the pin or mushroom the head. The tie rod end is shown in the LEFT side of this picture.

9. Remove 10MM bolt that secures brake line in place on strut.
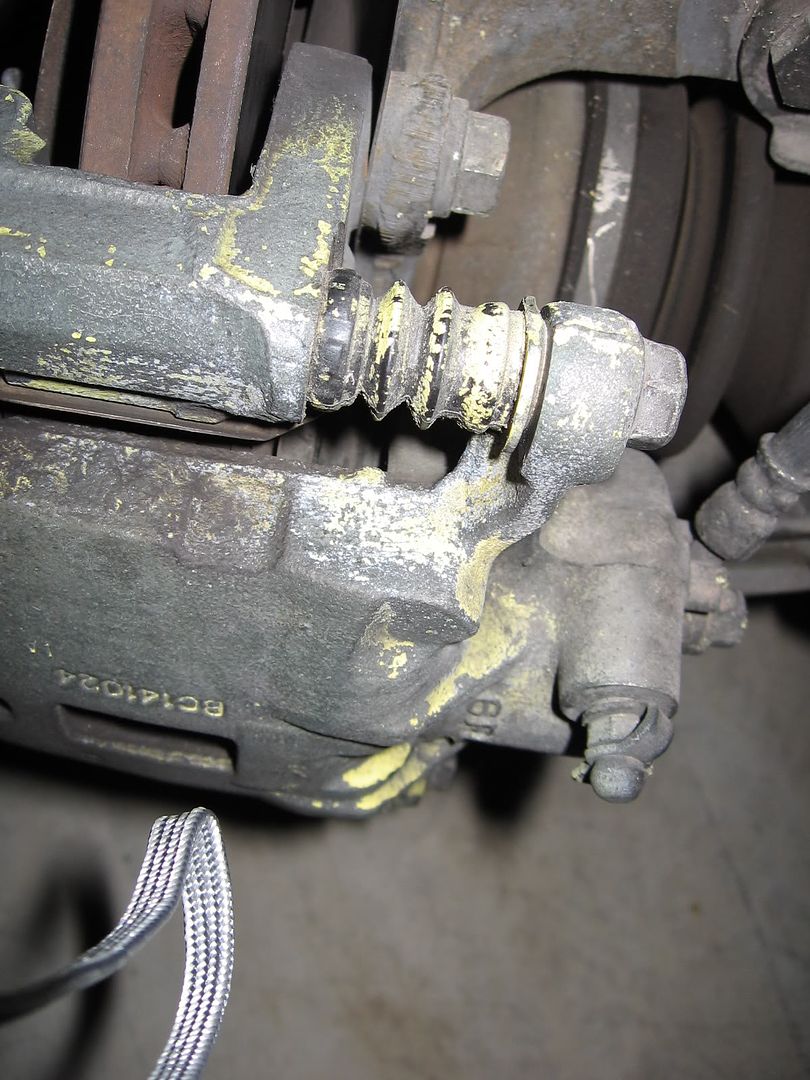
10. Remove 2 14MM bolts holding the caliper on the caliper bracket from behind the rotor. Pull the caliper out towards the front of the car. Using the metal hanger you prepared, run it through the mounting holes on the caliper and hang from the top of the strut spring so it doesn't fall and hurt you, or break the brake line.
11. Remove the 2 17MM Bolts holding the caliper bracket onto the hub. Be careful to not let the brake pads fall out, you need to refrence their mounting for the new pads if you are replacing them. Place bracket with pads in a safe place.
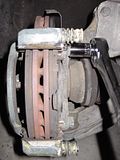
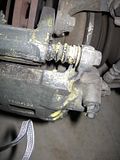
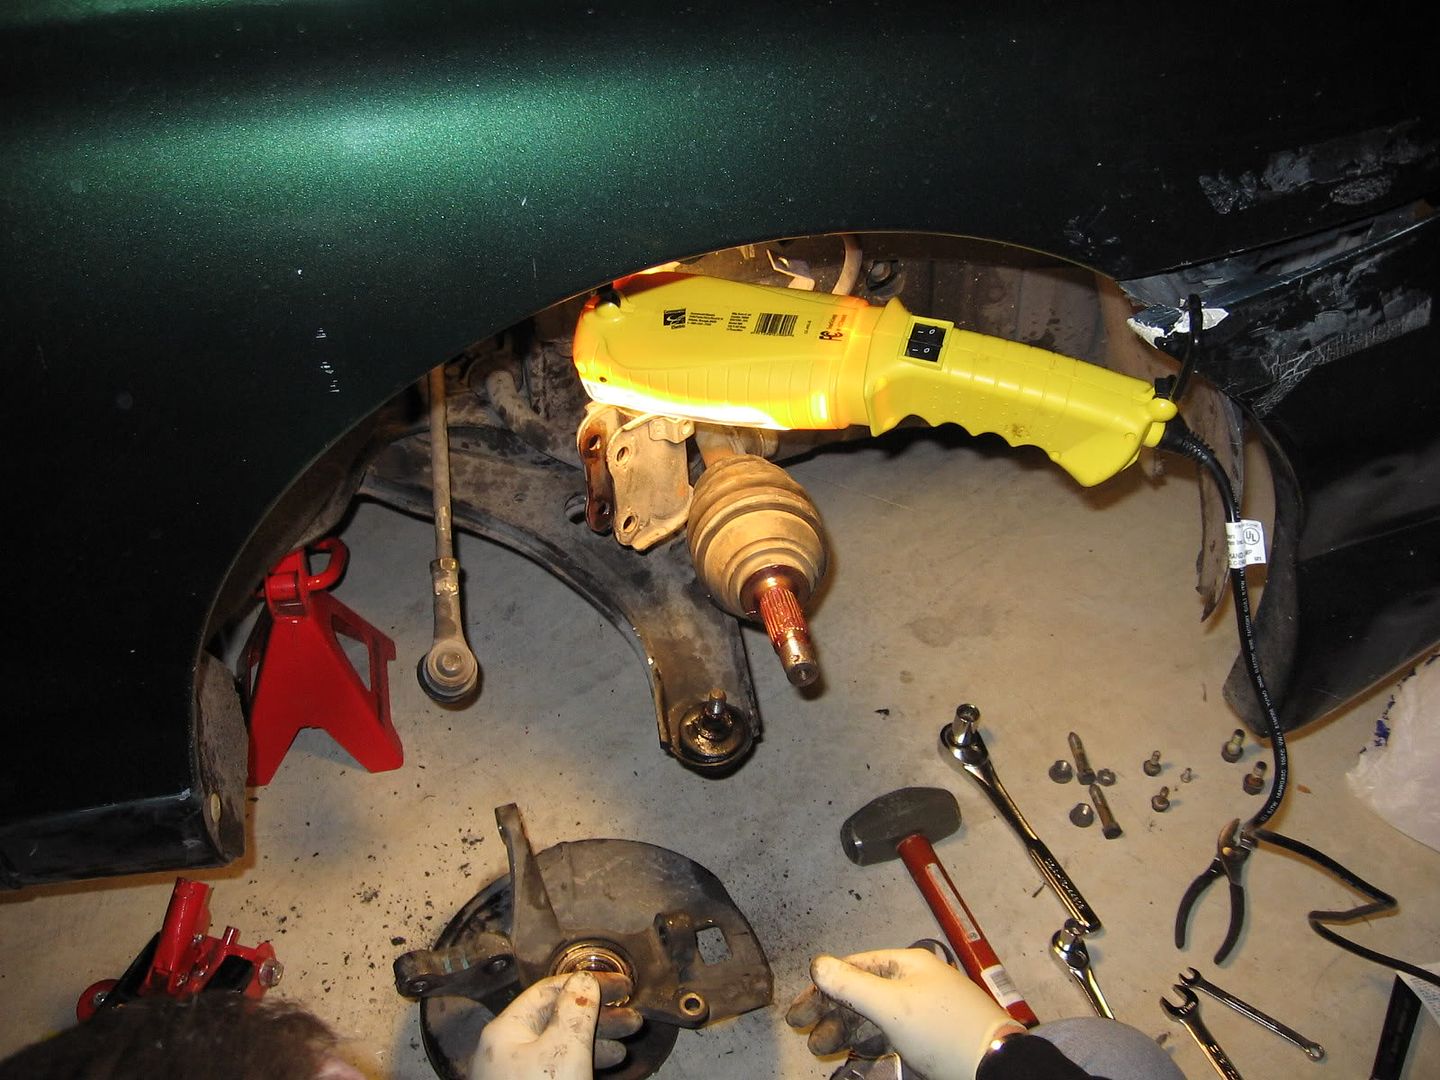
12. Remove the 2 17MM bolts and 17MM Nuts holding the hub to the strut. Use a open ended wrench and a ratchet combo, or 2 ratchet's to finish quickly. Shown in the center of this picture.
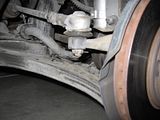
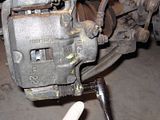
13. Remove the 19MM Nut holding the hub onto the lower A Arm ball joint. You will need a open end wrench for this, it can be hard to get to. It's right under the axle head at the hub.
14. Attempt to remove the hub from the lower ball joint. Try twisting it some and pulling, while someone holds down or steps on the A Arm. If this doesn't work, follow the next step.
14A. Using an ratchet extension, gently tap the end of the axle while pulling on the top of the hub, where it mounted to the strut. You should be able to get the axle out of the hub at this point without damaging the axle. When this is done, get your 3 lb sledge and hit the side of the hub at the ball joint a few times and it should pop right out.
15. If you followed 14, the hub is now free and on the axle, gently pull it off of the axle while holding the center rod of the axle to ensure it stays in the transmission. You might need a hand for this.

16. Captive hub is removed. Clean the axle of grease and rust, check for conditions of threads, axle play, and boots.
17. Clean the ball joint pins with a paper towel or lint less rag and then grease with fresh stuff. Also grease the axle on the face where it contacts the hub, the splines, ect. You also might want to put a thin layer of grease where the upper hub arm slides into the strut bolt housing, it will help prevent rust and aid assembly.
18. Ensure your new hub is moderately clean and that the hub turns easily. Clean the hole where the axle goes thru and straighten up the brake shield.
19. Install new hub on lower ball joint. Replace the 19MM Nut on the ball joint and tighten with a ratchet to save some time. Stop tightening when the ball joint pin starts turning with the nut.
20. Place axle back in hub.
21. Push upper hub arm back into the strut bolt housing. Use a large phillips screwdriver to help align the holes with the bracket, push through a bolt, and swap holes (That's kinky...). Replace nuts and tighten.
22. Push tie rod end back through the side hub arm, replace nut, tighten, and replace cotter pin. Bend ends of pin out.
23. Replace lock washer and large castle nut on axle, tighten fully. You may need someone on the brakes again here. Replace the cotterpin and bend ends.
ALMOST DONE!
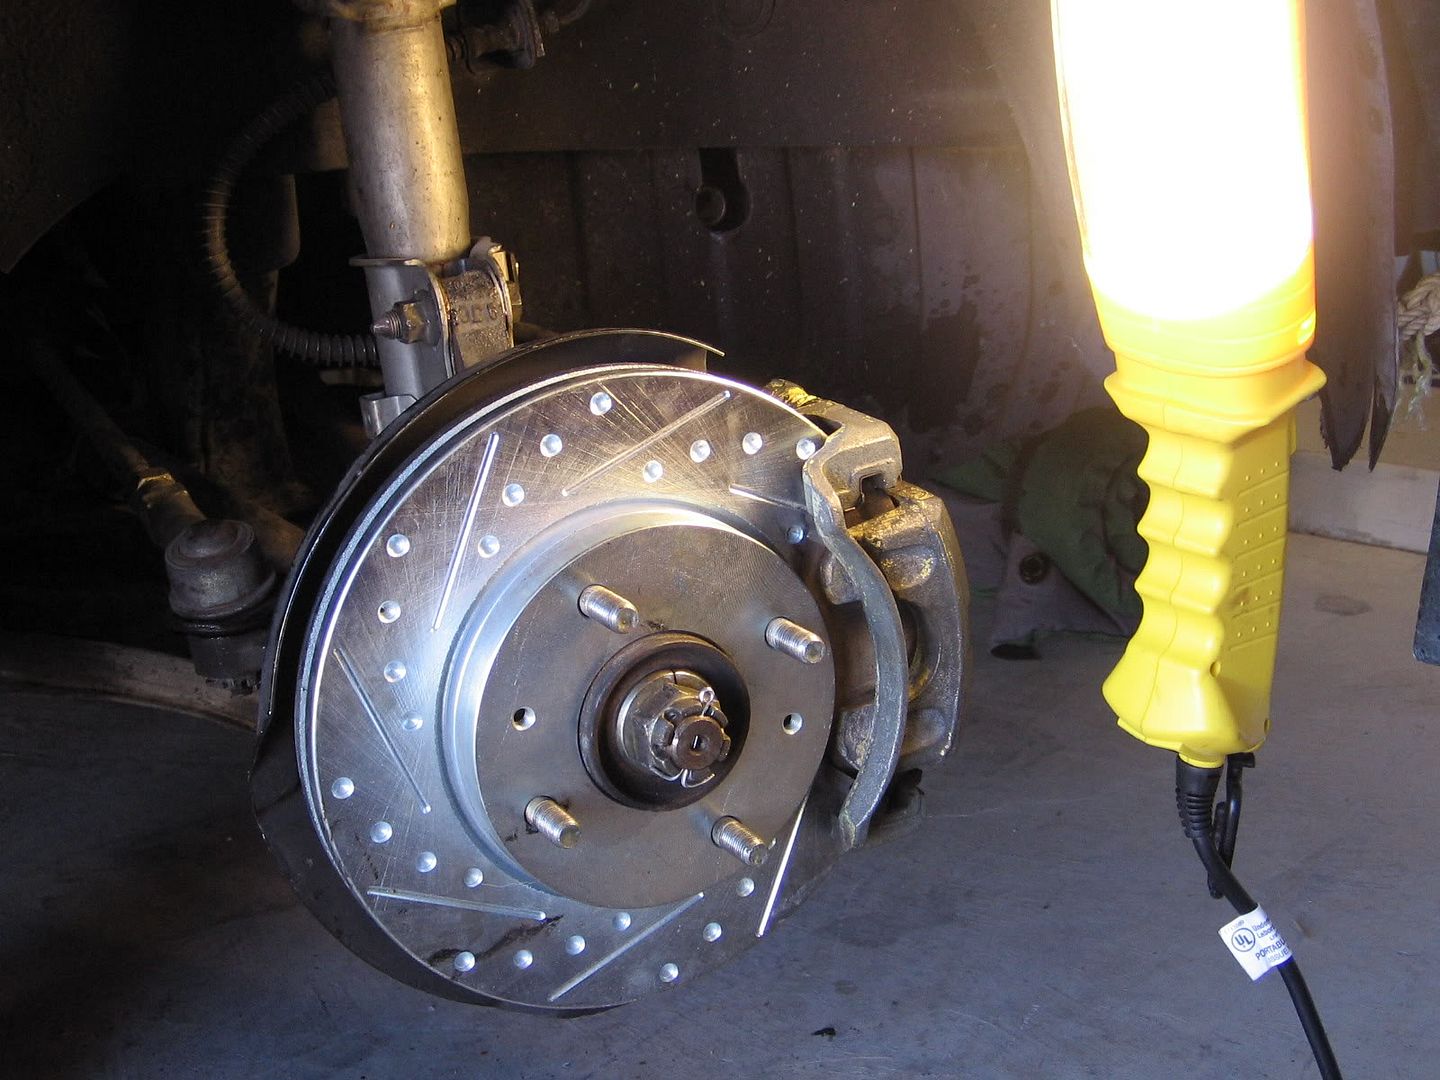
24. Place new rotor on the new hub and straighten dust shield to ensure it isn't going to rub.
25. Replace the caliper bracket and tighten down both bolts. Remove the rubber boots/caliper pins and clean them. Regrease using brake grease and replace pins. Retrieve the 14mm bolts for the caliper and clean them and grease the shoulders on them with the brake grease also. Fully seat the brake pads on the new rotor, or, replace your pads at this time (Recommended). Follow the DIY for doing your brakes.
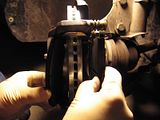
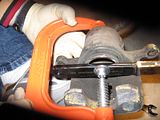
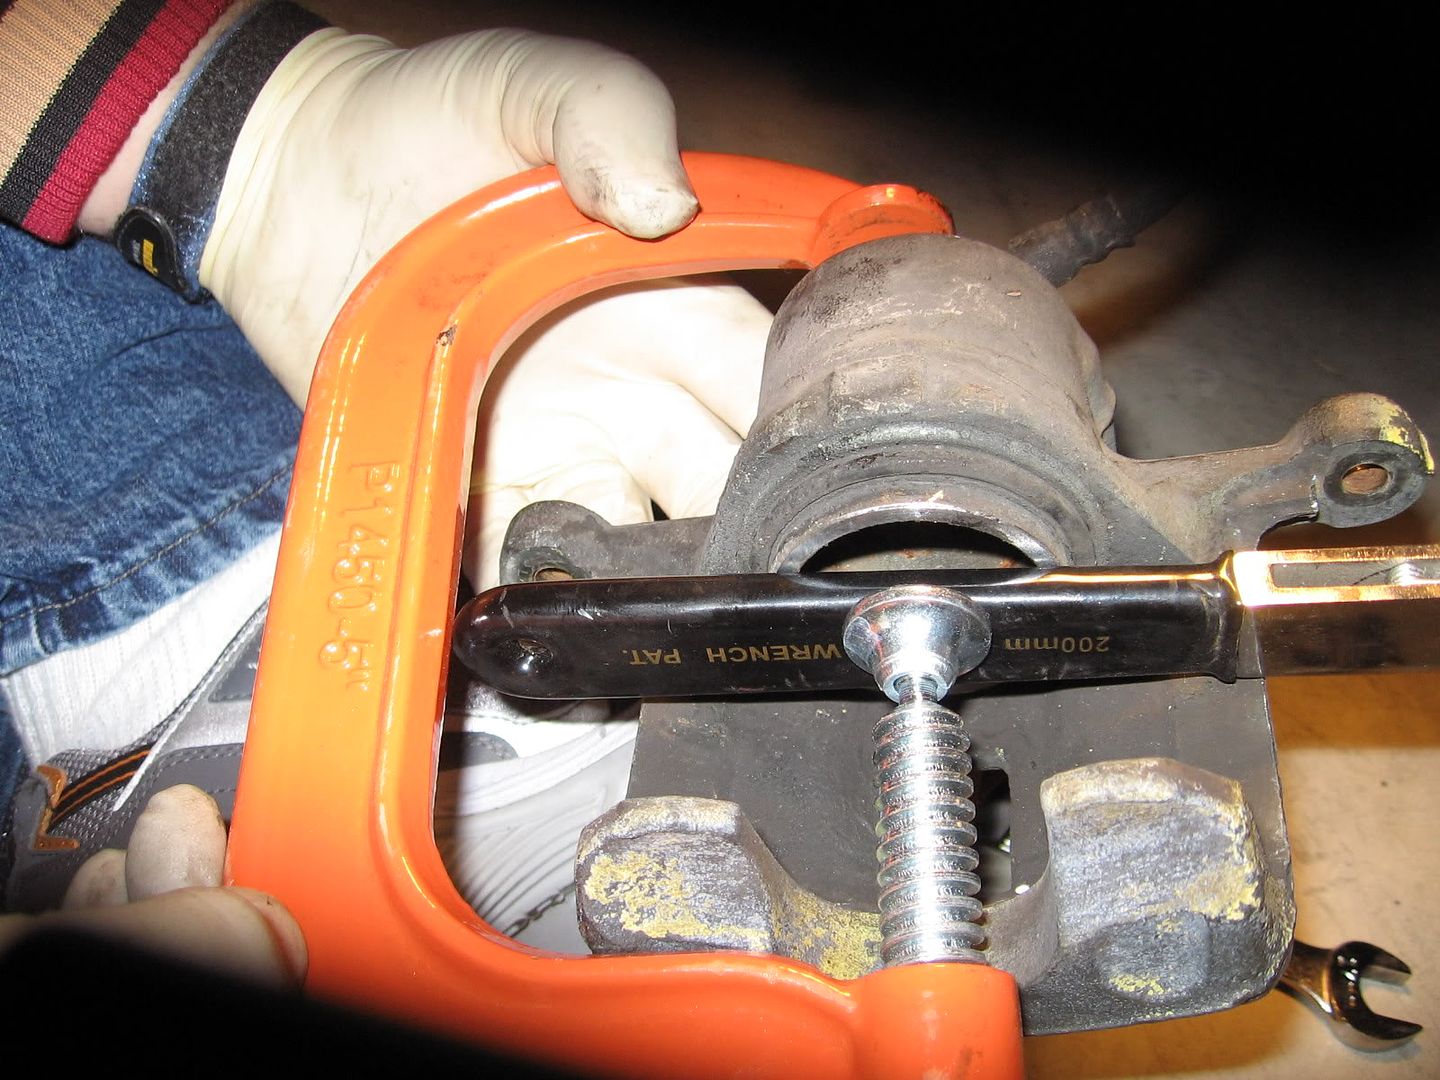
26. Take down your caliper from it's perch and compress the piston as far as possible. If you are using new brake pads, you will have to do it until it's flush or the caliper won't fit back on. Use a sturdy thin piece of wood or a flat handled tool with rubber on it to help you compress the caliper evenly.
27. Replace your caliper and secure it with your cleaned and greased 14MM bolts. Tighten fully.
28. Have your helper get in the car and, when you are turning the hub by hand (Only really works if the whole car front end is off the ground) have them hit the brakes. You shouldn't be able to turn it anymore.
29. Replace the 10MM bolt securing the brake line to the strut.
30. Check for tightness on everything, clean the area and replace your wheel and lug nuts. Raise car, remove stand, make sure the area is clear and then lower car slowly.
31. Repeat for other side.

Ease? Ehh, I'd give it a difficulty of 2 on a scale of 1 to 5, with 5 being HARD AS HELL, but only if you have no rust. If you have some rust, I raise the difficulty to 3.5 out of 5, because it can be VERY hard to get the hub out of the ball joints. I had one VERY easy, the other VERY hard.
I also thought this would be a good chance to play with a new digital scale I got. I weighed the Captive hub/rotor combo (118,000 miles on it), and it weighed 23.4 Lbs. The non captive hub weighed 12.65 lbs and the new dimpled/slotted rotor weighed 12.85.
This means that the new setup is slightly heavier, but not much. With the wear on the old disks, it could easily have been the same if they were new.
First, we'll start with pictures of the 2 different setups. I've noticed there's not one good full set of comparison pics for the folks that have no clue.
Here you go.
Captive in the pic on the left, NON CAPTIVE on the right. Note the 4 BOLT HEADS on the rotor hat. That's captive.

<u>TOOLS NEEDED</u>
Jack and Stand or Stands.
Wheel chocks.
Metric sockets and wrenches, size 10, 14, 17, 19mm and 1 1/4 inch (32MM).
1/2 Inch drive ratchet with a cheater bar would be helpful.
High Temp Automotive Grease.
C Clamp or Bar Clamp.
Thin block of wood or rubber handled tool.
Papertowels, rags.
3 LB Sledge hammer. LOL I needed it.
Wire coat hanger.
Large Phillips head screwdriver.
Replacement cotter pins, if yours are toast. I used these...
1/8 X 1 1/2 (Napa Part # 81377) and 5/32 X 1 1/2 (Napa Part # 81382)
<u>PARTS NEEDED</u>
Left and right hand front hub assembly from a non captive donor car (Junkyard, ect.)
Front Rotors for the same, get new ones.
New brake pads (Optional, but HIGHLY recommended).
Brake grease.
<u>PROCEDURE</u>
1. Find a flat parking spot, preferrably in a garage. Turn wheels straight, pull e brake tight, and set in a gear. Chock a rear wheel on both sides to ensure nothing moves.
2. Jack car up on the first side you want to replace. USE A JACKSTAND, JACKASS.
3. Remove the wheel on the side you are working on. If you have aftermarket wheels, you should have some of these spacers on in this pic. Take them off.

^^^
For those of you that haven't seen them before, those are the spacers you need to put aftermarket wheels on with captive rotors.
4. Remove the cotter pin in the center of the castle nut in the center of the hub. Straigten the pin after removal and clean. Determine if it can be reused or not. If not, replace with a similar sized pin.

5. Remove cotter pin in small castle nut on end of tie rod arm. Straighten the pin after removal and clean. Determine if it can be reused or not, if not, replace with a similar sized pin.
6. With someone in the car holding the brakes on (You may need the car started to get the extra boost from the power brakes, if so, ensure your garage door is open for ventilation), remove the large castle nut in the center of the rotor using the 1 1/4 inch (32MM) socket and the largest ratchet you have access to. You may need to use a cheater bar to gain extra torque, be careful, that sucker can be tighter than Mother Teresa. Picture of a sample cheater bar.

7. Remove small castle nut, 14MM shown in #5 above.
8. Pull tie rod arm ball joint out from the hub. If you are having trouble, you can hit the side of the HUB ARM with a sledge to try to shock it out. It worked for me. Be careful if you decide to try to knock the ball joint out, you can easily break the pin or mushroom the head. The tie rod end is shown in the LEFT side of this picture.
9. Remove 10MM bolt that secures brake line in place on strut.

10. Remove 2 14MM bolts holding the caliper on the caliper bracket from behind the rotor. Pull the caliper out towards the front of the car. Using the metal hanger you prepared, run it through the mounting holes on the caliper and hang from the top of the strut spring so it doesn't fall and hurt you, or break the brake line.


11. Remove the 2 17MM Bolts holding the caliper bracket onto the hub. Be careful to not let the brake pads fall out, you need to refrence their mounting for the new pads if you are replacing them. Place bracket with pads in a safe place.


12. Remove the 2 17MM bolts and 17MM Nuts holding the hub to the strut. Use a open ended wrench and a ratchet combo, or 2 ratchet's to finish quickly. Shown in the center of this picture.
13. Remove the 19MM Nut holding the hub onto the lower A Arm ball joint. You will need a open end wrench for this, it can be hard to get to. It's right under the axle head at the hub.
14. Attempt to remove the hub from the lower ball joint. Try twisting it some and pulling, while someone holds down or steps on the A Arm. If this doesn't work, follow the next step.
14A. Using an ratchet extension, gently tap the end of the axle while pulling on the top of the hub, where it mounted to the strut. You should be able to get the axle out of the hub at this point without damaging the axle. When this is done, get your 3 lb sledge and hit the side of the hub at the ball joint a few times and it should pop right out.
15. If you followed 14, the hub is now free and on the axle, gently pull it off of the axle while holding the center rod of the axle to ensure it stays in the transmission. You might need a hand for this.
16. Captive hub is removed. Clean the axle of grease and rust, check for conditions of threads, axle play, and boots.
17. Clean the ball joint pins with a paper towel or lint less rag and then grease with fresh stuff. Also grease the axle on the face where it contacts the hub, the splines, ect. You also might want to put a thin layer of grease where the upper hub arm slides into the strut bolt housing, it will help prevent rust and aid assembly.
18. Ensure your new hub is moderately clean and that the hub turns easily. Clean the hole where the axle goes thru and straighten up the brake shield.
19. Install new hub on lower ball joint. Replace the 19MM Nut on the ball joint and tighten with a ratchet to save some time. Stop tightening when the ball joint pin starts turning with the nut.
20. Place axle back in hub.
21. Push upper hub arm back into the strut bolt housing. Use a large phillips screwdriver to help align the holes with the bracket, push through a bolt, and swap holes (That's kinky...). Replace nuts and tighten.
22. Push tie rod end back through the side hub arm, replace nut, tighten, and replace cotter pin. Bend ends of pin out.
23. Replace lock washer and large castle nut on axle, tighten fully. You may need someone on the brakes again here. Replace the cotterpin and bend ends.
ALMOST DONE!
24. Place new rotor on the new hub and straighten dust shield to ensure it isn't going to rub.
25. Replace the caliper bracket and tighten down both bolts. Remove the rubber boots/caliper pins and clean them. Regrease using brake grease and replace pins. Retrieve the 14mm bolts for the caliper and clean them and grease the shoulders on them with the brake grease also. Fully seat the brake pads on the new rotor, or, replace your pads at this time (Recommended). Follow the DIY for doing your brakes.
26. Take down your caliper from it's perch and compress the piston as far as possible. If you are using new brake pads, you will have to do it until it's flush or the caliper won't fit back on. Use a sturdy thin piece of wood or a flat handled tool with rubber on it to help you compress the caliper evenly.
27. Replace your caliper and secure it with your cleaned and greased 14MM bolts. Tighten fully.
28. Have your helper get in the car and, when you are turning the hub by hand (Only really works if the whole car front end is off the ground) have them hit the brakes. You shouldn't be able to turn it anymore.
29. Replace the 10MM bolt securing the brake line to the strut.
30. Check for tightness on everything, clean the area and replace your wheel and lug nuts. Raise car, remove stand, make sure the area is clear and then lower car slowly.
31. Repeat for other side.


Senior Member
Joined: Oct 2002
Posts: 381
Likes: 0
I know this was written a long time ago but I wanted to add a few tips.
for the lower ball joint, also known as an "unloaded" ball joint, meaning no load at ride hight.
Loosen the nut about 3-4 full turns or until the top of the ball joint threads are flush with the top of the nut. Then jack up the lower control arm as high as you can then insert a thin wedge that is about a 1/4 inch thick between the top of the nut and bottom part of the axle. Then when you lower the arm, the axle will load the ball joint and cause it to pop free of the taper. If it doesn't pop free at first, press down on the control arm with a pry bar for added load.
After the install is complete, I highly suggest getting a front wheel alignment due to the 2 bolts being removed from the strut to hub connection.
Other than that, this is one awesome DIY.
Thanks for the hook up redz.
Senior Member
Joined: May 2005
Posts: 302
Likes: 0
From: IL
Vehicle: 1997/Hyundai/Tiburon RD1
I just read through this thing twice now and yep gonna have to do this soon myself. Redz since your the main guy posting this DIY could you help me by telling me what years will work with the swap. I have a 1997 tiburon, so which years for tibs will work? Also would an elantra's front hub assembly work? Only asking about the elantra's because there aren't very many tiburons it seems here in IL. I've called a lot of the local junkyards and all they have wrecked is elantra's it seems, no tiburons.
Thread Starter
Senior Member
Joined: Mar 2002
Posts: 34,642
Likes: 0
From: Los Lunas, New Mexico, USA.
Vehicle: 2001 Hyundai Tiburon, 2004 Kia Sorento, 2010 Kia Soul
Any year that has a non captive setup. If you stay away from 97's and 98's, you should be good. As long as you get it from an Elantra with the same hub setup, you'll be fine. I believe the J2's and the XD's will both work. Easiest way would be to take your wheels off, take some pics, print them, then go to the junkyard and look to see if the others look the same but have no captive rotors.

Senior Member
Joined: Aug 2007
Posts: 303
Likes: 0
From: Inglewood, CA 90302
wtf? my mechanic used a press to seperate the hub off the rotor, on the process the wheel bearings had to be replaced......well good to know it can be w/o a machine, I was actually looking for the captive to non captive thread but ended up here.

Member
Joined: Sep 2011
Posts: 42
Likes: 0
From: Florida
Vehicle: 2013 Sonata Limited 2.0T
Woop! Thanks for this guide.. performed this little auto surgery the other day w/ complete success. Didn't need to remove the brake line bolt though..
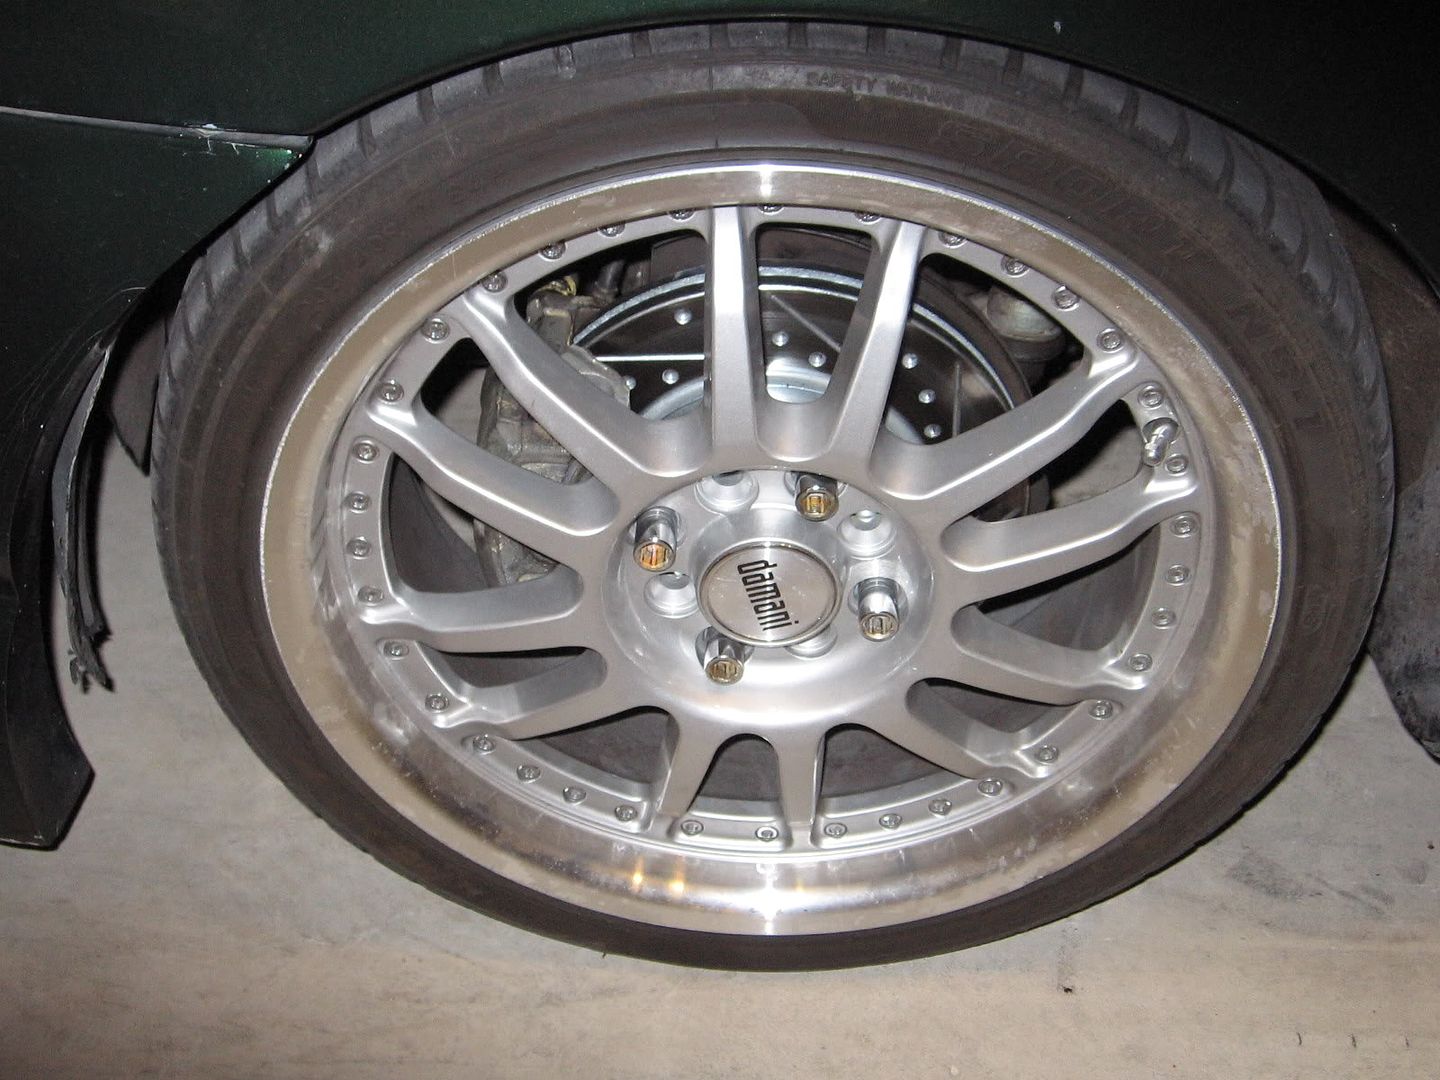
Now she sits on 17" Motegi's w/ 205/40 Neo Nitto Genz being slowed by drilled/slotted rotors all the way around. Looks reaaaal good. Once the brakes have had time to marry I'll go back and put a clear coat on the edges to prevent rusting.. and repaint my calipers/shield.
Now she sits on 17" Motegi's w/ 205/40 Neo Nitto Genz being slowed by drilled/slotted rotors all the way around. Looks reaaaal good. Once the brakes have had time to marry I'll go back and put a clear coat on the edges to prevent rusting.. and repaint my calipers/shield.
Senior Member
Joined: May 2005
Posts: 302
Likes: 0
From: IL
Vehicle: 1997/Hyundai/Tiburon RD1
Ok I'm trying to figure this out, I have a 1997 tiburon with captive rotors first off. I went to the junkyard and got a 1999 elantra non-captive rotor setup, knuckle and all that. Had to get new rotors, Napa gave me 1999 elantra rotors. I have Hawk performance HB261F.665 brake pads that fit 1997-2001 tiburons and also 1997-2001 elantras.
My caliper and caliper brackets are off my old 1997 tiburon. Before I did some Fab work things didn't fit together and were to snug to even spin the hub assembly and rotor. With everything together 1997 tiburon caliper bracket around rotor, hawk pads in place, caliper piston retracted I could not get the caliper to fit around the brake pads and into the bracket. I ended up having to grind down the bracket a little on the inside and also shaved off some of the outside brake pad. According to the directions above I shouldn't of had to go through the extra steps.
Everything rotates and is in place like it should be now after that fab work but any ideas where things didn't match up? Should I have grabbed the calipers and caliper bracket off the 1999 elantra also? I don't want to have to shave down one side of a brake pad every time I have to change out the brakes.
