Eibach Pro Kit Plus Help?
#11
I did the install tonight and boy was it a b1tch. I am really glad I had a hoist and some air tools. Here is what happened.
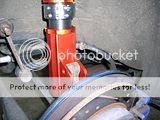
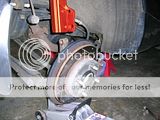
First we removed the Strut Braces and dropped the suspension before raising the car. Then removed the wheels for better access. The stock rear sway bar was the first to go. This proved to be one of the most challenging things we had to overcome.
For a car that is about six years old the nuts and bolts were quite seized. So after copious amounts of penetrating lube and some time for it to work, we fought with impact gun and vise grips to free the sway bar ends. I would say half of them had to be heated with a torch to be removed.
After that I began removing the suspension from the car. Some were easier that others because I had in the past had a couple of wheel bearings replaced and the "Saint" (tech) that did the work previously used anti-seize on the bolts. smile.gif
While I did this my buddy went about putting the Eibach Springs on the Eibach Shocks.
We took a look at removing the front OEM Sway Bar and realized we would have to drop the front sub-frame to get at it. It is in there really tight. We tried removing the front uprights from the axles to give us some more room but to no avail. So we had to leave it in for now due to the fact we had limited time to get the job done.
After installing the Eibach Shocks and Springs we connected the rear and front sway bar ends.
We put the wheels back on the hubs and lowered the car till it was just above the ground. This allowed us to align the tops of the shocks with the holes in the strut towers. My buddy lifted the wheel while I aligned the bolts and holes, and put the nuts in place. Tightened them down and proceeded to the rear of the car.
The rear proved to be more challenging than the front. It was very difficult to get the bolts on the shocks aligned with the holes in the rear strut tower. It was a very tight fit. So while my buddy felt around in the wheel well to get them aligned I lowered and raised the car until we managed to get it in the right place. (Don't try this at home. You could hurt yourself). What we should have done is take the wheels back off so it would have been lighter and easier to get into place.
Once the suspension was finished all that was left was replacing the interior panels.
Boy am I glad I had help. I am feeling worn out due to all the fighting I had to do to get everything in it's proper place.
I am not looking forward to the front Sway Bar install. Anyone have any tips for me? sad.gif
#12
Senior Member
Join Date: Jul 2001
Location: Winnipeg
Posts: 4,828
Likes: 0
Received 0 Likes
on
0 Posts
Hey Graham,
The rear bar was a sinch! Unbolt and came off,....
But, Yeah, the front Swaybar is a PITA!!!
You have to drop the cross member.
Have a buddy pry the tranny forward, then you can figure out the puzzle of how the front bar will slide out. The first time we did it, it took us like an HOUR to figure it out! What a PITA, it's seriously like one of those puzzles where you have to get that ring outta 2 messed up metal pieces. But yeah on the 4th one, it seriously "dropped out" in like 20 minutes, we've been doing it so much. Once you figure it out, it's easy, except for the seized bolts and nuts, on the 97 we installed it on (HOTROD's) lotsa torching was used wink1.gif
Change your front and rear swaybar links and nuts, thats a must with it being so old. I was able to spare my rears, they came off easy, but the fronts were torched off.
Anyway, don't feel like typing too much, thank god for good ol' HA!
http://www.hyundaiaftermarket.com/noncgi/u...t=001544#000001
http://www.hyundaiaftermarket.com/cgi-bin/...c;f=17;t=001505
And yeah, use the hoist again!
That was a god send! fing02.gif
smile.gif
#13
I was wondering if instead of lowering the subframe, we could unbolt the cross member under the engine/tranny and remove the bolts from the two mounts. Then use a pry bar to pull the engine forward. Do you think we would get enough clearance?
I was so tempted to just torch the damn thing outa there last night but then... how the hell were we going to get the new one in? laugh.gif
I was so tempted to just torch the damn thing outa there last night but then... how the hell were we going to get the new one in? laugh.gif


