My Head Has Holes In It. They Need A Port And Polish!
 04-30-2010, 09:22 AM
#101
Super Moderator


Thread Starter
It's gone to the 4 kids and a house budgetary committee. The head sits there on my bench and shakes itself at my empty wallet. I used to be getting $300/month bonus checks from work but you all know how the economy has gone (thanks Jesus for my job still! )
This engine is going to need a rebuild at some point, and that will be the extreme latest that the reworked head gets installed, along with the 1.8L pistons.
If anyone wants to make donations to the cause, I am waiting on funds for (or donations of):
Gasket/seals kit
New moly piston rings
Machine work to deck the head
It would be nice to have, but not strictly necessary if I use the parts currently in the engine:
Full set of intake valves
2.0L rods to match with the pistons
Fresh HLAs wouldn't hurt but they are still going strong so far
I know it's super slow. Trust me you are not more disappointed in progress on this than I am. I also have a piece of specialized test equipment I've been building since 2003 sitting next to the head.
 09-13-2015, 10:07 PM
#102
Super Moderator
Thread Starter
SEVEN years since I first touched tools to metal and this is still on my bench! That's it. New year's resolution time. Imma get this head machined, assembled, and on my engine. Unless something absolutely crazy happens, like did the past few years:
including, on a budget with *very* little wiggle-room:
$6000 for a new central A/C system which was money extremely well spent
$5000 into my mouth to make my teeth work like they used to do after minor injury and major rework on several molars
$800 or so to buy $3000 or so worth of camera gear, used. Some WAY better pictures will be made, after this head is well-and-truly Finished.
Bought the wife a new minivan, which I hated and she eventually crashed, and she now has a Suburban which I like a lot
The children are all out of diapers, but the savings on diapers is now permanently offset by bottomless pits of stomachs they all have
The stupid CAT had $800 worth of dental work too, but it's my daughter's cat (dads of daughters will understand). If it were my cat it would have been under a marker in the backyard at that point
About a frikken thousand bucks for FLEAS to be got rid of after we got new neighbors with dogs with fleas
It's endless. I'm going to just have to set money aside and pretend it doesn't exist. I don't think this is $500 away from done. It's almost a tear-jerker, thinking how much better my car could run, and all the work I put in on this head, and there it sits.
But now, for less than another year. Must. Install. Head!
03-15-2016, 10:20 PM
#105
Super Moderator
Thread Starter
Update: I got valves. Need seals and gaskets, maybe some guides and a little bit of a valve job, depending what the measurements say.
Only one more project in front of this. Need to make a new bed to enable sleepover guests to be on a proper mattress. Then this. Still hammered for time and money but that's life.
Only one more project in front of this. Need to make a new bed to enable sleepover guests to be on a proper mattress. Then this. Still hammered for time and money but that's life.
04-23-2017, 09:17 PM
#106
Super Moderator
Thread Starter
Ok, game on!
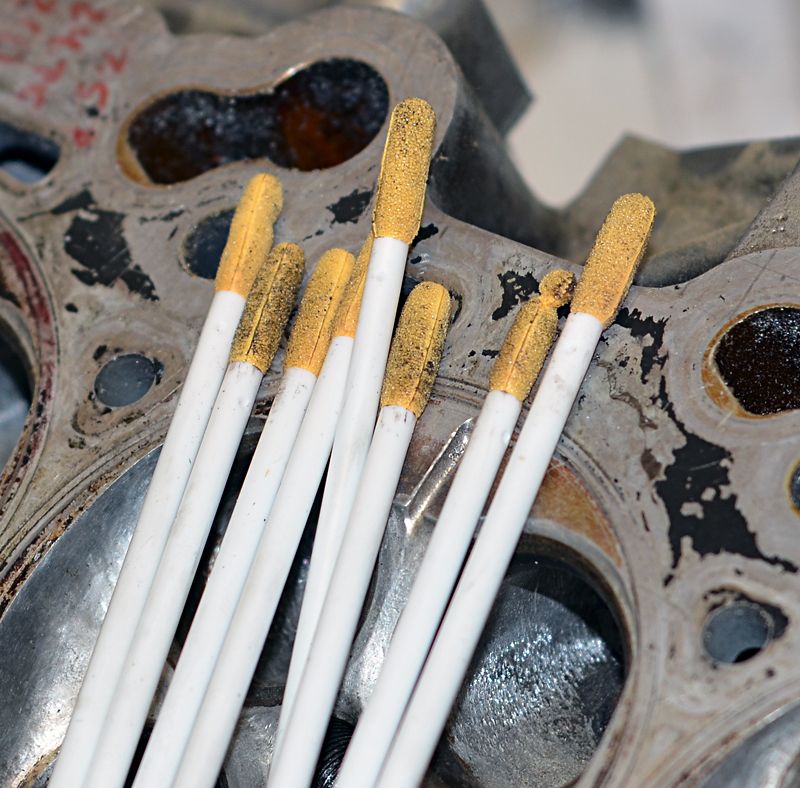
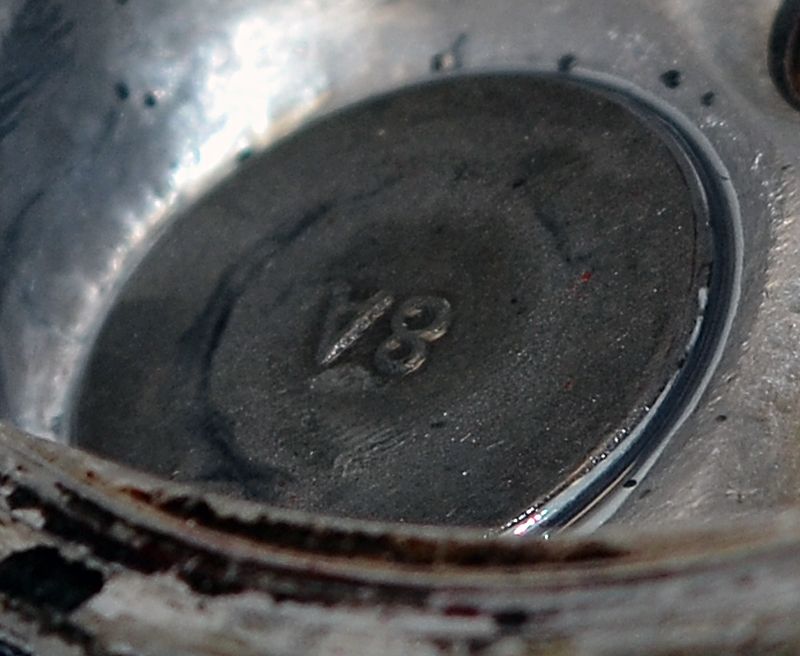
The final non-cylinder-head project is officially out of the way and I have the stuff needed to do this bit of the job, so it's finally time to get back to work on this head! I got some 1000 grit lapping compound and some valves, so it's time to do some valve work. This is the back of a valve with "40k miles" of use. The yellow color is from a brass brush I cleaned it off with so I could see what I have here.
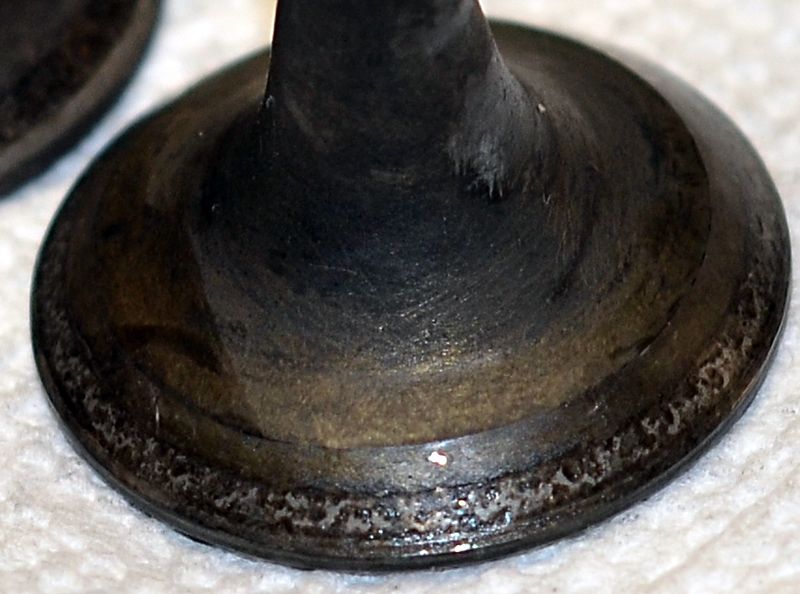
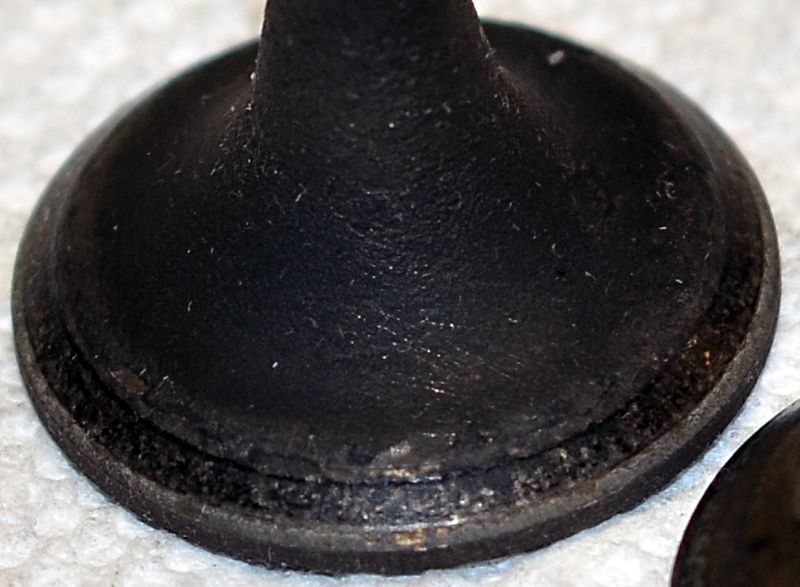
That looks pretty gnarly but you can't even feel it with a fingernail so it's all less than ~0.002' deep. For comparison, this valve was run for about 165k.
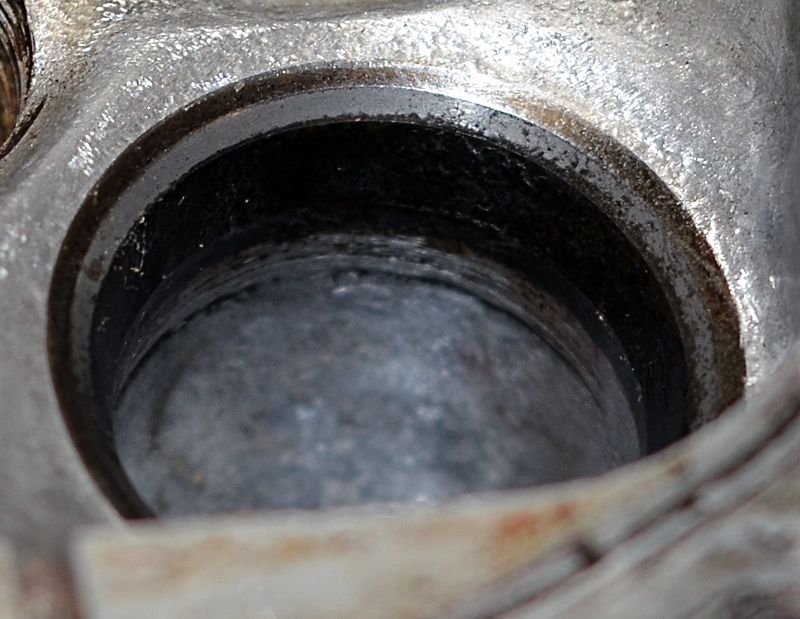
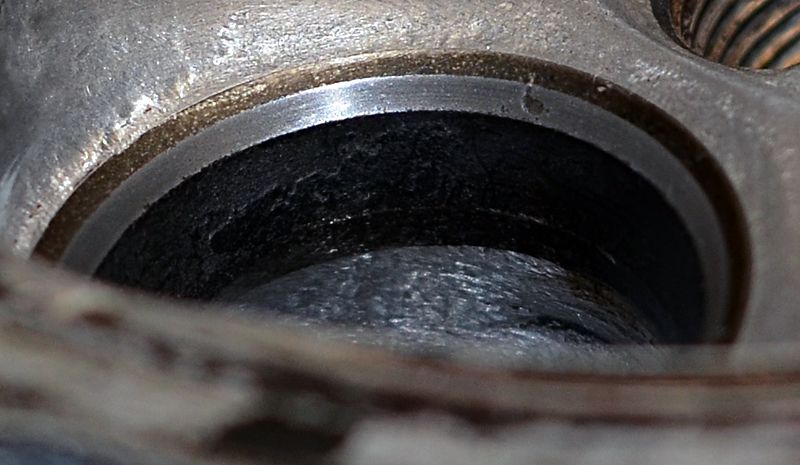
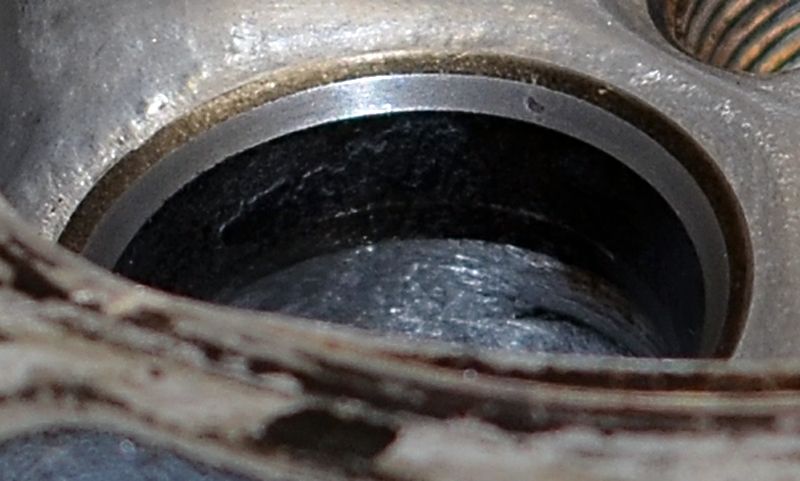
Yikes. Okay, what do the seats look like?
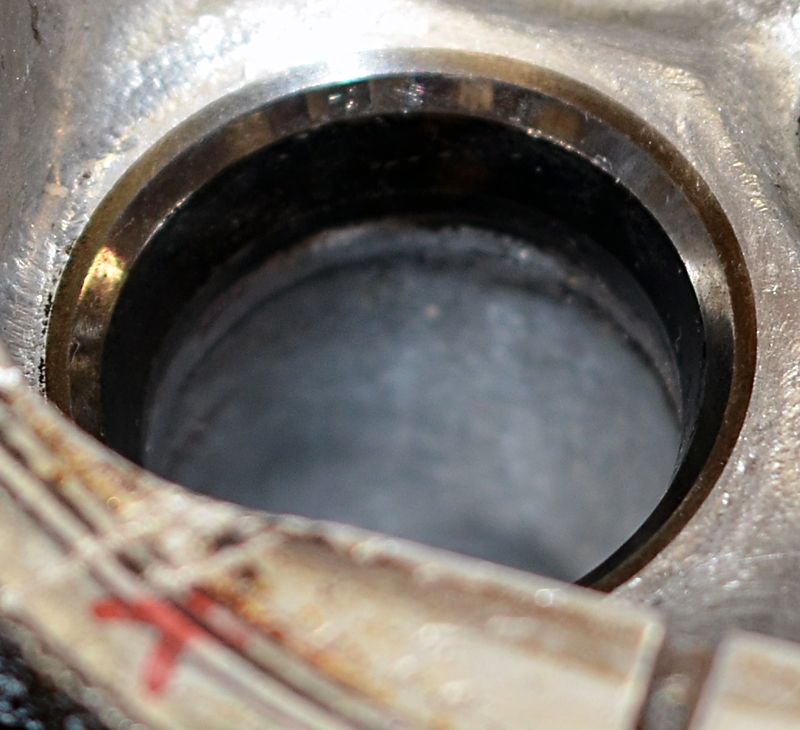
Not too terrible, right? Maybe a little bit of funkiness but
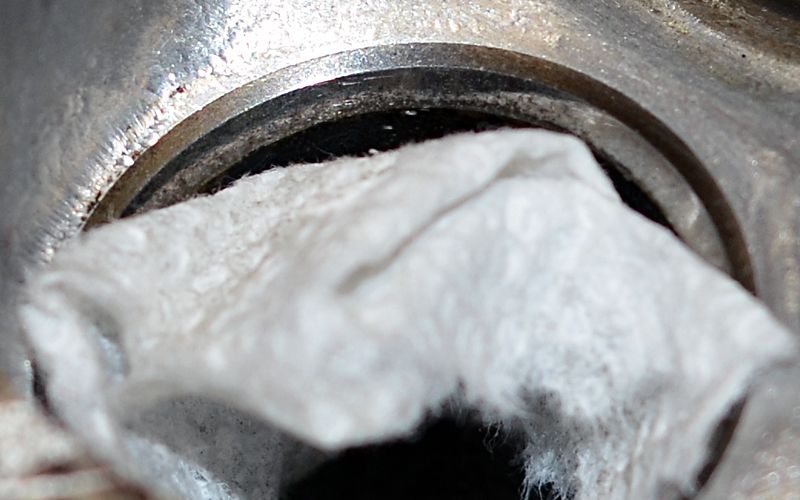
oh. Okay maybe not so great. Clean the valve guide
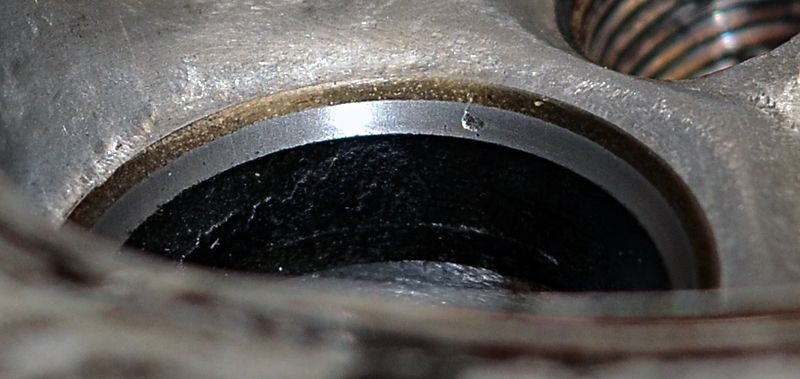
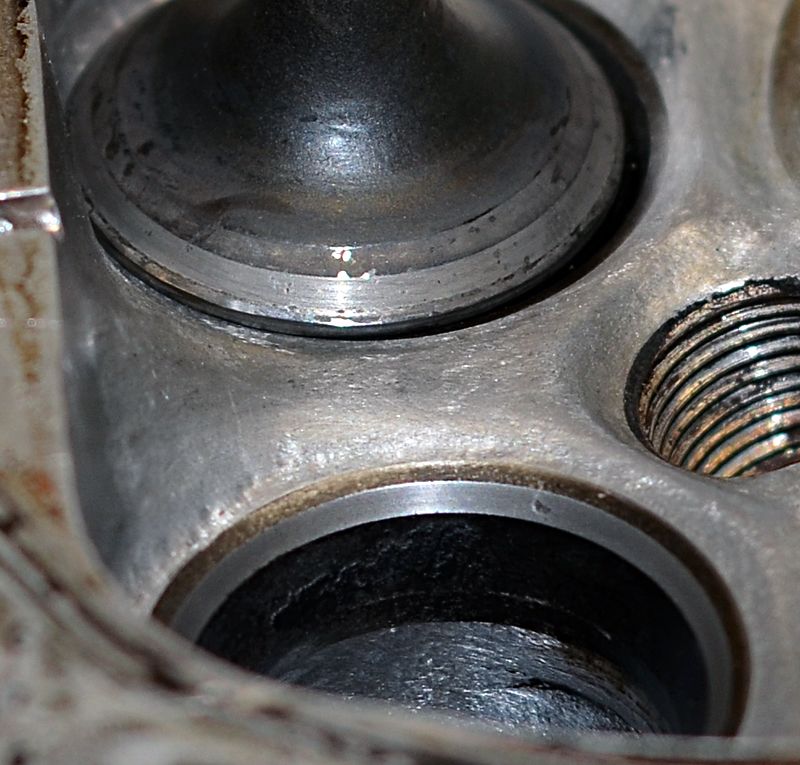
a drop of oil on the stem, insert a valve, add a bit of lapping compound and run a few spins of a valve in a seat, to see what needs to happen here. Obviously there's some pitting on this seat, but not all the way around. None of this looks very deep, either. If you look at the right side of this picture you'll see a short line on the chamber side of the seat, right around 3:00. I started with this cylinder because this was the only place in all my adventures with the dremel where a tool touched a valve seat. If this wouldn't clean up then it was time for some professional help. It looks like I was worried for nothing, on this point. The tiny mark I made on the sealing area is gone already.
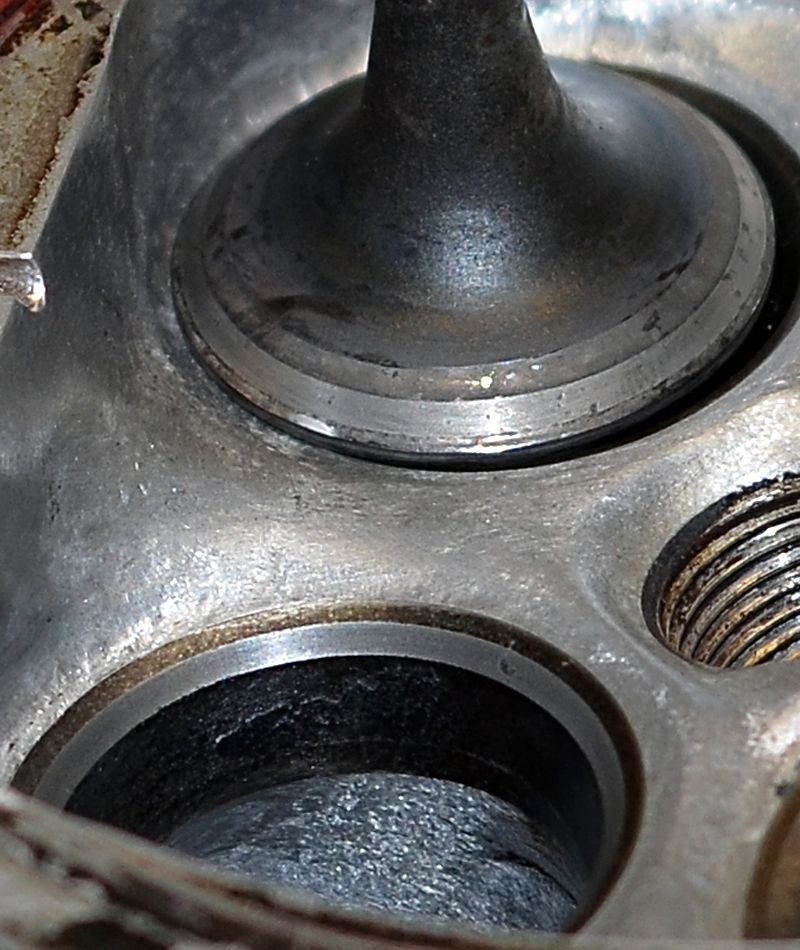
The valve...no surprises here. Note how some of the pitting goes clear across the sealing area (!)
Ok so it's time to put some lapping compound and work the valve until the compound goes dark, clean it off and check the surfaces. Lather, rinse, repeat. Between the time I scrubbed the first valve and the time I quit, this series of pictures covers about an hour and a half of work. If you can afford to have a machine shop do a better job, faster, then do it! I'm a little stubborn about this project costing as little as possible, plus I have the time and it gives me an excuse to go hide in the garage for a while, so . . .
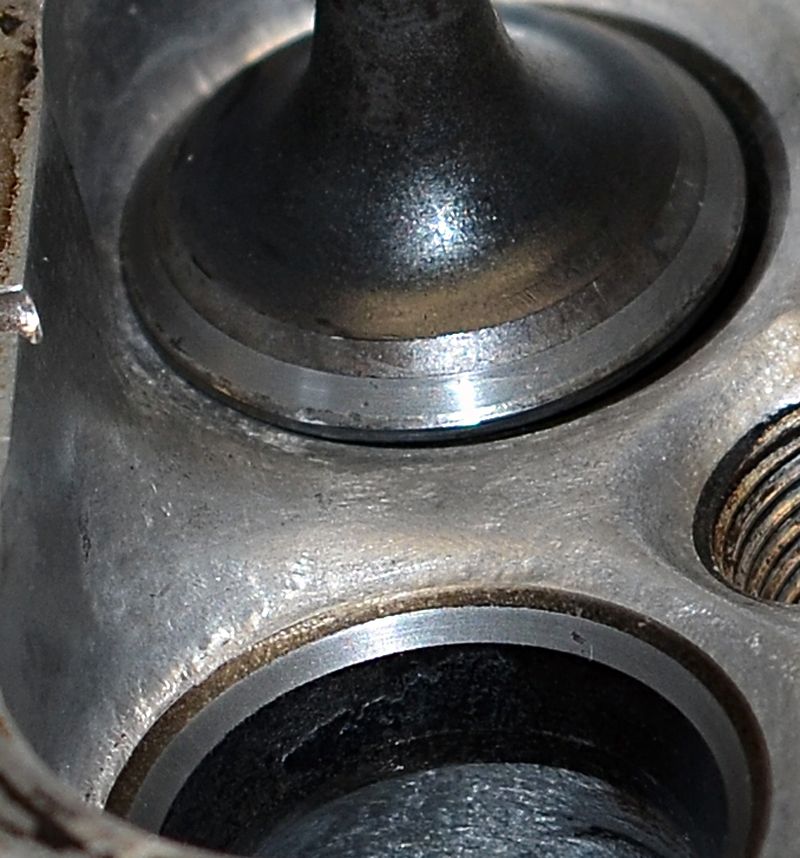
That's a relatively gigantic hole. Everything else on this seat was almost cleaned up, except for this spot. The valve needed more cleaning than the seat, except for that one place on the seat.

smaller
smoother
smaller
smoother
smaller
smoother
smaller
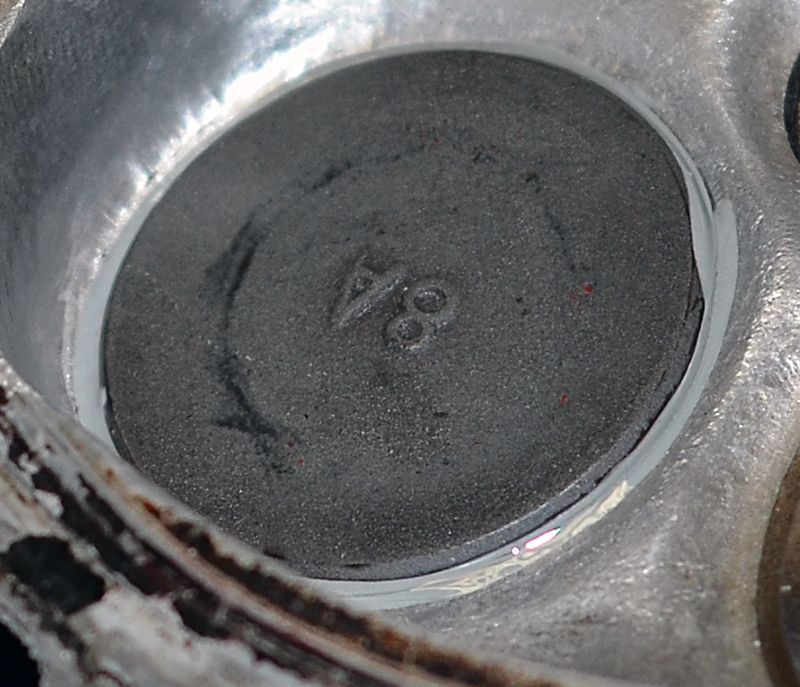
....aaaand now there's a ring?
The gaping hole disappeared, but its final act was to cause the lapping compound to leak around the edges of the hole and chew a ring into the seat, which now has a matching ridge around the valve. This looks waaaay worse than it is. It doesn't catch a fingernal, and it barely catches a metal scribe's tip. Less than a thousandth of an inch. It was getting late, so I stopped right here.
I also took most of the hardware off the head and put it into labeled bags. The cam caps are held on a sheet of cardboard by their bolts. There are 4 plugs in the ends of oil galleries in the cylinder head that were stuck like crazy, so I just left them soaking in penetrating oil. There are also 2 coolant plugs in the top of the head that I don't have allen keys big enough at the house so I'll have to bum one off my job to pull them out. After those are removed along with the valve seals, the head will be ready to go into the hot tank. After all the valves are done, I'll take the head to a shop and have them clean it, and smooth the deck. But that's for later. If anyone is counting, this project was begun almost 9 years ago!
...all of this, for an experiment: I'll lap these 4 valves and then put a plate on there, and see if it holds pressure. It should, and if it does, I'll go on to the next cylinder.
The final non-cylinder-head project is officially out of the way and I have the stuff needed to do this bit of the job, so it's finally time to get back to work on this head! I got some 1000 grit lapping compound and some valves, so it's time to do some valve work. This is the back of a valve with "40k miles" of use. The yellow color is from a brass brush I cleaned it off with so I could see what I have here.

That looks pretty gnarly but you can't even feel it with a fingernail so it's all less than ~0.002' deep. For comparison, this valve was run for about 165k.

Yikes. Okay, what do the seats look like?

Not too terrible, right? Maybe a little bit of funkiness but

oh. Okay maybe not so great. Clean the valve guide

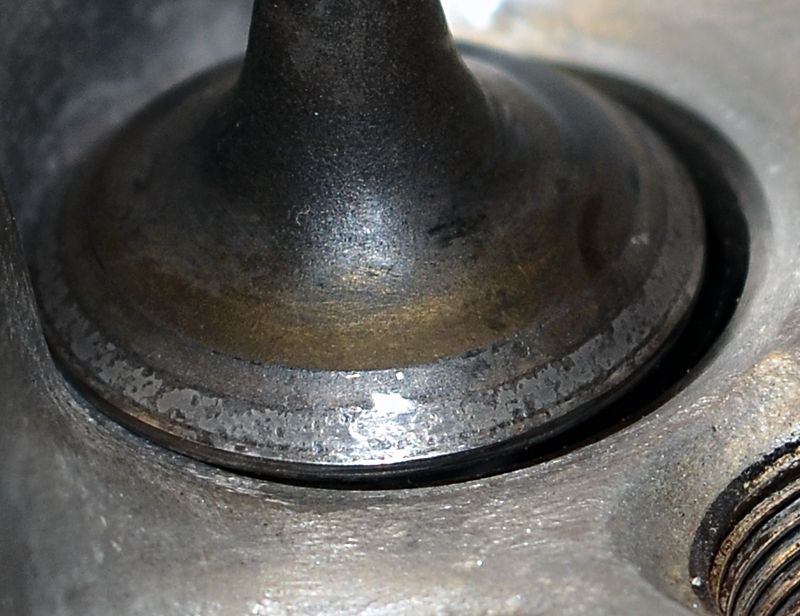
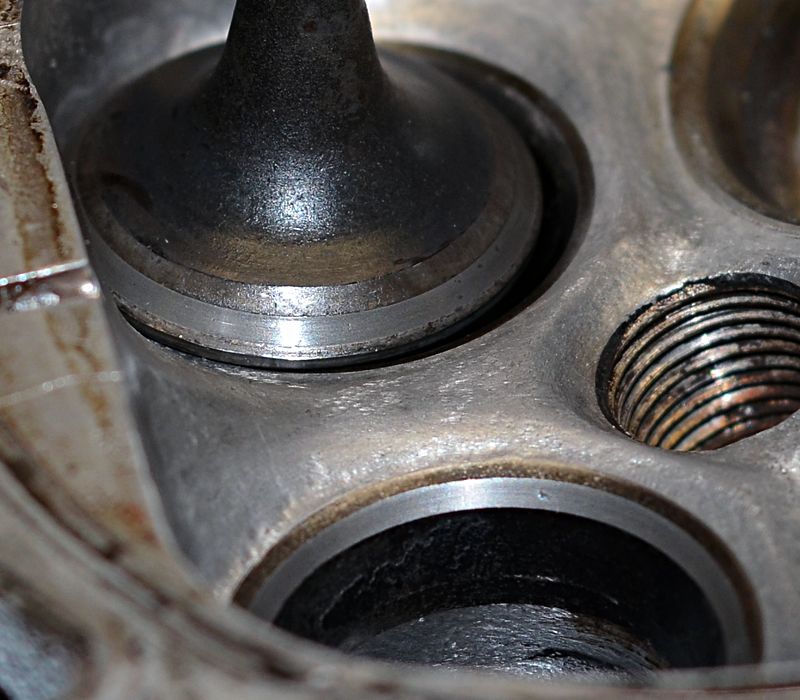
a drop of oil on the stem, insert a valve, add a bit of lapping compound and run a few spins of a valve in a seat, to see what needs to happen here. Obviously there's some pitting on this seat, but not all the way around. None of this looks very deep, either. If you look at the right side of this picture you'll see a short line on the chamber side of the seat, right around 3:00. I started with this cylinder because this was the only place in all my adventures with the dremel where a tool touched a valve seat. If this wouldn't clean up then it was time for some professional help. It looks like I was worried for nothing, on this point. The tiny mark I made on the sealing area is gone already.

The valve...no surprises here. Note how some of the pitting goes clear across the sealing area (!)

Ok so it's time to put some lapping compound and work the valve until the compound goes dark, clean it off and check the surfaces. Lather, rinse, repeat. Between the time I scrubbed the first valve and the time I quit, this series of pictures covers about an hour and a half of work. If you can afford to have a machine shop do a better job, faster, then do it! I'm a little stubborn about this project costing as little as possible, plus I have the time and it gives me an excuse to go hide in the garage for a while, so . . .


That's a relatively gigantic hole. Everything else on this seat was almost cleaned up, except for this spot. The valve needed more cleaning than the seat, except for that one place on the seat.

smaller

smoother

smaller

smoother

smaller

smoother

smaller

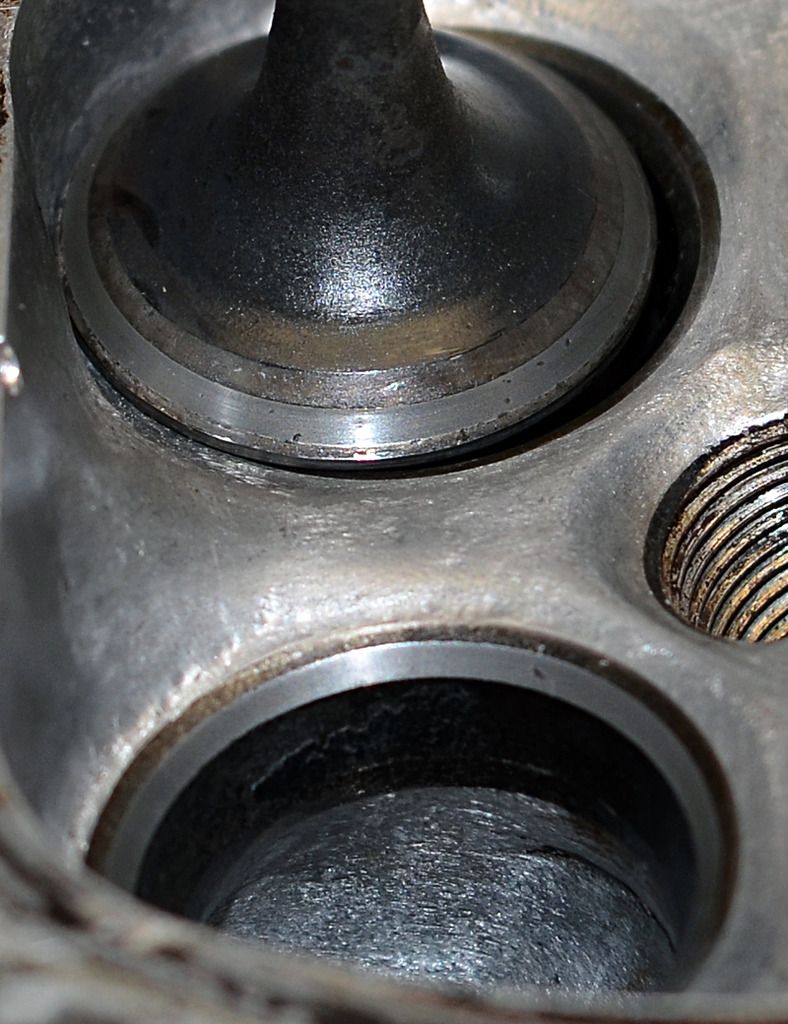
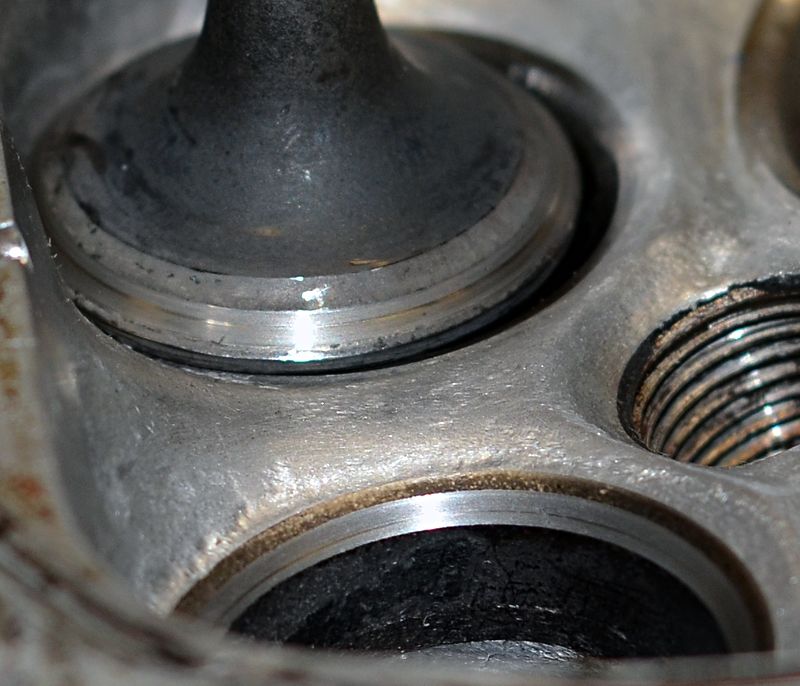
....aaaand now there's a ring?

The gaping hole disappeared, but its final act was to cause the lapping compound to leak around the edges of the hole and chew a ring into the seat, which now has a matching ridge around the valve. This looks waaaay worse than it is. It doesn't catch a fingernal, and it barely catches a metal scribe's tip. Less than a thousandth of an inch. It was getting late, so I stopped right here.

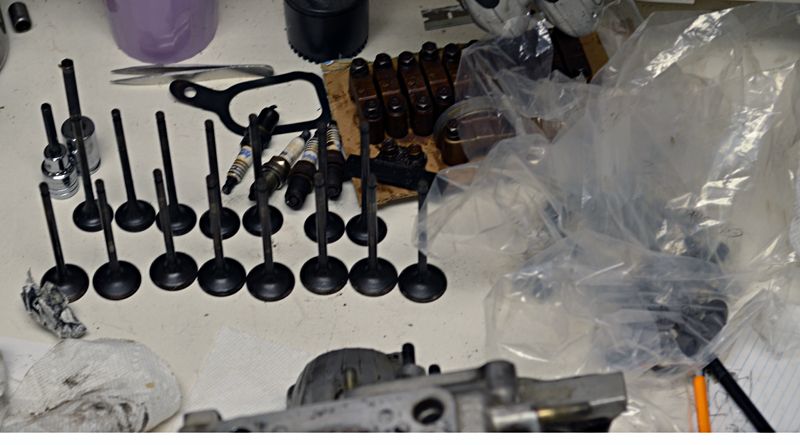
I also took most of the hardware off the head and put it into labeled bags. The cam caps are held on a sheet of cardboard by their bolts. There are 4 plugs in the ends of oil galleries in the cylinder head that were stuck like crazy, so I just left them soaking in penetrating oil. There are also 2 coolant plugs in the top of the head that I don't have allen keys big enough at the house so I'll have to bum one off my job to pull them out. After those are removed along with the valve seals, the head will be ready to go into the hot tank. After all the valves are done, I'll take the head to a shop and have them clean it, and smooth the deck. But that's for later. If anyone is counting, this project was begun almost 9 years ago!
...all of this, for an experiment: I'll lap these 4 valves and then put a plate on there, and see if it holds pressure. It should, and if it does, I'll go on to the next cylinder.
05-05-2017, 04:29 PM
#107
Super Moderator
Thread Starter
It's officially going to the machine shop now. I'd have done some more lapping but I smashed my thumb a bit and decided to measure instead because a) lapping was going to hurt and b) the second exhaust valve I put in was wobbly. I was prepared to run right at the maximum service limit valve stem-to-valve guide clearance, but this head needs new guides. The first intake valve and exhaust valve were about at the limit, but the second valve was like 200% of the maximum clearance in one direction and more in the other direction (elliptical wear). So I set up and measured the valves and the intakes range from the max. to a couple thousandths over the maximum, and the exhausts range from the maximum to that one port that's totally loose. Oh well. At least I can have them clean up the deck while it's there, so it will be ready to run, once the valves are done and the head's put back together.