
Chromed Coolant Tank And Powersteering Tank


Thread Starter
Senior Member

Joined: Mar 2010
Posts: 2,615
Likes: 11
From: Denver Co
Vehicle: 1999 Hyundai Tiburon
Well, I got half of it done!!! I'll post pics of the powersteering tank later tonight, its drying! smile.gif
I used this chrome paint called Alclad II and it is AMAZING! Probably one step down from actually chroming. It is VERY difficult to use though. I ended up painting it and stripping it 3 times before I got it right!!! If there is enough interest, I will post a DIY for this stuff, but be warned, its very difficult to use. Also, the paint is a laquere and is actually quite soft. Im just gonna see how she lasts. Its actually quite easy to touch up. A quick hit with the airbrush and you're back in business, so I am hoping for a 2 year life. Then, when it gets dull, I'll just touch it up. fing02.gif
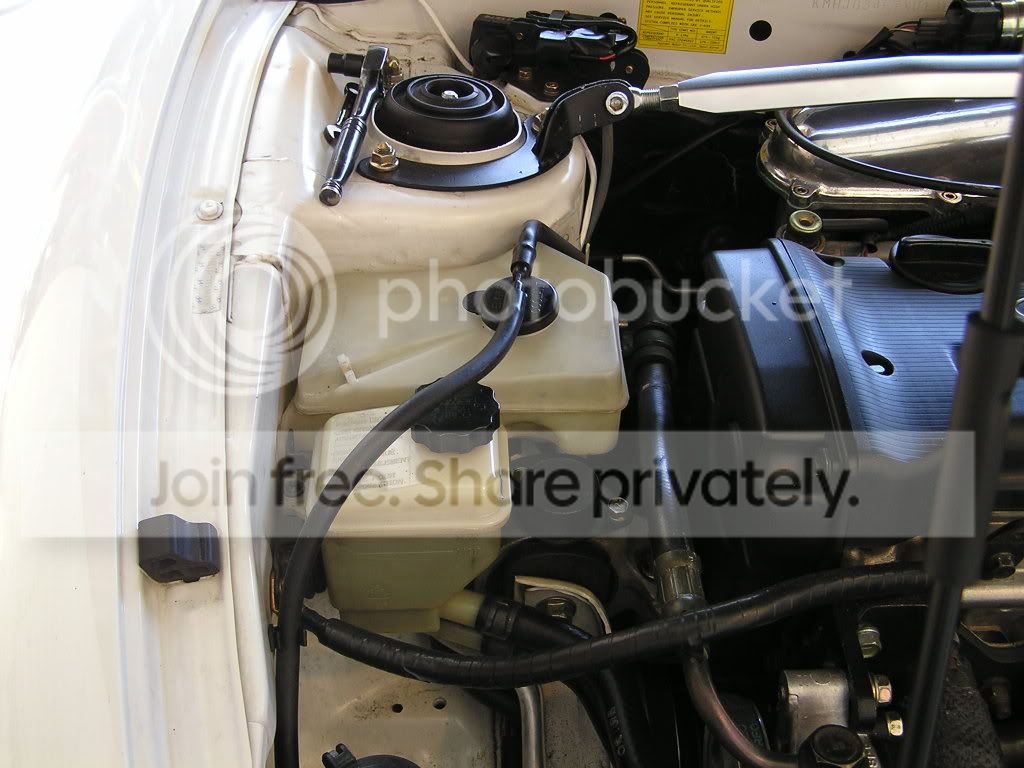
Here is a pic of the old Ugly tanks.
Here is a pic of the job in progress. I used a black primer, then a high gloss engine paint by Dupli-color. It is essintial that you have as close to a mirror finish with the high gloss black as possible. the glossyier the black is, the more shine and smoothness you're chrome will have.

And here is the finished product:
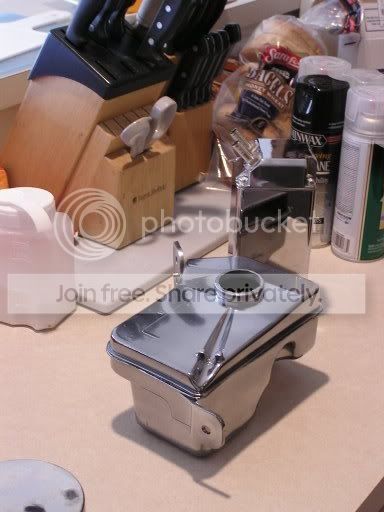
I put an actually chrome part, my oil catch can, next to the tank so you could see the difference. Not quite chrome, but DAMN close!!!
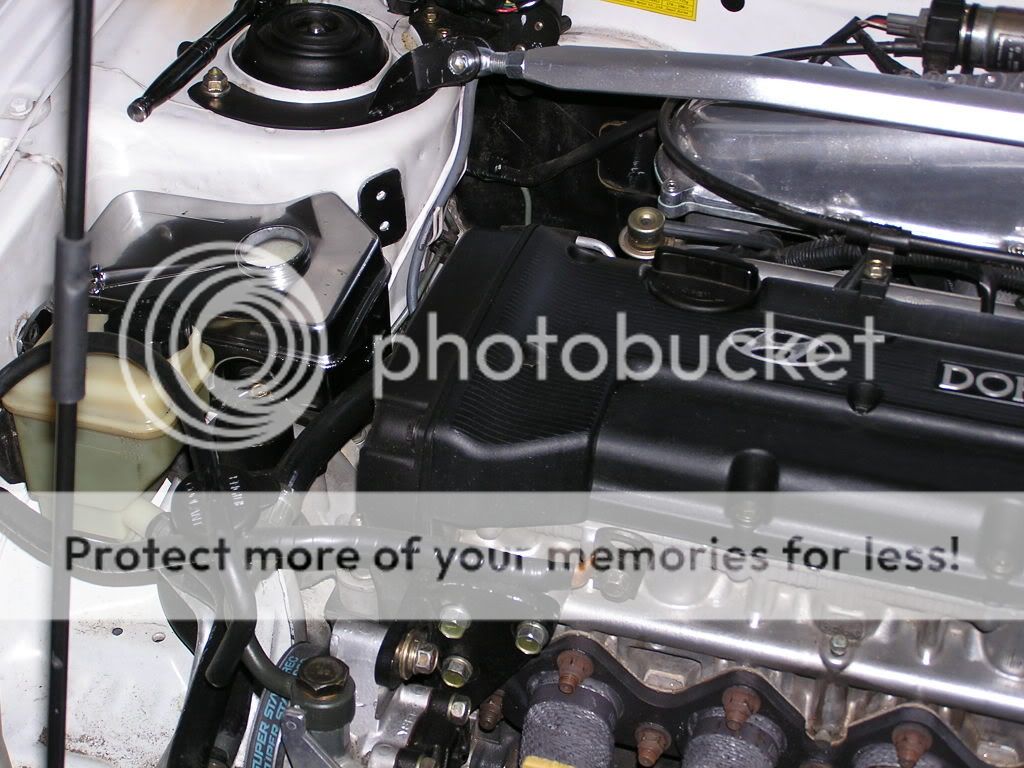
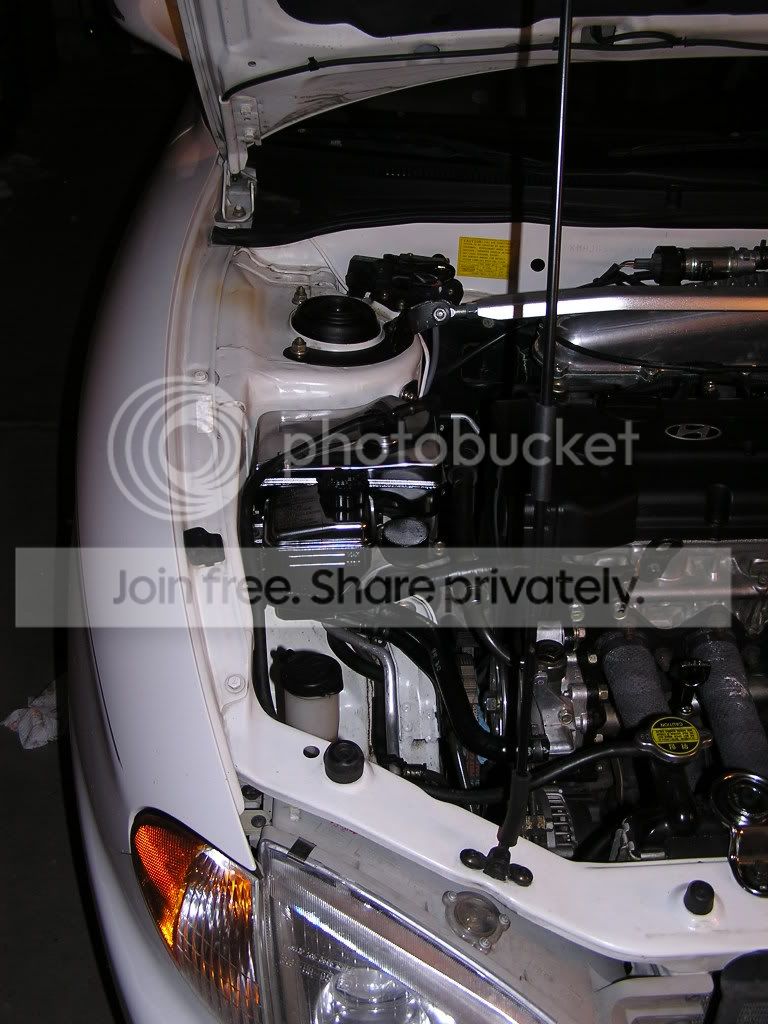
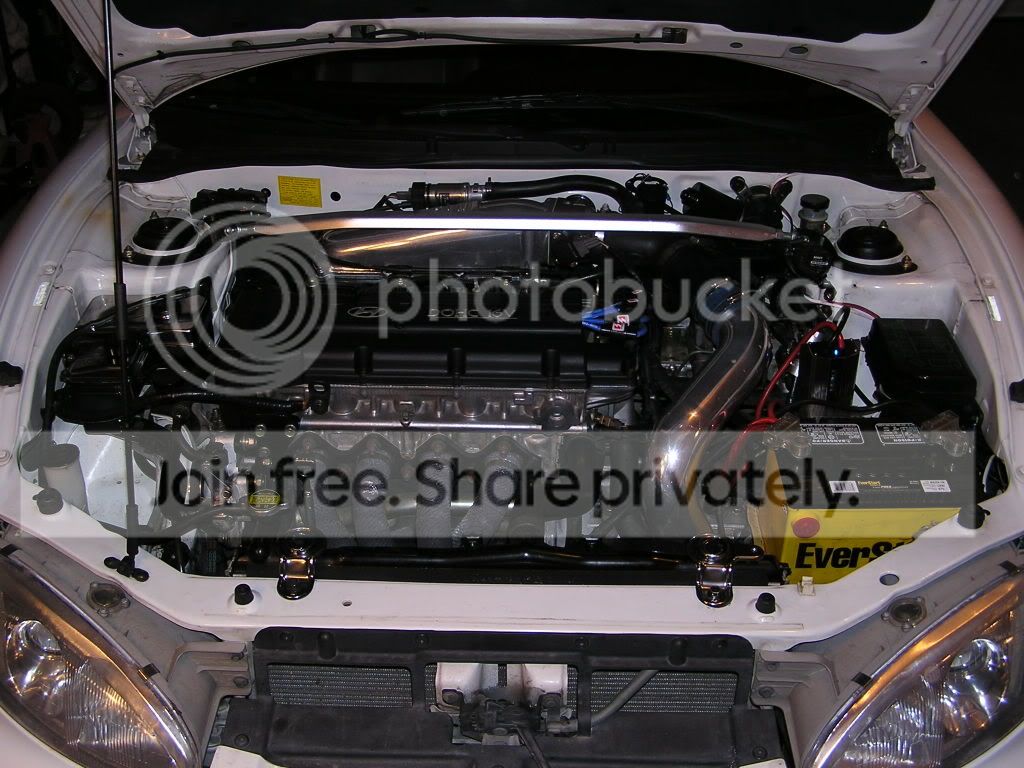
Here it is in the engine bay. Compare it the powersteering housing.
And one more....
This paint is so damn cool! I feel like the Terminator!
Sorry if that grossed someone out....
More pics to come, hopefully later tonight!
I used this chrome paint called Alclad II and it is AMAZING! Probably one step down from actually chroming. It is VERY difficult to use though. I ended up painting it and stripping it 3 times before I got it right!!! If there is enough interest, I will post a DIY for this stuff, but be warned, its very difficult to use. Also, the paint is a laquere and is actually quite soft. Im just gonna see how she lasts. Its actually quite easy to touch up. A quick hit with the airbrush and you're back in business, so I am hoping for a 2 year life. Then, when it gets dull, I'll just touch it up. fing02.gif
Here is a pic of the old Ugly tanks.
Here is a pic of the job in progress. I used a black primer, then a high gloss engine paint by Dupli-color. It is essintial that you have as close to a mirror finish with the high gloss black as possible. the glossyier the black is, the more shine and smoothness you're chrome will have.
And here is the finished product:
I put an actually chrome part, my oil catch can, next to the tank so you could see the difference. Not quite chrome, but DAMN close!!!
Here it is in the engine bay. Compare it the powersteering housing.
And one more....
This paint is so damn cool! I feel like the Terminator!
Sorry if that grossed someone out....
More pics to come, hopefully later tonight!


Senior Member
Joined: Mar 2006
Posts: 4,334
Likes: 0
From: Tampa/St Petersburg
Vehicle: Turbocharged 2001 Hyundai Tiburon
Dude that is awesome!
You better be doing a DIY right now, because i wanna do this as soon as i can find a place to get that paint, i know we sell some metalic paint at walmart that claims a SS finish but i doubt it looks as good as that. Finally a way to get rid of those ugly yellow boxes
You better be doing a DIY right now, because i wanna do this as soon as i can find a place to get that paint, i know we sell some metalic paint at walmart that claims a SS finish but i doubt it looks as good as that. Finally a way to get rid of those ugly yellow boxes
Moderator

Joined: Mar 2006
Posts: 6,976
Likes: 0
From: Arizona
Vehicle: N/A as in Not Applicable, not Naturally Aspirated
looks great Tom, but from experience it's going to get really dirty and be hard to keep clean. Hopefully you have a TON of layers of paint on their all SET and not just sticking to each other. Otherwise it's going to scratch and peel under the hood. The tanks stay relatively cool throughout the time you are driving (except when your car overheats), so that shouldn't be a problem.
How do you check your levels? Just pop the top?
How do you check your levels? Just pop the top?


Thread Starter
Senior Member
Joined: Mar 2010
Posts: 2,615
Likes: 11
From: Denver Co
Vehicle: 1999 Hyundai Tiburon
Pat- Well, thats the thing that I'm having to take my chances on. Prep'ed the parts best I could. The chrome paint is a translucent lacquer that has to be sprayed on pretty lightly. Also, there is NO chance of clearcoating this stuff. Pretty much every kind of clear coat: acryilic, enamel, engine, wheel, automotive, lacquer, polyurethane reactivates the chrome paint and turns it into a gray finish. Trust me, I spent about 40.00 in every kind of clearcoat I could get a hold of and none of them worked. They only thing that did kind of work is a water-based clear called polycrylic. I diluted it 4:1 and it dulled the finish quite a bit. looked like hazy aluminum so it still retained the "metal" look, but not near as impressive as leaving it alone.
I think the solution to this will be having some spare chrome around. It touches up very easily, but you must know how to spray it first. I ordered 2 extra bottles to practice with and I still made some mistakes. I dont know, I'm hoping that the finish will last at least a year before having to touch it up, maybe 2 years. But, the hard work is done. Like I said, touch up should be quick and consist of no more than 30 min.
Checking the levels is a bit of a pain. I wish I would have made a small slit, a window to see. Not a big deal though, I'll just pop the cap and check it before long trips and during oil changes. should be fine. I may take a razor to the back of the tanks and carefully scrape away some paint to see. I'll do it in an inconspicuous place so only I can see it.
I'll do a DIY for people, but realize, this is very experimental. I'm not sure how this paint is going to with stand engine temps and fluids, let alone oil from the roads and the damn mag-cloride we have here in the winter. I'll try to get a DIY together, but you'll should either hold off and see how my paint holds up, or do it at your own risk! smile.gif fing02.gif
So... here's a few last pics of the project. I had a little left over so I decided to do a few more things!
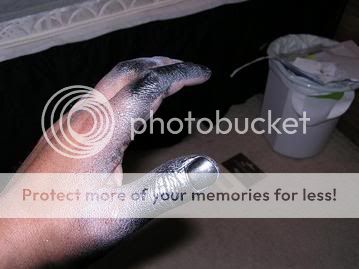
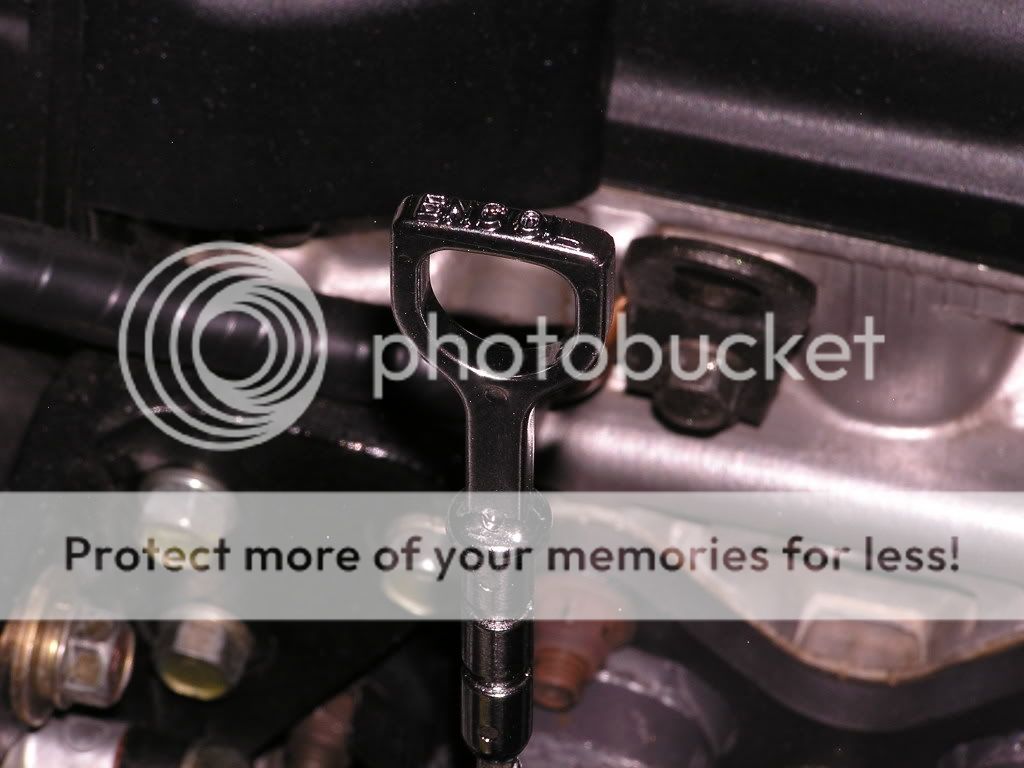
I chromed my oil dipstick.
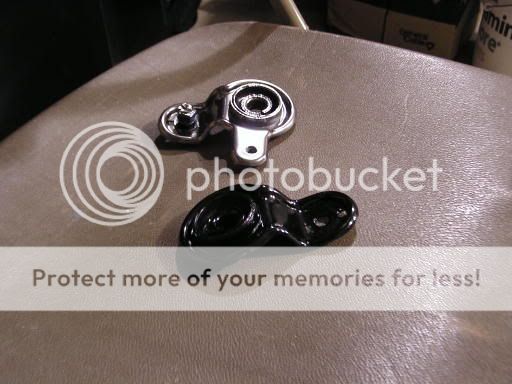
I also chromed my supports for my radiator. This will be a good test to see how this paint takes the heat!
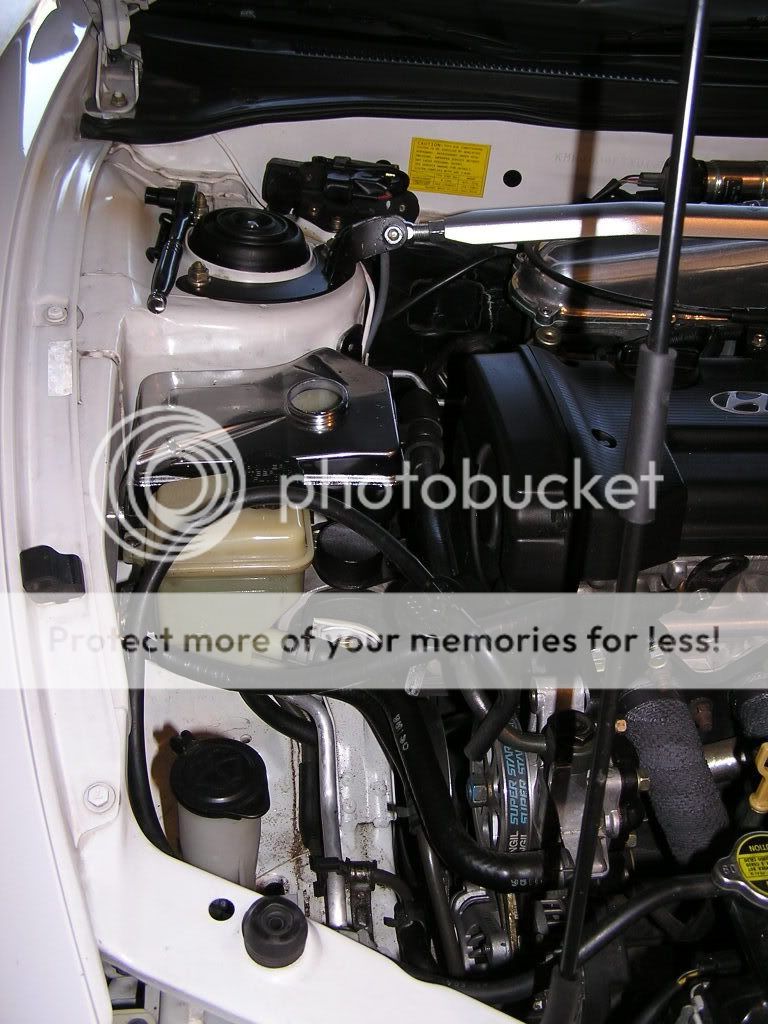
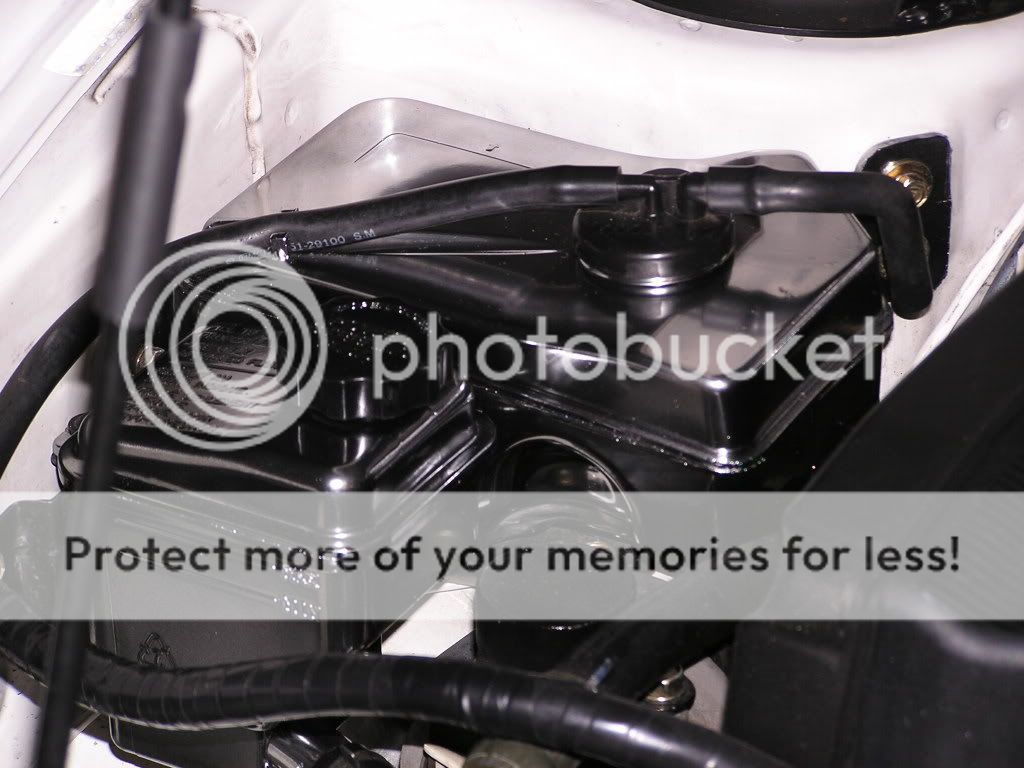
Pics with Powersteering and coolant tank installed.
I want to do my other 3 plastic housings that are left in the engine bay: the neck of the washer reservior, the clutch fluid reservior, and the brake fluid reservior. Maybe I'll to tackle those this weekend.
I think the solution to this will be having some spare chrome around. It touches up very easily, but you must know how to spray it first. I ordered 2 extra bottles to practice with and I still made some mistakes. I dont know, I'm hoping that the finish will last at least a year before having to touch it up, maybe 2 years. But, the hard work is done. Like I said, touch up should be quick and consist of no more than 30 min.
Checking the levels is a bit of a pain. I wish I would have made a small slit, a window to see. Not a big deal though, I'll just pop the cap and check it before long trips and during oil changes. should be fine. I may take a razor to the back of the tanks and carefully scrape away some paint to see. I'll do it in an inconspicuous place so only I can see it.
I'll do a DIY for people, but realize, this is very experimental. I'm not sure how this paint is going to with stand engine temps and fluids, let alone oil from the roads and the damn mag-cloride we have here in the winter. I'll try to get a DIY together, but you'll should either hold off and see how my paint holds up, or do it at your own risk! smile.gif fing02.gif
So... here's a few last pics of the project. I had a little left over so I decided to do a few more things!
I chromed my oil dipstick.
I also chromed my supports for my radiator. This will be a good test to see how this paint takes the heat!
Pics with Powersteering and coolant tank installed.
I want to do my other 3 plastic housings that are left in the engine bay: the neck of the washer reservior, the clutch fluid reservior, and the brake fluid reservior. Maybe I'll to tackle those this weekend.
