
Projekt: Door Panels

Thread Starter
Member

Joined: Mar 2008
Posts: 58
Likes: 0
From: Vancouver, WA
Vehicle: 98 Hyundai Accent X3
So heres the latest project I've got going on the X3. the Door Panels. I was able to obtain some marine vinyl locally. I got this to
insure of no fading of the material and can take a little abuse if needed. Passenger side only so far.
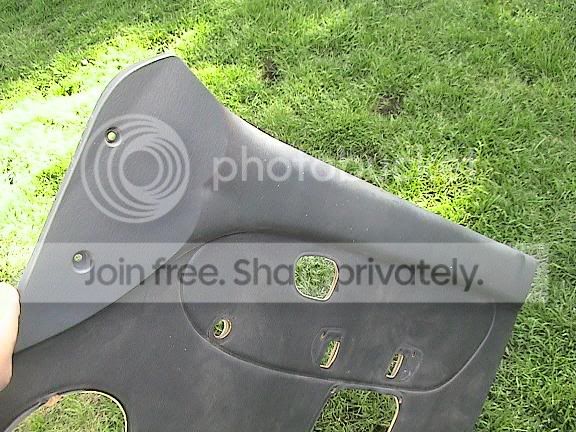
Panel before, basic dark gray, pulled from the door.....
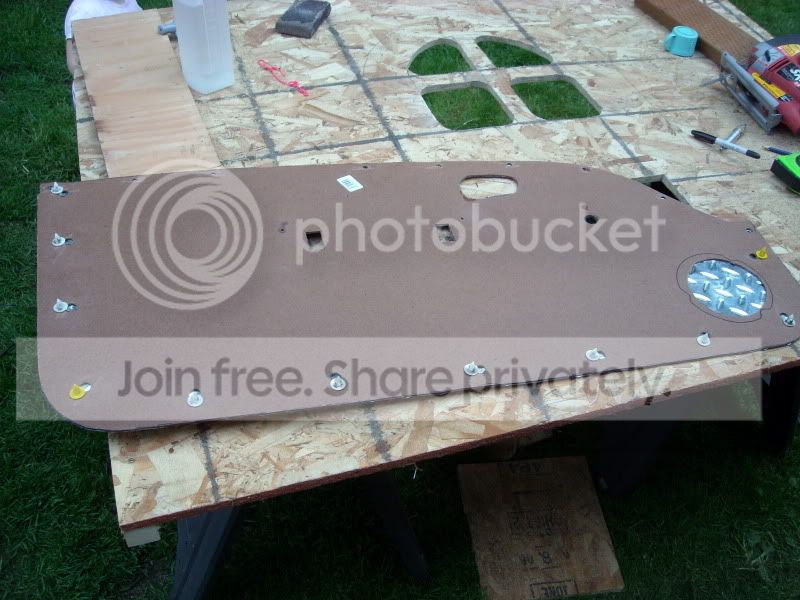
I had to make a new panel piece and traced and cut out a new tempered hardboard. This pic is of the new piece finished. I have to
drill new holes for the fasteners and fine tuned them with the dremel.....
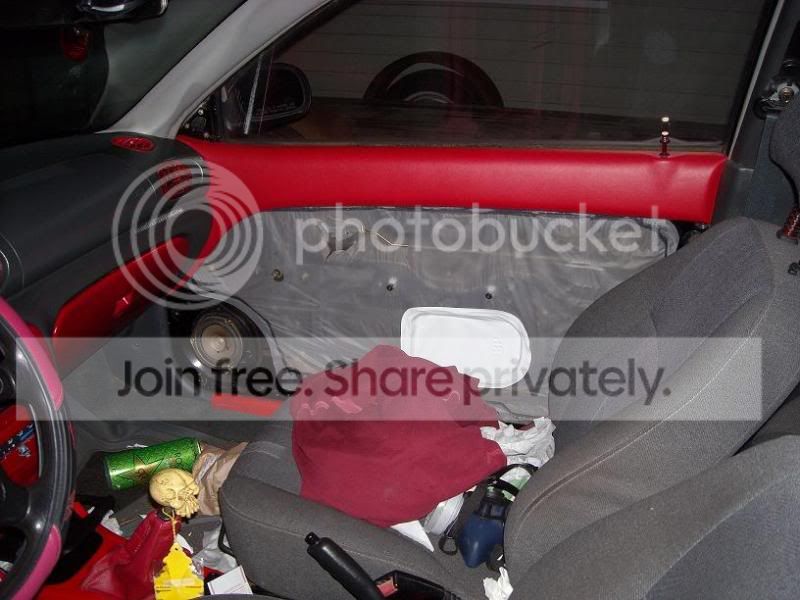
I wrapped the top piece with the vinyl and test fit it on the door.....
And here's the front of the panel....Keep in mind it'll still get the door cubby/pocket.
Thats it for now.
insure of no fading of the material and can take a little abuse if needed. Passenger side only so far.
Panel before, basic dark gray, pulled from the door.....
I had to make a new panel piece and traced and cut out a new tempered hardboard. This pic is of the new piece finished. I have to
drill new holes for the fasteners and fine tuned them with the dremel.....
I wrapped the top piece with the vinyl and test fit it on the door.....
And here's the front of the panel....Keep in mind it'll still get the door cubby/pocket.
Thats it for now.
Administrator

Joined: Mar 2006
Posts: 12,515
Likes: 2
From: Lacey, WA
Vehicle: Two Accents, Mini, Miata, Van, Outback, and a ZX-6
Looks good so far. I helped a friend do this to his Toyota pickup, but his panels were pretty much flat already so it was pretty easy.
Thread Starter
Member
Joined: Mar 2008
Posts: 58
Likes: 0
From: Vancouver, WA
Vehicle: 98 Hyundai Accent X3
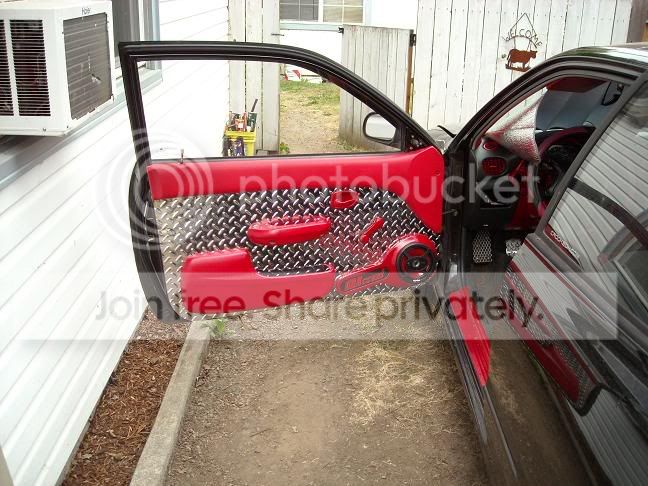
Sorry for not updating on this, but I have finished the panel and is on the car now as of yesterday. Here are more progress pics
leading up to how it is now. I still have to hookup power to the LEDs, but its basically 99% done fo the Passenger door.
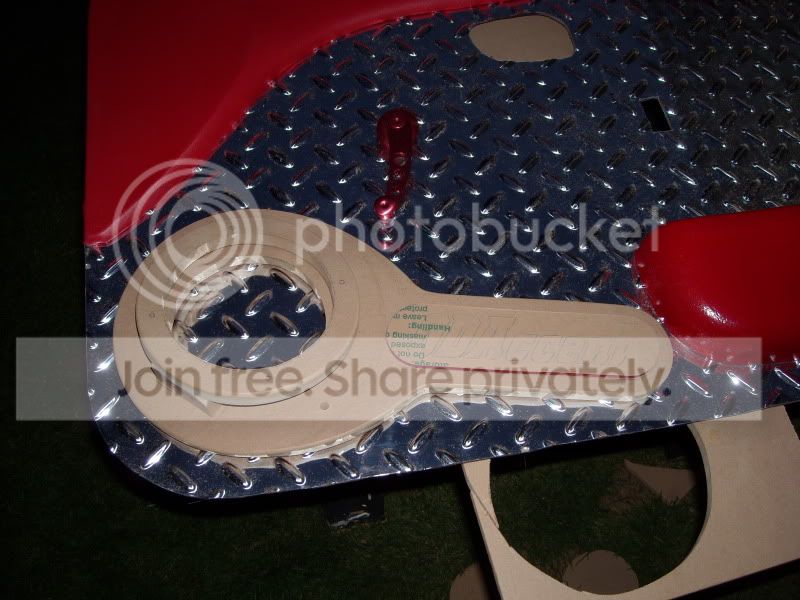
So the next part was to figure out the door pocket. I decided to move it back 8" to allow room for the speaker pod and custom name sign. I did a test fit of the panel with the pocket and upper door panel...
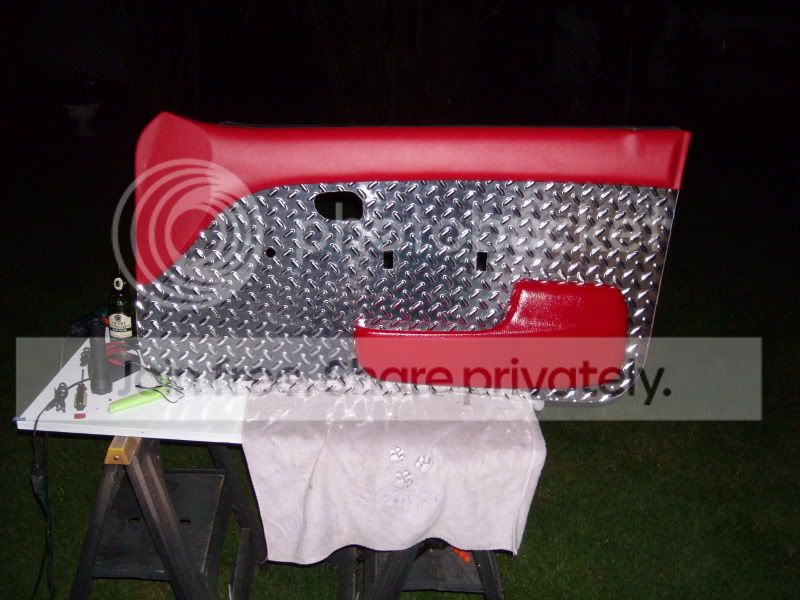
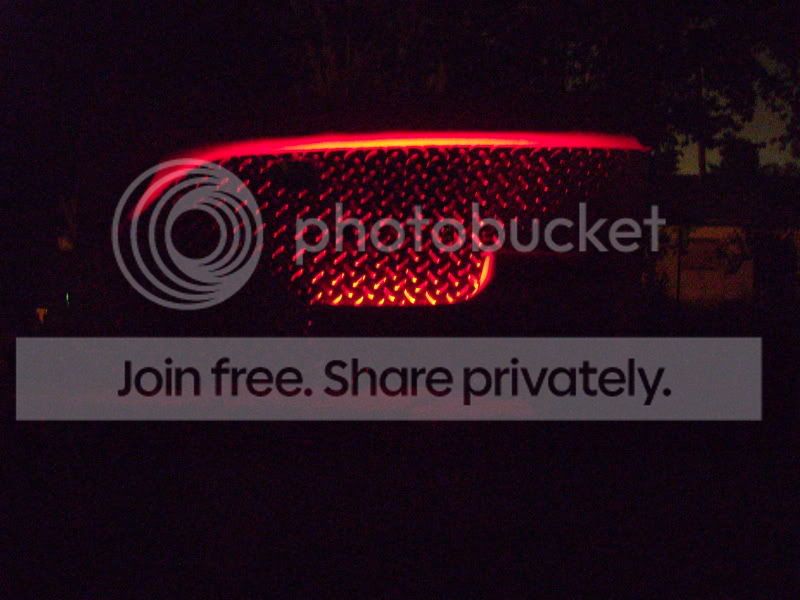
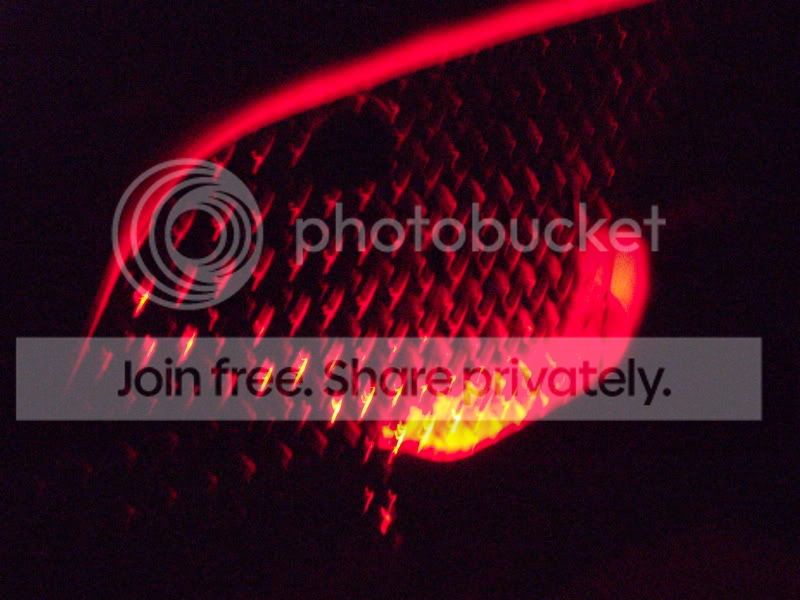
I then added an RED LED light strip in the pocket....
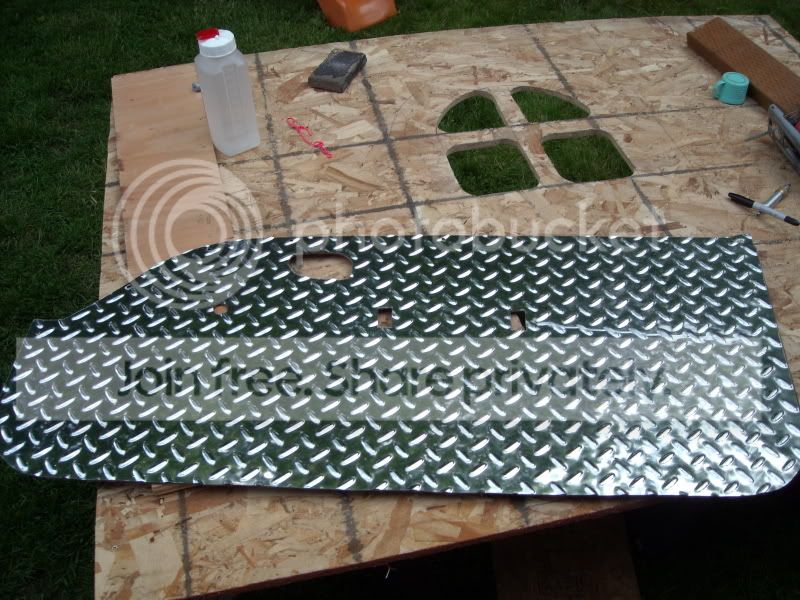
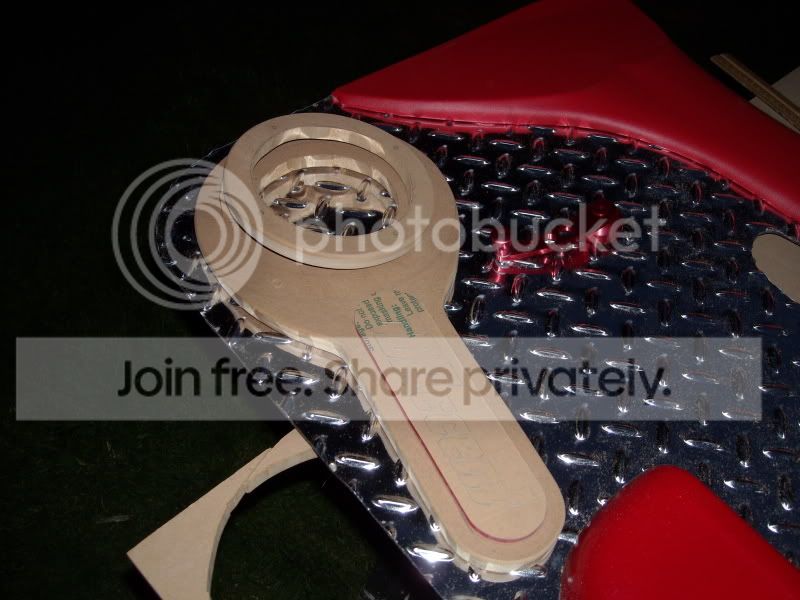
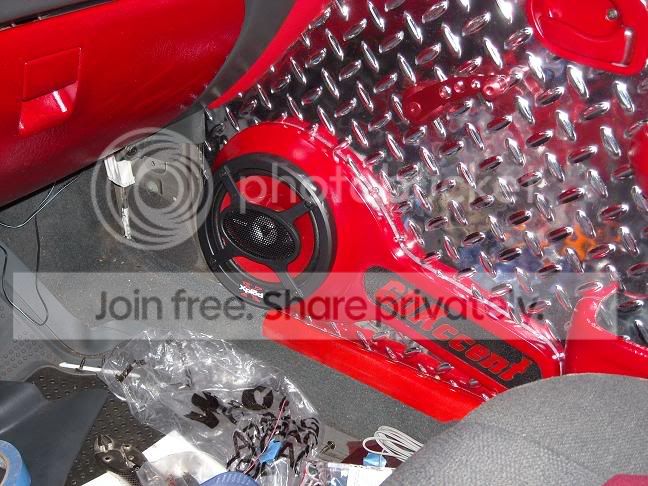
Next was designing the speaker pod. I am putting in a set of Sony 6.5" Xplod series...made the substructure out of HDF. The other reason for making the pod, is that the 6.5" speaker are deeper. So I need to build it out....
On Red plexi, I chose a font from the computer, used carbon paper to trace out the letters on the paper backing. What you see in Red will be painted, then the paper from the letter will be removed to reveal red letters. This will also be back light, by another LED strip.
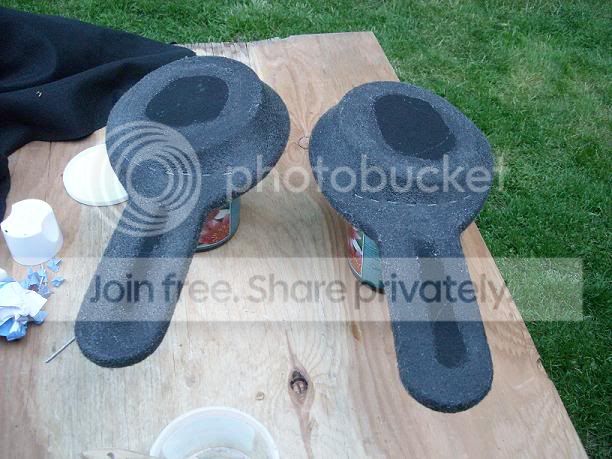
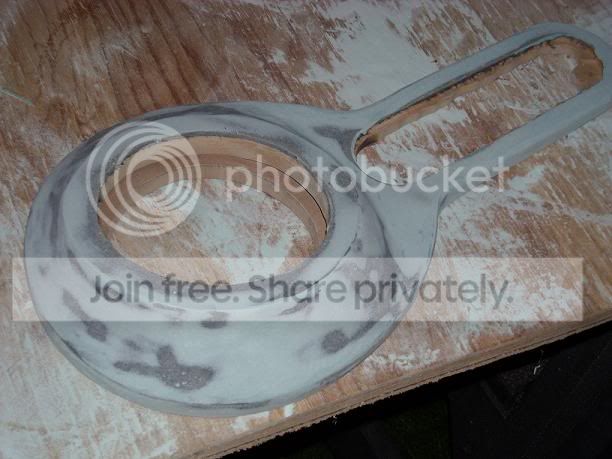
Speaker pods fleeced and resined, ready for fiberglassing. Yes it look like a paddle, but you'll see how it comes togther...
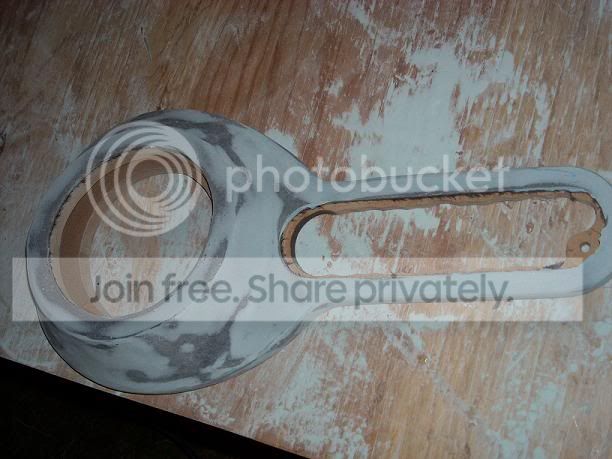
3 Layers of glass, and some filler to smooth out everything....
leading up to how it is now. I still have to hookup power to the LEDs, but its basically 99% done fo the Passenger door.
So the next part was to figure out the door pocket. I decided to move it back 8" to allow room for the speaker pod and custom name sign. I did a test fit of the panel with the pocket and upper door panel...
I then added an RED LED light strip in the pocket....
Next was designing the speaker pod. I am putting in a set of Sony 6.5" Xplod series...made the substructure out of HDF. The other reason for making the pod, is that the 6.5" speaker are deeper. So I need to build it out....
On Red plexi, I chose a font from the computer, used carbon paper to trace out the letters on the paper backing. What you see in Red will be painted, then the paper from the letter will be removed to reveal red letters. This will also be back light, by another LED strip.
Speaker pods fleeced and resined, ready for fiberglassing. Yes it look like a paddle, but you'll see how it comes togther...
3 Layers of glass, and some filler to smooth out everything....
Thread Starter
Member
Joined: Mar 2008
Posts: 58
Likes: 0
From: Vancouver, WA
Vehicle: 98 Hyundai Accent X3
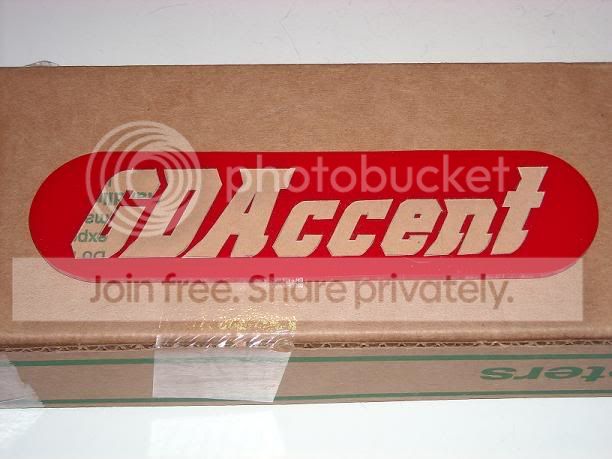
Next is to finish the name plate....
Satisfied with the smooth feel of the pods, I painted it in primer and did a test fit with the sign....
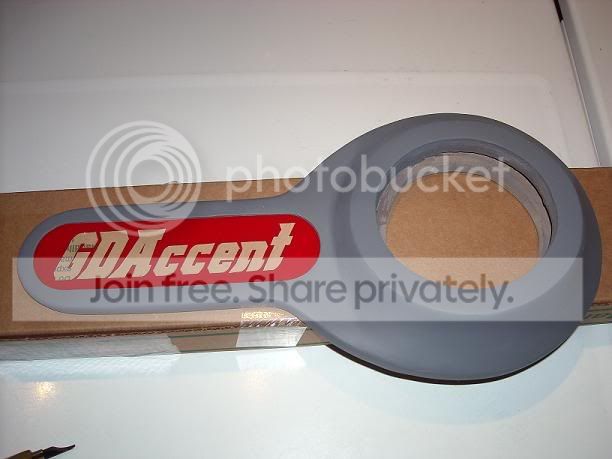
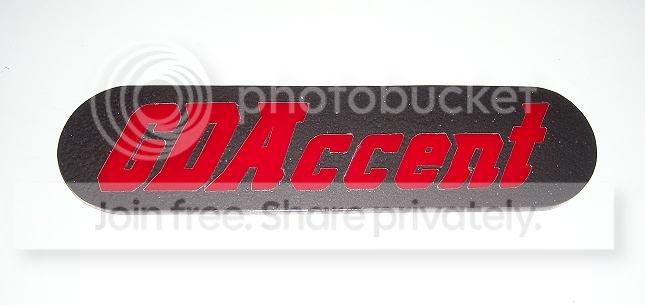
Happy with the fit results.....I proceeded to paint the name plate...using Hammerite spray, this is how it turned out
sorry pic looks fuzzy...
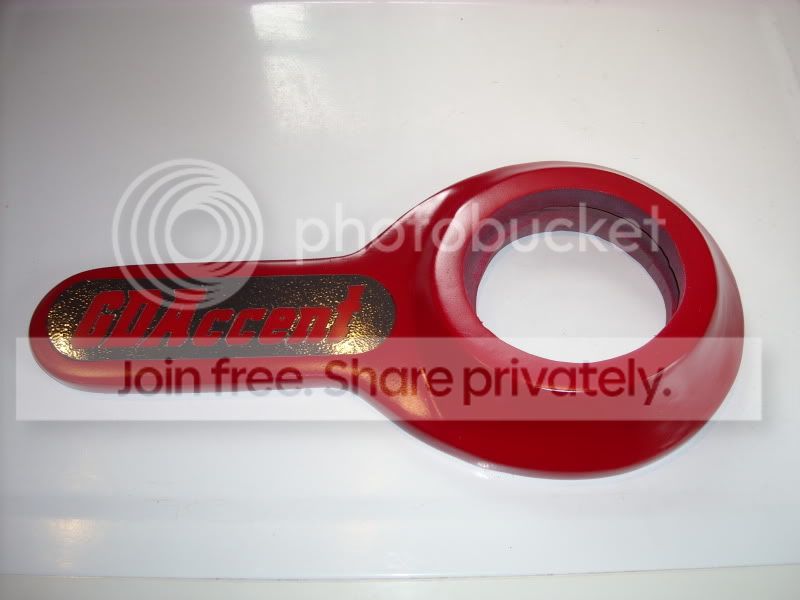
Next I painted the pods and added the name plate....(pic of drivers side pod, had this one painted first)
Needing to do a light test before installing it all on....This is back lit with Red 8" LED SMD strip...
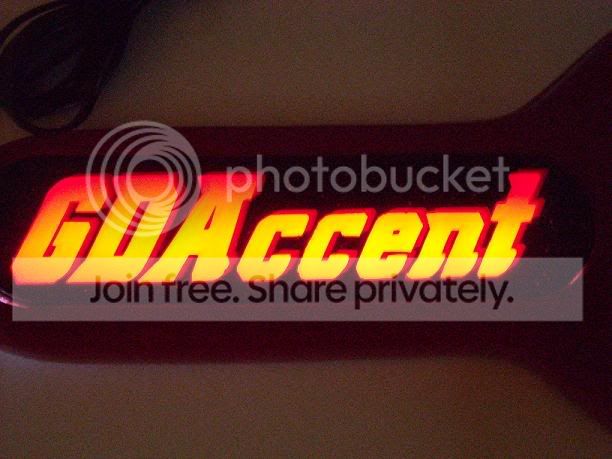
Now happy with it....I'm finally ready to put it on the door...
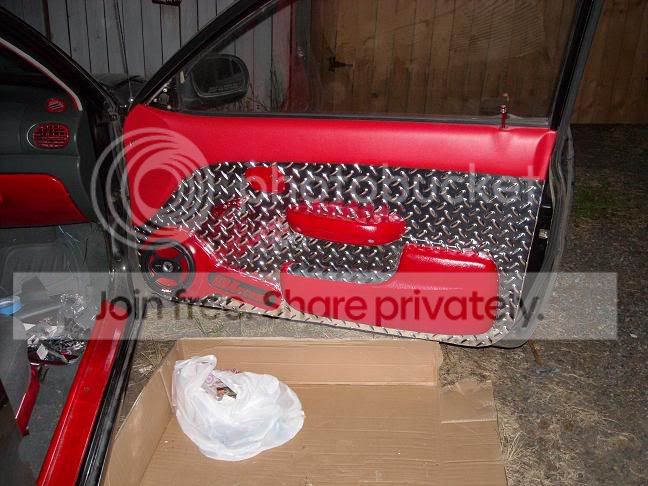
Now I have to get the Drivers side done. Today I had to get the oil changed and stopped into a Texaco Xpress Oil an Lube.
The guys were checking it out. Being surprise to see it as they stepped up to the window. It was kinda cool feeling the buzz it was creating and endless questions, How?, What? Why? and Why a Hyundai.....lol?
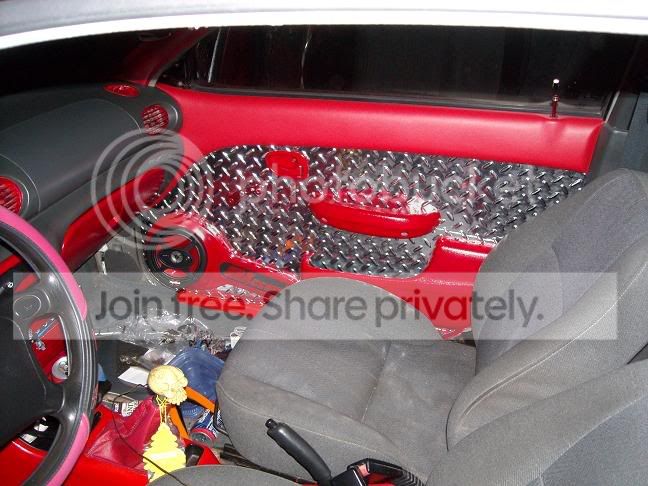
Thx for looking. Now the other cool thing will be how it looks with the interior LED light kit. Should look pretty cool at night with it reflecting off the diamond plate. I'm gonna finish the other door first before putting in the interior LED kit.
Next project will be the Exterior mods.
GDA
Satisfied with the smooth feel of the pods, I painted it in primer and did a test fit with the sign....
Happy with the fit results.....I proceeded to paint the name plate...using Hammerite spray, this is how it turned out
sorry pic looks fuzzy...
Next I painted the pods and added the name plate....(pic of drivers side pod, had this one painted first)
Needing to do a light test before installing it all on....This is back lit with Red 8" LED SMD strip...
Now happy with it....I'm finally ready to put it on the door...
Now I have to get the Drivers side done. Today I had to get the oil changed and stopped into a Texaco Xpress Oil an Lube.
The guys were checking it out. Being surprise to see it as they stepped up to the window. It was kinda cool feeling the buzz it was creating and endless questions, How?, What? Why? and Why a Hyundai.....lol?
Thx for looking. Now the other cool thing will be how it looks with the interior LED light kit. Should look pretty cool at night with it reflecting off the diamond plate. I'm gonna finish the other door first before putting in the interior LED kit.
Next project will be the Exterior mods.
GDA
Thread Starter
Member
Joined: Mar 2008
Posts: 58
Likes: 0
From: Vancouver, WA
Vehicle: 98 Hyundai Accent X3
Thanks guys ! I had to get the oil changed yesterday and the guys in the shop were all looking it over. kinda felt cool for a moment....lol. So wait til I get the driver side done. I'm gonna hook up the LEDs tonight. We'll see how that goes. I'll get pics and post as well. Or if not tonight, this weekend sometime.
Thread Starter
Member
Joined: Mar 2008
Posts: 58
Likes: 0
From: Vancouver, WA
Vehicle: 98 Hyundai Accent X3
Ok, so I have finished the drivers side panel.
And here is a shot with both doors....
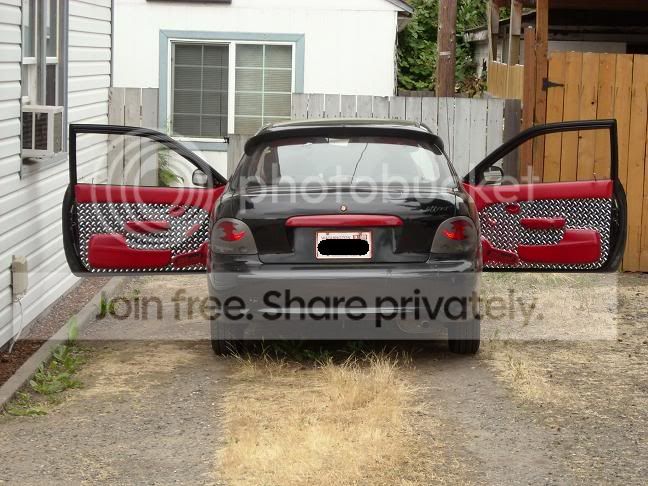
I'm still needing to get the LED wired up. Limited time and sometimes other projects I get going have to come first..lol.
And here is a shot with both doors....
I'm still needing to get the LED wired up. Limited time and sometimes other projects I get going have to come first..lol.

Moderator

Joined: Feb 2009
Posts: 11,732
Likes: 5
From: Leesville, Louisiana
Vehicle: 2001 Hyundai Tiburon
That looks seriously awesome. If it were my car I'd do the entire thing with that sort of a scheme, starting with the floor mats, working to the exterior of the car. I think that has alot of potential for interior and exterior modification. It definitely needs floor mats from diamond mat.