
Tighten Up The Sloppy Stock Shifter

Thread Starter
Super Moderator


Joined: Sep 2001
Posts: 10,795
Likes: 5
From: Pflugerville, TX
Vehicle: 2000 Elantra
The stock shifter on my car had several mm of free travel at the pivot points, which translates to what feels like 1/2 of excess slop at the shifting knob before the shifter started shifting gears. After the work described below, almost 100% of the motion of the shifting knob is used to shift gears. It feels much tighter, and much less like a car worth <1 month's pay.
This is how I got rid of most of the slop in the stock shifter for $0 with stuff I had laying around the garage.
Tools required:
2 crescent wrenches
Zip tie gun (if you have one, pliers and cutting pliers if you don't)
Flat head screwdriver
Zip ties
Total time: 15 minutes if that
Difficulty: Easy
********
Unscrew your gearshift knob
Pry up the shifter boot surround with the flathead screwdriver
Lift the shifter boot and surround off the shifter
I was a bit surprised to find out that the fore-and-aft slop in my shifter was at least half caused by the nut at point "A" being not-so-very tight. The rest of the slop is in the shifter cable, but I don't want to adjust that until I do the GEAR LINK MOD
So, tighten up the nut on the bolt running sideways through the shifter (point "A")
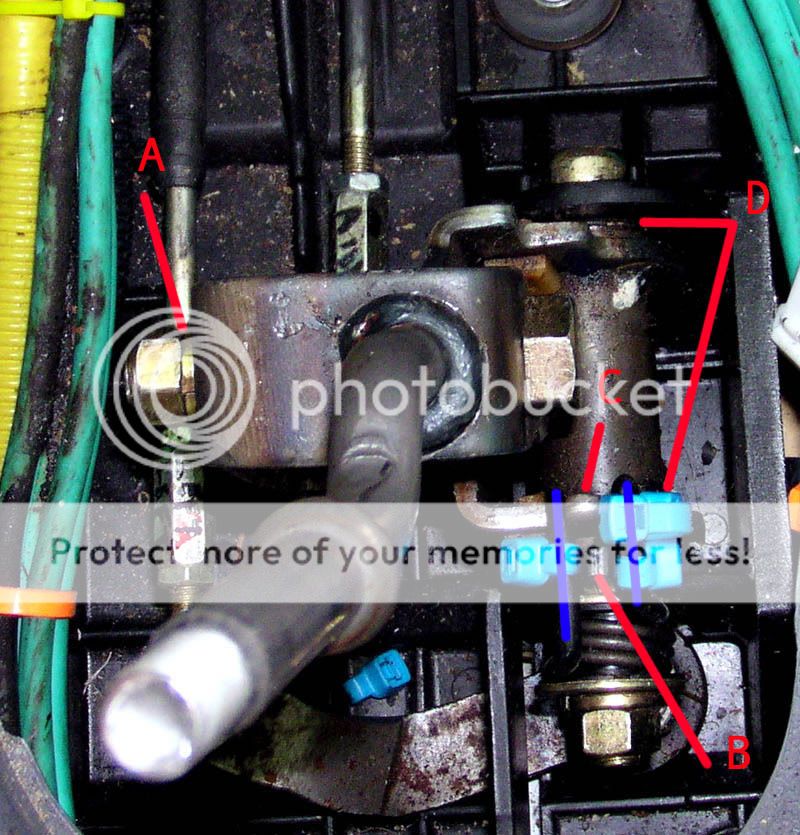
The blue lines are the ends of the spring that centers the shift lever vertically (left/right). "B" is stationary, "C" is part of the shifter. I put zip ties over the ends of the springs adjacent to "B" and "C" until all slack was removed. You might also be able to use some heat shrink tubing but zip-ties was what I had on hand that day. Note that you may have to push the shift lever sideways in order to gain clearance for the zip ties to go on the springs. It occurred to me later that you might be able to make the points pushed on by the springs (vice the springs) larger by putting zip ties or heat shrink tubing over them.
Points "D" are both places where there is a little bit of slop still. Disassembling the whole thing and inserting a little bronze shim/bushing would be the proper solution, but I left it as I didn't feel like getting that far into it on a 90 degree afternoon in the sun, plus I didn't have any bronze shim stock and a pair of tin snips with me.
Note that if you tighten point "A" too tight, it will bind up the shifter. I don't recall if it was there already or if I put it there, but there is a series of teflon bushings like really thin washers inside this part of the shifter, and they are greased. It probably wouldn't hurt anything if you pulled that bolt out and greased everything with some bearing grease, then tightened it up. Something tells me a jamb nut would be helpful here, but there isn't one.
Here's another picture because you can never get enough of other people's dirty car parts:
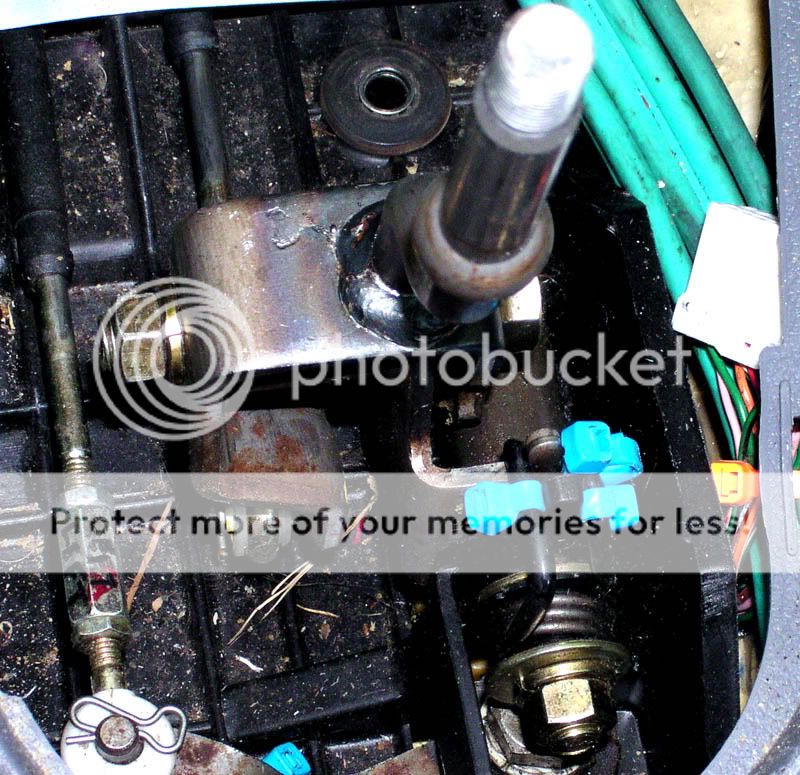
Additional notes: it's dusty in there because (as I found out when taking these photos for the DIY) my shifter boot is broken off at the bottom. The blue things on the sides are audio RCA cables, and the yellow stuff is the airbag wiring. There is also an extra blue zip tie down there which I was too lazy to pull out when it fell off the end of the spring. In the second photo, the big white connector going to nothing used to go to the shifter for the automatic transmission that used to be in this car.
This is how I got rid of most of the slop in the stock shifter for $0 with stuff I had laying around the garage.
Tools required:
2 crescent wrenches
Zip tie gun (if you have one, pliers and cutting pliers if you don't)
Flat head screwdriver
Zip ties
Total time: 15 minutes if that
Difficulty: Easy
********
Unscrew your gearshift knob
Pry up the shifter boot surround with the flathead screwdriver
Lift the shifter boot and surround off the shifter
I was a bit surprised to find out that the fore-and-aft slop in my shifter was at least half caused by the nut at point "A" being not-so-very tight. The rest of the slop is in the shifter cable, but I don't want to adjust that until I do the GEAR LINK MOD
So, tighten up the nut on the bolt running sideways through the shifter (point "A")
The blue lines are the ends of the spring that centers the shift lever vertically (left/right). "B" is stationary, "C" is part of the shifter. I put zip ties over the ends of the springs adjacent to "B" and "C" until all slack was removed. You might also be able to use some heat shrink tubing but zip-ties was what I had on hand that day. Note that you may have to push the shift lever sideways in order to gain clearance for the zip ties to go on the springs. It occurred to me later that you might be able to make the points pushed on by the springs (vice the springs) larger by putting zip ties or heat shrink tubing over them.
Points "D" are both places where there is a little bit of slop still. Disassembling the whole thing and inserting a little bronze shim/bushing would be the proper solution, but I left it as I didn't feel like getting that far into it on a 90 degree afternoon in the sun, plus I didn't have any bronze shim stock and a pair of tin snips with me.
Note that if you tighten point "A" too tight, it will bind up the shifter. I don't recall if it was there already or if I put it there, but there is a series of teflon bushings like really thin washers inside this part of the shifter, and they are greased. It probably wouldn't hurt anything if you pulled that bolt out and greased everything with some bearing grease, then tightened it up. Something tells me a jamb nut would be helpful here, but there isn't one.
Here's another picture because you can never get enough of other people's dirty car parts:
Additional notes: it's dusty in there because (as I found out when taking these photos for the DIY) my shifter boot is broken off at the bottom. The blue things on the sides are audio RCA cables, and the yellow stuff is the airbag wiring. There is also an extra blue zip tie down there which I was too lazy to pull out when it fell off the end of the spring. In the second photo, the big white connector going to nothing used to go to the shifter for the automatic transmission that used to be in this car.