DIY: Remove/Replace RD Radiator
 10-20-2014, 07:29 PM
#1
Super Moderator


Thread Starter
This DIY is to show you how to remove and replace the radiator in an RD platform Hyundai. This should be the same for 1996-2000 Elantras and 1997-2001 Tiburons. Other cars will be similar in principle but the devil is in the details.
Difficulty: 2/10 can accomplish
Cost: $100 or less, unless you go to the dealership for parts
Time required: 1/2 to several hours, depending on you and what else besides the radiator needs replaced.
********
Required:
10mm socket wrench
12mm socket wrench
Catch pan for old coolant (and if you have an automatic transmission, for the transmission oil). This should have a wide opening (I use an engine oil catch pan about 2 feet diameter)
New coolant: easiest is 50/50 'green' pre-mixed from the car parts store.
New transmission oil: This MUST BE SPIII that Hyundai recommends, or your transmission will die. Seriously.
Nice to have:
10mm nut driver
Splash-resistant goggles
Gloves
Paper towels
May need:
baby flathead screwdriver
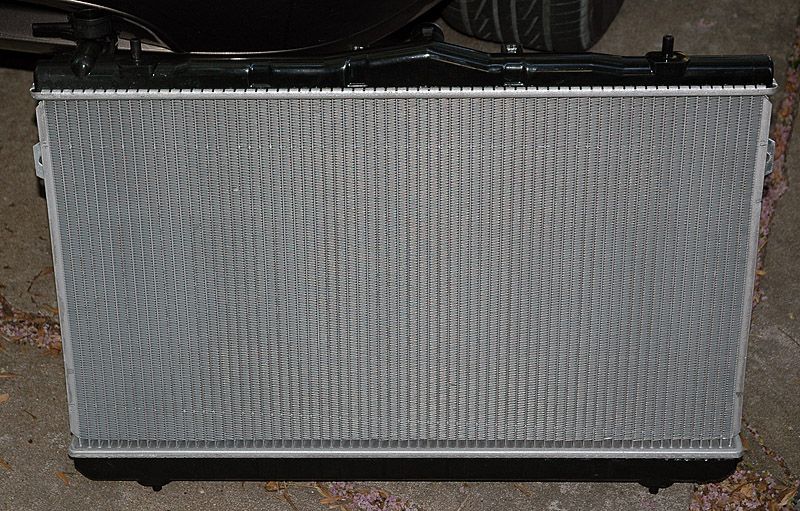
New radiator: I got mine for $60 shipped from Florida. Made in China. Identical construction to the old one, down to the last detail and with new mounting hardware included.
New upper/lower radiator hoses
Radiator cap (if yours is old and crusty like mine was a couple of years ago)
Beer: If you like, you can drink and work this time. This is pretty simple stuff, just don't overdo it and put the old radiator back in and forget to fill with coolant (or whatever) because you drank faster than you worked!
********
First, and VERY important, this job is to be done when the coolant is cold. My FIL almost died from an infection in his 2nd degree burns, which he gave himself opening a radiator with hot coolant inside. You can die from this, or suffer grievous burns, so be careful. The engine AND the radiator should be about ambient temperature before you touch anything on the coolant system.
Second, if you have the luxury of time, give the large upper and lower hoses between the radiator and the engine a big squeeze. If hey are soft and supple but offer firm resistance, that's good. If they are soft and squishy, that's bad. If they are hard and crackly, that's bad. If you see cracks on the hose where it bends as you squeeze, that's very bad - buy new hoses before you get into this job.
********
The stock engine bay has a kinked plastic tube to take air from the front of the car to the air filter box. There are a couple of resonating boxes on this tube, and they make engine operation much quieter. Removing this tube is known as the Snorkus Mod and it was the first thing I did to my car when it was brand new. The Air Duct and the Resonator are only there to quiet your engine. They are in your way for this work, so they have to come out - putting them back in the car is your call but you should at least drive without them for a while, to see if you like the sound. Leave the air filter box in place!
At a bare minimum, you will need to remove the Air Duct. Removing the larger resonator may also be necessary.
The coolant has to be drained from the radiator, and so does the transmission fluid. Yes, transmission fluid. The so-called, poor excuse for a stock ATF cooler lives in the radiator. Your transmission oil goes from red to brown in 10,000 miles or less because it is BURNED. This "cooler" probably helps somewhat, but the car still constantly runs the ATF 15 degrees too hot. If you don't take this opportunity to install an aftermarket transmission oil cooler, you should at the very least observe the short "severe duty" ATF oil change interval from the Onwer's Manual. At any rate, this part is easy. Use pliers to open the spring clips on the small hoses running to these two metal tubes on the bottom of the radiator.
You will want to clamp off or plug these lines so you don't lose much of your transmission fluid. Some will drain out of the radiator as well, so have your catch pan ready.
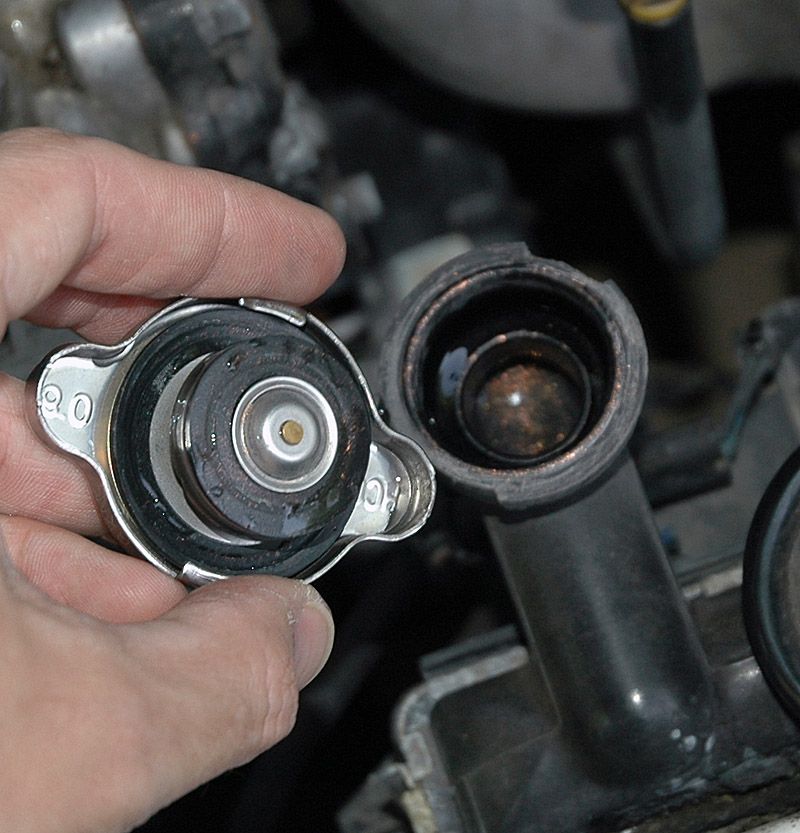
Turn the radiator cap (it only turns one way when it's tight). Push down when it stops, then turn it some more in the same direction. Then pull up. The turn-push-turn removal is a safety thing. The radiator cap doesn't unscrew all the way to protect you from yourself. If the coolant is still hot, it will spew when you loosen it, but not spray out all over you because it will hold itself in place. You're welcome, says the engineer.
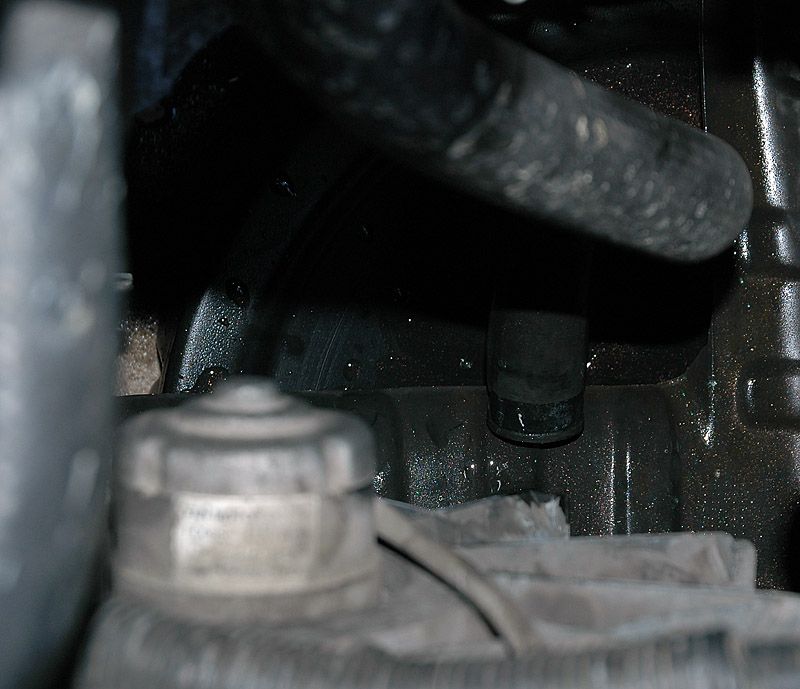
With the radiator cap open, you can drain the coolant easily. The bottom corner of the radiator has a drain petcock. Unscrew it to open it, and coolant will drain out the bottom of the tube. Have your catch pan ready. This will take a while, because it's a small hole and there's a gallon or so to drain out.
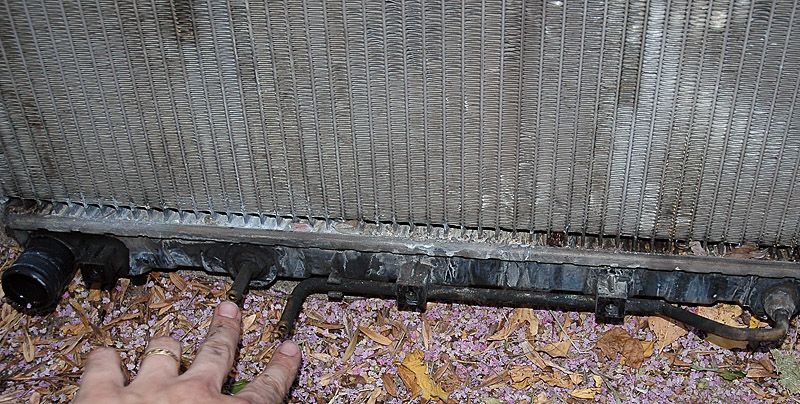
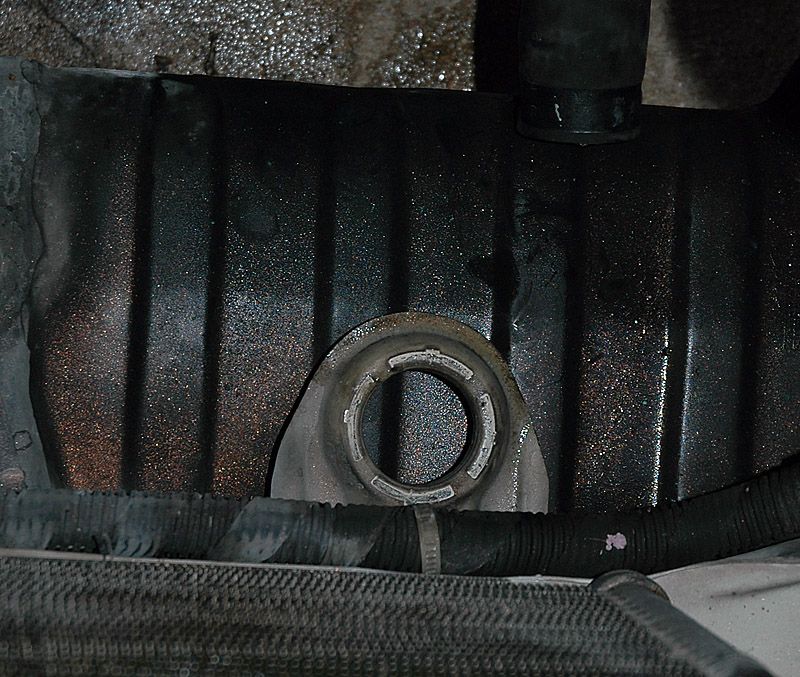
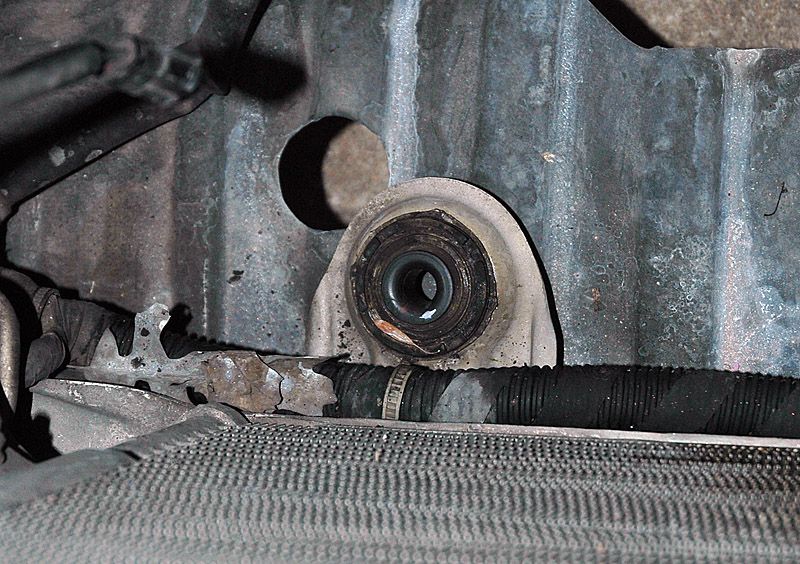
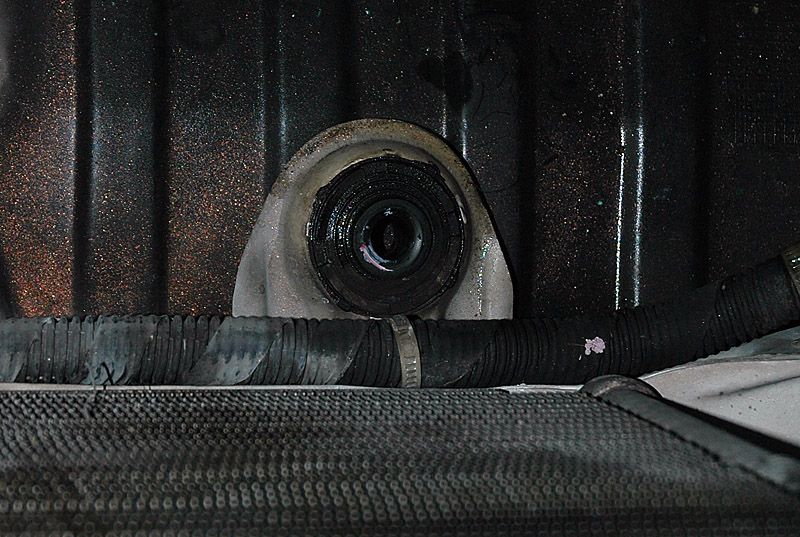
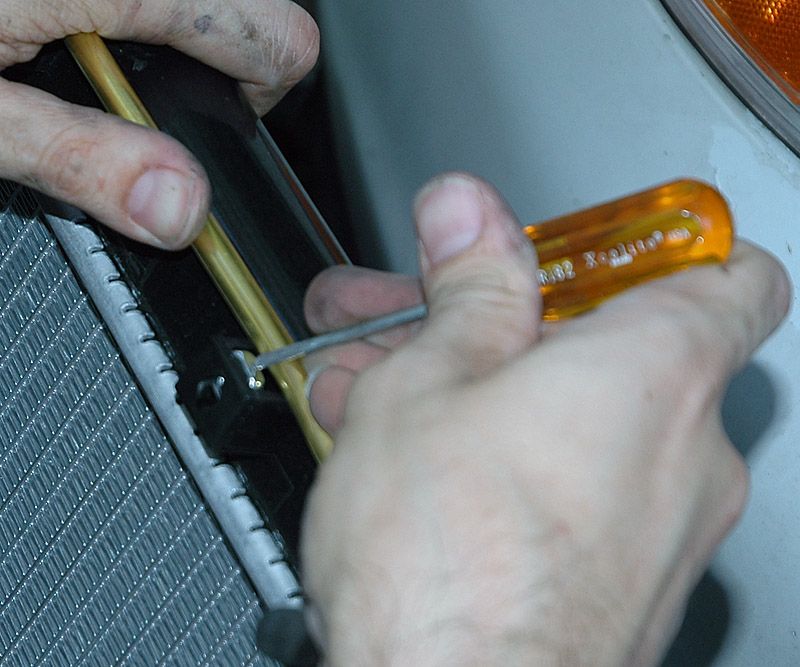
This is the petcock
and it hides waaaaaay down there: (you are looking down from the top of the radiator)
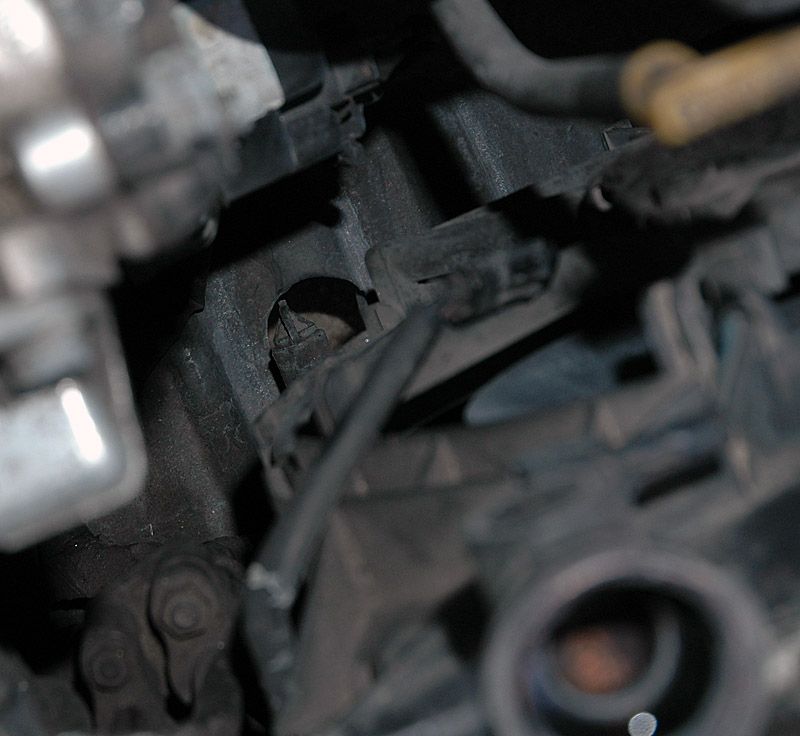
Note there is a hole under this drain fitting. Note that the hole is small. Have a catch can with a large mouth under there; it will not be the only place coolant drips.
While the coolant is draining, you can do some more hose removal. The hose to the overflow reservoir just slips on the nipple near the radiator cap. Twist and pull it off. A small amount of coolant may leak out.
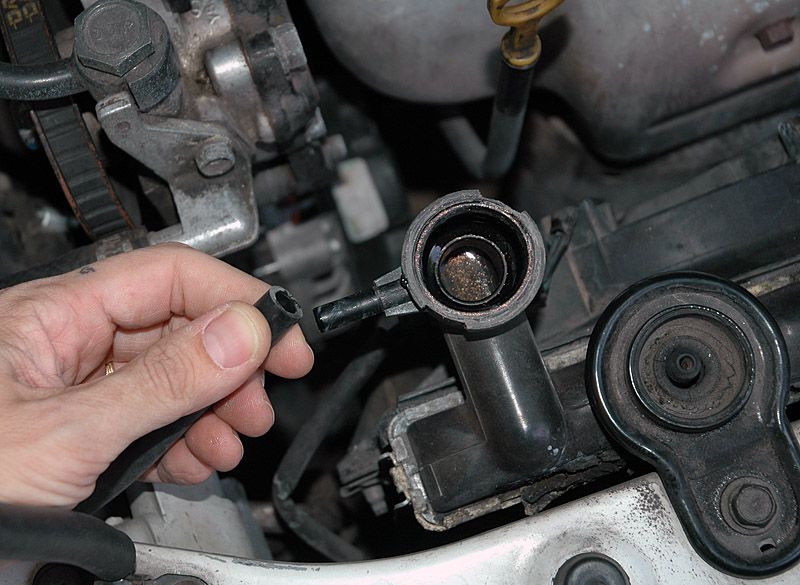
The top radiator hose can come off also. It is held on with a big spring clip. Once the coolant is lower than the top of the cooling fins in the radiator (there will be no more visible in the radiator cap tube) the upper hose no longer is FULL of coolant but there will be a bit of coolant still in there.
Slide the clip a few inches back down the hose. Twist and pull, and the hose comes off with hopefully not too much effort. This hose is covered with spray from the failed radiator, but it is still usable. There are no cracks inside or on the end of hose. If you see any cracks, replace the hose now, in your shop, instead of later, in the middle of the street.
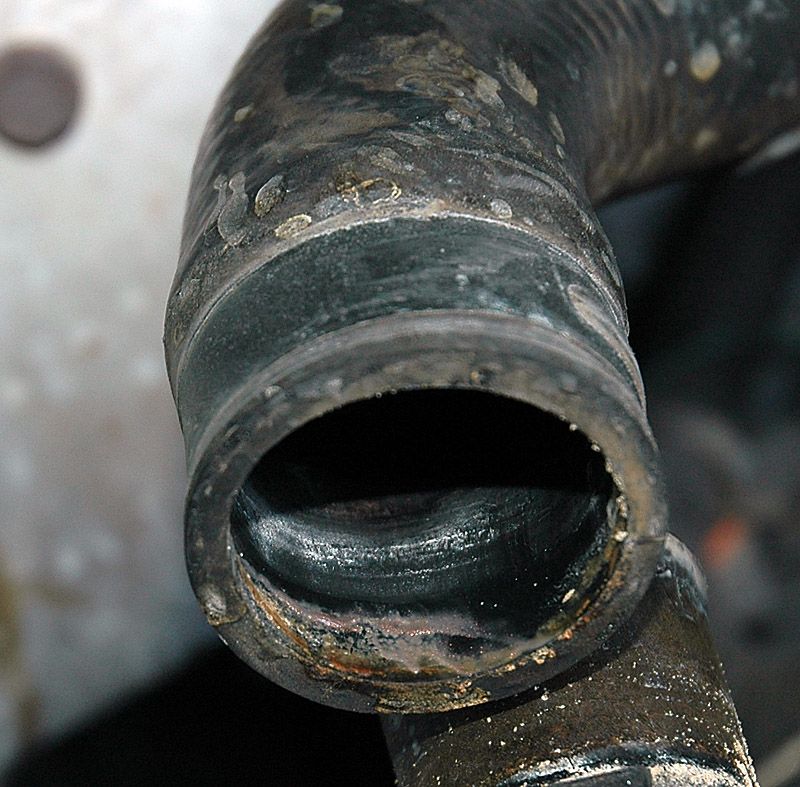
The pink/orange/brown crud is what you get when you use Bar's Stop Leak. Small leaks in these hoses (without the stop leak) will tend to leave crusty deposits. Big leaks tend to leave a pool of coolant where you stop after you notice the clouds of steam coming from the front of your car, and also there might be a trail of green behind your car
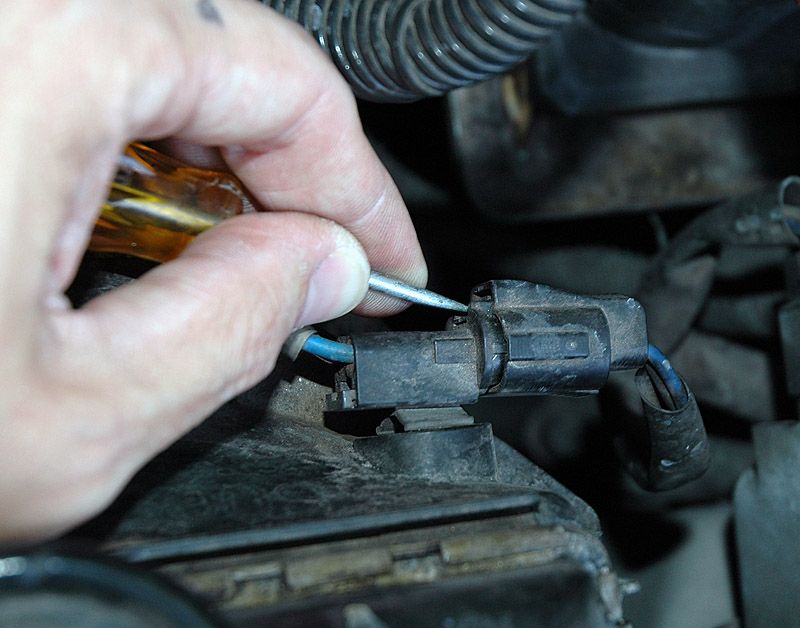
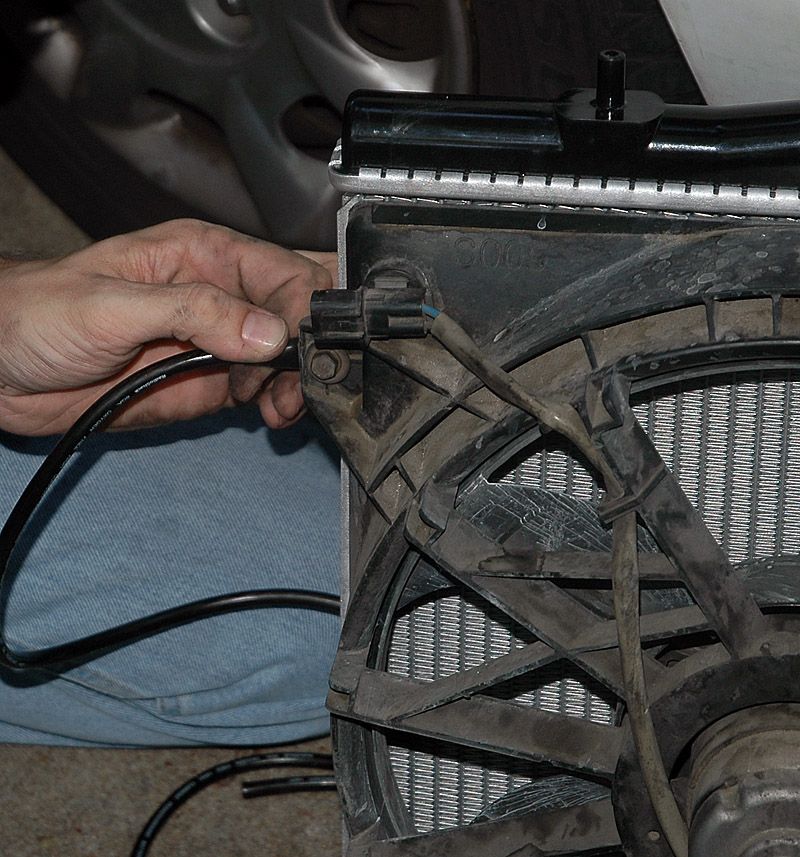
The top hoses are off, and the coolant is still draining. Remove the power connector from each fan. Be very careful with these. One of mine broke many years ago and the other makes crackly noises when I work the connector.
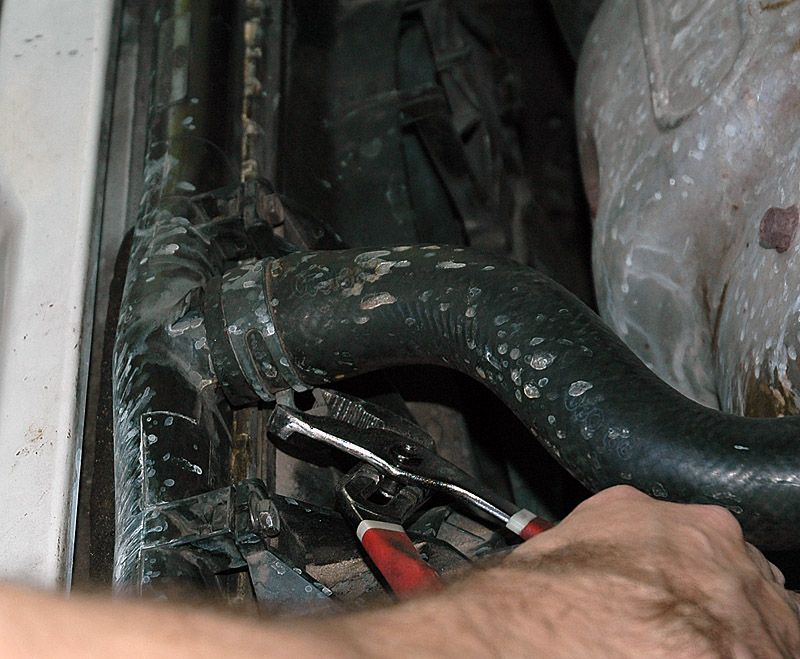
Now you are waiting for the coolant which is still draining. If you arelike me impatient, you are done waiting and you will remove the spring clamp on the big lower hose. Pull the hose off and it will gush forth a fountain of coolant. Remember to move the catch pan to this side first. The copper glitter is more Bar's.
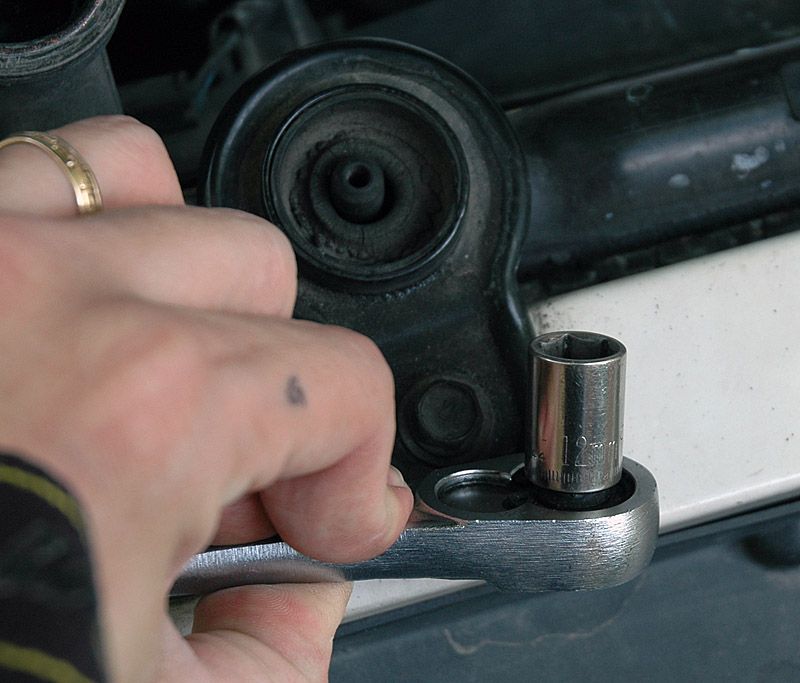
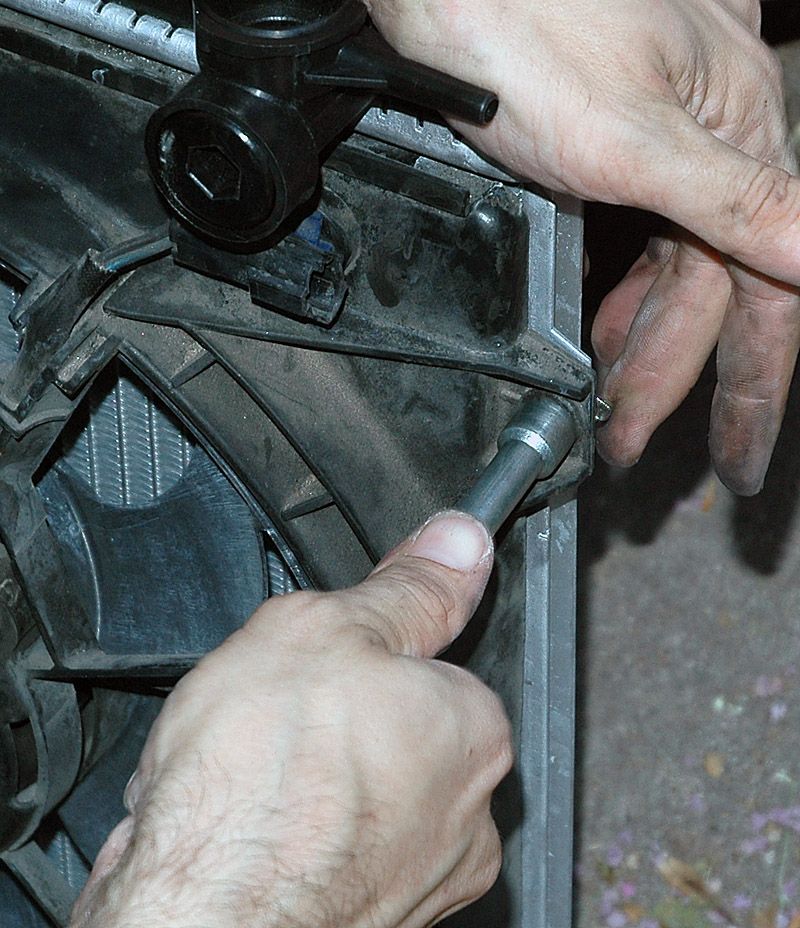
The top brackets hold the radiator in two places. Unbolt and set the brackets aside.
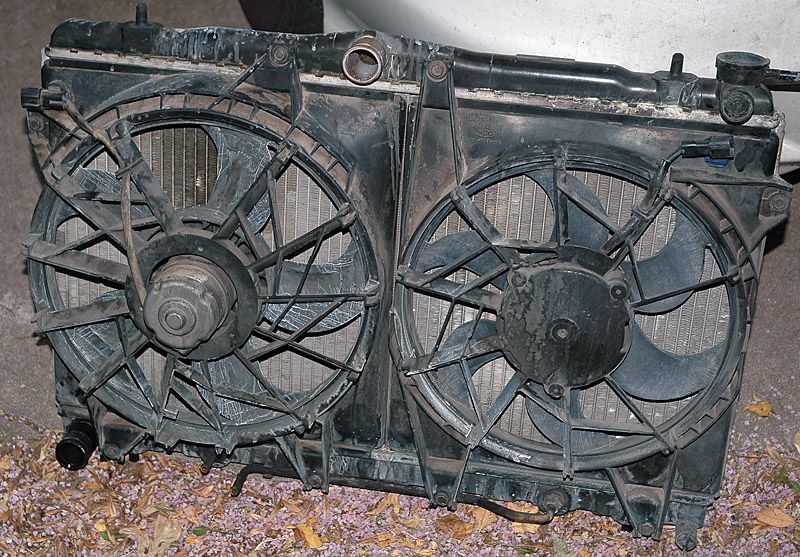
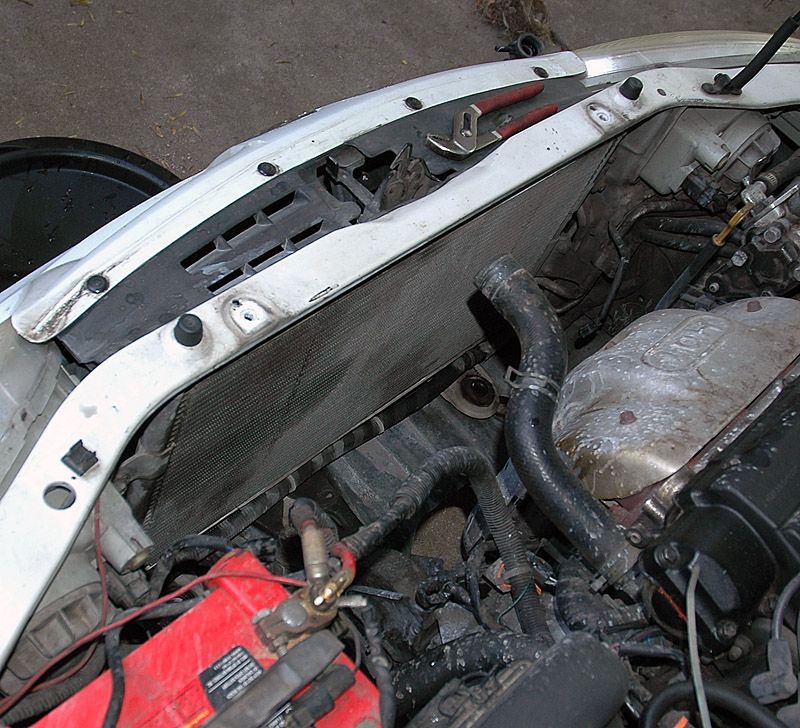
The radiator is now ready to lift out. The fans are bolted to the radiator and will come with it. Mind the wires as you lift the radiator out.
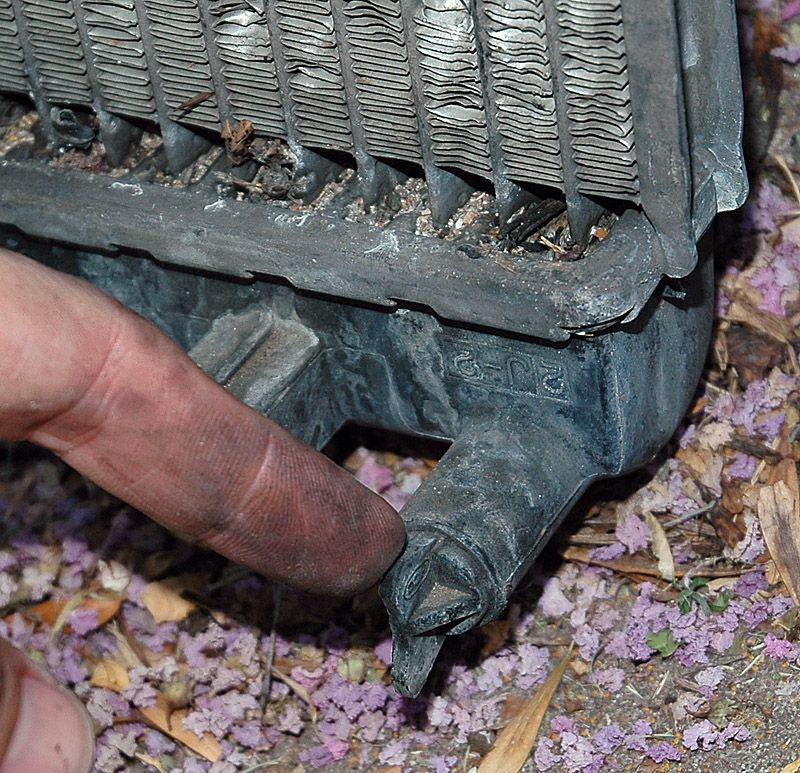
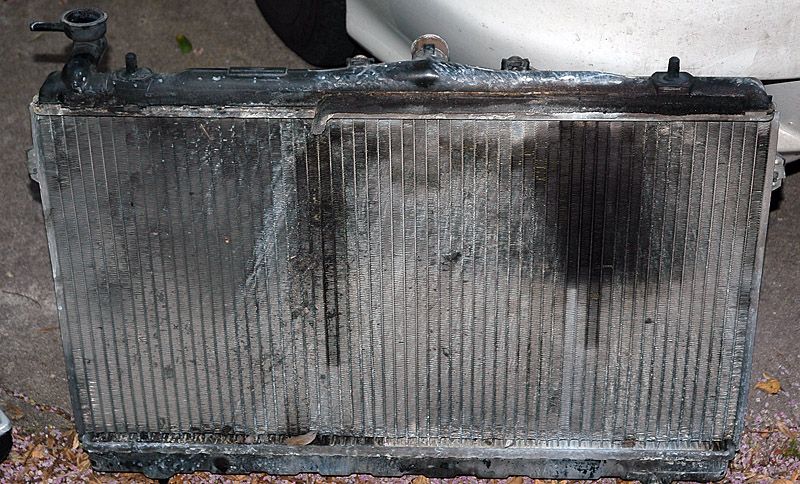
Can you guess where this radiator was leaking?
The new one, straight fromChina Florida
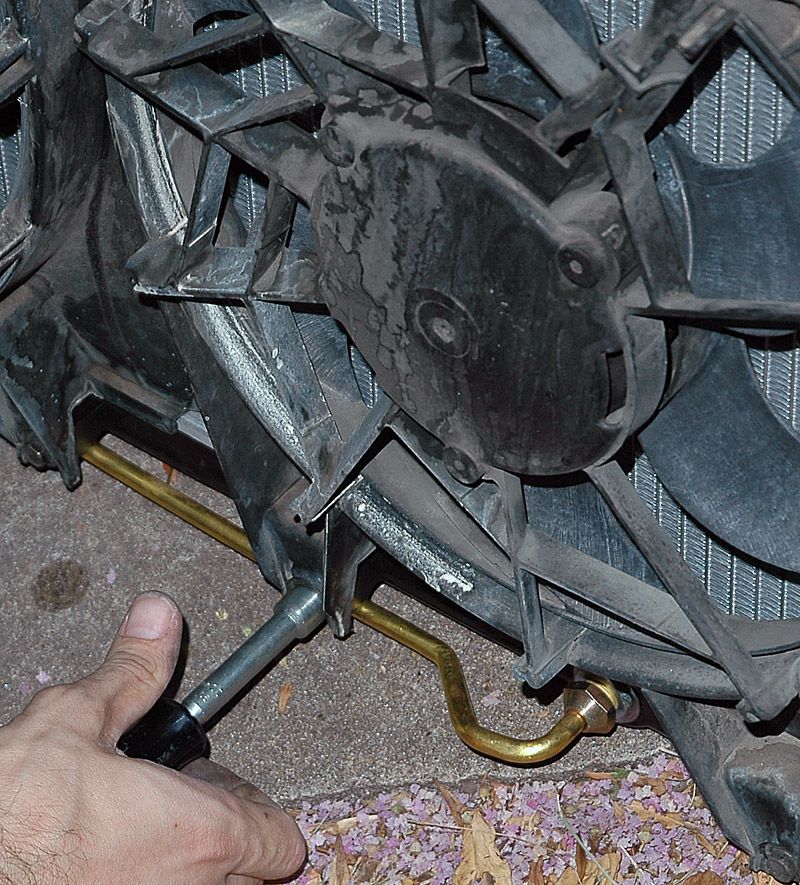
The new radiator has a bling bonus: brass ATF cooler lines wheeeeeeee!!! I am so glad I have a manual transmission now, and these are superfluous for my car.

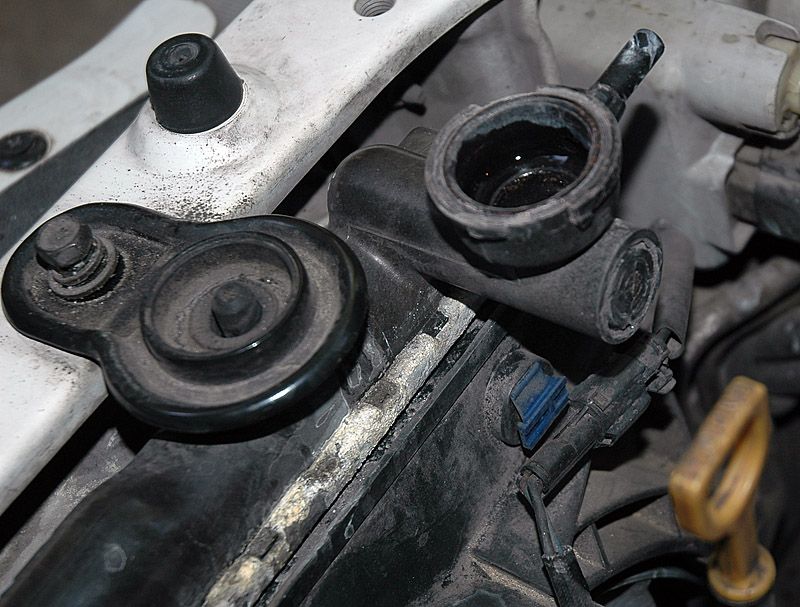
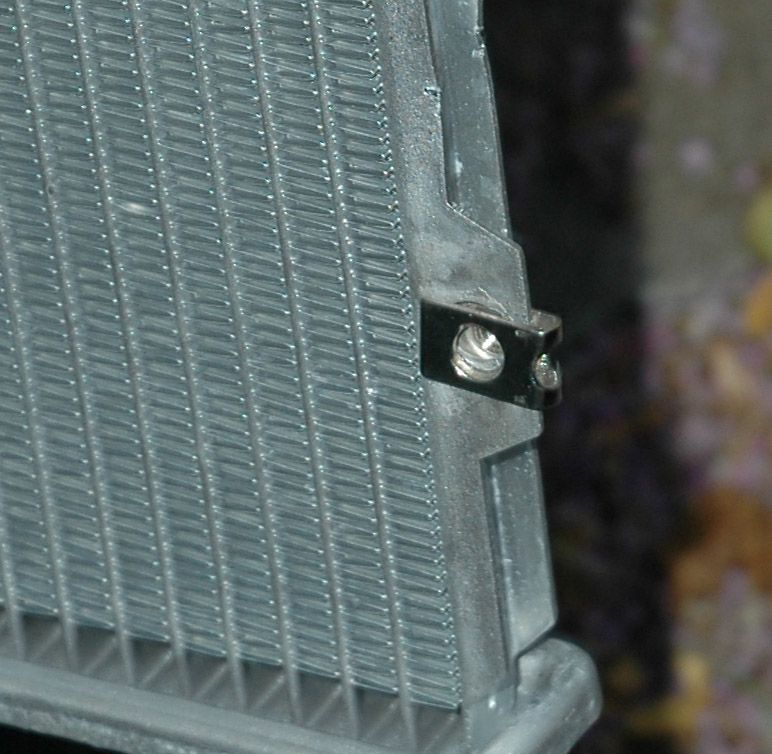
Your radiator may have come out with a rubber grommet on one of the bottom mounts.
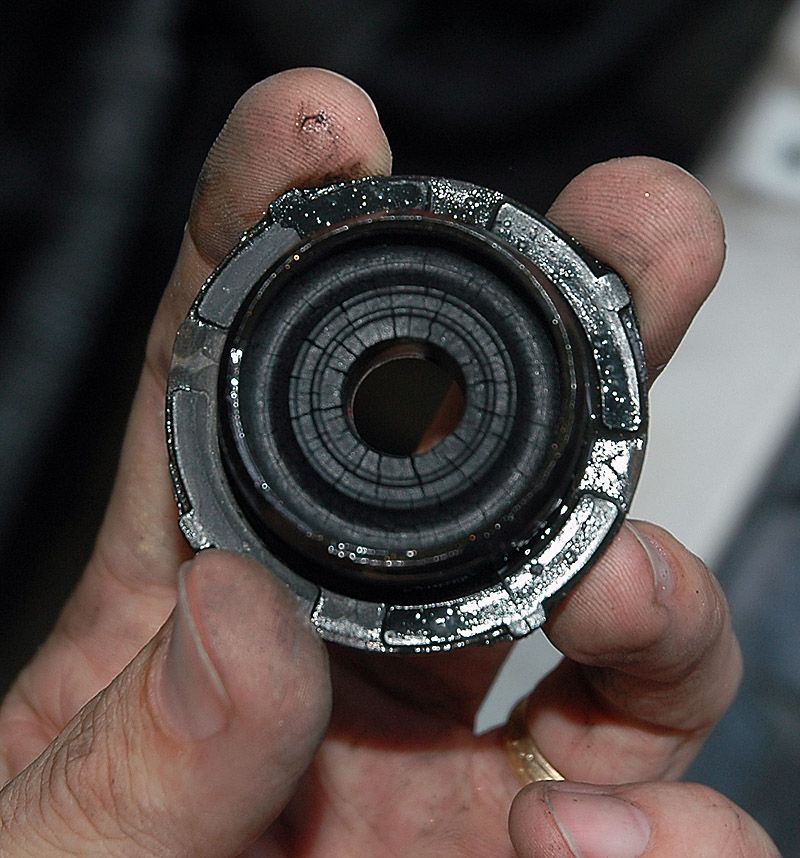
It came from the lower radiator mounting bracket. Put it back!
There are two of these. Yours may be old and cracking like mine, but they still hold the radiator fairly well. I found that my new radiator was rubbing on the engine cradle crossmember, and put a piece of rubber hose between the beam radiator and the metal of the car, to prevent rubbing a hole in the new radiator. I think new lower radiator mounts would put the radiator up high where it should be but meh.
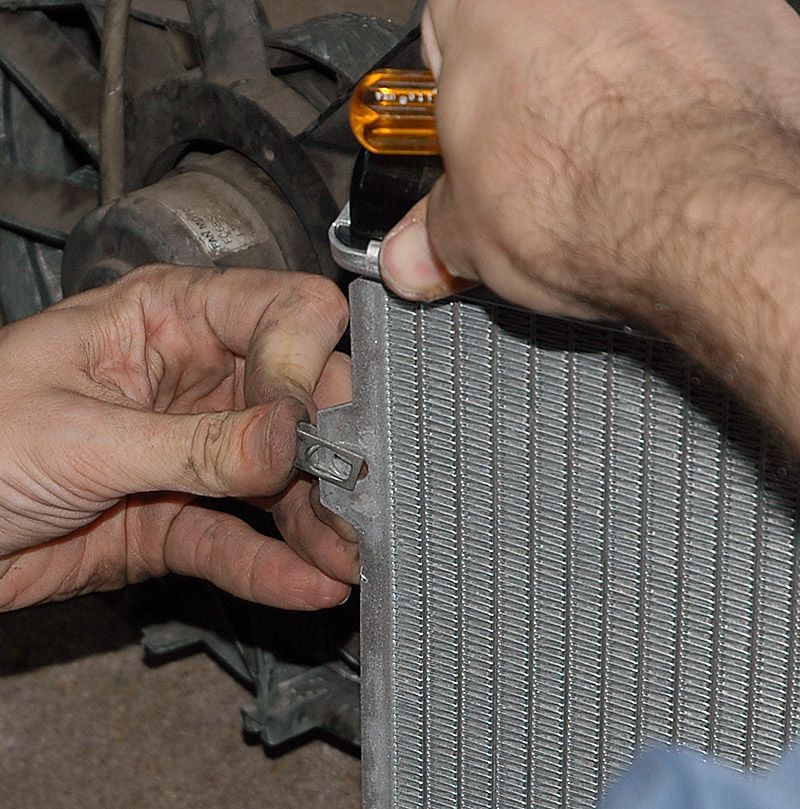
Something's missing, can you spot it?
The fans are held on with 10mm bolts. Unbolt and remove the fans. The bolts thread into spring clips and captive nuts. If your new radiator came with new hardware, install the hardware.
If you don't have new hardware, the old can be (carefully) pried off the old radiator and reused. This sucks, but you do what you have to do.
Bolt the fans in place
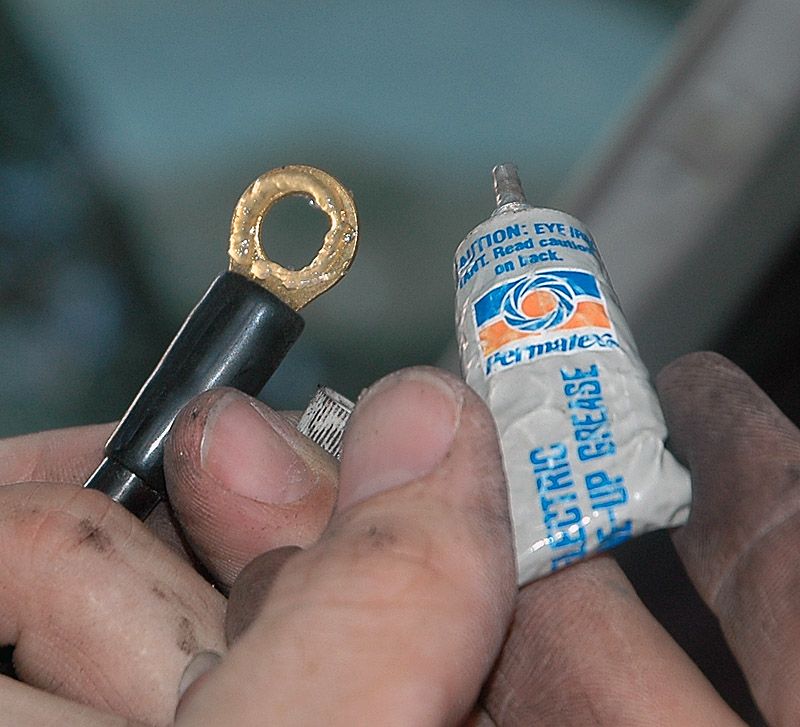
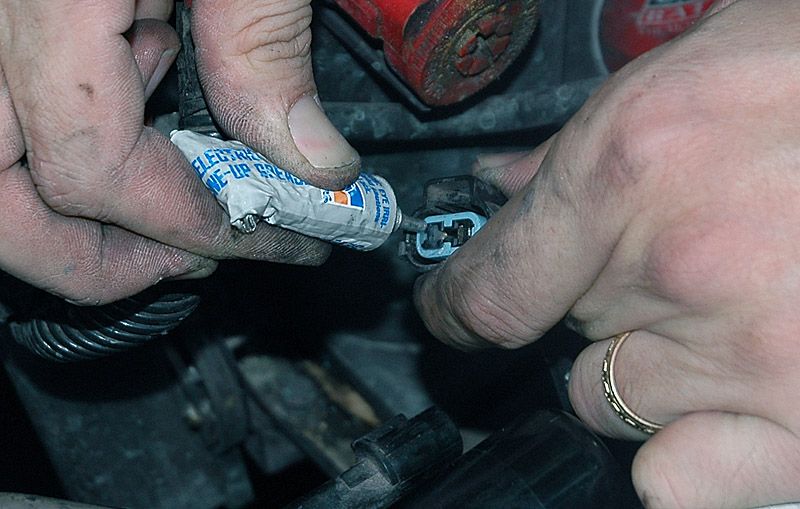
Fresh coolant is good for a couple of years. It should be regularly changed out. Some of us tend to neglect coolant changes and the degraded coolant leads to voltage differentials in the cooling system, which leads to corrosion. Corrosion leads to catastrophic radiator failures. I had a ground wire handy, so I installed it on one of the mounting tabs attached to a metal portion of the new radiator and routed it back to my (aftermarket) ground distribution block. This is a just-in-case deal, you don't have to do this if you don't want. I put dielectric grease (read: vaseline) on this lug and on the radiator mounting spot as well.
note the lifetime supply of "tune-up grease"
Now slap it all back together. Installation is the reverse of removal.
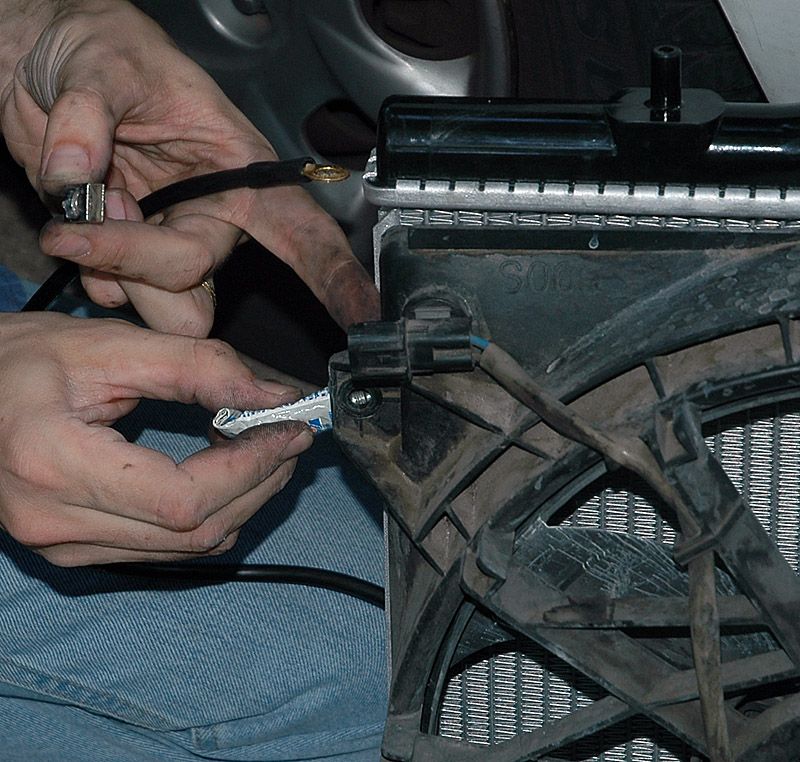
Spooge some dielectric grease into the fan connectors for good measure. You can't put too much - it won't hurt anything.
Hook it all back up. Don't forget to fill the coolant again! Make sure the drain petcock seals tight, and remember all the spring clamps. Remember the overflow hose. Remember to transfer the radiator cap over to the new radiator.
Fill the radiator with coolant. Fill the overflow tank to the F with coolant as well. Squeeze the big upper hose and get the bubbles out. This spills a little coolant.
This next bit carries a mild risk of grave bodily injury if you are not careful. Start the engine and let it idle until it warms up. When the thermostat opens you will see the coolant drop a bit in the radiator cap tube, and you need to add more coolant. This is done with the engine running and the radiator cap off so be careful to avoid spilling coolant. The fan will sling it everywhere, as will the belts, if you get them wet. You can tell the radiator is pretty well full when the coolant swirls instead of the level dropping. I park on an incline so this is enough to get the air out, but if your engine runs hot you might have to 'burp' the coolant hose again.
Check for leaks. There should be none. DO NOT forget to top off your ATF if you have an automatic transaxle!
Congratulations, you just saved several hundred dollars.
Difficulty: 2/10 can accomplish
Cost: $100 or less, unless you go to the dealership for parts
Time required: 1/2 to several hours, depending on you and what else besides the radiator needs replaced.
********
Required:
10mm socket wrench
12mm socket wrench
Catch pan for old coolant (and if you have an automatic transmission, for the transmission oil). This should have a wide opening (I use an engine oil catch pan about 2 feet diameter)
New coolant: easiest is 50/50 'green' pre-mixed from the car parts store.
New transmission oil: This MUST BE SPIII that Hyundai recommends, or your transmission will die. Seriously.
Nice to have:
10mm nut driver
Splash-resistant goggles
Gloves
Paper towels
May need:
baby flathead screwdriver
New radiator: I got mine for $60 shipped from Florida. Made in China. Identical construction to the old one, down to the last detail and with new mounting hardware included.
New upper/lower radiator hoses
Radiator cap (if yours is old and crusty like mine was a couple of years ago)
Beer: If you like, you can drink and work this time. This is pretty simple stuff, just don't overdo it and put the old radiator back in and forget to fill with coolant (or whatever) because you drank faster than you worked!
********
First, and VERY important, this job is to be done when the coolant is cold. My FIL almost died from an infection in his 2nd degree burns, which he gave himself opening a radiator with hot coolant inside. You can die from this, or suffer grievous burns, so be careful. The engine AND the radiator should be about ambient temperature before you touch anything on the coolant system.
Second, if you have the luxury of time, give the large upper and lower hoses between the radiator and the engine a big squeeze. If hey are soft and supple but offer firm resistance, that's good. If they are soft and squishy, that's bad. If they are hard and crackly, that's bad. If you see cracks on the hose where it bends as you squeeze, that's very bad - buy new hoses before you get into this job.
********
The stock engine bay has a kinked plastic tube to take air from the front of the car to the air filter box. There are a couple of resonating boxes on this tube, and they make engine operation much quieter. Removing this tube is known as the Snorkus Mod and it was the first thing I did to my car when it was brand new. The Air Duct and the Resonator are only there to quiet your engine. They are in your way for this work, so they have to come out - putting them back in the car is your call but you should at least drive without them for a while, to see if you like the sound. Leave the air filter box in place!
At a bare minimum, you will need to remove the Air Duct. Removing the larger resonator may also be necessary.
The coolant has to be drained from the radiator, and so does the transmission fluid. Yes, transmission fluid. The so-called, poor excuse for a stock ATF cooler lives in the radiator. Your transmission oil goes from red to brown in 10,000 miles or less because it is BURNED. This "cooler" probably helps somewhat, but the car still constantly runs the ATF 15 degrees too hot. If you don't take this opportunity to install an aftermarket transmission oil cooler, you should at the very least observe the short "severe duty" ATF oil change interval from the Onwer's Manual. At any rate, this part is easy. Use pliers to open the spring clips on the small hoses running to these two metal tubes on the bottom of the radiator.
You will want to clamp off or plug these lines so you don't lose much of your transmission fluid. Some will drain out of the radiator as well, so have your catch pan ready.
Turn the radiator cap (it only turns one way when it's tight). Push down when it stops, then turn it some more in the same direction. Then pull up. The turn-push-turn removal is a safety thing. The radiator cap doesn't unscrew all the way to protect you from yourself. If the coolant is still hot, it will spew when you loosen it, but not spray out all over you because it will hold itself in place. You're welcome, says the engineer.
With the radiator cap open, you can drain the coolant easily. The bottom corner of the radiator has a drain petcock. Unscrew it to open it, and coolant will drain out the bottom of the tube. Have your catch pan ready. This will take a while, because it's a small hole and there's a gallon or so to drain out.
This is the petcock
and it hides waaaaaay down there: (you are looking down from the top of the radiator)
Note there is a hole under this drain fitting. Note that the hole is small. Have a catch can with a large mouth under there; it will not be the only place coolant drips.
While the coolant is draining, you can do some more hose removal. The hose to the overflow reservoir just slips on the nipple near the radiator cap. Twist and pull it off. A small amount of coolant may leak out.
The top radiator hose can come off also. It is held on with a big spring clip. Once the coolant is lower than the top of the cooling fins in the radiator (there will be no more visible in the radiator cap tube) the upper hose no longer is FULL of coolant but there will be a bit of coolant still in there.
Slide the clip a few inches back down the hose. Twist and pull, and the hose comes off with hopefully not too much effort. This hose is covered with spray from the failed radiator, but it is still usable. There are no cracks inside or on the end of hose. If you see any cracks, replace the hose now, in your shop, instead of later, in the middle of the street.
The pink/orange/brown crud is what you get when you use Bar's Stop Leak. Small leaks in these hoses (without the stop leak) will tend to leave crusty deposits. Big leaks tend to leave a pool of coolant where you stop after you notice the clouds of steam coming from the front of your car, and also there might be a trail of green behind your car
The top hoses are off, and the coolant is still draining. Remove the power connector from each fan. Be very careful with these. One of mine broke many years ago and the other makes crackly noises when I work the connector.
Now you are waiting for the coolant which is still draining. If you are
The top brackets hold the radiator in two places. Unbolt and set the brackets aside.
The radiator is now ready to lift out. The fans are bolted to the radiator and will come with it. Mind the wires as you lift the radiator out.
Can you guess where this radiator was leaking?
The new one, straight from
The new radiator has a bling bonus: brass ATF cooler lines wheeeeeeee!!! I am so glad I have a manual transmission now, and these are superfluous for my car.
Your radiator may have come out with a rubber grommet on one of the bottom mounts.
It came from the lower radiator mounting bracket. Put it back!
There are two of these. Yours may be old and cracking like mine, but they still hold the radiator fairly well. I found that my new radiator was rubbing on the engine cradle crossmember, and put a piece of rubber hose between the beam radiator and the metal of the car, to prevent rubbing a hole in the new radiator. I think new lower radiator mounts would put the radiator up high where it should be but meh.
Something's missing, can you spot it?
The fans are held on with 10mm bolts. Unbolt and remove the fans. The bolts thread into spring clips and captive nuts. If your new radiator came with new hardware, install the hardware.
If you don't have new hardware, the old can be (carefully) pried off the old radiator and reused. This sucks, but you do what you have to do.
Bolt the fans in place
Fresh coolant is good for a couple of years. It should be regularly changed out. Some of us tend to neglect coolant changes and the degraded coolant leads to voltage differentials in the cooling system, which leads to corrosion. Corrosion leads to catastrophic radiator failures. I had a ground wire handy, so I installed it on one of the mounting tabs attached to a metal portion of the new radiator and routed it back to my (aftermarket) ground distribution block. This is a just-in-case deal, you don't have to do this if you don't want. I put dielectric grease (read: vaseline) on this lug and on the radiator mounting spot as well.
note the lifetime supply of "tune-up grease"
Now slap it all back together. Installation is the reverse of removal.
Spooge some dielectric grease into the fan connectors for good measure. You can't put too much - it won't hurt anything.
Hook it all back up. Don't forget to fill the coolant again! Make sure the drain petcock seals tight, and remember all the spring clamps. Remember the overflow hose. Remember to transfer the radiator cap over to the new radiator.
Fill the radiator with coolant. Fill the overflow tank to the F with coolant as well. Squeeze the big upper hose and get the bubbles out. This spills a little coolant.
This next bit carries a mild risk of grave bodily injury if you are not careful. Start the engine and let it idle until it warms up. When the thermostat opens you will see the coolant drop a bit in the radiator cap tube, and you need to add more coolant. This is done with the engine running and the radiator cap off so be careful to avoid spilling coolant. The fan will sling it everywhere, as will the belts, if you get them wet. You can tell the radiator is pretty well full when the coolant swirls instead of the level dropping. I park on an incline so this is enough to get the air out, but if your engine runs hot you might have to 'burp' the coolant hose again.
Check for leaks. There should be none. DO NOT forget to top off your ATF if you have an automatic transaxle!
Congratulations, you just saved several hundred dollars.


