
DIY: LC/LC2 spring/strut replacement

Thread Starter
Administrator

Joined: Mar 2006
Posts: 12,515
Likes: 2
From: Lacey, WA
Vehicle: Two Accents, Mini, Miata, Van, Outback, and a ZX-6
I know this DIY is not 100% complete, but I think it will be helpful to anyone attempting to work on the Accent's suspension for the first time.
The project car is a 2003 Accent Base model.
For a few more pics of the process see here.
Step 1:
Jack up the car and secure on jack stands.
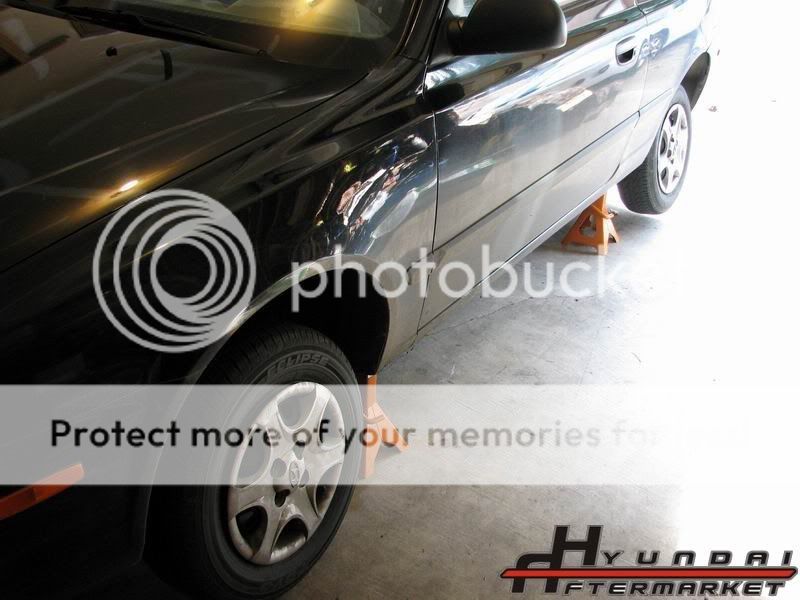
Step 2:
Remove wheels and tires.

This car's rear fender lip has been modified to fit 215/35/18's with no rubbing.
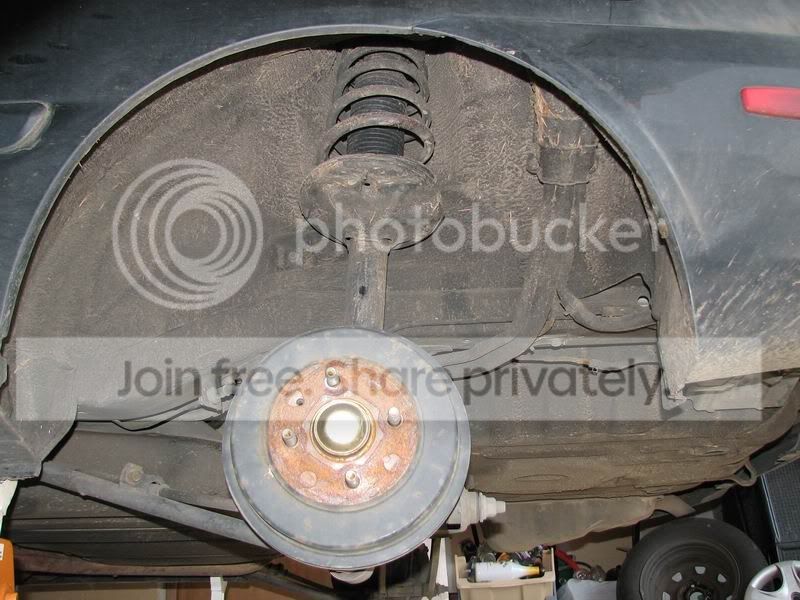
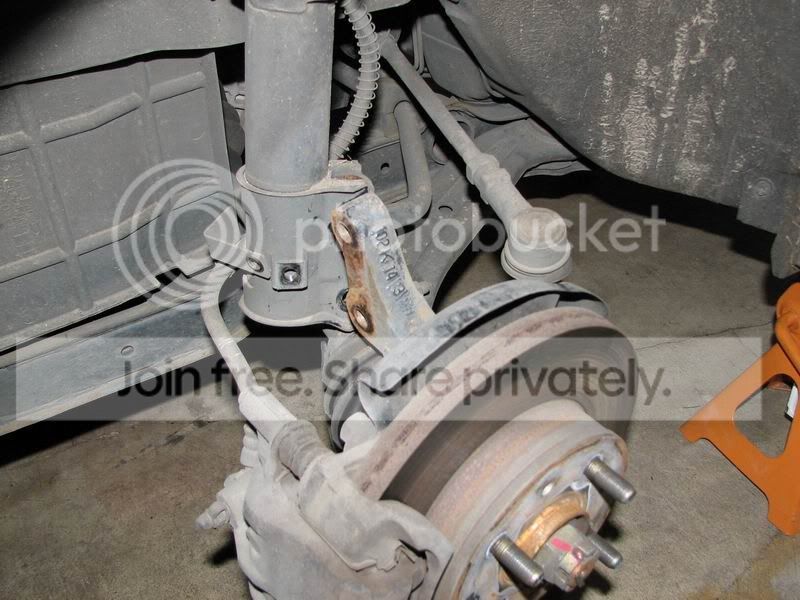
Step 3:
Remove the strut assembly.
Using a wrench on the bolt head to keep it from spinning loosen and remove the strut to knuckle bolts. These bolts are often very tight, use of either a strong impact wrench or a breaker bar may be necessary or at least make things easier. Loosen any other minor brackets from the strut body.
Remove the 3 nuts off of the upper strut mounting studs. Carefully remove strut assembly from vehicle. It is a tight fit be sure not to tear the CV boot or scratch your paint. Procedure is similar in the rear, removal of the rear deck speakers is required to access the rear strut top mount. To remove the speaker covers remove the screws and pull up. Disconnect the speaker wiring at the harness connector and set aside. Other panel removal may be beneficial and speed things up, but is not absolutely required to perform the job.
Removed strut assembly next to a new KYB GR-2 strut.

Step 4:
Disassemble the strut assembly.
The first thing to do is compress the springs. There are many types of spring compressors. These are the cheapest kind you can get pretty much, $15 from Harbor Freight. They offer a reasonable amount of safety when you use two at a time on a spring and I think they're adequate for a DIY'er to use. Their biggest downside is that it takes a very long time to decompress and compress a spring if you don't have an impact gun. I strongly recommend tightening and loosening the two spring compressors in small incremental amounts to ensure that the compressor doesn't slip off of the spring.

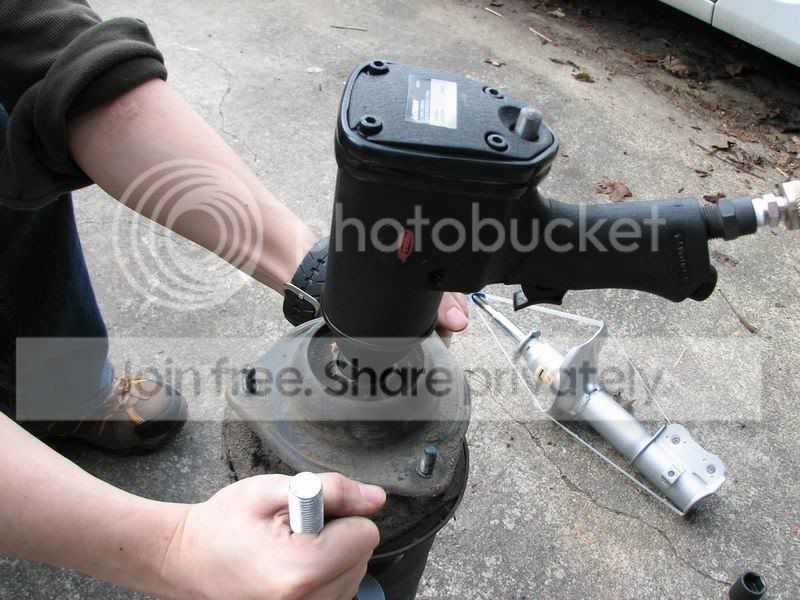
Pulling off the dust cap on the top of the strut reveals a large nut covered in grease. This nut is best removed with an impact. It is on tight and the shaft of the strut can spin.
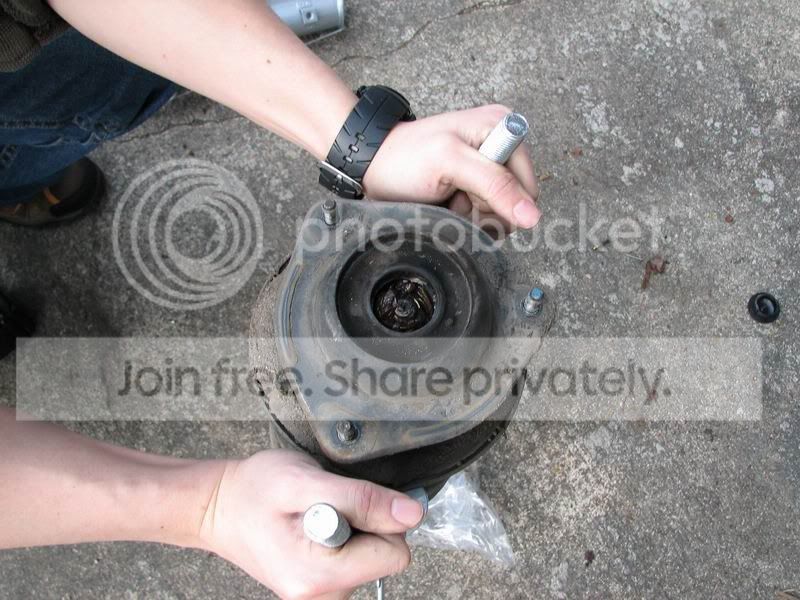
With the springs compressed enough to not be exerting any pressure on the strut top use an impact to remove the nut.
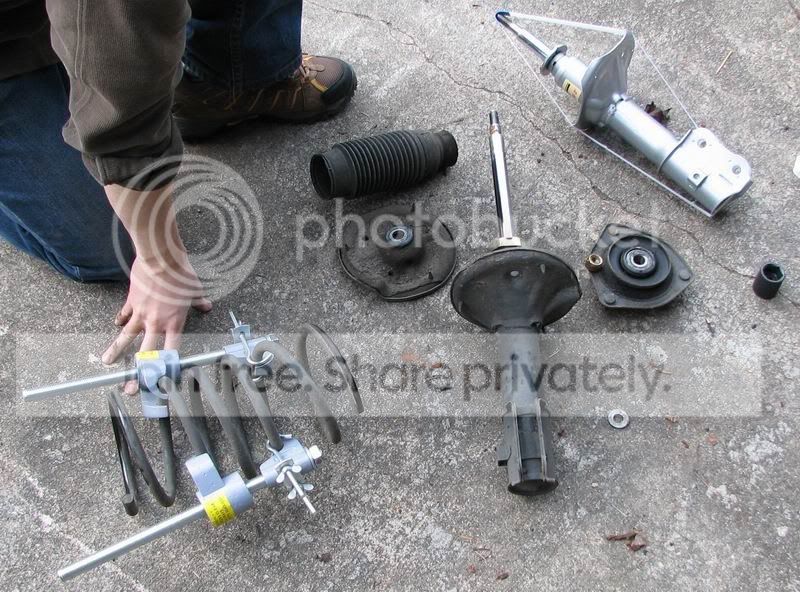
Now you can disassemble the strut assembly into it's components. Keep track of the order things come off in. Those washers need to go back in their intended locations.
Step 5:
Reassemble the strut assembly
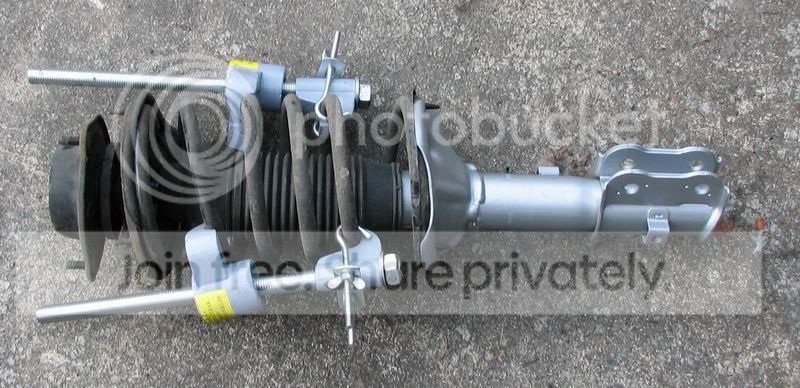
Ok, so you have the shiny new strut or spring to install. In these pics we replaced the struts. When replacing the struts remember to move the rubber insulator over to the new strut's lower spring perch. You'll also be re-using your old piston dust boot. After tightening down the nut on the piston shaft you can start to back the spring compressors off evenly. Be sure that the springs are seating properly in the upper and lower spring perches.
If you're replacing the spring and reusing your old strut, prior to reassembly decompress the original spring and set aside. Compress the new spring and continue the steps above for replacing the struts.
If you are replacing the strut and spring together, you still have to disassemble the original strut assembly and reuse the hardware unless replacements were supplied.
Step 6:
Reinstall the strut assemblies.
Installation is the reverse of removal with one small extra step. When removing the struts you throw your alignment off slightly. It is not in your best interest to just bolt the spindle back into the strut however it wants to go in unless you're going to get the car aligned shortly after installation. To set your alignment this is what I do:
Have a friend push in HARD on the top of the rotor/drum while simultaneously pulling hard on the bottom of the rotor/drum. Light pressure from a floor jack can be helpful also. Before exerting pressure the strut to knuckle bolts should be in place and the nuts should be installed but kept loose enough for the components to move around. While the pressure is being applied tighten the bolts. This will set your car with the maximum amount of negative camber that you can get within the meager adjustment range allowed by the factory components. In this case, generally the car's alignment will be within factory spec. It is still a good idea to get your alignment checked. If you don't and you start eating tires don't blame me.
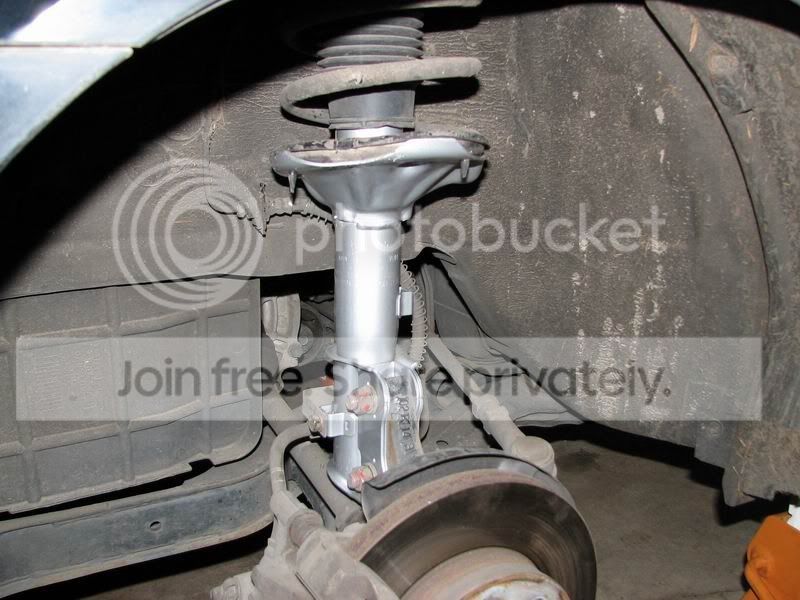
Shiny new KYB GR-2 in place ready for the wheels and tires.
Any questions feel free to ask.
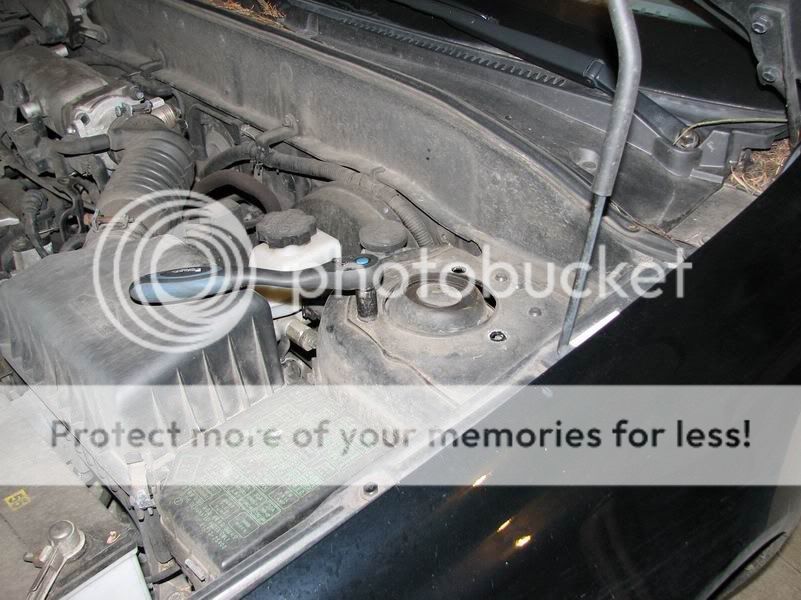
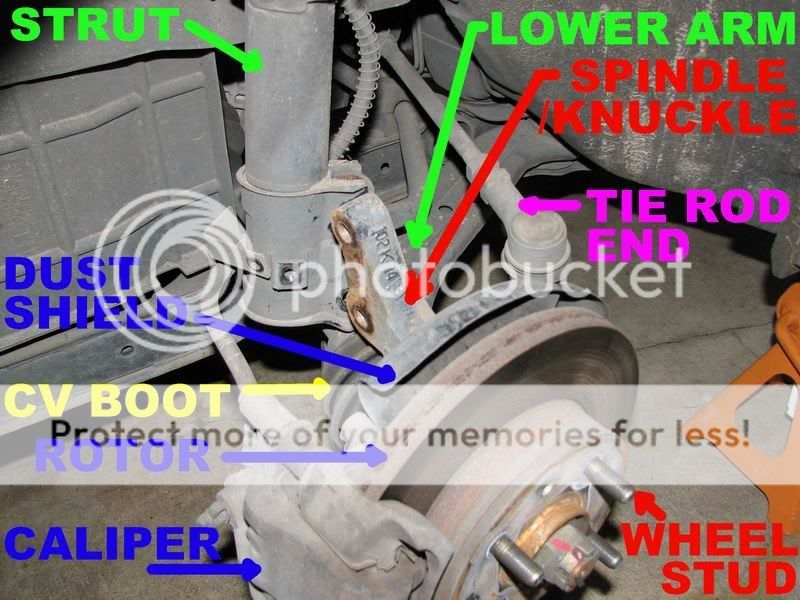
Also, here are some part locations for reference.
The project car is a 2003 Accent Base model.
For a few more pics of the process see here.
Step 1:
Jack up the car and secure on jack stands.
Step 2:
Remove wheels and tires.
This car's rear fender lip has been modified to fit 215/35/18's with no rubbing.
Step 3:
Remove the strut assembly.
Using a wrench on the bolt head to keep it from spinning loosen and remove the strut to knuckle bolts. These bolts are often very tight, use of either a strong impact wrench or a breaker bar may be necessary or at least make things easier. Loosen any other minor brackets from the strut body.
Remove the 3 nuts off of the upper strut mounting studs. Carefully remove strut assembly from vehicle. It is a tight fit be sure not to tear the CV boot or scratch your paint. Procedure is similar in the rear, removal of the rear deck speakers is required to access the rear strut top mount. To remove the speaker covers remove the screws and pull up. Disconnect the speaker wiring at the harness connector and set aside. Other panel removal may be beneficial and speed things up, but is not absolutely required to perform the job.
Removed strut assembly next to a new KYB GR-2 strut.
Step 4:
Disassemble the strut assembly.
The first thing to do is compress the springs. There are many types of spring compressors. These are the cheapest kind you can get pretty much, $15 from Harbor Freight. They offer a reasonable amount of safety when you use two at a time on a spring and I think they're adequate for a DIY'er to use. Their biggest downside is that it takes a very long time to decompress and compress a spring if you don't have an impact gun. I strongly recommend tightening and loosening the two spring compressors in small incremental amounts to ensure that the compressor doesn't slip off of the spring.
Pulling off the dust cap on the top of the strut reveals a large nut covered in grease. This nut is best removed with an impact. It is on tight and the shaft of the strut can spin.
With the springs compressed enough to not be exerting any pressure on the strut top use an impact to remove the nut.
Now you can disassemble the strut assembly into it's components. Keep track of the order things come off in. Those washers need to go back in their intended locations.
Step 5:
Reassemble the strut assembly
Ok, so you have the shiny new strut or spring to install. In these pics we replaced the struts. When replacing the struts remember to move the rubber insulator over to the new strut's lower spring perch. You'll also be re-using your old piston dust boot. After tightening down the nut on the piston shaft you can start to back the spring compressors off evenly. Be sure that the springs are seating properly in the upper and lower spring perches.
If you're replacing the spring and reusing your old strut, prior to reassembly decompress the original spring and set aside. Compress the new spring and continue the steps above for replacing the struts.
If you are replacing the strut and spring together, you still have to disassemble the original strut assembly and reuse the hardware unless replacements were supplied.
Step 6:
Reinstall the strut assemblies.
Installation is the reverse of removal with one small extra step. When removing the struts you throw your alignment off slightly. It is not in your best interest to just bolt the spindle back into the strut however it wants to go in unless you're going to get the car aligned shortly after installation. To set your alignment this is what I do:
Have a friend push in HARD on the top of the rotor/drum while simultaneously pulling hard on the bottom of the rotor/drum. Light pressure from a floor jack can be helpful also. Before exerting pressure the strut to knuckle bolts should be in place and the nuts should be installed but kept loose enough for the components to move around. While the pressure is being applied tighten the bolts. This will set your car with the maximum amount of negative camber that you can get within the meager adjustment range allowed by the factory components. In this case, generally the car's alignment will be within factory spec. It is still a good idea to get your alignment checked. If you don't and you start eating tires don't blame me.
Shiny new KYB GR-2 in place ready for the wheels and tires.
Any questions feel free to ask.
Also, here are some part locations for reference.