Diy - Halo Hid Headlight Setup
 05-18-2006, 09:56 PM
#21
Senior Member


Join Date: Jul 2004
Location: Eau Claire, WI
Posts: 5,155
Likes: 0
Received 0 Likes
on
0 Posts
Vehicle: 97 Tib
This is what I'd do..connect the power wires right so that you know those are going to work.
Then, extend the ground wires coming off of the ballast and find a solid ground somewhere in your engine bay (shouldn't be hard) and connect them both to that ground.
Then, extend the ground wires coming off of the ballast and find a solid ground somewhere in your engine bay (shouldn't be hard) and connect them both to that ground.

 05-20-2006, 12:17 PM
#23
http://www.hyundaiaftermarket.org/images/vendor1.png
Join Date: Mar 2006
Location: Vancouver, BC, Canada
Posts: 2,178
Likes: 0
Received 0 Likes
on
0 Posts
Vehicle: 01 Tiburon
thanks to hprockets and vladimer for this info:
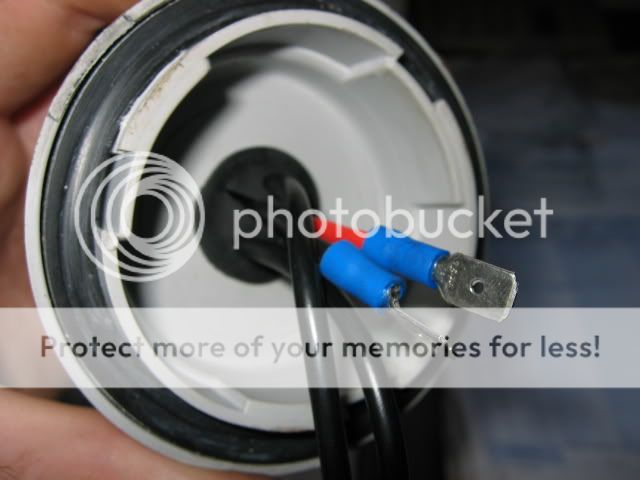
allright... our fog light socket holes/plugs are not the same in sizes, for some reason, the - (ground) side is just a little larger that the + (positive) side, so when you plug the hid (black) connector in it, it may look like it fits snug but the conductors inside are not touching each other.
sure... you can find good ground from someplace else in car and make this work
but a fix to this is to pinch the fog light socket itself so that the connector inside, especially the - (ground) one moves/will come closer towards the middle of the plug, this way it will touch with the hid (black) connector for sure.
also... added note, upgrade your fog light fuse to a 25A or a little higher when a hid conversion kit is used
I'm pm'ing hprockets to give us more light on this and to corect me if i'm wrong on this whole thing
05-20-2006, 01:20 PM
#24
Senior Member

Join Date: Aug 2004
Location: Toronto, Canada
Posts: 618
Likes: 0
Received 0 Likes
on
0 Posts
Vehicle: 2009 Hyundai Sonata
I've used a voltmeter to confirm that the stock wiring gives stable/same power as grounding it to the chassis
(i have a voltage stabilizer though)
In any case, on my RD2, male connectors coming off HID bulb did not fit tight enough onto the female plugs of the stock harness. I used pliers to make a tight connection.
One of the two connections will have a rubber insulator, so ground/power touching each other is not an issue, although stock wiring isn't the standard black/red (i think it was grey/green) so you'll need to verify which one is ground/power
a quick summary:
1) stock ground wiring to the fogs is OK
2) 15A --> 25A fuse upgrade is recommended
3) verify which stock wire is ground, so you don't reverse the polarity on your HID bulb
05-20-2006, 04:12 PM
#25
Senior Member

Join Date: Aug 2009
Location: Washington D.C.
Posts: 11,992
Likes: 0
Received 0 Likes
on
0 Posts
Vehicle: Hyundai Tiburon FX
some good info here that we didn't know about. yeah the right clip is smaller than our left. it requires some modification. i simply took another wire and connected the clips together.
ALSO, our sockets are parallel sockets. i think black goes to black and red goes to blue on both sockets.
how can one reverse the polarity of the bulbs and what are the effects of that? what are the effects of not grounding your power? because mine work fine without being grounded.
ALSO, our sockets are parallel sockets. i think black goes to black and red goes to blue on both sockets.
how can one reverse the polarity of the bulbs and what are the effects of that? what are the effects of not grounding your power? because mine work fine without being grounded.
05-25-2006, 04:49 PM
#26
Senior Member
Join Date: Mar 2006
Posts: 878
Likes: 0
Received 0 Likes
on
0 Posts
Vehicle: 2000 Hyundai Tiburon
Just to clarify anything for the HID's. I took some pics as I installed.
I first off started by drilling a 3/4" hole in the headlight cover.
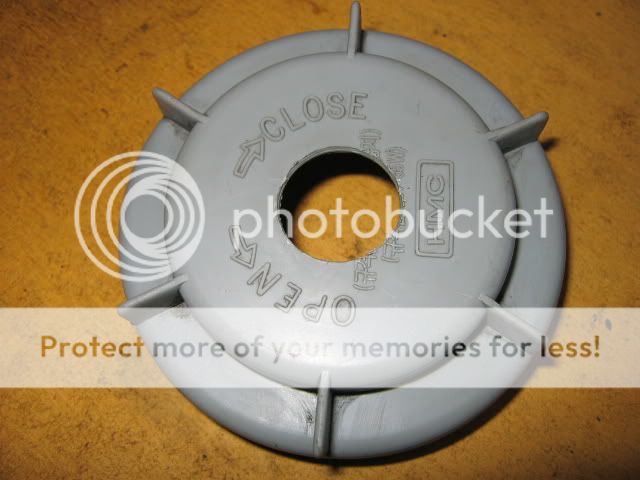
I then cut a slit in the grommet so I could push through the wire that taps into the stock light harness.
After that I used some silicone to seal up the slit I had cut in the grommet. Not alot, but enough to seal it pretty well.
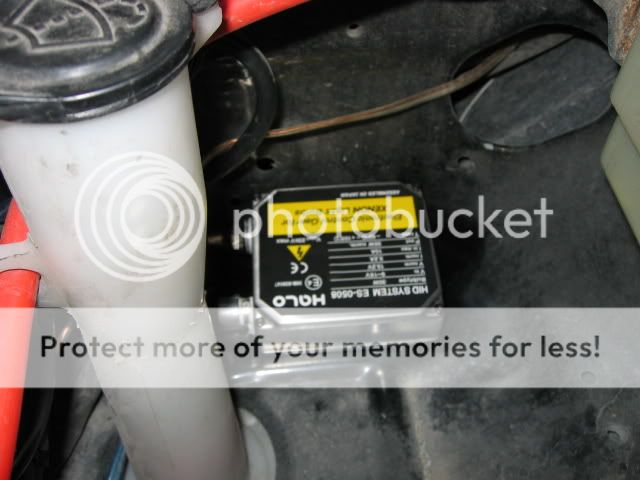
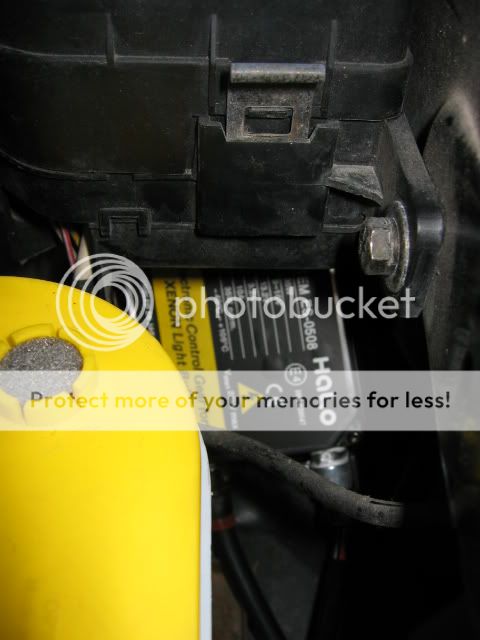
Here are some pictures of where I put the ballasts. One was right by the widshield washer fluid filler. The other was under he main fuse box under the hood, behind the battery. Then used some zip ties to secure the loose wires and take up some slack.
Here is after everything was put back together.


I'll take some pictures of them light. They were the 8000K, H7's
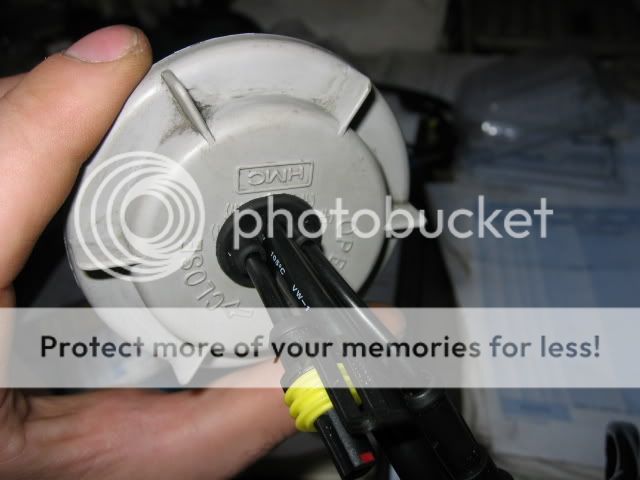
Oh and to clarify further. When hooking up the wires into the stock harness, the red wire from the ballast goes with the brown wire from the stock harness. And the Black wire from the ballast goes with the yellow from the stock harness.
I first off started by drilling a 3/4" hole in the headlight cover.
I then cut a slit in the grommet so I could push through the wire that taps into the stock light harness.
After that I used some silicone to seal up the slit I had cut in the grommet. Not alot, but enough to seal it pretty well.
Here are some pictures of where I put the ballasts. One was right by the widshield washer fluid filler. The other was under he main fuse box under the hood, behind the battery. Then used some zip ties to secure the loose wires and take up some slack.
Here is after everything was put back together.
I'll take some pictures of them light. They were the 8000K, H7's
Oh and to clarify further. When hooking up the wires into the stock harness, the red wire from the ballast goes with the brown wire from the stock harness. And the Black wire from the ballast goes with the yellow from the stock harness.
05-31-2006, 07:05 PM
#27
Senior Member
Join Date: Aug 2009
Location: Washington D.C.
Posts: 11,992
Likes: 0
Received 0 Likes
on
0 Posts
Vehicle: Hyundai Tiburon FX
yep yep, thanks blacktibby00, thats how ya do it!! anyways, here are my lights. they're damn good, reminder these photos are at the last peak of daylight so they don't look as bright as they really are.


 07-12-2006, 06:35 AM
#29
Senior Member

Join Date: Mar 2006
Posts: 1,012
Likes: 0
Received 0 Likes
on
0 Posts
Vehicle: 2000 Hyundai Tiburon
Followed Blacktibby00's Step by Step, easiest thing I've done. It took me a bit longer because it was around midnight, and I was trying not to wake up the old man.
45 minutes tops.......in the dark.
The hardest part I found was trying to get that metal wire that holds the bulb in place to close. Just used a long screwdriver for leverage and pushed it in. Everything seems to hold solid in there.
HUGE difference over stock.
45 minutes tops.......in the dark.
The hardest part I found was trying to get that metal wire that holds the bulb in place to close. Just used a long screwdriver for leverage and pushed it in. Everything seems to hold solid in there.
HUGE difference over stock.
01-05-2007, 08:36 PM
#30
Senior Member
Join Date: Nov 2008
Location: Huntsville, AL
Posts: 2,881
Likes: 0
Received 0 Likes
on
0 Posts
Vehicle: 2001/Hyundai/Tiburon
Sorry to raise this from the dead, but I had a quickie question and didn't want to start a new thread.
Does polarity matter?? When I plug in the wires to the stock wiring harness, does it matter which one it's plugged into? If so, what color is which on the stock harness? There's a brown and yellow, but no indication as to which is negative. I would think brown is neg. and yellow is pos, but I wanted to be sure.
I'm in the middle of installing, so a quick reply would be handy cool.gif
Thanks!