
Diy Fiberglassing In A Tib


Thread Starter
Moderator


Joined: Feb 2009
Posts: 11,732
Likes: 5
From: Leesville, Louisiana
Vehicle: 2001 Hyundai Tiburon
I'm planning on doing another fiberglassing project soon. I was going through all the steps in my head and decided to do a DIY. This should guide someone who would be unfamiliar with 'glassing' Through the process.
The way this DIY goes, You'll see a description of the process, and then pix after the description. I wrote it in word and do not have detailed pix explaining each and every step. If you have pix to post, please post them in this thread and I'll add them into this DIY. I did not take the best pictures as it's very hard to use a camera with fiberglass on your hands. If you can take better pix, please do and post them.
Although I posted this, mad props goes to TiburonMoo. We had both decided to do the same project at the same time. We helped eachother out via instant messenger quite a bit. Thanks mang!
<span style="font-size:18pt;line-height:100%">You will need</span>
Durables:
Dremmel
Cutoff wheel
Sander
Jig saw
Hot glue gun
heat gun
Consumables:
Spray glue (I like super 66)
Fiber mat
Fiber weave (just 1 package for repair if anything goes wrong)
Resin (gallon containers)
Cheap disposable Paint brushes (1â€, 2†and 3â€)
Medium/large sized cheap Tupperware-like bowls for mixing
Drop mat (large plastic sheet)
Tin foil
Masking tape
Mixing device (I use plastic spoons)
Resin Jelly (for filling in divots)
Spatula or plastic spreader (ensure it’s flexible so you can break off anything that hardens to it)
Sand paper (40 grit, 80 grit, 180 grit, 300-400 grit, and 800 grit if you wish to paint)
Bondo body filler (for finishing the project smooth)
¼ inch dowels (long ones from craft section at Walmart for making a frame)
Hot glue
Woll cloth or old t-shirt, or stretchable fabric of some kind.
Latex gloves
Mounting device (IE. speaker ring, or monitor frame, MDF particle board is suggested)
Primer, paint, clearcoat
Or carpet (from local stereo shop should be $12/square yard)
24 bottles of Corona with lime
Note: You can get all of this at Walmart/local liquor store/car stereo shop. You will need to go to a car parts/ building supply to buy 1 gallon cans of resin instead of expensive quarts of resin. Plan on spending $150 for a large speaker box.
<span style="font-size:18pt;line-height:100%">General information</span>
I would like to start by pointing out that fiberglass is an art, not a science. No two pieces of FG will ever be laid the same. If you use a mold, then it would be possible to make more accurate replicas, but even still, it will not be the same thing each time. Curves can be matched well, but never perfectly.
Fiberglass is much like paper maché. It’s composed of two parts. Instead of using glue and paper, your tools are Resin with hardener and Fiber. You may start a fiberglass project by laying down either fiber or resin. Either way, the resin will harden and create the form, while the fiber gives shape to the resin and adds bulk as well as durability. Let’s look at the 2 parts of fiberglass more closely.
Fiber- 2 major types of fiber; mat and weave(cloth). Fiber weave, although it looks to be the easiest to use, is not a good choice for building fiberglass. Fiber weave should be used for repair only. It can only be broken using a pair of scisors, or it will get ugly and hard to use. Nuff said about that. Fiber mat is the best choice for building. Fiber mat is stringy, fluffy and can be torn apart by hand or cut with scissors. No matter what type of fiber you’re using or even how you use it, the fiber will absorb resin, locking it into place and give it more mass then if it were simply resin only.
Resin (glass)- consists of 2 parts, Resin and Hardener. Resin on its own will likely take years to harden. You must add the manufacturer provided hardener to the resin in order to create a chemical reaction which causes the resin/hardener mixture to get hot and become hard. If you do not add enough hardener, the resin will take a long time to stiffen up. If you add too much hardener, the resin will jelly up while you’re working with it and become unusable. If you don’t use enough hardener on a layer, you can always go back and make a batch of resin with extra hardener and then apply it to cure the problem.
You should use the hardener the manufacturer provided for the resin. It will come in the lid of the resin. It is tempting to use too much hardener. You will run out of hardener quickly if you do. Usually, you can buy extra hardener where you buy your resin. Resin and hardener should be mixed in a manner so that if you use ¼ of the can of resin, then you use ¼ of the tube of hardener.
<span style="font-size:18pt;line-height:100%">Getting started</span>
Depending on the project you may want to start with the Masking an area section, or Bringing it together section of this DIY. If you’re making a full enclosure, you will want to start with Masking an area. If you’re making a housing, start with Bringing it together. You will need to have your mounting device ready by the time you get to the bringing it together section. Personally I’d have it ready before starting so it’s not a last minute thing.
<span style="font-size:18pt;line-height:100%">Masking an area</span>
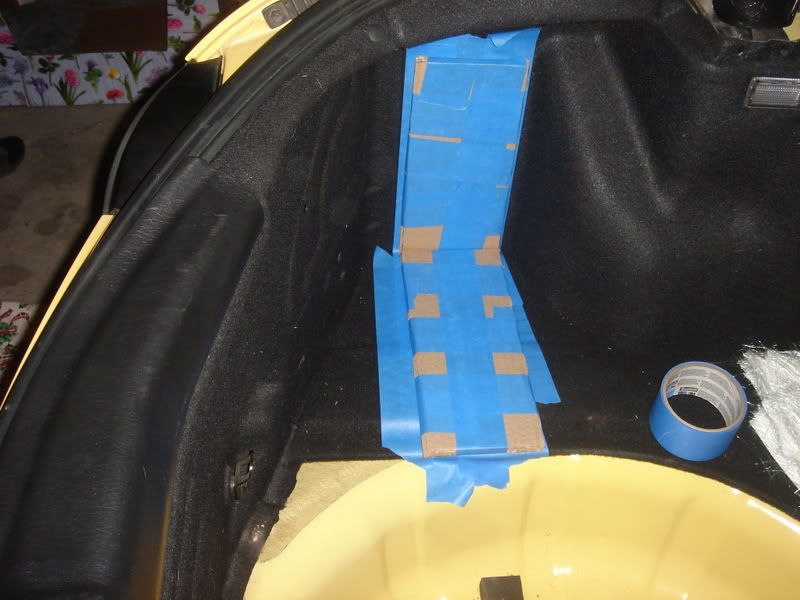
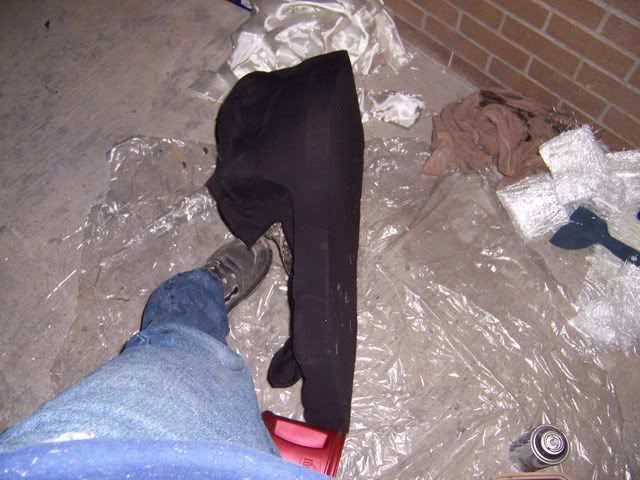
1. Mask off the area you want to fiberglass with 2 layers masking tape, you wouldn’t want to ruin your carpet. If you’re making a sealed box, make sure you calculate how much room you’ll need to make the proper airspace.
2. Lay a drop mat down and trim the edges so it will not get fiberglassed
3. Tape the edges of the mat down
4. tape strips of aluminum foil to the area masked, this will make the mold release easier when it comes time to remove it
5. see making a mold section
Thanks TiburonMoo
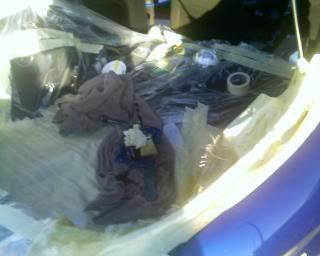
note: when taping over a vent you might want to add a way for air to pass through. The one on the driver's side trunk is there so the windows don't blow out when you slam the trunk.
<span style="font-size:18pt;line-height:100%">Making a mold</span>
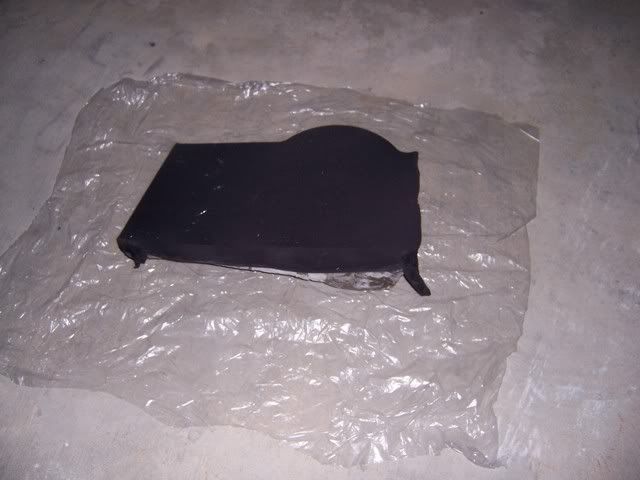
1. Cut small strips of fiber mat, some 3x3, some 5x12. Basically, you want to make sure you have enough to cover the entire area. The walls and upside down areas should be much smaller then the base so they’ll stick better and be more manageable. You want to cover more area then you need and it will be cut to size later (it might even help to jack the car up so it’s angled and less likely to make your FG slide off while hardning
2. mix your first batch of fiberglass
3. paint the masking tape/aluminum foil with the resin
4. Apply strips of fiber to the resin.
5. with a somewhat wet brush (not too wet) tap the fiber into the resin and try to get it to absorb as much of the resin on the walls/base as possible and rub the edges of the mat back and forth to get them to join together somewhat.
6. Wait for it to start to harden and then apply another layer of resin.
7. You may repeat this process as many times as desired (at least 2). The idea is to make a mold of the walls that will not be too flexible when you pull it out. You do not have to work the entire area at the same time. You can work just a small area at a time and progress to other areas.
8. Make sure when you start a new layer, you must try your best to remove all bubbles by popping them with a knife, or pushing them to the edges or you will do a repair
9. Wait for your fiberglass to dry for an hour or so. It will start to cool off when it dries. You can use a heat gun to help it along
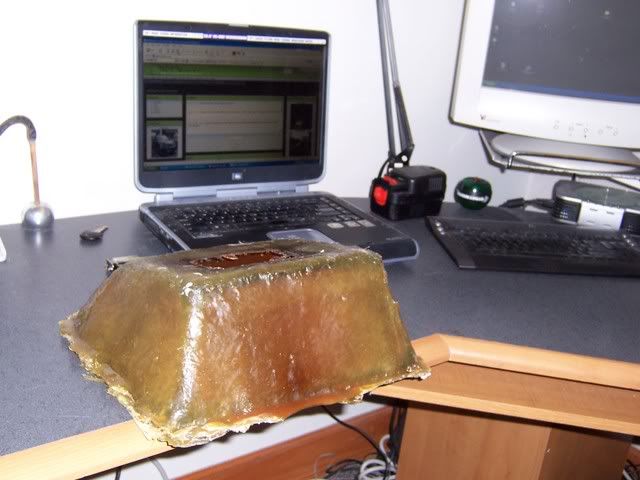
10. Pull the sucker out. It will bend a lot but it will not break unless you get all He-Man on it.
11. You now have your mold to start working. It is easier to work outside of the car because you can rotate the mold any direction you wish to prevent sliding.
12. if there’s a bubble or an area you’re not happy with, see the repairing fiberglass section
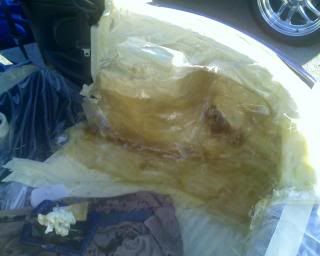
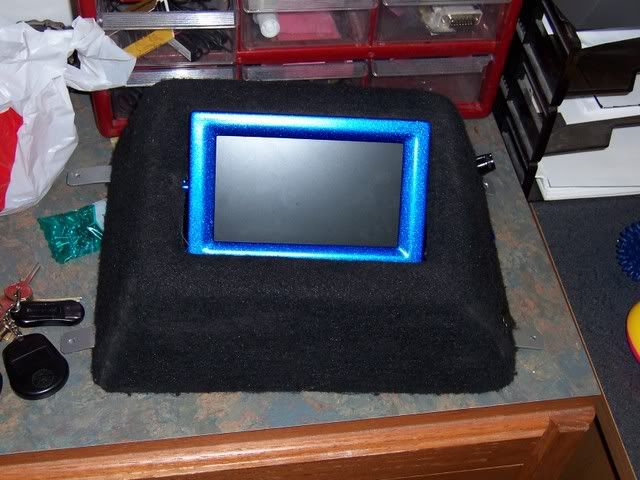
note, something that looks rough like this can be made nice and pretty with a coat of resin/hardner

Thanks TiburonMoo
<span style="font-size:18pt;line-height:100%">Repairing fiberglass</span>
1. Cut out the area to be repaired. (reduce exposed skin, use eye protection, fiberglass dust will make you itch, use baby powder on exposed skin to fill your pores)
2. paint resin on surface (or edges if you have a hole)
3. Add fiber weave with at least 1†overlap into good area
4. wait for the edges to dry and resin over it again
5. repeat from step 2 as needed
6. see the adding layers section
<span style="font-size:18pt;line-height:100%">Adding layers</span>
1. Take your mold somewhere you can work.
2. Lay down a drop mat
3. mix a large quantity of resin
4. Paint resin on inside surface of mold, or outside, if appropriate.
5. Lay fiber mat down on surface
6. With a somewhat wet brush tap the fibermat into the resin and keep working, lay fiber mat, tap, resin, lay, tap until your fiberglass is ½ inch thick or better (4-8 layers). It is best to work the entire area to create an entire strong layer. It is also best to keep working quickly to make multiple layers which dry together
7. Cut the excess fiberglass off with a jig-saw or cutoff wheel to make an appropriate shape for your application. (reduce exposed skin, use eye protection, fiberglass dust will make you itch, use baby powder on exposed skin to fill your pores)
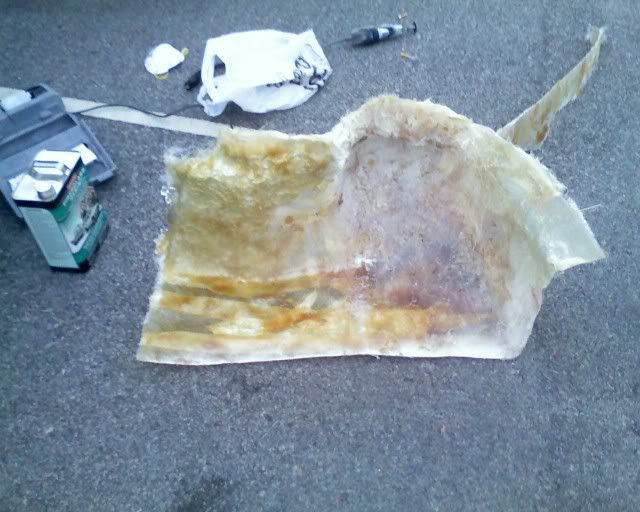
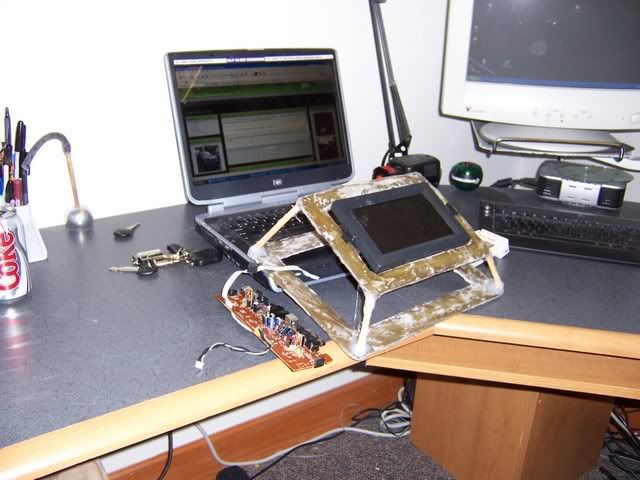
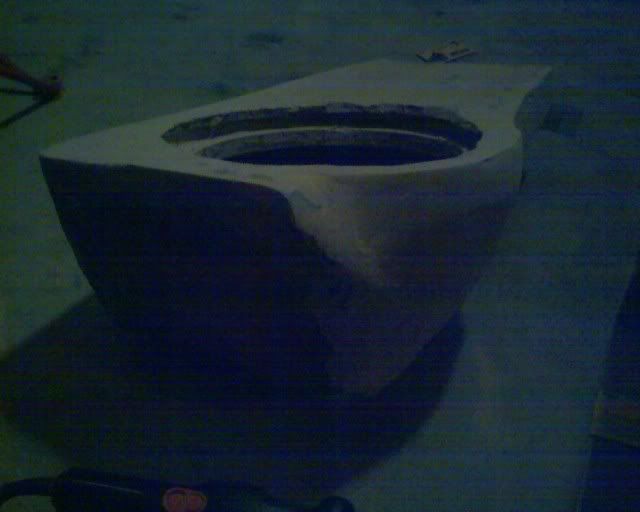
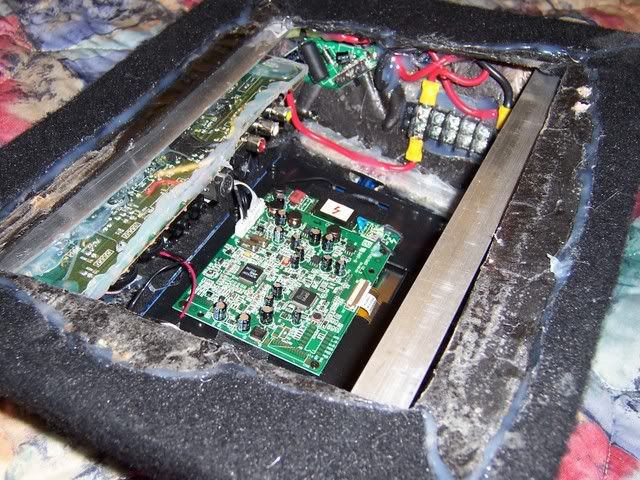
I wish I had better pictures displaying what adding layers looks like but this is a picture of fiberglass laid already. Sorry.
<span style="font-size:18pt;line-height:100%">Bringing it together</span>
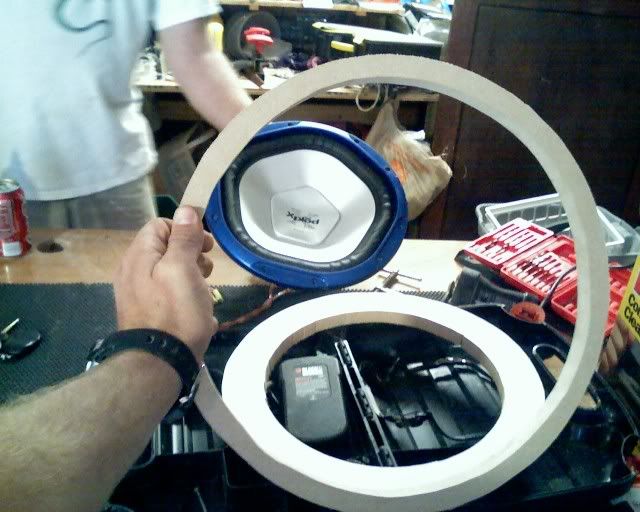
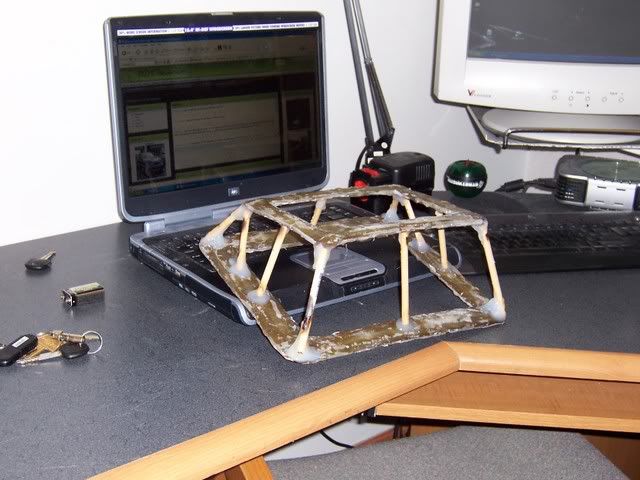
1. make a frame from dowels, hot glue and your mount. If this is a sealed box, make sure you make it the right size for your airspace requirements. If you mess up, use a heat gun to melt the hot glue to be remolded.
2. spray glue onto the edges, mounting device, and outside areas of dowels.
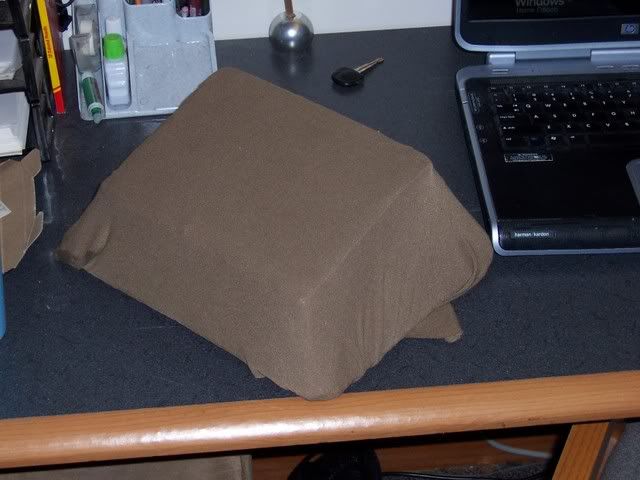
3. cut and stretch your fabric or shirt over the project and as TiburonMoo says, “the spray glue helps when you’re stretching and pulling and stretching and pulling†because it stays sticky even after you pull it apart and restick it. Use as much glue as you need because it is important that this is stretched tight.
4. cut off excess fabric and do not worry about a hole for your mounting device just now, you’ll cut it later
5. mix your resin
6. paint your resin over the entire fabric area The fiberglass resin will seep through the fabric and glue and bond into the dowels as well as MDF particle board. Just resin right over everything
7. wait for the resin to dry
8. see the adding layers section
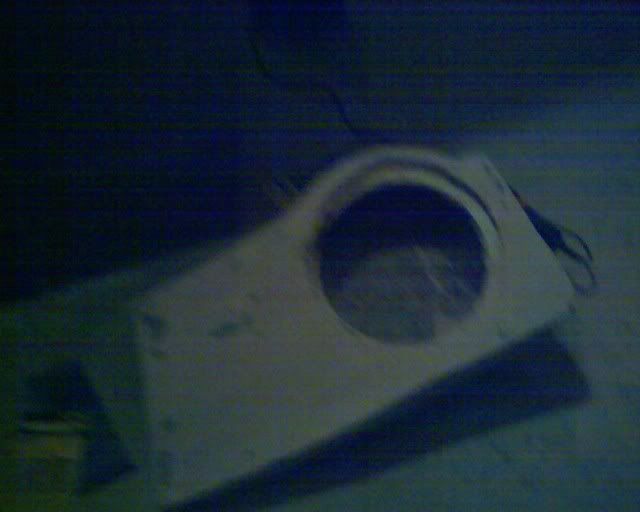
9. cut the hole for your mounting device with a dremmel or jigsaw carefully so as to ensure no damage occours. Leave at least ½ MM of fiberglass
10. sand down the edges to meet the mounting device.
11. if this is to be a sealed enclosure, you will want to mix another batch of resin, then pour it into the enclosure and swish it around so that it seals up the edges where your fabric meets the mold

Thanks TiburonMoo
<span style="font-size:18pt;line-height:100%">Finishing</span>
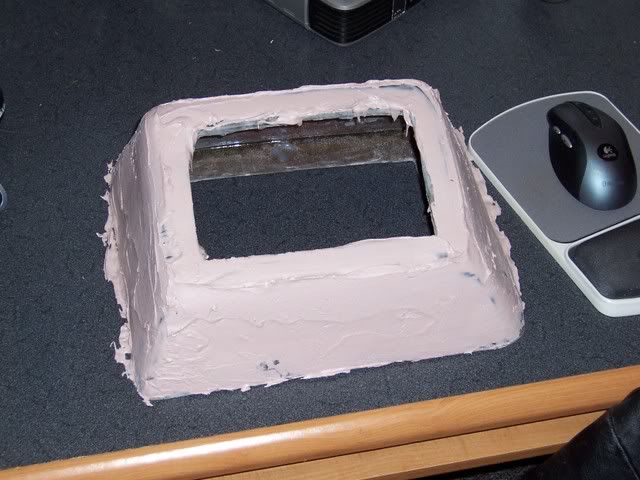
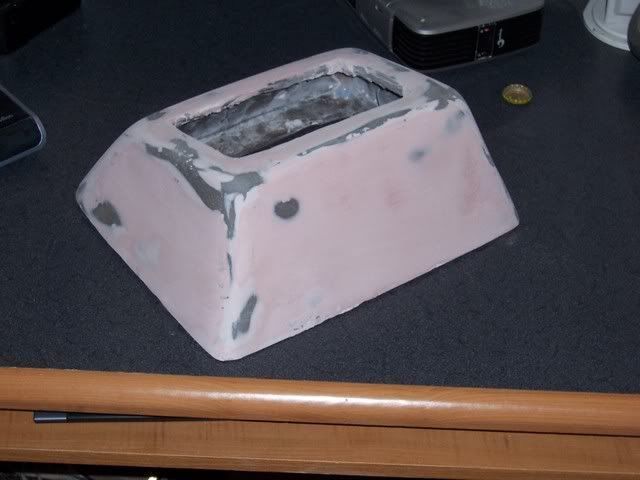
1. a. Using a cutoff wheel or grinder, remove all large bumps in the fiberglass. Or… b. use some resin jelly and a plastic spreader to fill in the bumps
2. sand down the entire project using your sand paper and sander, with 40-80 grit sand paper or hand sand it if you’re completely nuts. (I’m partially nuts) (reduce exposed skin, use eye protection, fiberglass dust will make you itch, use baby powder on exposed skin to fill your pores)
3. use bondo as directed on label with a plastic spreader to make the project smooth.
4. At this point, you’re done building. You may either sand to appropriate grit for painting (see paint label) and then mount your device, or see applying carpet
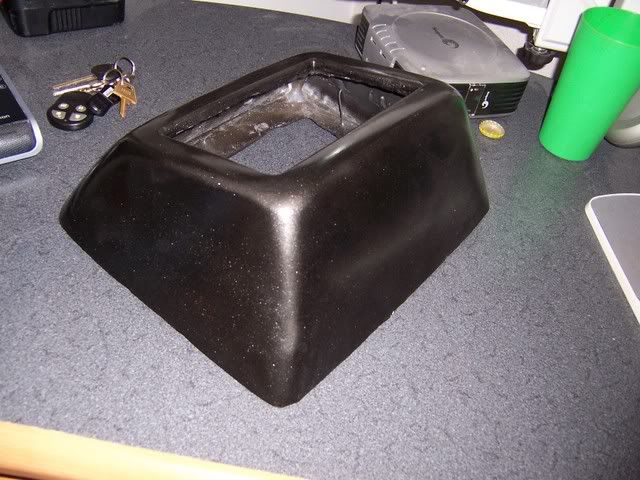
<span style="font-size:18pt;line-height:100%">Applying Carpet</span>
1. stretch the carpet across the surface and get a general idea of how much you’ll need.
2. starting with the front, spray large amounts of spray glue on the surface
3. Have a buddy help you stretch the carpet across the surface and press it onto the glue.
4. spray the sides down with spray glue
5. have a buddy help you stretch the carpet across the sides and try to take up the excess on the corners
6. clip off the excess carpet, lift up the edges spray under the edges and then press them back down and join them together
7. spray glue on the back of the enclosure
8. have a buddy help you stretch the carpet across the back. Take up the slack wherever you can, neatly.
9. cut the slack off the carpet.
10. Lift up the edges and spray glue liberally, then press the edges back down
11. cut the opening out, leave enough material to stretch around the corners.
12. spray under the carpet
13. stretch the carpet to match the opening
14. add in any controls or indicators and then mount your device in the box

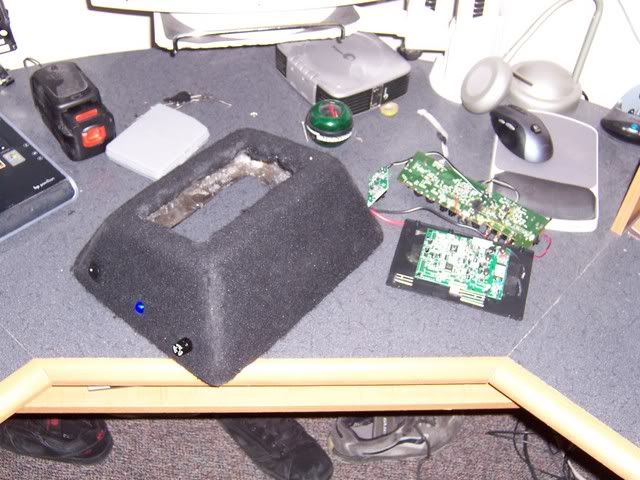
Note: hot glue on edges, the super66 would have held, but I wanted to be sure.
<span style="font-size:18pt;line-height:100%">That wasn’t so hard was it?
</span>You now have a fiberglass enclosure. It may or may not be beautiful. Even if it’s not, it’s still worth more and will sound better then a wooden box. Plus, it’s custom!

total project time: ~ 2-3 days
total project cost: ~ $50-$200
The way this DIY goes, You'll see a description of the process, and then pix after the description. I wrote it in word and do not have detailed pix explaining each and every step. If you have pix to post, please post them in this thread and I'll add them into this DIY. I did not take the best pictures as it's very hard to use a camera with fiberglass on your hands. If you can take better pix, please do and post them.
Although I posted this, mad props goes to TiburonMoo. We had both decided to do the same project at the same time. We helped eachother out via instant messenger quite a bit. Thanks mang!
<span style="font-size:18pt;line-height:100%">You will need</span>
Durables:
Dremmel
Cutoff wheel
Sander
Jig saw
Hot glue gun
heat gun
Consumables:
Spray glue (I like super 66)
Fiber mat
Fiber weave (just 1 package for repair if anything goes wrong)
Resin (gallon containers)
Cheap disposable Paint brushes (1â€, 2†and 3â€)
Medium/large sized cheap Tupperware-like bowls for mixing
Drop mat (large plastic sheet)
Tin foil
Masking tape
Mixing device (I use plastic spoons)
Resin Jelly (for filling in divots)
Spatula or plastic spreader (ensure it’s flexible so you can break off anything that hardens to it)
Sand paper (40 grit, 80 grit, 180 grit, 300-400 grit, and 800 grit if you wish to paint)
Bondo body filler (for finishing the project smooth)
¼ inch dowels (long ones from craft section at Walmart for making a frame)
Hot glue
Woll cloth or old t-shirt, or stretchable fabric of some kind.
Latex gloves
Mounting device (IE. speaker ring, or monitor frame, MDF particle board is suggested)
Primer, paint, clearcoat
Or carpet (from local stereo shop should be $12/square yard)
24 bottles of Corona with lime
Note: You can get all of this at Walmart/local liquor store/car stereo shop. You will need to go to a car parts/ building supply to buy 1 gallon cans of resin instead of expensive quarts of resin. Plan on spending $150 for a large speaker box.
<span style="font-size:18pt;line-height:100%">General information</span>
I would like to start by pointing out that fiberglass is an art, not a science. No two pieces of FG will ever be laid the same. If you use a mold, then it would be possible to make more accurate replicas, but even still, it will not be the same thing each time. Curves can be matched well, but never perfectly.
Fiberglass is much like paper maché. It’s composed of two parts. Instead of using glue and paper, your tools are Resin with hardener and Fiber. You may start a fiberglass project by laying down either fiber or resin. Either way, the resin will harden and create the form, while the fiber gives shape to the resin and adds bulk as well as durability. Let’s look at the 2 parts of fiberglass more closely.
Fiber- 2 major types of fiber; mat and weave(cloth). Fiber weave, although it looks to be the easiest to use, is not a good choice for building fiberglass. Fiber weave should be used for repair only. It can only be broken using a pair of scisors, or it will get ugly and hard to use. Nuff said about that. Fiber mat is the best choice for building. Fiber mat is stringy, fluffy and can be torn apart by hand or cut with scissors. No matter what type of fiber you’re using or even how you use it, the fiber will absorb resin, locking it into place and give it more mass then if it were simply resin only.
Resin (glass)- consists of 2 parts, Resin and Hardener. Resin on its own will likely take years to harden. You must add the manufacturer provided hardener to the resin in order to create a chemical reaction which causes the resin/hardener mixture to get hot and become hard. If you do not add enough hardener, the resin will take a long time to stiffen up. If you add too much hardener, the resin will jelly up while you’re working with it and become unusable. If you don’t use enough hardener on a layer, you can always go back and make a batch of resin with extra hardener and then apply it to cure the problem.
You should use the hardener the manufacturer provided for the resin. It will come in the lid of the resin. It is tempting to use too much hardener. You will run out of hardener quickly if you do. Usually, you can buy extra hardener where you buy your resin. Resin and hardener should be mixed in a manner so that if you use ¼ of the can of resin, then you use ¼ of the tube of hardener.
<span style="font-size:18pt;line-height:100%">Getting started</span>
Depending on the project you may want to start with the Masking an area section, or Bringing it together section of this DIY. If you’re making a full enclosure, you will want to start with Masking an area. If you’re making a housing, start with Bringing it together. You will need to have your mounting device ready by the time you get to the bringing it together section. Personally I’d have it ready before starting so it’s not a last minute thing.
<span style="font-size:18pt;line-height:100%">Masking an area</span>
1. Mask off the area you want to fiberglass with 2 layers masking tape, you wouldn’t want to ruin your carpet. If you’re making a sealed box, make sure you calculate how much room you’ll need to make the proper airspace.
2. Lay a drop mat down and trim the edges so it will not get fiberglassed
3. Tape the edges of the mat down
4. tape strips of aluminum foil to the area masked, this will make the mold release easier when it comes time to remove it
5. see making a mold section
Thanks TiburonMoo
note: when taping over a vent you might want to add a way for air to pass through. The one on the driver's side trunk is there so the windows don't blow out when you slam the trunk.
<span style="font-size:18pt;line-height:100%">Making a mold</span>
1. Cut small strips of fiber mat, some 3x3, some 5x12. Basically, you want to make sure you have enough to cover the entire area. The walls and upside down areas should be much smaller then the base so they’ll stick better and be more manageable. You want to cover more area then you need and it will be cut to size later (it might even help to jack the car up so it’s angled and less likely to make your FG slide off while hardning
2. mix your first batch of fiberglass
3. paint the masking tape/aluminum foil with the resin
4. Apply strips of fiber to the resin.
5. with a somewhat wet brush (not too wet) tap the fiber into the resin and try to get it to absorb as much of the resin on the walls/base as possible and rub the edges of the mat back and forth to get them to join together somewhat.
6. Wait for it to start to harden and then apply another layer of resin.
7. You may repeat this process as many times as desired (at least 2). The idea is to make a mold of the walls that will not be too flexible when you pull it out. You do not have to work the entire area at the same time. You can work just a small area at a time and progress to other areas.
8. Make sure when you start a new layer, you must try your best to remove all bubbles by popping them with a knife, or pushing them to the edges or you will do a repair
9. Wait for your fiberglass to dry for an hour or so. It will start to cool off when it dries. You can use a heat gun to help it along
10. Pull the sucker out. It will bend a lot but it will not break unless you get all He-Man on it.
11. You now have your mold to start working. It is easier to work outside of the car because you can rotate the mold any direction you wish to prevent sliding.
12. if there’s a bubble or an area you’re not happy with, see the repairing fiberglass section
note, something that looks rough like this can be made nice and pretty with a coat of resin/hardner
Thanks TiburonMoo
<span style="font-size:18pt;line-height:100%">Repairing fiberglass</span>
1. Cut out the area to be repaired. (reduce exposed skin, use eye protection, fiberglass dust will make you itch, use baby powder on exposed skin to fill your pores)
2. paint resin on surface (or edges if you have a hole)
3. Add fiber weave with at least 1†overlap into good area
4. wait for the edges to dry and resin over it again
5. repeat from step 2 as needed
6. see the adding layers section
<span style="font-size:18pt;line-height:100%">Adding layers</span>
1. Take your mold somewhere you can work.
2. Lay down a drop mat
3. mix a large quantity of resin
4. Paint resin on inside surface of mold, or outside, if appropriate.
5. Lay fiber mat down on surface
6. With a somewhat wet brush tap the fibermat into the resin and keep working, lay fiber mat, tap, resin, lay, tap until your fiberglass is ½ inch thick or better (4-8 layers). It is best to work the entire area to create an entire strong layer. It is also best to keep working quickly to make multiple layers which dry together
7. Cut the excess fiberglass off with a jig-saw or cutoff wheel to make an appropriate shape for your application. (reduce exposed skin, use eye protection, fiberglass dust will make you itch, use baby powder on exposed skin to fill your pores)
I wish I had better pictures displaying what adding layers looks like but this is a picture of fiberglass laid already. Sorry.
<span style="font-size:18pt;line-height:100%">Bringing it together</span>
1. make a frame from dowels, hot glue and your mount. If this is a sealed box, make sure you make it the right size for your airspace requirements. If you mess up, use a heat gun to melt the hot glue to be remolded.
2. spray glue onto the edges, mounting device, and outside areas of dowels.
3. cut and stretch your fabric or shirt over the project and as TiburonMoo says, “the spray glue helps when you’re stretching and pulling and stretching and pulling†because it stays sticky even after you pull it apart and restick it. Use as much glue as you need because it is important that this is stretched tight.
4. cut off excess fabric and do not worry about a hole for your mounting device just now, you’ll cut it later
5. mix your resin
6. paint your resin over the entire fabric area The fiberglass resin will seep through the fabric and glue and bond into the dowels as well as MDF particle board. Just resin right over everything
7. wait for the resin to dry
8. see the adding layers section
9. cut the hole for your mounting device with a dremmel or jigsaw carefully so as to ensure no damage occours. Leave at least ½ MM of fiberglass
10. sand down the edges to meet the mounting device.
11. if this is to be a sealed enclosure, you will want to mix another batch of resin, then pour it into the enclosure and swish it around so that it seals up the edges where your fabric meets the mold
Thanks TiburonMoo
<span style="font-size:18pt;line-height:100%">Finishing</span>
1. a. Using a cutoff wheel or grinder, remove all large bumps in the fiberglass. Or… b. use some resin jelly and a plastic spreader to fill in the bumps
2. sand down the entire project using your sand paper and sander, with 40-80 grit sand paper or hand sand it if you’re completely nuts. (I’m partially nuts) (reduce exposed skin, use eye protection, fiberglass dust will make you itch, use baby powder on exposed skin to fill your pores)
3. use bondo as directed on label with a plastic spreader to make the project smooth.
4. At this point, you’re done building. You may either sand to appropriate grit for painting (see paint label) and then mount your device, or see applying carpet
<span style="font-size:18pt;line-height:100%">Applying Carpet</span>
1. stretch the carpet across the surface and get a general idea of how much you’ll need.
2. starting with the front, spray large amounts of spray glue on the surface
3. Have a buddy help you stretch the carpet across the surface and press it onto the glue.
4. spray the sides down with spray glue
5. have a buddy help you stretch the carpet across the sides and try to take up the excess on the corners
6. clip off the excess carpet, lift up the edges spray under the edges and then press them back down and join them together
7. spray glue on the back of the enclosure
8. have a buddy help you stretch the carpet across the back. Take up the slack wherever you can, neatly.
9. cut the slack off the carpet.
10. Lift up the edges and spray glue liberally, then press the edges back down
11. cut the opening out, leave enough material to stretch around the corners.
12. spray under the carpet
13. stretch the carpet to match the opening
14. add in any controls or indicators and then mount your device in the box
Note: hot glue on edges, the super66 would have held, but I wanted to be sure.
<span style="font-size:18pt;line-height:100%">That wasn’t so hard was it?
</span>You now have a fiberglass enclosure. It may or may not be beautiful. Even if it’s not, it’s still worth more and will sound better then a wooden box. Plus, it’s custom!
total project time: ~ 2-3 days
total project cost: ~ $50-$200


Senior Member
Joined: Mar 2006
Posts: 5,754
Likes: 0
Vehicle: 1997 Tiburon
Cool man, very informative DIY. Lots of pictures and lots of explanation.
mods: Can someone add this to the listing, upload the pictures, and re-link them to our account. I'm at work at the moment and don't have the time.
mods: Can someone add this to the listing, upload the pictures, and re-link them to our account. I'm at work at the moment and don't have the time.

Senior Member
Joined: Mar 2006
Posts: 7,799
Likes: 0
Vehicle: 2001 Hyundai Tiburon
nice job DTN. only thing i ever wondered is do the dowels ever break or snap off where you set them while stretching the fabric? im looking to get into glassing soon and this will definately help.
Thread Starter
Moderator
Joined: Feb 2009
Posts: 11,732
Likes: 5
From: Leesville, Louisiana
Vehicle: 2001 Hyundai Tiburon
^^ no. They're pretty strong. If you're worried, arrange them in triangle shape for more stability or double up on the dowels. The only thing you should really be worried about is if you got the hot glue hot enough. You can assist it with a heat gun.

Senior Member
Joined: Apr 2006
Posts: 1,401
Likes: 0
Vehicle: 2000 Tiburon
Looks good but one thing...
Jack your car up to keep the F/G from sliding? You forgot one of Tiburonmoo's other sayings. Spray glue the tape or foil(whatever you used to protect your carpet), stick the F/G mat to the glue(lay the entire first layer along the sides) and apply the resin to the mat after having the whole first layer of mat up.
I'll add more later tonight to my reply but for now that's all I can think of.
***Sorry for double posting. Hope the site merges these posts automatically.
Ok, while discussing the project with DTN he told me to make sure I leave the space open for the vent on the driver side corner so I came up with this idea to adjust for it. I just taped and F/G over it.

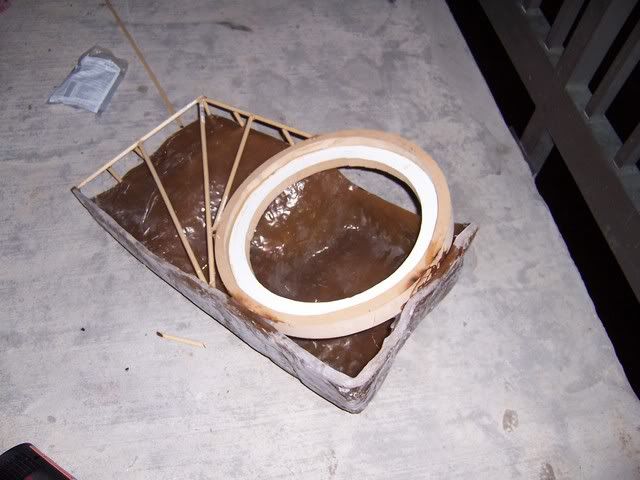
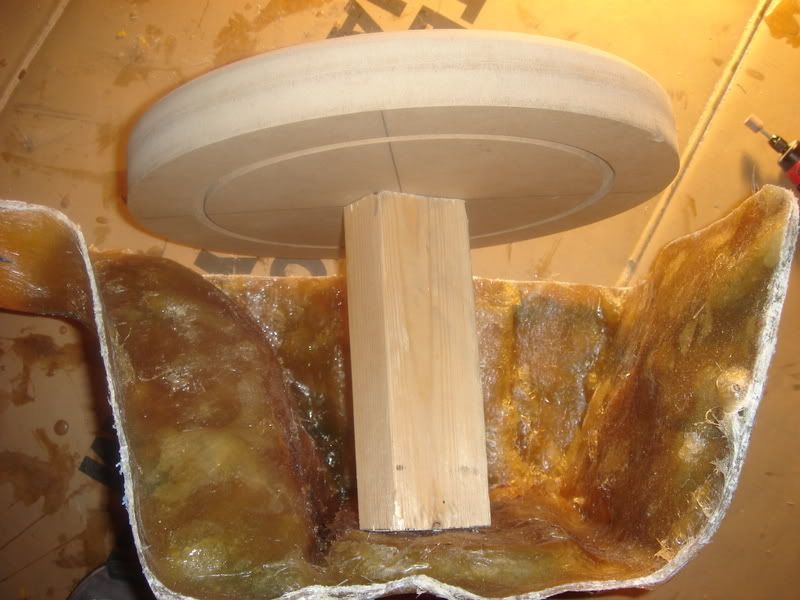
For Ericy wondering about the dowels just do what I did, though they should be sturdy enough to do the job like DTN said. Cut your rings out like such...
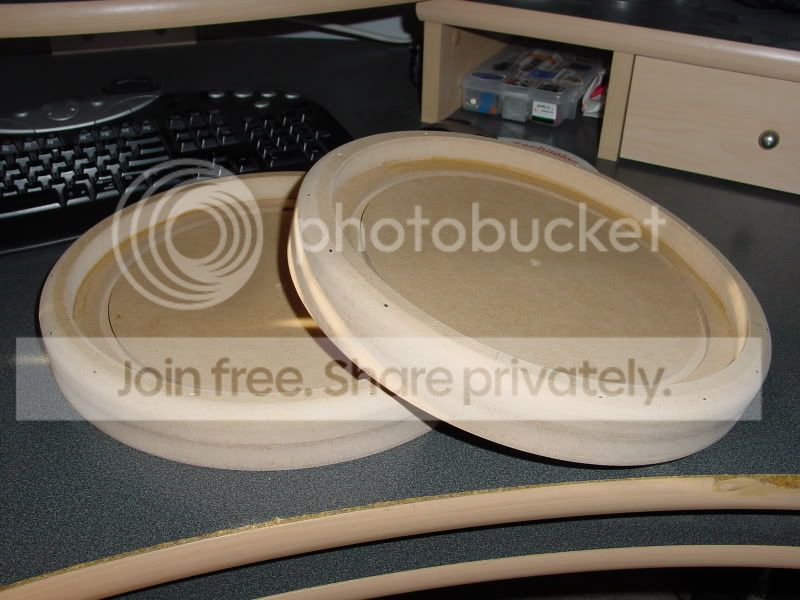
Then you can attach it to the shell with 2 screws and a block of wood. Just unscrew the wood and cut out the ring to take it out.

Jack your car up to keep the F/G from sliding? You forgot one of Tiburonmoo's other sayings. Spray glue the tape or foil(whatever you used to protect your carpet), stick the F/G mat to the glue(lay the entire first layer along the sides) and apply the resin to the mat after having the whole first layer of mat up.
I'll add more later tonight to my reply but for now that's all I can think of.
***Sorry for double posting. Hope the site merges these posts automatically.
Ok, while discussing the project with DTN he told me to make sure I leave the space open for the vent on the driver side corner so I came up with this idea to adjust for it. I just taped and F/G over it.
For Ericy wondering about the dowels just do what I did, though they should be sturdy enough to do the job like DTN said. Cut your rings out like such...
Then you can attach it to the shell with 2 screws and a block of wood. Just unscrew the wood and cut out the ring to take it out.
Thread Starter
Moderator
Joined: Feb 2009
Posts: 11,732
Likes: 5
From: Leesville, Louisiana
Vehicle: 2001 Hyundai Tiburon
<div class='quotetop'>QUOTE (tiburonmoo @ Mar 27 2007, 04:08 AM) <{POST_SNAPBACK}></div><div class='quotemain'>Looks good but one thing...
Jack your car up to keep the F/G from sliding? You forgot one of Tiburonmoo's other sayings. Spray glue the tape or foil(whatever you used to protect your carpet), stick the F/G mat to the glue(lay the entire first layer along the sides) and apply the resin to the mat after having the whole first layer of mat up.</div>
that was what i tried the 2nd time I made the mold. it didn't work either. They both kept sliding. Once the resin met the glue it disolved it. Thanks for the pix mang... post your other ones.
Senior Member
Joined: Apr 2006
Posts: 1,401
Likes: 0
Vehicle: 2000 Tiburon
Depends on how you have them in there. Like in DTN's I doubt there was any way for him to get them out. After he put the resin on his fleece and with the way his dowels were he probably just left them in and he will probably not ever have a problem because they became a part of his structure but otherwise pluck them out if they are just there doing nothing.
DTN, which ones? Ehh, I'll catch you later on today.
DTN, which ones? Ehh, I'll catch you later on today.
Thread Starter
Moderator
Joined: Feb 2009
Posts: 11,732
Likes: 5
From: Leesville, Louisiana
Vehicle: 2001 Hyundai Tiburon
^^ what he said.
Dowels are made of wood. Wood absorbs fg. They're locked in there for good. If you want to try to take them out, you can, but after I swished the resin around inside the box it really sealed them in good. There's not really much of a point in taking them out anyways..
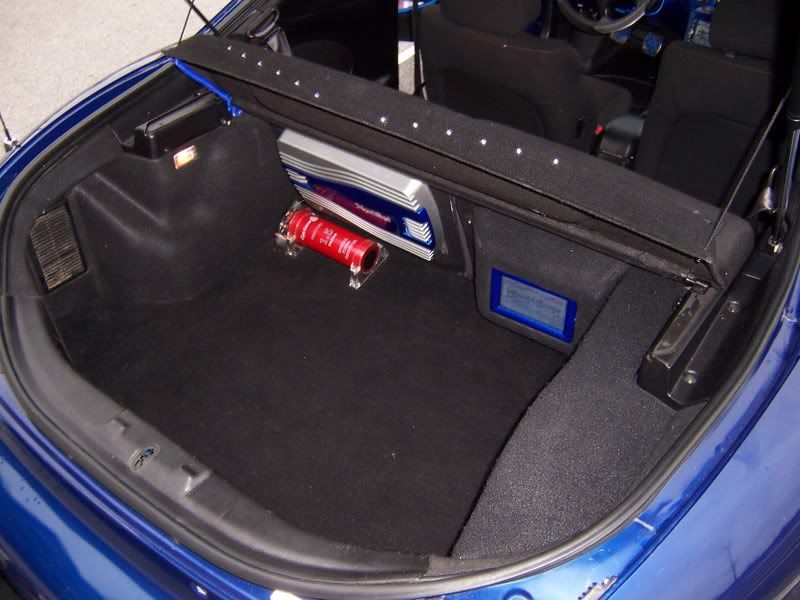
Also, i thought I'd throw this in here for those who wish to make a speaker box. My box is roughly 1 CuFt.
i'm out of room for pix so I'll have to make an addendum to this post later listing sections and displaying pix.
Dowels are made of wood. Wood absorbs fg. They're locked in there for good. If you want to try to take them out, you can, but after I swished the resin around inside the box it really sealed them in good. There's not really much of a point in taking them out anyways..
Also, i thought I'd throw this in here for those who wish to make a speaker box. My box is roughly 1 CuFt.
i'm out of room for pix so I'll have to make an addendum to this post later listing sections and displaying pix.