LC/LC2 Accent Brake Swap Walkthrough
 02-28-2011, 01:41 PM
#1
Senior Member

Thread Starter
Join Date: Apr 2009
Location: Sacramento, CA
Posts: 1,687
Likes: 0
Received 1 Like
on
1 Post
Vehicle: 02 Hyundai Accent
First off I have to give out some mad props to Jason over at All Hyundai Auto Recycler, if it wasnt for him and that companies trust in me this swap would have been hard to research and pull off. Ive been a customer there since about 04 so they know me well but still, how many auto recyclers will let you walk out the door with a bunch of unpaid parts for research purposes? These guys have quality parts and I would recommend you use them as a parts source, www.allhyundaiisuzukianissanparts.com
This guide will cover a 11" rotor swap retaining your 4x100 bolt pattern but can be used as a basic guide for all the front brake swaps listed in the sticky post "Accent Brake Swaps" Go there to decide the setup you want to run. After some research I found the spec of J2 Elantra knuckle to be closer to the LC Accent knuckle then the XD Elantra knuckle. If your going to change to a 4x100 bolt pattern then the XD Elantra knuckle is out of the question, you will need to use a J2 Elantra knuckle as it shares the same bearing of the LC Accent.
Parts I Used:
99 Elantra Knuckle Assembly
02 Accent Hubs
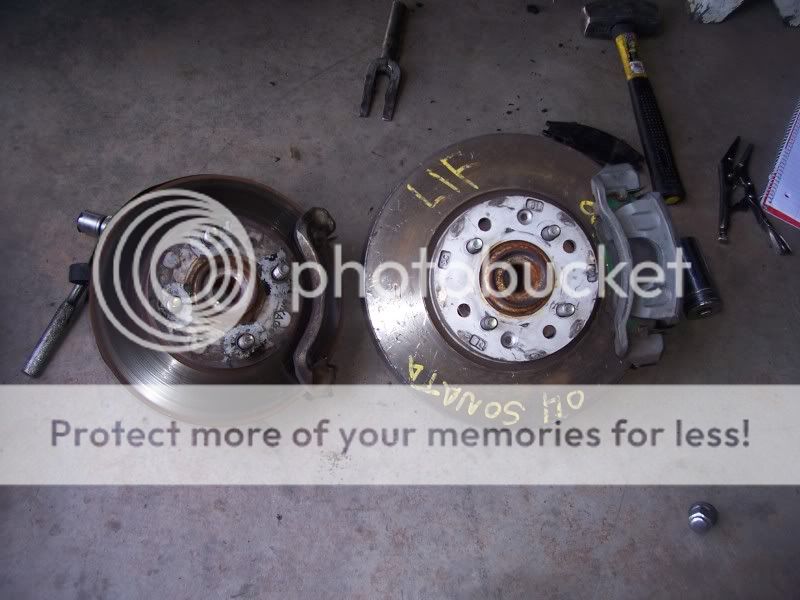
04 Sonata Rotor re-drilled to 4x100
04 Tiburon Calipers and new pads
Step 1: Prep
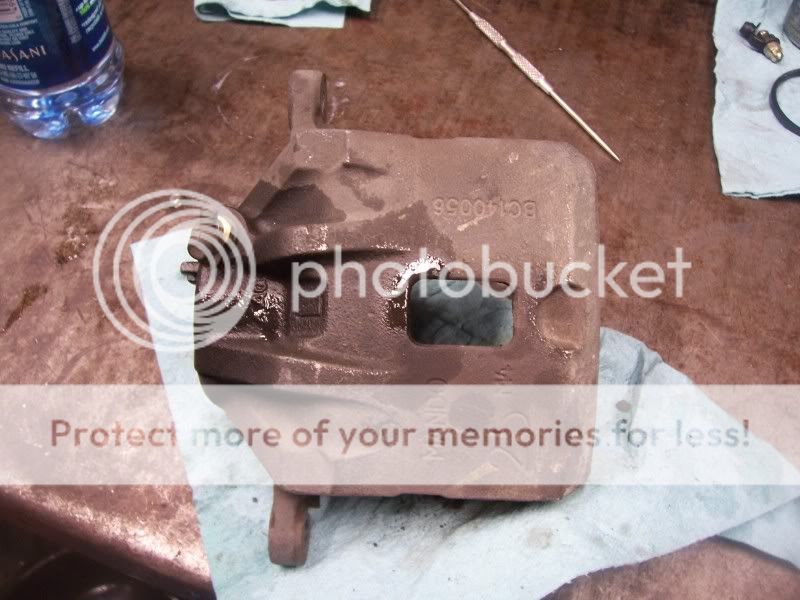
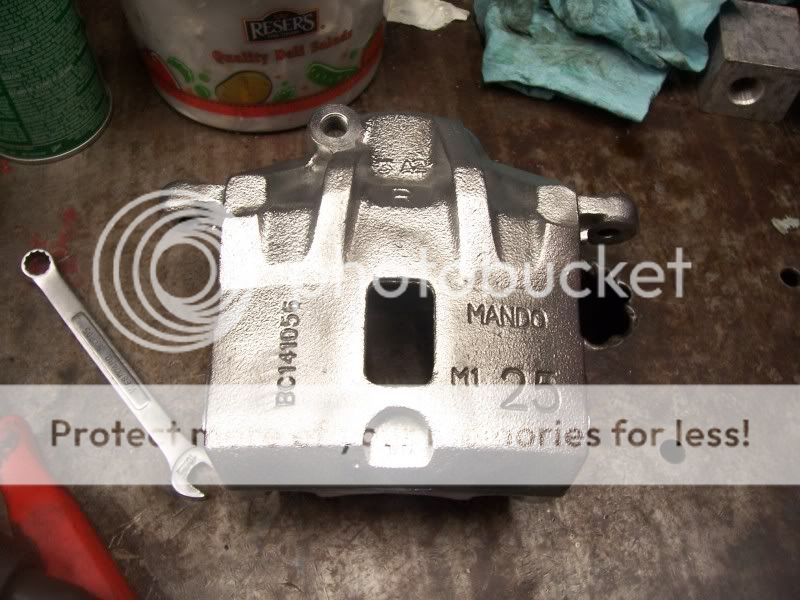
I bought the knuckles and calipers used and since there off the car it is the perfect time to rebuild the calipers and put new bearings into the knuckles. I also painted them, just be sure to mask off the mating surfaces. This swap is a good time to replace the lower ball joint, tie rod ends and anything else in that area that needs replaced.
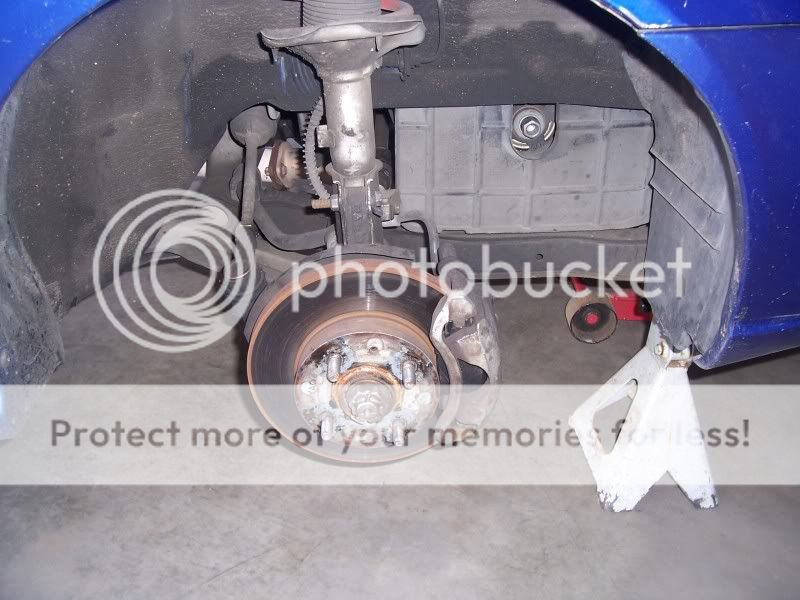
Step 2: Removal
Get that knuckle out of there, basic hand tools and a ball joint tool will be needed. I used a standard forked ball joint tool that will scar the ball joint and tie rod end. HMAservice calls for a special tool but since I was replacing them I didnt care.
1: Remove your wheel and take the cotter pin out of the castle nut on the axle. Put your wheel back, get the car back on the ground and break that axle nut free, then back off with the wheel.
2: Remove your caliper and hang it from the spring with whatever you have.
3: Remove the caliper bracket and rotor.
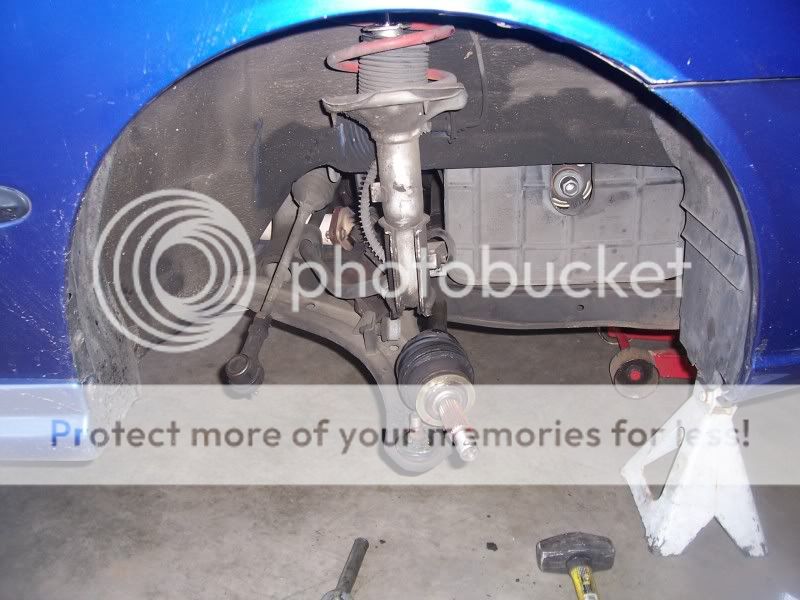
4: Remove the tie rod end and the 2 bolts holding the knuckle and strut together.
5: You should be able to free your axle at this point with the knuckle in the right position.
6: Remove the lower ball joint, your knuckle should be free.
**Guys changing to 4x114 bolt pattern skip to step 4**
Step 3: Hub Swap
If you have a press then thats great. If ya dont find a shop willing to do this for you.
*** Pics coming***
1: Press the Accent hub out of the the knuckle assembly, a special tool or creativeness is needed to get the knuckle assembly square with the press, I went with the creative part. Dont forget to press off the bearing race that will be on the hub once it is free.
2: Press your Accent hub into the Elantra knuckle. You should have the new bearing already pressed into the Elentra knuckle. There is a procedure for seating the bearing that I wont go into, look it up here at www.hmaservice.com
Side Note: The Elantra dust shield will not fit the 11" rotor but it can be bent and tweaked to fit and it doesnt look bad. In the end I opted for no dust shield.
Step 3: Maintenance
If you planned on replacing anything in that area nows the time. I did lower ball joints, tie rod ends and cv boots on my passenger side axle. I would have done the driver side but there was to much play at the inner joint. I also drained and filled the trans with Red Line MT 90.
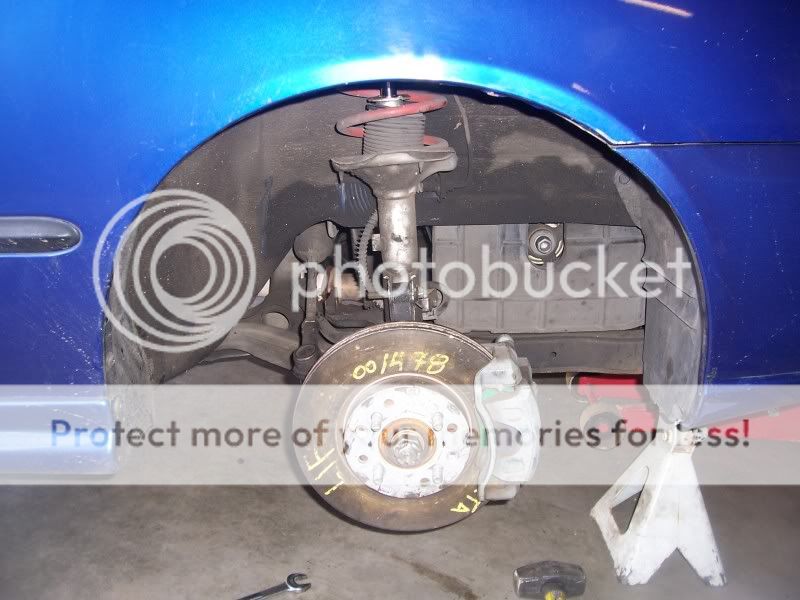
Step 4 Reinstall
1: Reinstall your knuckle assembly reverse of the way you took it out.
2: Slap on your re-drilled rotor and check for run out (see "drilling your 4x100 pattern")
3: Place your caliper bracket on the knuckle.
4: Free your brake line from the old caliper and swap it over to your new caliper, use new copper washers.
5: Bleed your brakes.
6: Slap your wheels back on.

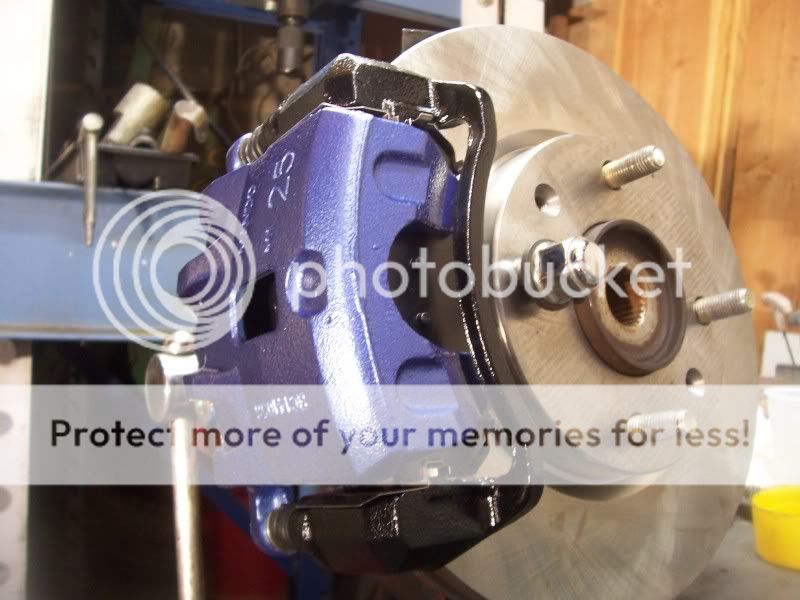
If your new brakes look like this when your done then CONGRATS... YOU FAILED STEP 1
Step 5: Alignment
Not gunna go deep on this, you can adjust by eye to get it close enough to drive to an alignment shop, your gunna need it. Your camber and toe will be out.
Drilling your 4x100 pattern
Step 1 Making the Templates
You will need a quality compass and some grid paper and a metric ruler.
***pics coming***
1: Spread your compass open to 50mm
2: Center the point of the compass onto one of the cross lines of the grid and make a circle. Measure it to make sure it is 100mm across with the small hole the compass left in the center (50mm). If your off even one hair start over. Now following the grid lines up an down, left an right from the center you will come across were your circle meets those lines, these are your point for drilling.
3: Adjust the compass to 34.5mm. You are now going to add the rotor hub bore to your pattern. Now the compass I used was in a set of compasses. One had super sharp point at both ends, no lead. I used this to carve out the hub bore hole in the pattern, a perfect circle. Make sure to make 2 patterns, one for each rotor.
**Note** Your hub bore may vary, be sure to check yours.
**Note** Use a hard surface with the compass or it will dig in at the point of rotation throwing you off a bit with a soft surface.
Step 2 Prepping the rotor
1: Lay your pattern over the rotor, I trimmed it up a bunch so I could tape it in place.
2: Center your pattern using the cut out bore hole that i hope you put in your pattern.
3: Use the most open space available for your holes and tape it in place, make sure the paper stays flat and true
4: Using a sharp punch and a hammer mark your 4 holes for drilling
5: Remove the template and inspect your marks. measure them to ensure they are in there proper place. If they are not then correct them. They should be 100mm apart from each other. The other big thing to check is to see how far from the edge of the hub bore they are. They should be 15.5mm apart. If this is not right do not proceed.
Step 3 Drilling
1: Secure the rotor, I used a bench vise with a towel folded several times to protect it, you dont need a ton of pressure to hold it, to much may damage or warp it.
2: I drilled in 3 steps, first a small bit to make the pilot hole, then a 1/4 inch bit then a 12mm bit. That is the size of the lug bolt.
3: Place on your car, first off if it fit congrats you have mad skills with a drill. If you dont have run out on the rotor then you are a god with a compass an drill.
4: If it is super close to fitting then a dremel with a grinding stone may do the trick, ream it out a bit.
5: If your off more then a dremel can handle (or if you dont have a dremel) step the holes up to a 1/2 inch bit, this is just a bit bigger then 12mm.
6: If your off more then that then there is still hope before buying a new rotor, this happened on one of my rears.
Step 4 Runout
More on this later, im out of time for the night
This guide will cover a 11" rotor swap retaining your 4x100 bolt pattern but can be used as a basic guide for all the front brake swaps listed in the sticky post "Accent Brake Swaps" Go there to decide the setup you want to run. After some research I found the spec of J2 Elantra knuckle to be closer to the LC Accent knuckle then the XD Elantra knuckle. If your going to change to a 4x100 bolt pattern then the XD Elantra knuckle is out of the question, you will need to use a J2 Elantra knuckle as it shares the same bearing of the LC Accent.
Parts I Used:
99 Elantra Knuckle Assembly
02 Accent Hubs
04 Sonata Rotor re-drilled to 4x100
04 Tiburon Calipers and new pads
Step 1: Prep
I bought the knuckles and calipers used and since there off the car it is the perfect time to rebuild the calipers and put new bearings into the knuckles. I also painted them, just be sure to mask off the mating surfaces. This swap is a good time to replace the lower ball joint, tie rod ends and anything else in that area that needs replaced.
Step 2: Removal
Get that knuckle out of there, basic hand tools and a ball joint tool will be needed. I used a standard forked ball joint tool that will scar the ball joint and tie rod end. HMAservice calls for a special tool but since I was replacing them I didnt care.
1: Remove your wheel and take the cotter pin out of the castle nut on the axle. Put your wheel back, get the car back on the ground and break that axle nut free, then back off with the wheel.
2: Remove your caliper and hang it from the spring with whatever you have.
3: Remove the caliper bracket and rotor.
4: Remove the tie rod end and the 2 bolts holding the knuckle and strut together.
5: You should be able to free your axle at this point with the knuckle in the right position.
6: Remove the lower ball joint, your knuckle should be free.
**Guys changing to 4x114 bolt pattern skip to step 4**
Step 3: Hub Swap
If you have a press then thats great. If ya dont find a shop willing to do this for you.
*** Pics coming***
1: Press the Accent hub out of the the knuckle assembly, a special tool or creativeness is needed to get the knuckle assembly square with the press, I went with the creative part. Dont forget to press off the bearing race that will be on the hub once it is free.
2: Press your Accent hub into the Elantra knuckle. You should have the new bearing already pressed into the Elentra knuckle. There is a procedure for seating the bearing that I wont go into, look it up here at www.hmaservice.com
Side Note: The Elantra dust shield will not fit the 11" rotor but it can be bent and tweaked to fit and it doesnt look bad. In the end I opted for no dust shield.
Step 3: Maintenance
If you planned on replacing anything in that area nows the time. I did lower ball joints, tie rod ends and cv boots on my passenger side axle. I would have done the driver side but there was to much play at the inner joint. I also drained and filled the trans with Red Line MT 90.
Step 4 Reinstall
1: Reinstall your knuckle assembly reverse of the way you took it out.
2: Slap on your re-drilled rotor and check for run out (see "drilling your 4x100 pattern")
3: Place your caliper bracket on the knuckle.
4: Free your brake line from the old caliper and swap it over to your new caliper, use new copper washers.
5: Bleed your brakes.
6: Slap your wheels back on.
If your new brakes look like this when your done then CONGRATS... YOU FAILED STEP 1
Step 5: Alignment
Not gunna go deep on this, you can adjust by eye to get it close enough to drive to an alignment shop, your gunna need it. Your camber and toe will be out.
Drilling your 4x100 pattern
Step 1 Making the Templates
You will need a quality compass and some grid paper and a metric ruler.
***pics coming***
1: Spread your compass open to 50mm
2: Center the point of the compass onto one of the cross lines of the grid and make a circle. Measure it to make sure it is 100mm across with the small hole the compass left in the center (50mm). If your off even one hair start over. Now following the grid lines up an down, left an right from the center you will come across were your circle meets those lines, these are your point for drilling.
3: Adjust the compass to 34.5mm. You are now going to add the rotor hub bore to your pattern. Now the compass I used was in a set of compasses. One had super sharp point at both ends, no lead. I used this to carve out the hub bore hole in the pattern, a perfect circle. Make sure to make 2 patterns, one for each rotor.
**Note** Your hub bore may vary, be sure to check yours.
**Note** Use a hard surface with the compass or it will dig in at the point of rotation throwing you off a bit with a soft surface.
Step 2 Prepping the rotor
1: Lay your pattern over the rotor, I trimmed it up a bunch so I could tape it in place.
2: Center your pattern using the cut out bore hole that i hope you put in your pattern.
3: Use the most open space available for your holes and tape it in place, make sure the paper stays flat and true
4: Using a sharp punch and a hammer mark your 4 holes for drilling
5: Remove the template and inspect your marks. measure them to ensure they are in there proper place. If they are not then correct them. They should be 100mm apart from each other. The other big thing to check is to see how far from the edge of the hub bore they are. They should be 15.5mm apart. If this is not right do not proceed.
Step 3 Drilling
1: Secure the rotor, I used a bench vise with a towel folded several times to protect it, you dont need a ton of pressure to hold it, to much may damage or warp it.
2: I drilled in 3 steps, first a small bit to make the pilot hole, then a 1/4 inch bit then a 12mm bit. That is the size of the lug bolt.
3: Place on your car, first off if it fit congrats you have mad skills with a drill. If you dont have run out on the rotor then you are a god with a compass an drill.
4: If it is super close to fitting then a dremel with a grinding stone may do the trick, ream it out a bit.
5: If your off more then a dremel can handle (or if you dont have a dremel) step the holes up to a 1/2 inch bit, this is just a bit bigger then 12mm.
6: If your off more then that then there is still hope before buying a new rotor, this happened on one of my rears.
Step 4 Runout
More on this later, im out of time for the night

 02-28-2011, 10:14 PM
#4
Senior Member
Thread Starter
Join Date: Apr 2009
Location: Sacramento, CA
Posts: 1,687
Likes: 0
Received 1 Like
on
1 Post
Vehicle: 02 Hyundai Accent
Floyd thanks for making this a sticky, also J1 changed to J2, thanks for that info as im not familiar with Elantra chassis codes. Juanra, i am using 07 accent rims, they are 16's, they might squeeze into a 15 inch rim.
03-01-2011, 06:01 PM
#5
Member
Join Date: Jan 2011
Location: winnibega
Posts: 31
Likes: 0
Received 0 Likes
on
0 Posts
Vehicle: 2005 Hyundai Accent
This is awesome. I'm gonna go source parts at the junkyards this weekend in the snow. Im getting bored here in winterpeg, this should keep me busy for the weekend. thanks for all the great info.
03-03-2011, 08:55 PM
#7
Senior Member
Thread Starter
Join Date: Apr 2009
Location: Sacramento, CA
Posts: 1,687
Likes: 0
Received 1 Like
on
1 Post
Vehicle: 02 Hyundai Accent
Give me your inside diameter of your rim and I will measure that up against my set up but I can tell ya now it is gunna be real tight in there.
03-03-2011, 09:26 PM
#8
Senior Member
Thread Starter
Join Date: Apr 2009
Location: Sacramento, CA
Posts: 1,687
Likes: 0
Received 1 Like
on
1 Post
Vehicle: 02 Hyundai Accent
***FYI***
I did some hard cornering last night for the first time and there are some issues but it should only effect Beta swapped LC's that also used the Beta trans, so that is what, basically just me lol. The issue is the same thing I dealt with when I first did the beta swap so I recognized it right away, axle binding!!! This is when the axle is a bit to long and during cornering the axle will only flex to a point before it starts shoving the engine/trans assembly. FUUUUUUCK!!! I will have to double check but i believe the hubs protruded a bit past the bearing on the assembly I put together were the axle comes in. I may be able to shave a bit off the hub if this is the case allowing a bit more room for the axle. Look for an update on this.
I did some hard cornering last night for the first time and there are some issues but it should only effect Beta swapped LC's that also used the Beta trans, so that is what, basically just me lol. The issue is the same thing I dealt with when I first did the beta swap so I recognized it right away, axle binding!!! This is when the axle is a bit to long and during cornering the axle will only flex to a point before it starts shoving the engine/trans assembly. FUUUUUUCK!!! I will have to double check but i believe the hubs protruded a bit past the bearing on the assembly I put together were the axle comes in. I may be able to shave a bit off the hub if this is the case allowing a bit more room for the axle. Look for an update on this.
03-05-2011, 05:50 PM
#9
Senior Member
Thread Starter
Join Date: Apr 2009
Location: Sacramento, CA
Posts: 1,687
Likes: 0
Received 1 Like
on
1 Post
Vehicle: 02 Hyundai Accent
Time for an update, I have found a fix for my axle issue. For the driver (left) side I have ordered an axle from a 98 Accent 1.5L sohc automatic axle. Compressed over all length is 24 an 3/16 of an inch. My current axle on that side is a 02 Accent 1.6L auto axle at a length of 24 an 5/8. This is deceiving however cause there is a differance between auto an manual axles in this year range of Hyundais.
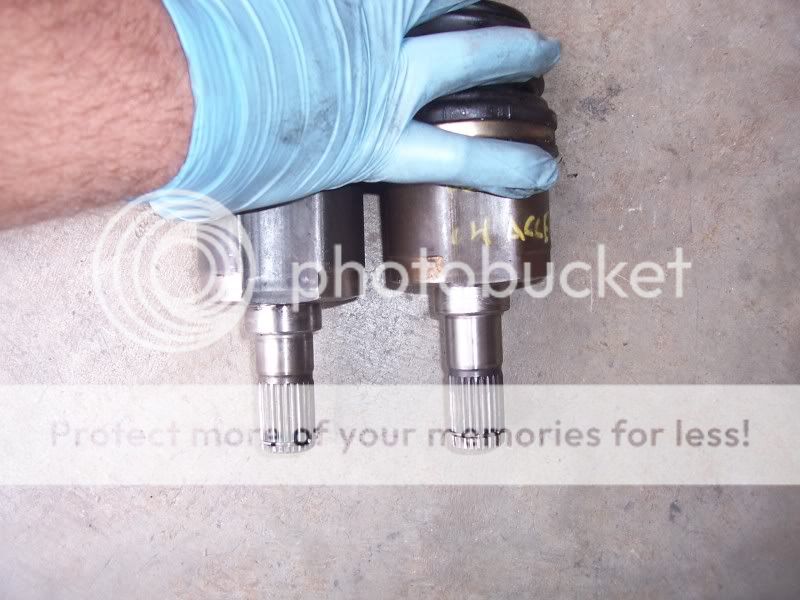
So the passenger (right) side axle I did get today from a 02 Accent 1.6L auto. Overall compressed length on that axle is 35 an 11/16. overall length on my 1.5L sohc manual axle is also 35 an 11/16. The difference that makes the 1.6L auto axle shorter is the spline end that goes into the transmission, its longer by 9mm. Sounds crazy I know but basically the axle is shorter because 9mm more of that over ll length goes into the trans, shortening the axle in essence by 9mm. Check the pics
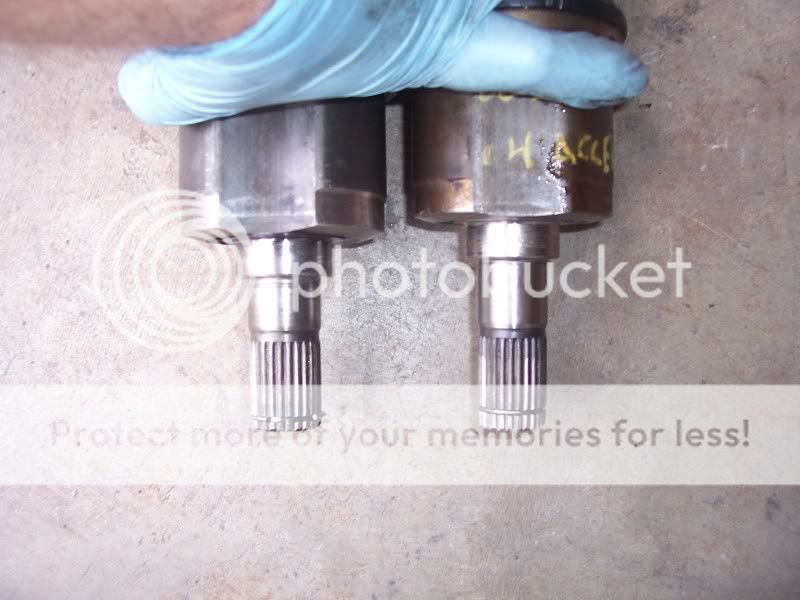
The spline length difference is seen here, 1.5L manual on the left an 1.6 auto on the right. This also means the longer spline will lock into your beta trans.
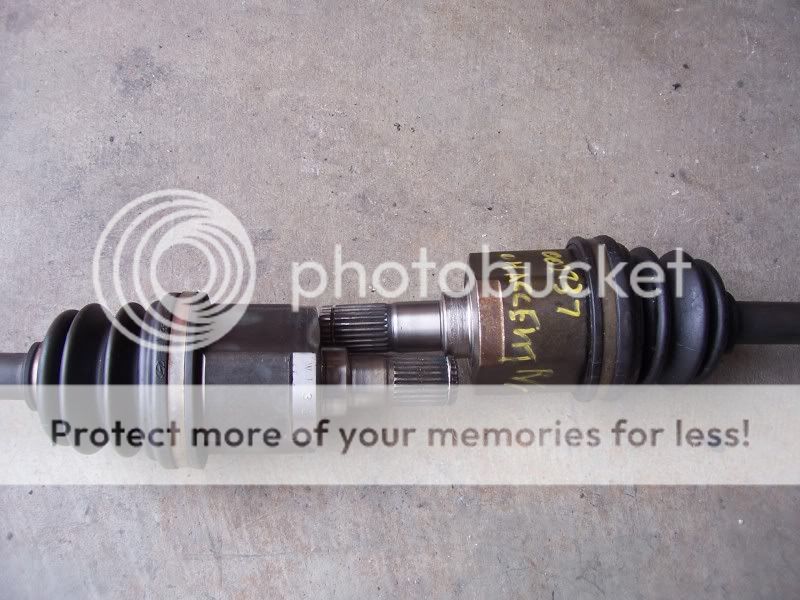
The threaded axle nut end is all the same.
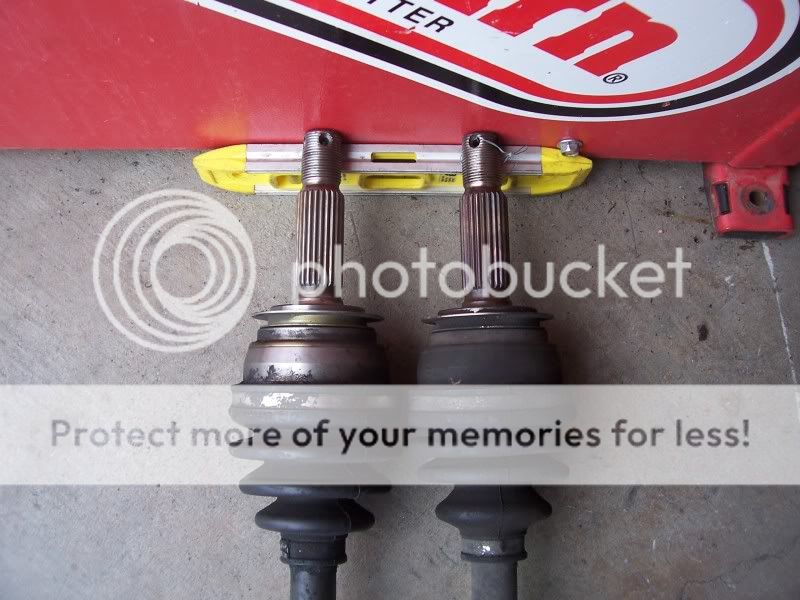
With the axles compress you can see that the 1.6L auto axle on the right is 9mm shorter at the mating surface but equal at the end if the spline.
When inserted into the tranny the length is now based at the mating surface not the end of the spline, now I have a axle that is 9mm shorter.
I am hoping that the spline difference between auto an manual is the same with the X3 Accents making my driver side axle much shorter then what im using now, I should have it monday or tuesday so i will know soon.
So the passenger (right) side axle I did get today from a 02 Accent 1.6L auto. Overall compressed length on that axle is 35 an 11/16. overall length on my 1.5L sohc manual axle is also 35 an 11/16. The difference that makes the 1.6L auto axle shorter is the spline end that goes into the transmission, its longer by 9mm. Sounds crazy I know but basically the axle is shorter because 9mm more of that over ll length goes into the trans, shortening the axle in essence by 9mm. Check the pics
The spline length difference is seen here, 1.5L manual on the left an 1.6 auto on the right. This also means the longer spline will lock into your beta trans.
The threaded axle nut end is all the same.
With the axles compress you can see that the 1.6L auto axle on the right is 9mm shorter at the mating surface but equal at the end if the spline.
When inserted into the tranny the length is now based at the mating surface not the end of the spline, now I have a axle that is 9mm shorter.
I am hoping that the spline difference between auto an manual is the same with the X3 Accents making my driver side axle much shorter then what im using now, I should have it monday or tuesday so i will know soon.
03-27-2011, 05:38 PM
#10
Senior Member
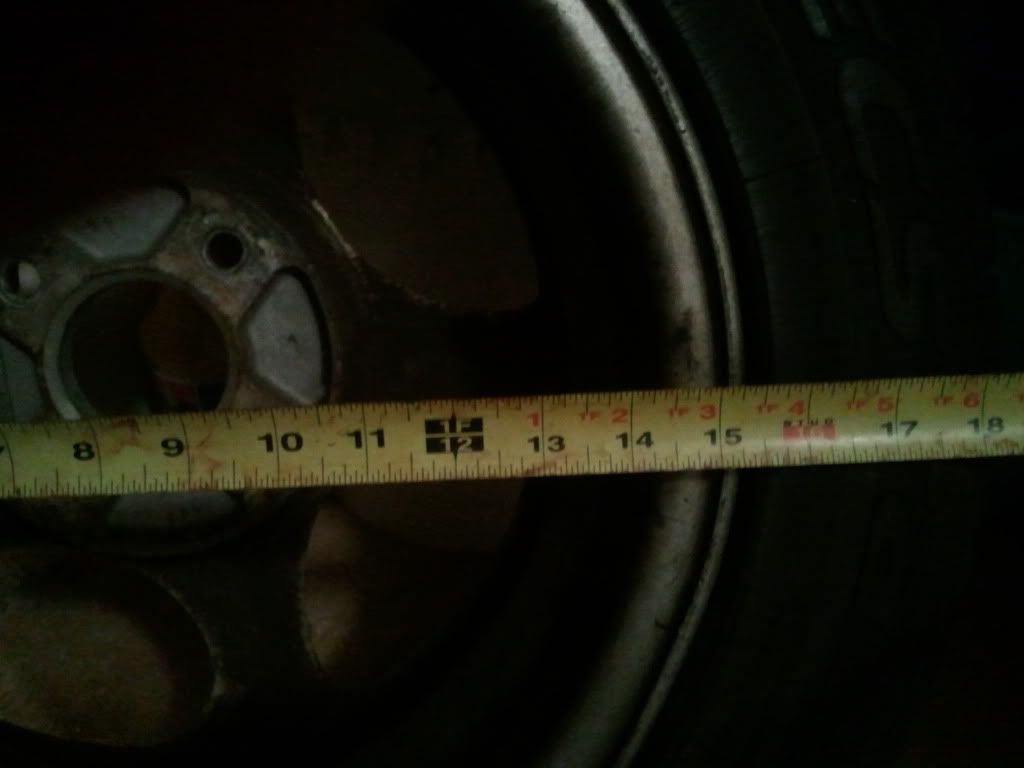
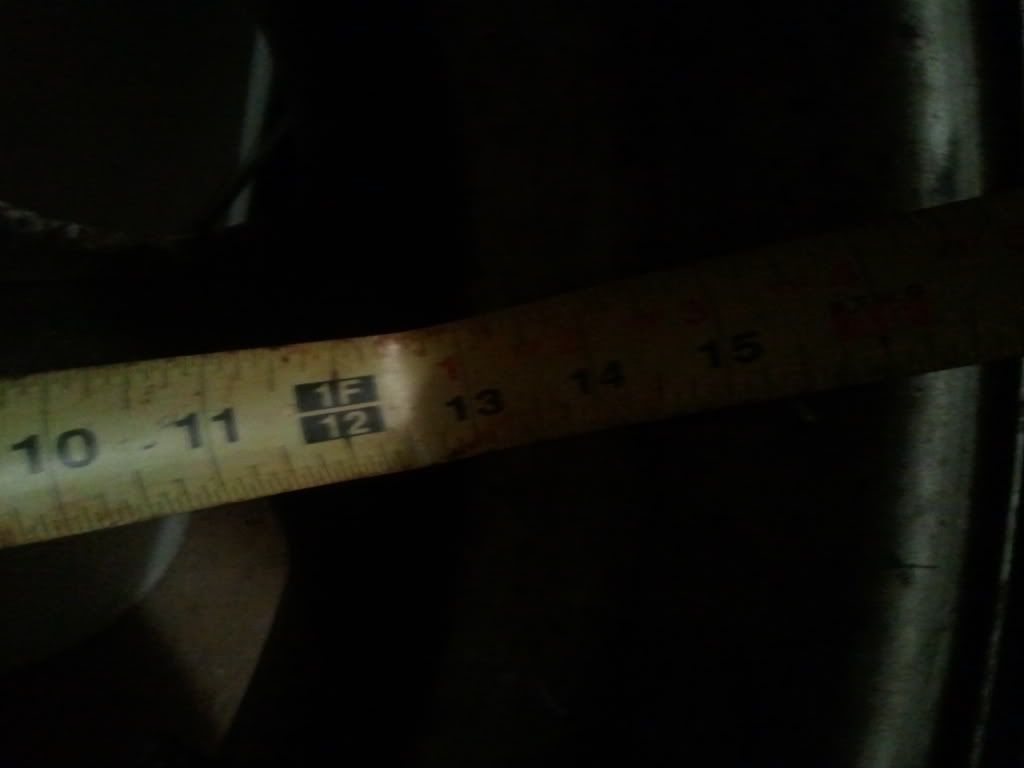
The diameter of the 15" 1999 Tiburon FX wheels is 14.5"in the outside, the inside is 13" and taken from the front, center to 6.5"...