Diy: Rd2 Hvac Knobs In Rd1 Dash
 04-24-2006, 05:13 PM
#1
Senior Member

Thread Starter

Join Date: Jul 2004
Location: Mississauga, ON and Long Island, NY
Posts: 4,868
Likes: 0
Received 0 Likes
on
0 Posts
Tools needed:
- Bench grinder or dremel
- Scissors
- Turbulence HVAC knobs from kspec.com http://kspec.com/list.php?ac_id=91&ai_id=412 http://kspec.com/list.php?ac_id=91&ai_id=413 (You'll need 2 smalls and 1 big, for a total of $24. You can also check junkyards for these)
Step 1.
Take apart entire dash. Remove HVAC control unit from dash.
This is what you should have in front of you:
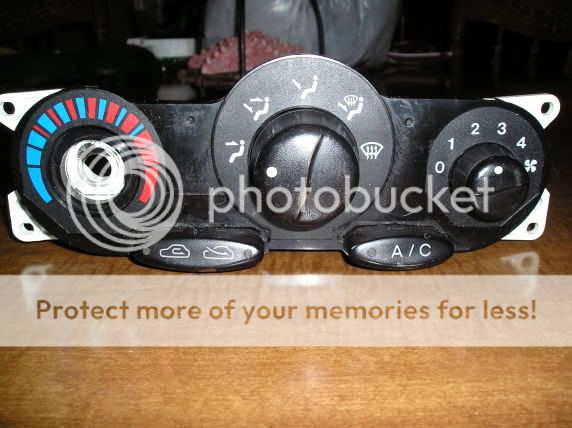
Make sure you take out the heat dial arm too.
Step 2.
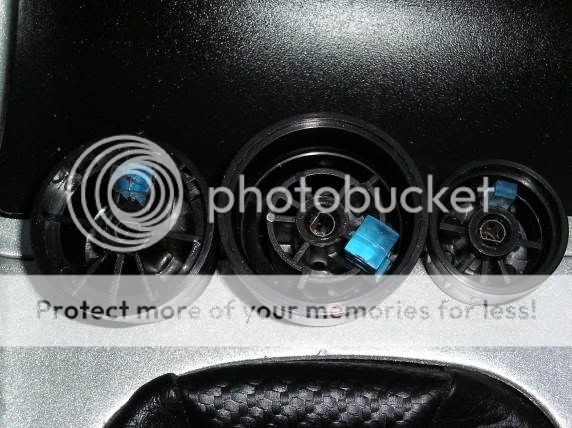
Remove stock black knobs and replace with RD2 knobs. You can see that the RD2 knobs stick out way too far from the face of the HVAC panel. This is a problem. The main reason for this is that with the stock black knobs, the little mounting "nub" on the back that you slide into the metal post sits deep into the knob so that it can sit flush with the HVAC panel. With the RD2 knobs, the mounting "nub" on the back is right a the edge and isnt as deep. So when you stick it onto the long metal post, it sits on the end of the post.
Comparision:
Stock
RD2
So what you have to do is shorten the metal posts so that when you stick the RD2 knobs on them, they sit flush with the HVAC panel.
Step 3.
With the RD2 knobs still on the metal posts, figure out how much of the posts you need to grind off. I did this by trial and error. I would grind a little bit, then put the RD2 knobs on to see how they fit until I finally got it how I wanted. I felt this was the best way to do it because I didn't wanna grind down too much. Then you would be completely screwed. I think it's better to take your time.
To grind the metal posts down I used this old bench grinder here:

I'm sure a dremel or similar tool would work just as well but I liked the bench grinder because I felt it was easy to work with and accurate.
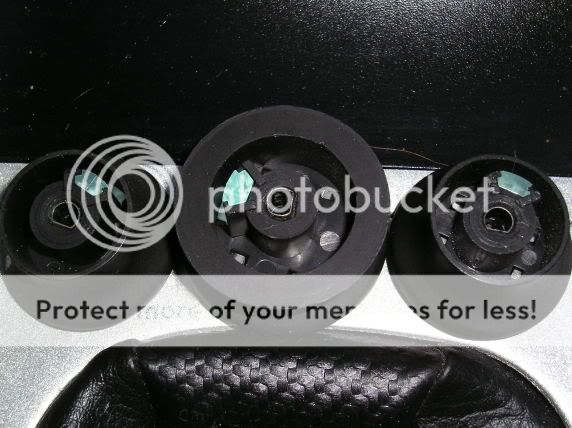
Here's the length of the stock metal posts:

and after they were ground down, you can see how much shorter they are:

Step 4.
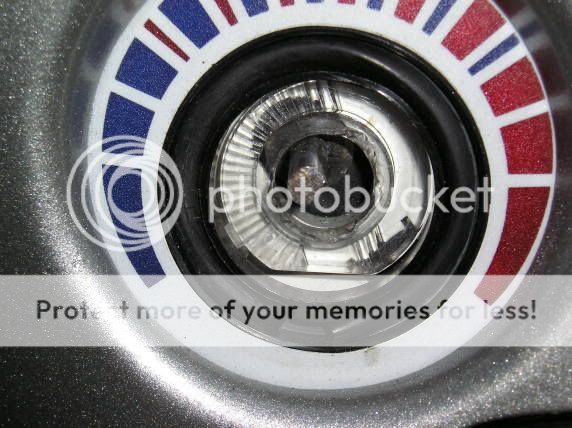
After you have tested the RD2 knobs for fitment and are happy with how they look, you will notice that theres a little bit of a gap between the dial faces and the base of the knobs. To solve this, I needed something black to fill the gap so you wouldn't see it. I ended up using the rubber rings from extra headlight caps that I had laying around.
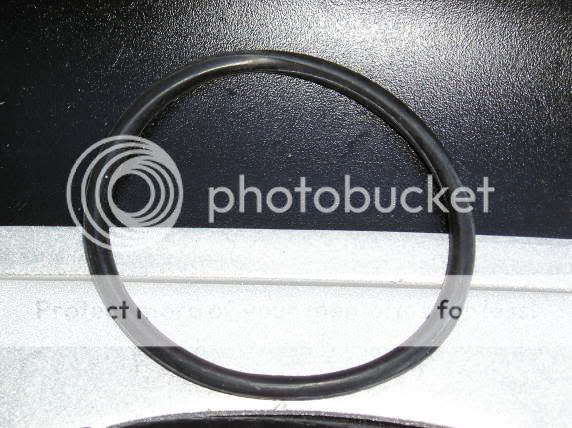

These worked perfectly. If you don't have any extras, you could also use black rubber bracelets that those goth girls wear, I've seen them in stores like Hot Topic. They're pretty much the same thing, same size. You could also probably use a wide rubber band although I dont think that would look as good. Or maybe you could fill it with black silicone or something. I'm sure there's lots of ways you could fill it.
So what I did was shove the rubber rings into the gaps and then stuck the knobs back on to make sure it looks right. I had to cut the rings a little bit so they would fit in there.

I did this after I reinstalled the HVAC panel and the dash. If you wanna see how it looks before you put the dash back together, do this step first. Otherwise put the dash back together and then shove the rings in there.
So at this point this is what it should look like:
Now stick the RD2 knobs on there and here's your final product:
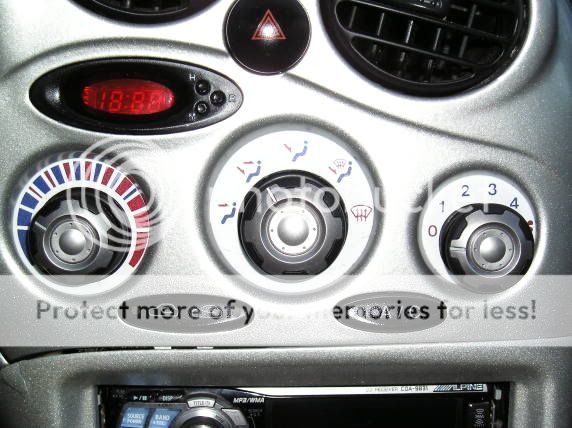

Looks MUCH better, in my opinion.
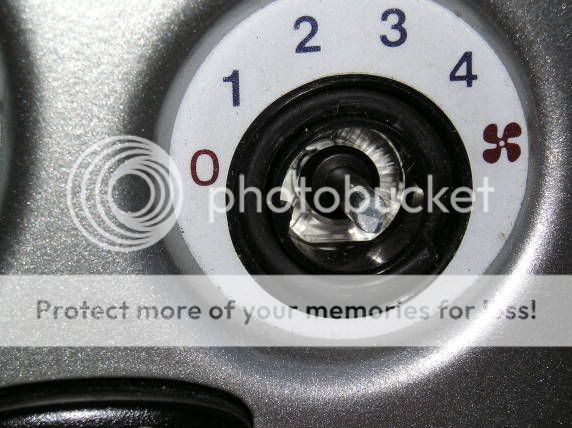
The only little problems I have found is that the little blue lighted indicator strips on the RD2 knobs do not line up excatly where the should. The heat adjustment knob is pretty much upside down. The middle knob is almost dead on. The speed knob (right) is very close (you can see 2 pictures off that when this knob is at the off position, it should be sitting at 0 but instead is sitting right below it. You can still tell where's its pointing to though). This doesn't bother me though and unless you're a real nitpicker it shouldn't be a big deal for you either. The only way I could think of to fix this is, well the metal post isnt circular, its kinda like a half circle so it fits into the knob. I don't remember specifically but when you grind down the posts you might grind it down far enough that the original half circle is gone and you are left with a circle. If thats the case you might be able grind a new half circle in the right location so that the knob sits on it in the correct position. But again I'm not sure if you grind down enough of the original post. You'd have to see after you grind it down.
But otherwise, the knobs work fine. They do turn a little bit slower because they are a little tighter than the stock knobs. But I've had these installed for about a year now with no problems, no complaints. Although my boyfriend did pull the temp control knob off cause he turned it too fast and with too much force, lol.
Overall this was a pretty easy mod as long as you have some sort of grinding tool. Like I said just be careful not to grind the posts down too much.
Any questions or comments, let me know. Hopefully this is useful to somebody laugh.gif
- Bench grinder or dremel
- Scissors
- Turbulence HVAC knobs from kspec.com http://kspec.com/list.php?ac_id=91&ai_id=412 http://kspec.com/list.php?ac_id=91&ai_id=413 (You'll need 2 smalls and 1 big, for a total of $24. You can also check junkyards for these)
Step 1.
Take apart entire dash. Remove HVAC control unit from dash.
This is what you should have in front of you:
Make sure you take out the heat dial arm too.
Step 2.
Remove stock black knobs and replace with RD2 knobs. You can see that the RD2 knobs stick out way too far from the face of the HVAC panel. This is a problem. The main reason for this is that with the stock black knobs, the little mounting "nub" on the back that you slide into the metal post sits deep into the knob so that it can sit flush with the HVAC panel. With the RD2 knobs, the mounting "nub" on the back is right a the edge and isnt as deep. So when you stick it onto the long metal post, it sits on the end of the post.
Comparision:
Stock
RD2
So what you have to do is shorten the metal posts so that when you stick the RD2 knobs on them, they sit flush with the HVAC panel.
Step 3.
With the RD2 knobs still on the metal posts, figure out how much of the posts you need to grind off. I did this by trial and error. I would grind a little bit, then put the RD2 knobs on to see how they fit until I finally got it how I wanted. I felt this was the best way to do it because I didn't wanna grind down too much. Then you would be completely screwed. I think it's better to take your time.
To grind the metal posts down I used this old bench grinder here:
I'm sure a dremel or similar tool would work just as well but I liked the bench grinder because I felt it was easy to work with and accurate.
Here's the length of the stock metal posts:
and after they were ground down, you can see how much shorter they are:
Step 4.
After you have tested the RD2 knobs for fitment and are happy with how they look, you will notice that theres a little bit of a gap between the dial faces and the base of the knobs. To solve this, I needed something black to fill the gap so you wouldn't see it. I ended up using the rubber rings from extra headlight caps that I had laying around.
These worked perfectly. If you don't have any extras, you could also use black rubber bracelets that those goth girls wear, I've seen them in stores like Hot Topic. They're pretty much the same thing, same size. You could also probably use a wide rubber band although I dont think that would look as good. Or maybe you could fill it with black silicone or something. I'm sure there's lots of ways you could fill it.
So what I did was shove the rubber rings into the gaps and then stuck the knobs back on to make sure it looks right. I had to cut the rings a little bit so they would fit in there.
I did this after I reinstalled the HVAC panel and the dash. If you wanna see how it looks before you put the dash back together, do this step first. Otherwise put the dash back together and then shove the rings in there.
So at this point this is what it should look like:
Now stick the RD2 knobs on there and here's your final product:
Looks MUCH better, in my opinion.
The only little problems I have found is that the little blue lighted indicator strips on the RD2 knobs do not line up excatly where the should. The heat adjustment knob is pretty much upside down. The middle knob is almost dead on. The speed knob (right) is very close (you can see 2 pictures off that when this knob is at the off position, it should be sitting at 0 but instead is sitting right below it. You can still tell where's its pointing to though). This doesn't bother me though and unless you're a real nitpicker it shouldn't be a big deal for you either. The only way I could think of to fix this is, well the metal post isnt circular, its kinda like a half circle so it fits into the knob. I don't remember specifically but when you grind down the posts you might grind it down far enough that the original half circle is gone and you are left with a circle. If thats the case you might be able grind a new half circle in the right location so that the knob sits on it in the correct position. But again I'm not sure if you grind down enough of the original post. You'd have to see after you grind it down.
But otherwise, the knobs work fine. They do turn a little bit slower because they are a little tighter than the stock knobs. But I've had these installed for about a year now with no problems, no complaints. Although my boyfriend did pull the temp control knob off cause he turned it too fast and with too much force, lol.
Overall this was a pretty easy mod as long as you have some sort of grinding tool. Like I said just be careful not to grind the posts down too much.
Any questions or comments, let me know. Hopefully this is useful to somebody laugh.gif


 05-05-2006, 11:01 AM
#9
Senior Member

Join Date: May 2005
Location: Chicago, IL
Posts: 1,141
Likes: 0
Received 0 Likes
on
0 Posts
Just got my radio surround painted silver from Kayjay. Now, if I can find a set of RD2 knbos, I'll work on this project next. I think it will do wonders for the interior.
Thanks
Aviv
Thanks
Aviv
05-05-2006, 11:17 AM
#10
Senior Member

Join Date: May 2005
Location: Ohio, USA
Posts: 1,931
Likes: 0
Received 0 Likes
on
0 Posts
<div class='quotetop'>QUOTE (guido @ May 5 2006, 10:39 AM) <{POST_SNAPBACK}></div><div class='quotemain'>it makes me sooo hott hail.gif</div>
Im goin to have to say that was just a little too much information getout.gif ban2.gif
Im goin to have to say that was just a little too much information getout.gif ban2.gif