Diy: Change Struts
 03-06-2006, 07:03 PM
#1
Moderator


Thread Starter

I left a dust boot off of the strut when i put them on last time, so I decided to do this diy while replacing the dust boot.
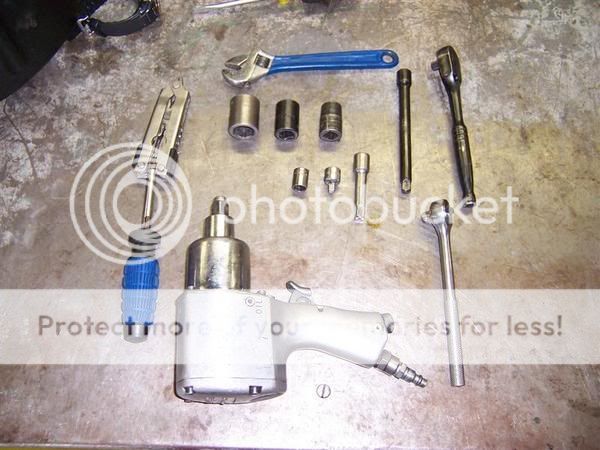
You will need:
ratchet set
philips screw driver
adjustable wrench
pliers
impact wrench recommended
Corona w/lime (not pictured)
<span style="font-size:14pt;line-height:100%">Remove rear strut</span>
1. remove storage net and rear hatch cover

2. remove 5 philips screws securing rear strut cover trim
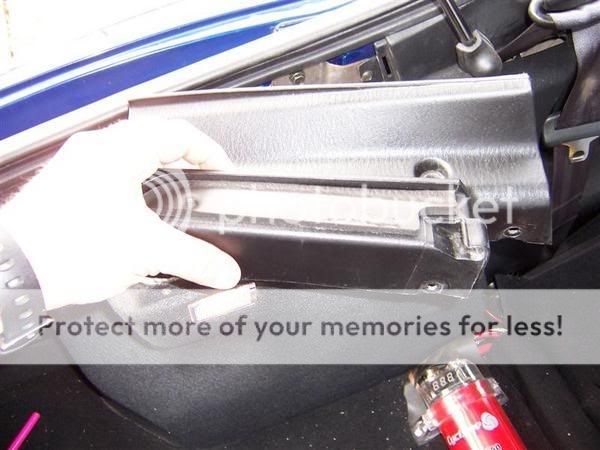
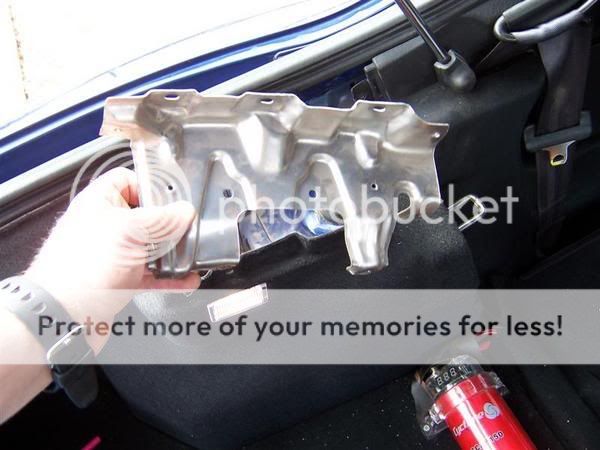
3. remove 2 philips screws and 3 10mm bolts securing strut cover
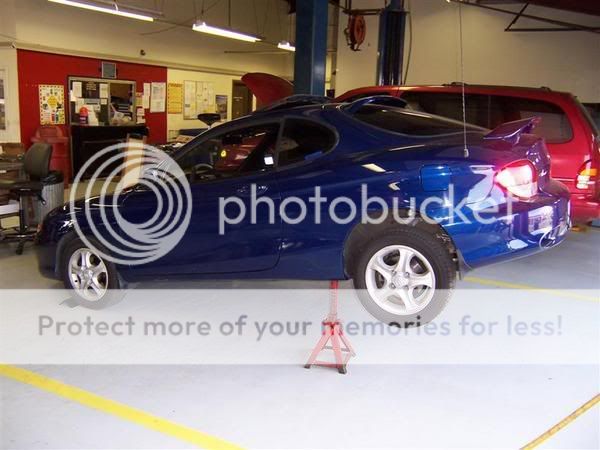
4. jack your vehical up
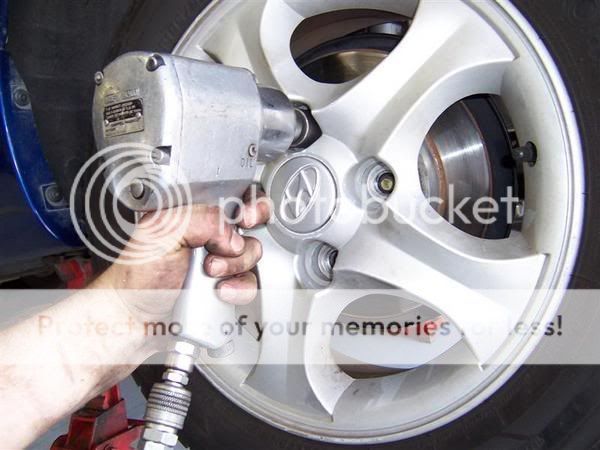
5. remove 4 13/16 lug nuts
6. remove 1 14mm nut from sway bar ball joint
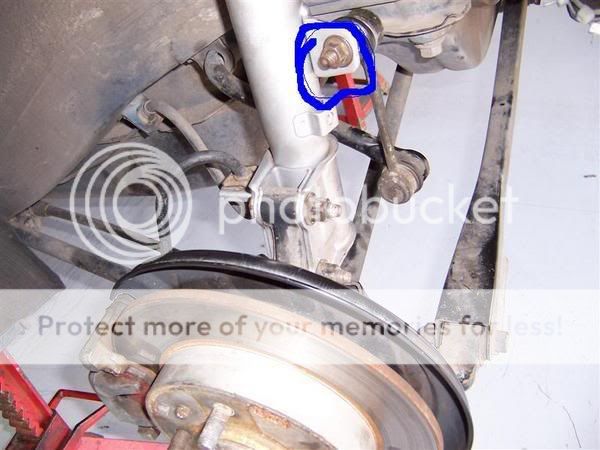
note: if nut will not turn at first, use a crescent wrench or needle nose vice grips on the back side of the joint, at the end of the boot.
7. loosten 2 17mm nuts from bolts.
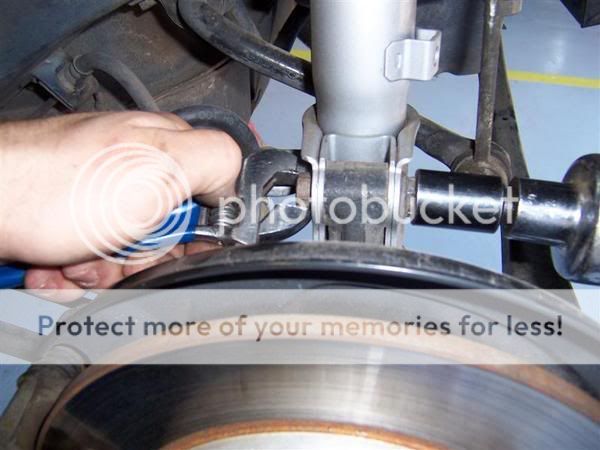
note: leave bolts in place
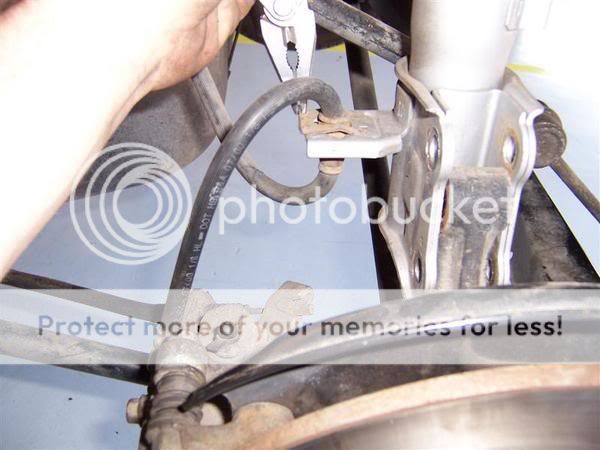
8. using a pair of pliers, remove the retainer clip from the brake line and move brake line out of the way.
9. remove 2 bolts from bottom of strut and allow to hang
10. remove 3 12mm or 14mm nuts from the top of the strut
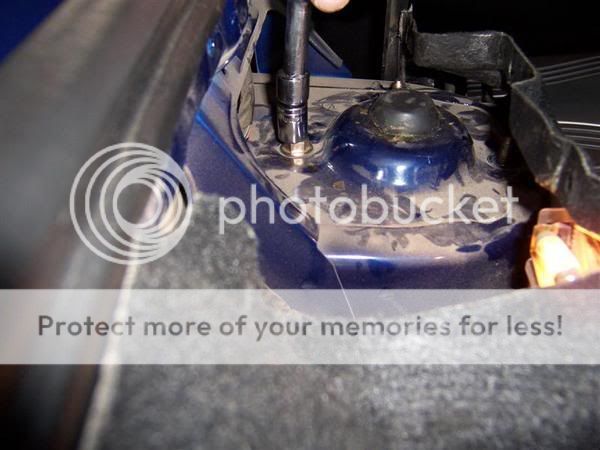
11. remove strut from vehical

<span style="font-size:18pt;line-height:100%">Change strut cartridge</span>
12. place strut in spring compressor and compress spring
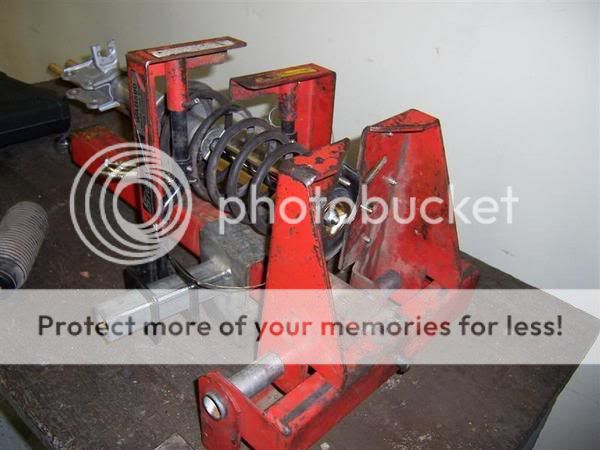
13. remove 17mm bolt from top of spring.
note: basically, here in the next steps you should make the new one look just like the old one did, just newer smile.gif
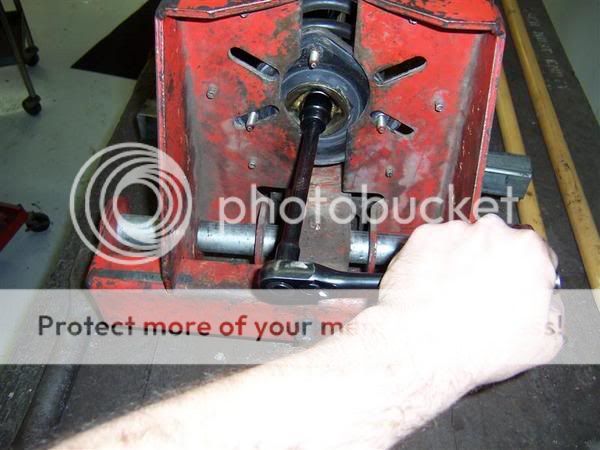
14. slide strut out from spring
15. place rubber portion and dust boot from old strut assy onto new strut assy
16. place new strut in spring/upper strut assy
17. ratchet new nut on top of new strut
18. decompress strut
note: ensure that the rubber portion of the upper strut assy lines up with the metal portion and that the spring lines up with the rubber portion. Everything should fit tightly and but up against edges.
<span style="font-size:18pt;line-height:100%">Replace rear strut</span>
19. replace strut
<span style="font-size:18pt;line-height:100%">Installation is the reverse of removal</span>
You will need:
ratchet set
philips screw driver
adjustable wrench
pliers
impact wrench recommended
Corona w/lime (not pictured)
<span style="font-size:14pt;line-height:100%">Remove rear strut</span>
1. remove storage net and rear hatch cover
2. remove 5 philips screws securing rear strut cover trim
3. remove 2 philips screws and 3 10mm bolts securing strut cover
4. jack your vehical up
5. remove 4 13/16 lug nuts
6. remove 1 14mm nut from sway bar ball joint
note: if nut will not turn at first, use a crescent wrench or needle nose vice grips on the back side of the joint, at the end of the boot.
7. loosten 2 17mm nuts from bolts.
note: leave bolts in place
8. using a pair of pliers, remove the retainer clip from the brake line and move brake line out of the way.
9. remove 2 bolts from bottom of strut and allow to hang
10. remove 3 12mm or 14mm nuts from the top of the strut
11. remove strut from vehical
<span style="font-size:18pt;line-height:100%">Change strut cartridge</span>
12. place strut in spring compressor and compress spring
13. remove 17mm bolt from top of spring.
note: basically, here in the next steps you should make the new one look just like the old one did, just newer smile.gif
14. slide strut out from spring
15. place rubber portion and dust boot from old strut assy onto new strut assy
16. place new strut in spring/upper strut assy
17. ratchet new nut on top of new strut
18. decompress strut
note: ensure that the rubber portion of the upper strut assy lines up with the metal portion and that the spring lines up with the rubber portion. Everything should fit tightly and but up against edges.
<span style="font-size:18pt;line-height:100%">Replace rear strut</span>
19. replace strut
<span style="font-size:18pt;line-height:100%">Installation is the reverse of removal</span>

 03-07-2006, 07:07 PM
#3
Moderator
Thread Starter
the shop i use services every type of vehical there is. They only have multipurpose tools, for impact guns they have adjustable ones that can do Semi's wheels or tiburon's wheels smile.gif
You don't need to get an alignment unless you bump or bend something in the tib, they're all fixed bolt-on points. As long as everything still lines up right your alignment will be right on.
You don't need to get an alignment unless you bump or bend something in the tib, they're all fixed bolt-on points. As long as everything still lines up right your alignment will be right on.
 07-30-2007, 10:13 PM
#5
Senior Member

Join Date: Feb 2009
Location: Boston
Posts: 1,932
Likes: 0
Received 0 Likes
on
0 Posts
Vehicle: 2006 Pontiac GTO
Thought it would be handy to have the tightening torque info here as well. If someone remembers them please take a look to check if they look ok!
Numbers are the same for front and rear unless specified.
Bolt in step 6 (sway bar joint): 35-45 Nm (25-33 lbft)
The 2 bolts in step 7 (2 nuts): 110-130 Nm (80-94 lbft)
Upper strut nuts (step 10): Front: 40-50 Nm (29-36 lbft) Rear: 20-30 Nm (14-22 lbft)
Central strut self-locking nut: 60-70 Nm (43-51 lbft)
Related question -- I need to change my upper mount for a front strut, I can hear clunking noises when going over bumps while steering. Is there anything special to do, other than just taking the old mount out and putting the new one back in? Do you need to grease anything or something?
Also, in step 13 - doesn't the shock rotate when you try to loosen the top nut? Do you have to hold it with something? If only those spring compressor clamps are available, would it help putting the clamps before removal and loosening the top nut with the strut still on the car?
 07-31-2009, 08:33 PM
#7
Senior Member

Join Date: Mar 2009
Location: Pa
Posts: 1,014
Likes: 0
Received 0 Likes
on
0 Posts
Vehicle: 2000 Hyundai Tiburon
<div class='quotetop'>QUOTE (radu_rd2 @ Jul 31 2007, 12:13 AM) <{POST_SNAPBACK}></div><div class='quotemain'>Upper strut nuts (step 10): Front: 40-50 Nm (29-36 lbft)</div>
yes
yes