Window & Sunroof Relay Diy
 10-30-2005, 02:18 PM
#1
Senior Member

Thread Starter
Join Date: Mar 2002
Location: Los Lunas, New Mexico, USA.
Posts: 34,642
Likes: 0
Received 0 Likes
on
0 Posts
Vehicle: 2001 Hyundai Tiburon, 2004 Kia Sorento, 2010 Kia Soul
Okay, here's the thread where I first talked about them after installed.
http://www.rdtiburon.com/index.php?showtopic=7393&st=0
CLICK ON ANY PICTURES TO VIEW THEM LARGER. Or HUGER as may be. These are with my old camera.
If you know what you are doing, this is simple.
The WINDOW Relays are the ones in the Greenish box.
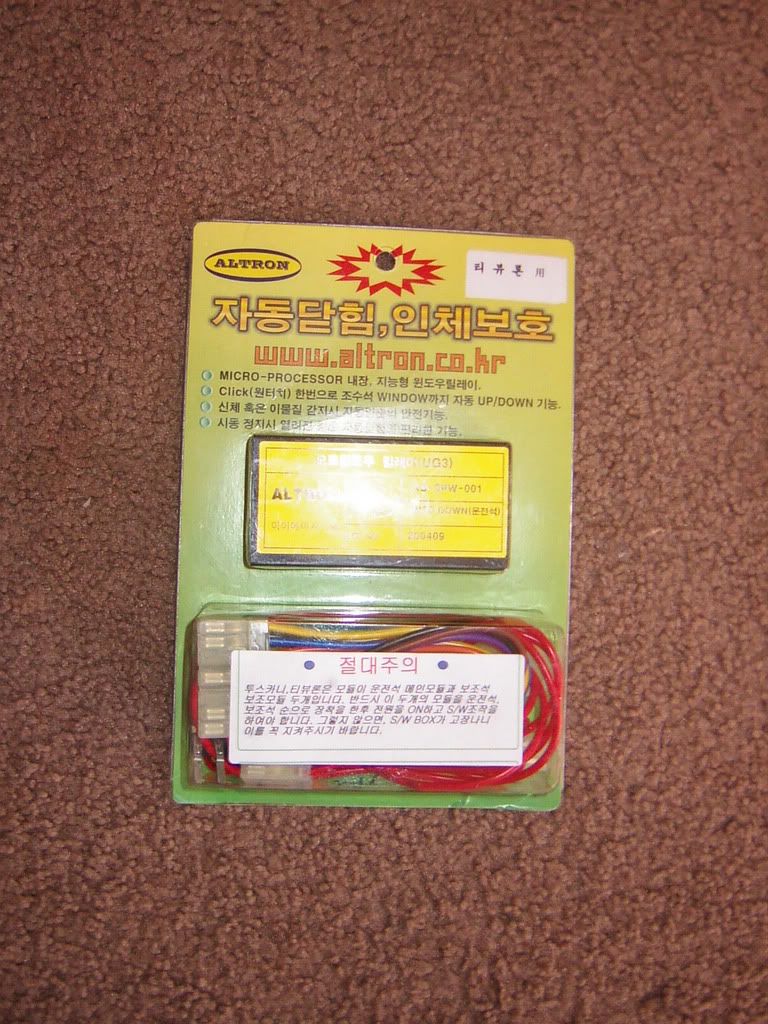
The SUNROOF relays are in the BLUISH box.
The WINDOW relays are very easy to install.
This requires a large and small Phillips screwdriver and a wire cutter. You also may need an inline fuse holder and a 30 amp fuse.
1. Remove both door panels.
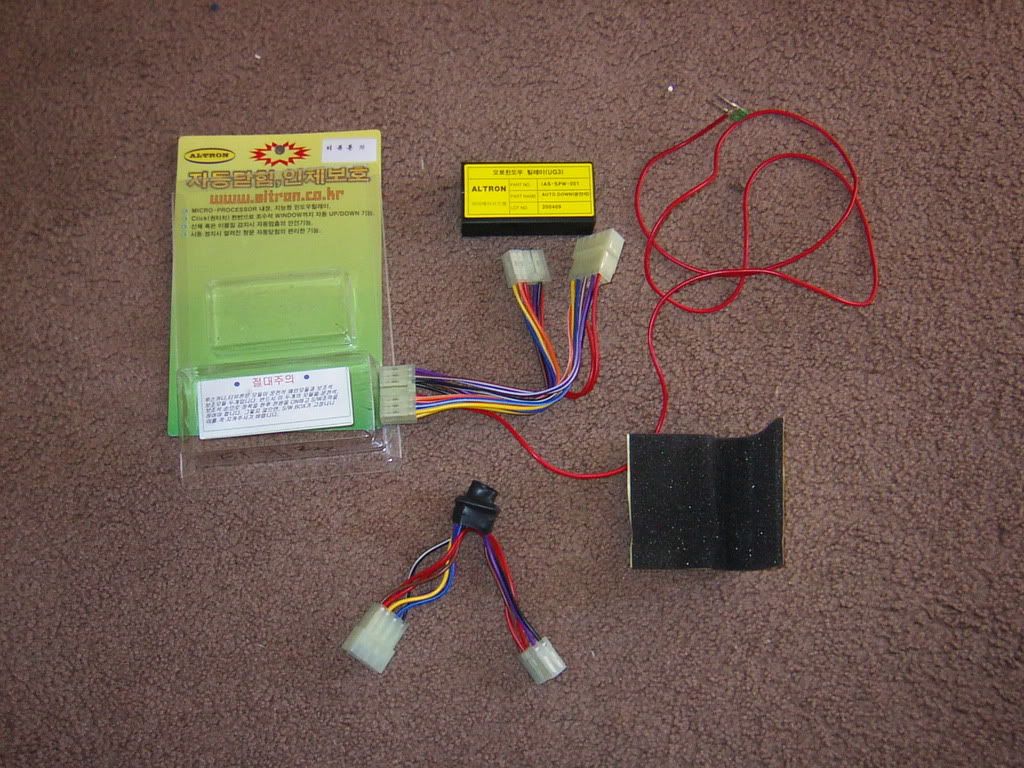
2. Wrap self adhesive foam around relay box.
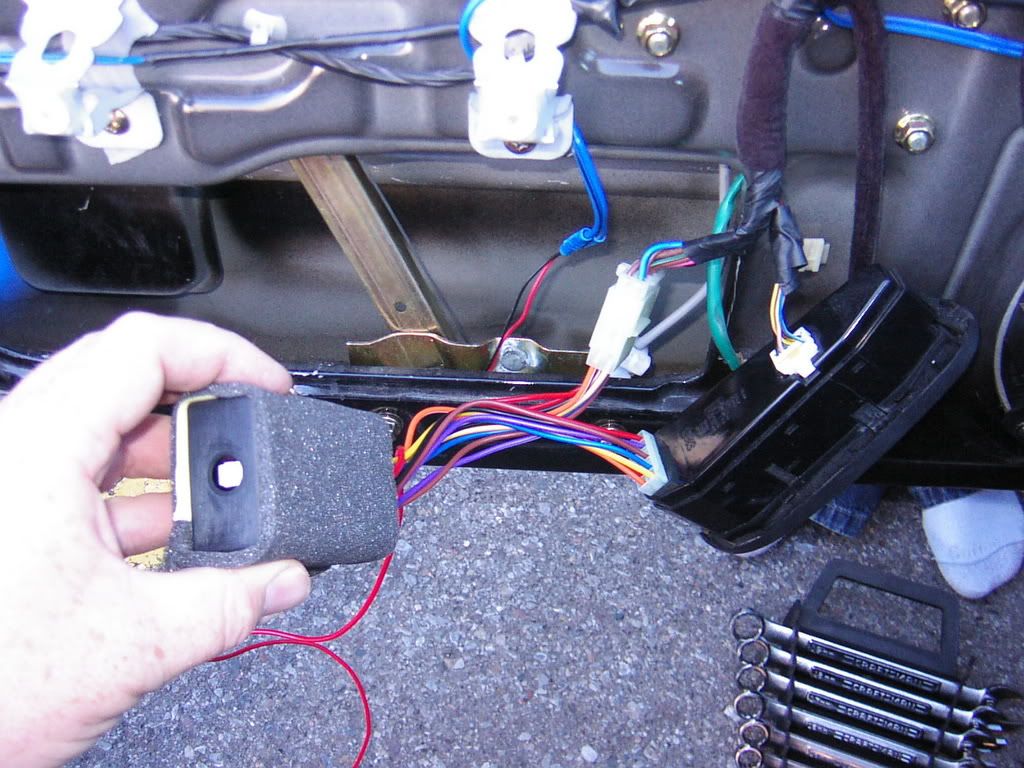
3. Plug the relay harness into the OEM harness on the door (Remove the switch assy from the door panel) and to the switch. See above picture.
4. Plug in the wiring harness to the relay. Only one end will fit into any of the plugs. See above picture.
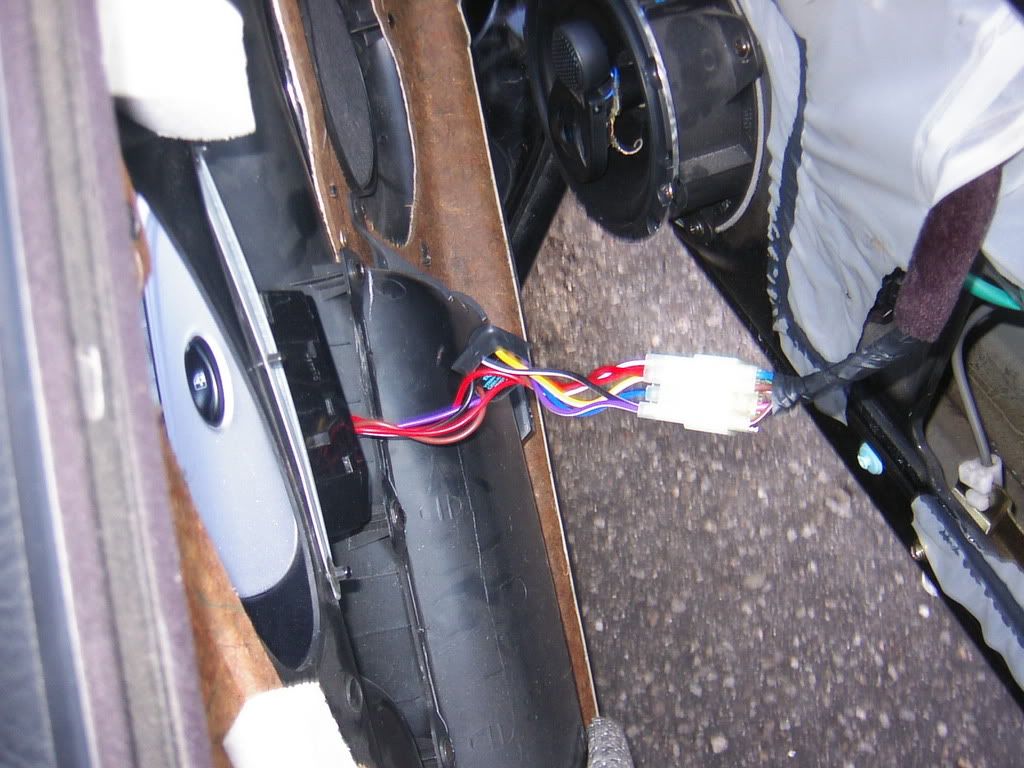
5. Plug the SMALLER wiring harness inbetween the switch and OEM harness on the passenger side.
6. Run the RED power wire around the outside of the car (door open, hood open) to the battery and temporarily connect.
(AT THIS POINT EVERYTHING SHOULD BE PLUGGED IN AND CONNECTED.)
7. Turn ignition to ON, but don't start the car.
8. Quickly push the drivers side window button to the down position for about .5 second. Watch the window go down on it's own. If it doesn't, you held it too long or for too short. I push mine to the FULL down positon and let go.
9. Push the drivers window button UP for approx .5 seconds, watch it go all the way up.
Repeat steps 8 & 9 for the passenger window (Only works from the DRIVERS switch set).
10. Click both switches on drivers side down for .5 second and watch both go down at once.
11. Switch engine off. Both windows should go all the way back up on their own after about 2 seconds.
NOTE!!!
If the passenger one doesn't go all the way up, don't panic. Look at the relay box, you'll note there is a hole on the side with a white phillips "Pot" adjustment on it.
Take a small phillips head screwdriver and adjust it slowly. Be careful when adjusting, if you break it, we are not responsible. It should turn very easily. If it doesn't turn, try the opposite direction. This "Pot" adjustment will adjust the amount of resistance the system allows before it stops trying to close the window. So make about a 1/2 turn adjustment, turn the ignition back on, and repeat steps 10 and 11. Repeat this process until the windows go all the way up on their own after you turn the ignition off.
12. With ignition off, pull the power wire back off for the relay and cut the fuze off. You now need to feed the power wire thru the inside of the door assy, making sure it won't get caught in any moving parts. Feed it forward to the edge of the door and either thru the stock wire passage (EXTREMELY HARD TO GET THRU), or go down about 4 inches and cut a hole thru the small plastic grommet there. Feed it down thru the grommet in the door frame and give the wire enough slack for opening and closing the door. After the wire is in the fuse compartment area, just feed it thru the firewall into the engine bay. (YES, YOU COULD CONNECT THIS INSIDE SOMEWHERE, BUT REMEMBER, IT NEEDS A LOT OF POWER. 30 AMPS, AND IT HAS TO BE CONTINUOUS)
13. With the wire in the engine bay, make sure to run it in a manner to keep it away from VERY hot items and anything moving. Run the wire to your battery but do not connect it yet. At this point you can either try to find a way to use the fuse that came with it, or get one of those inline fuse holders and a 30 amp fuse for it. Connect to your battery. (I crimped mine on a ring terminal and put it on one of my spare battery posts.)
14. Reverify that everything is working via steps 10 and 11.
15. Reinstall passenger door panel. After panel is on, do steps 10 and 11 for the passenger side again.
16. Reinstall drivers door panel. Be VERY carefull as to where the lengthened wires go and where you put the relay box.
17. Re test steps 10 and 11 a few more times. Just to make sure everything is working and nothing is scraping or getting in the way.
18. Enjoy.
I super simplified this, so it shouldn't be any issues. Make sure you do the testing or you may not get everything right. The adjustments are easy, and it only took me one try to get it adjusted.
Although I haven't tested it, these are supposed to also STOP closing and go back down if something interfears with them. So watch your car when you walk away to make sure someone doesn't try to get their arm in the way. It'll go back up in 30 seconds, but just for peace of mind, make sure they go all the way up. You also want to make sure not to walk off for the first 20 to 30 times you use this, as your passenger side may need to be adjusted.
I've had NO problems with mine at all, and they've been installed and USED for over 8 months now.
SUNROOF.
This one is perty easy, and requires you to cut one wire.
You need a set of wire cutters and a large phillips screwdriver, you also need a very thin flat head screwdriver and a small flashlight.
1. Turn off the sunroof door lights.
2. Remove the light lenses, you'll see a slot where you can use the flat headed screwdriver to do this.

3. Open the sunglasses holder.
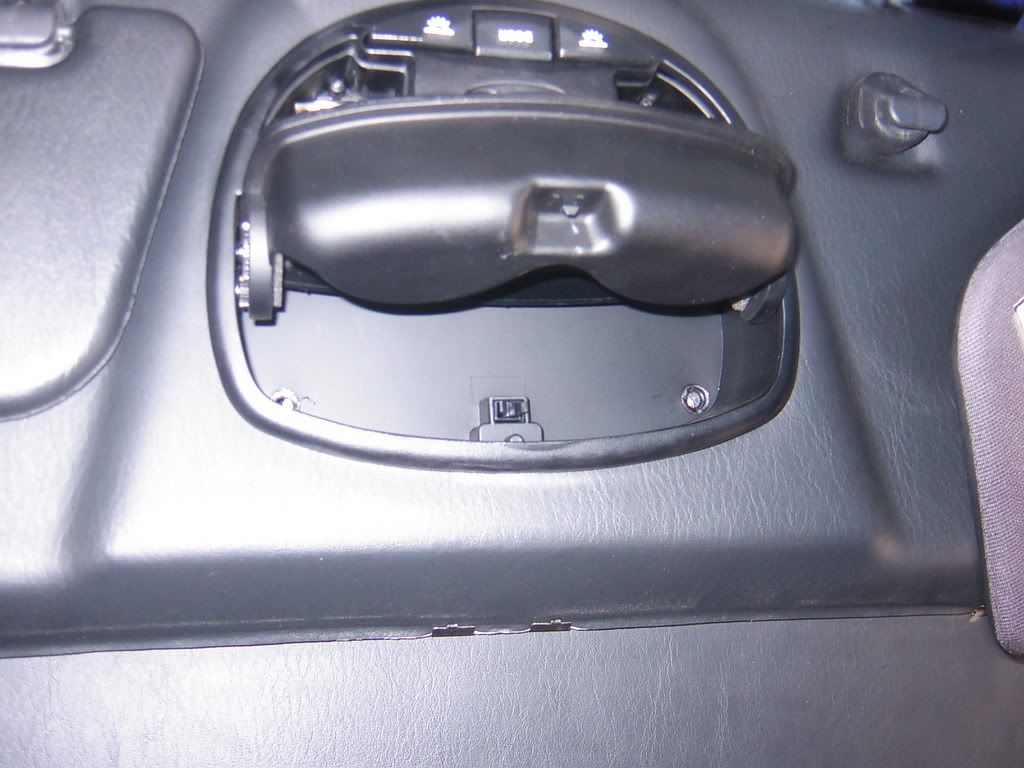
4. Remove the bulbs from the lights, and remove all 4 large phillips screws holding the sunroof control assembly in place.
5. Remove the sunroof assembly. Note how it comes out so you can reinstall it easily.
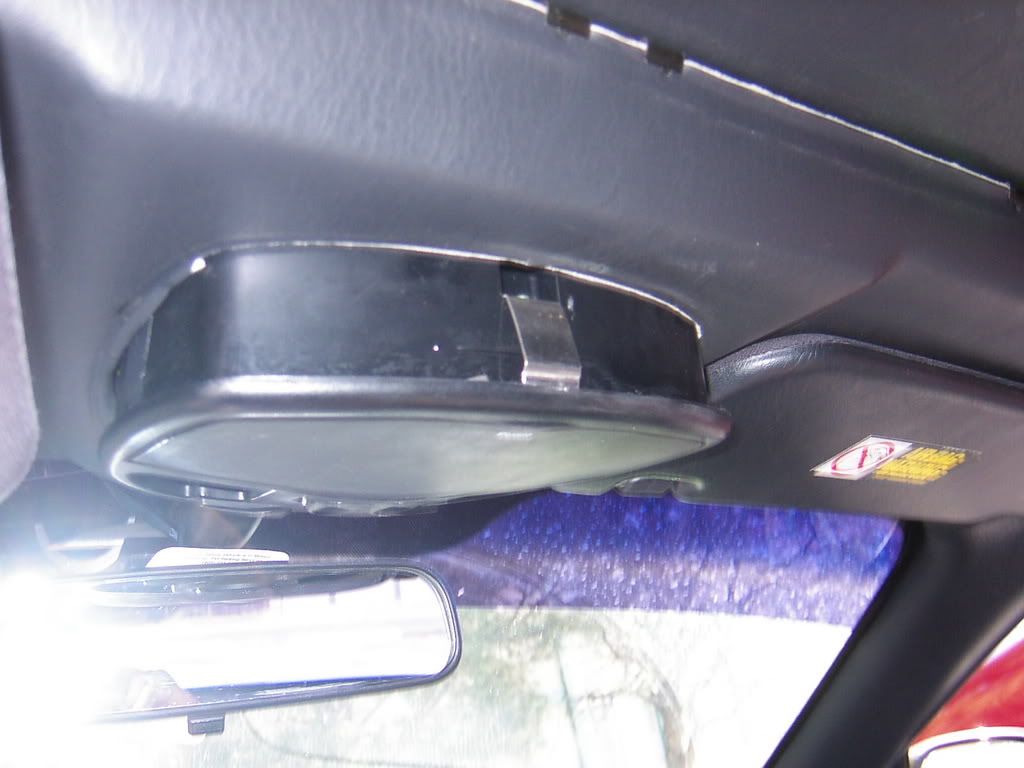
6. Get in the back seat. The plastic cover that is above your head at the back of the headliner needs to come off. The only way to do so is to work your fingers under it and pull it off. Don't YANK it, as you'll break something. Try to be gentle, but get it off. I can't remember if you need to loosen the side panels first or not. The deal is you need enough room to be able to pull down on the headliner enough to reach the sunroof motor assembly. Just be careful, and remove just what you need to to accomplish this.

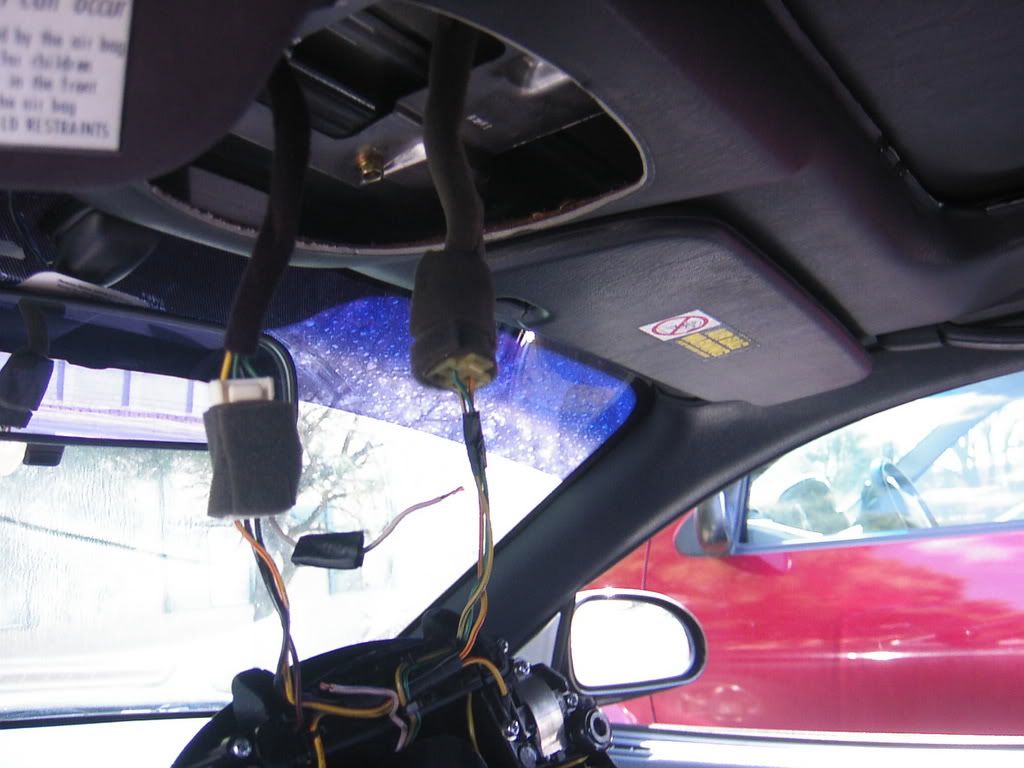
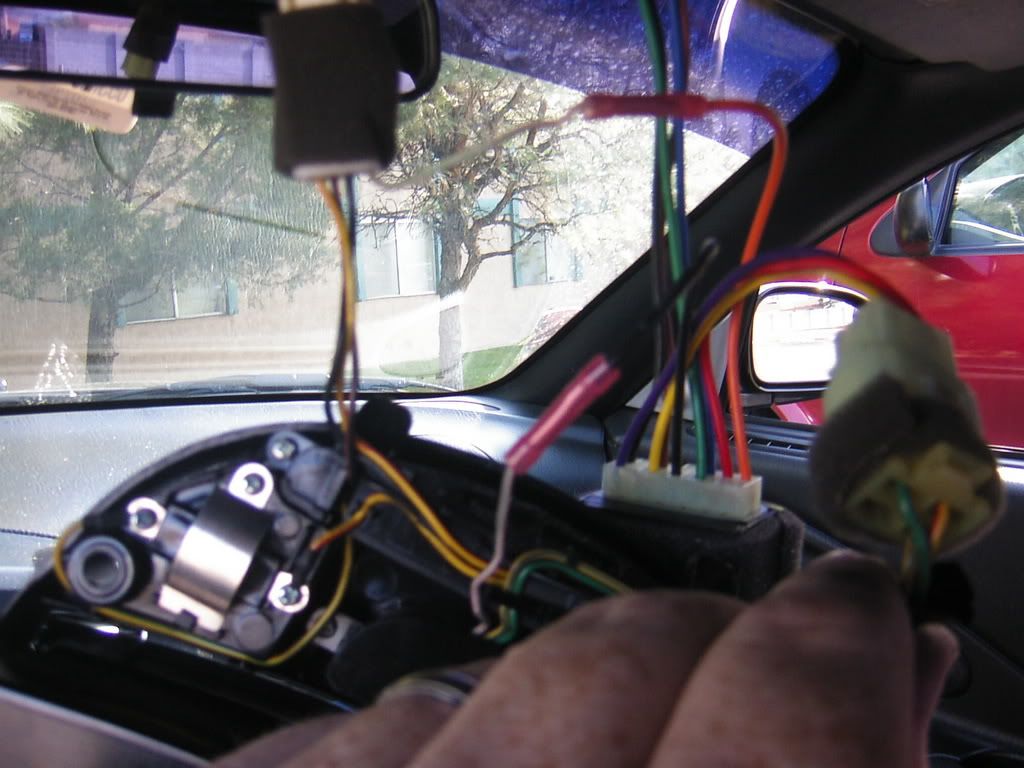
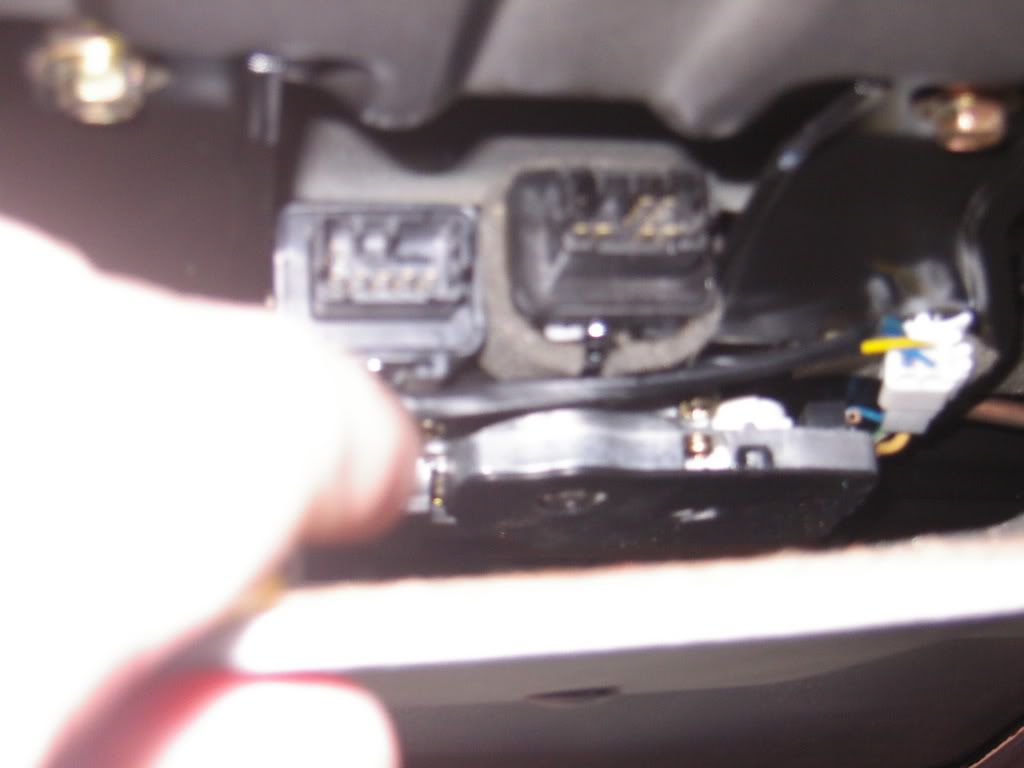
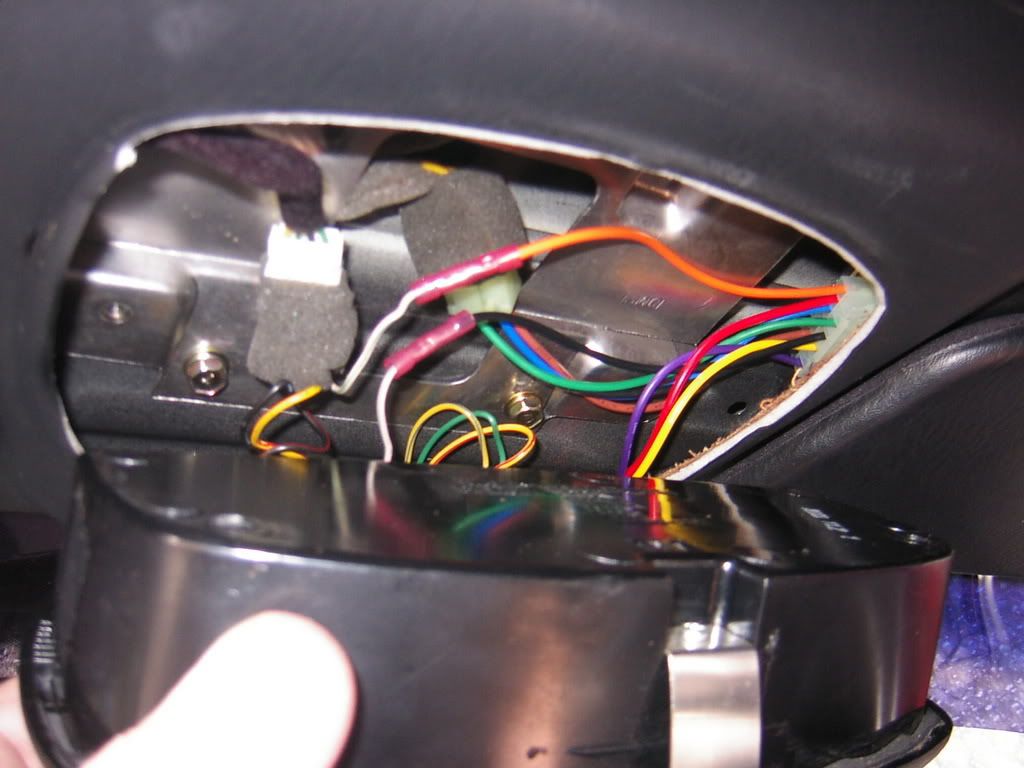
7. Get back up front. Disconnect the wiring harnesses from the sunroof control assembly.
8. Wrap relay box with the self adhesive foam included in package.
ENSURE YOUR KEY IS OUT OF THE IGNITION
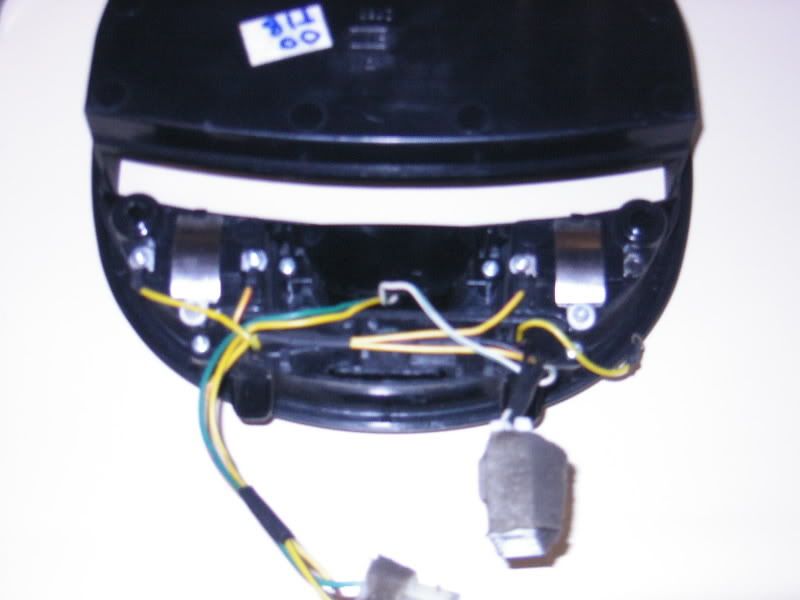
9. There are 2 relay harnesses. Only one connects in the front. Connect it to the relay box, and connect the other 2 connectors to the corresponding harnesses in the roof and sunroof control assembly. Refer to the above picture.
10. You'll see a whitish wire in the control assembly with a green stripe. This is the wire to cut. Cut it in the center and strip both sides of the wire.
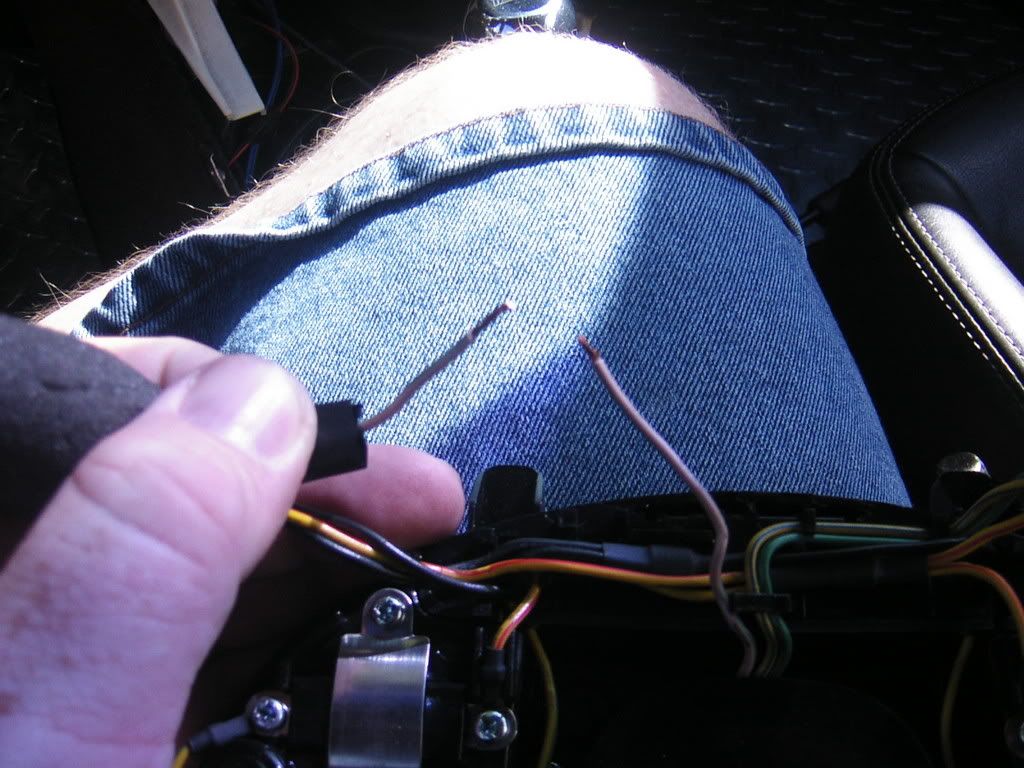
11. On the relay harness, you'll note there is a orange wire and a black wire coming off of it with a crimp in place on each. The wire you just cut and stripped will be going into these crimps. BEFORE YOU CRIMP, we need to test. So, for now, just stuff the relay assembly into the gaping hole in the roof, up to the right.
12. Place the stripped wires in the CRIMPS, BUT DO NOT CRIMP. Just make sure they are getting some contact. The orange wire should go to the stripped wire going into the connector, the black wire should go to the stripped wire going to the OEM switch assembly.
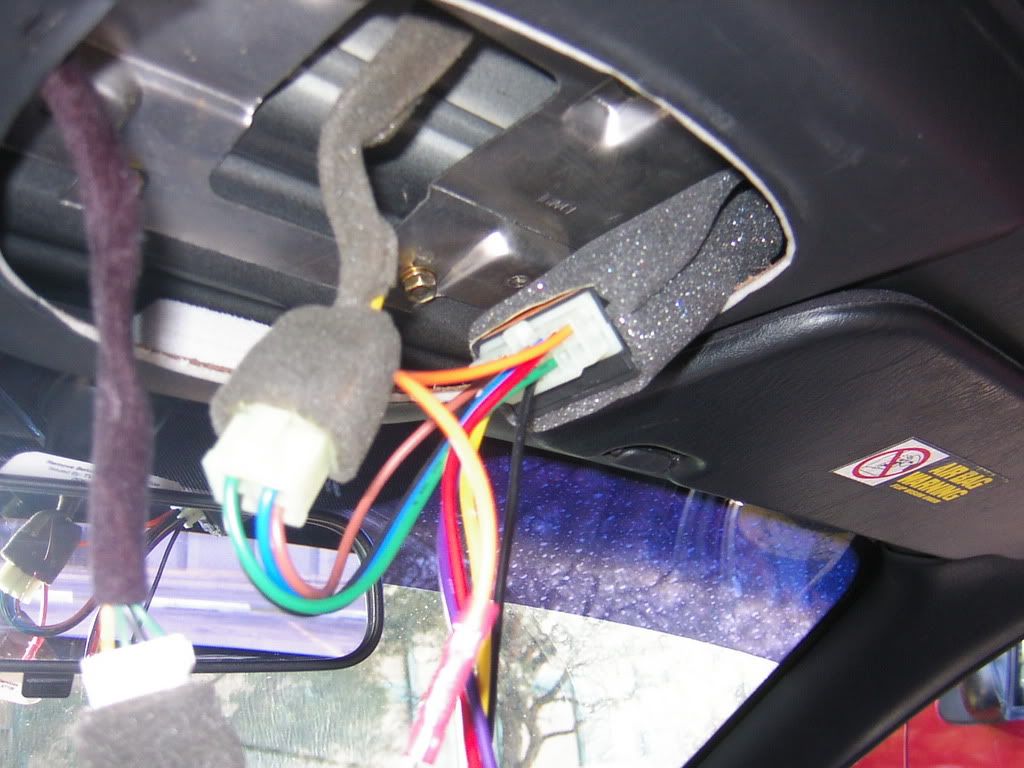
13. Climb back into the rear seat with the second harness.
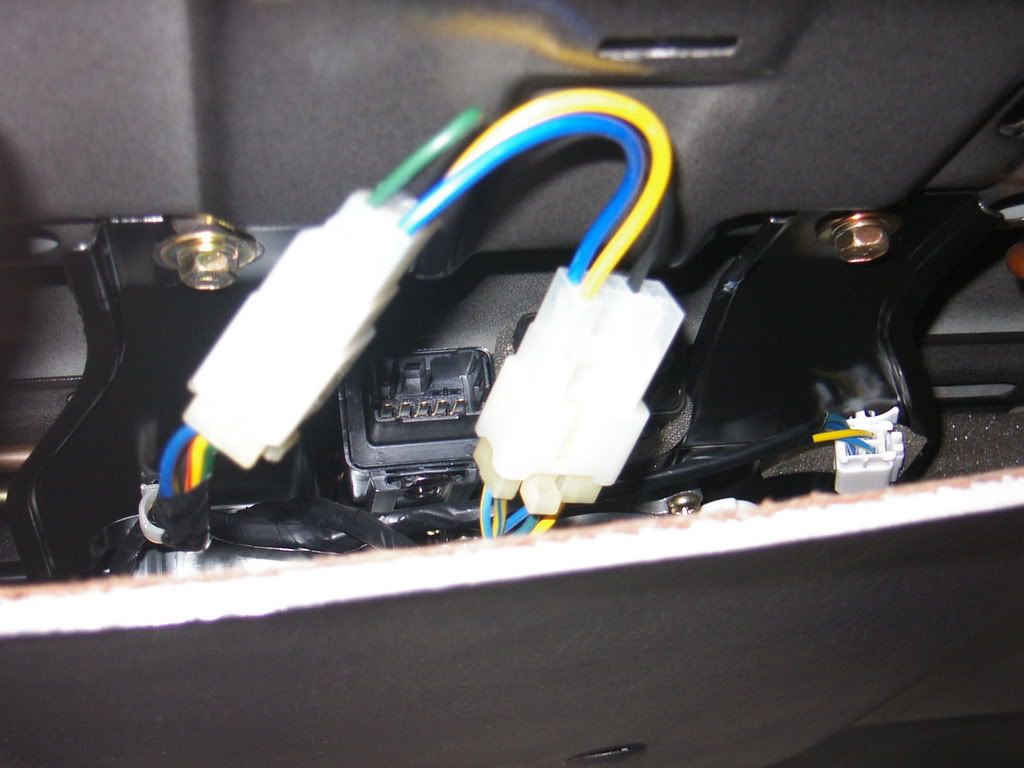
14. Pull gently down on the headliner until you can see the sunroof motor and relay assembly with your flashlight. The relays are small metal cubes, about 2 inch by 2 inch. Remove the wiring harness from the the OEM relays and install your relay harness, bypassing the OEM relays completely. You'll note in the pictures that the RELAY HARNESS you are installing has a green wire loop that goes back on itself, make sure it is installed as shown, with the green loop end going to the harness plug on the LEFT, or drivers side.
15. Turn on the ignition but do not start the car.
16. Quickly push the OPEN button on your sunroof controls for about .5 second. Sunroof should open to the TILT position. Push on the close button for the same time and it should fully close. IF NOTHING HAPPENS, make sure that the stripped wires are in their crimps, making sure they have some contact (It would have been nice to have some help here when I installed them). Also ensure that you installed the harness in the REAR correctly and are bypassing both OEM relays as shown in the pictures above. Turn the ignition on and try again. If it STILL doesn't work, try one of the following.
a. Guarantee the stripped wires have some sort of contact. Either slightly crimp them in place or use a pin or something to conduct power to them. Make sure that you have the wires going to the correct color.
b. Get into the back seat and turn the relay harness you installed around.
After you have tested step 16 again and it WORKS...
17. With the ignition on, push the sunroof open button for .5 second, it will tilt open. Push again after it stops and it should open all the way. Push close once, and it should close all the way. Open it fully one last time, and turn the ignition off. It should close on it's own.
18. If you have the Sunroof and window relays, make sure to test them together, to see if they all close all the way. If not, you will have to adjust the "Pot" on the window to fine tune it. I never had to touch the one on the sunroof relay set.
19. After you've fully tested everything and it works fine, carefully CRIMP the wires in place. Ensure they still work once more.
20. Carefully route the extended wiring harnesses into the cavity in the roof. Make sure the relay is out of the way in the headliner up and above the passenger seat. Carefully push the sunroof control assembly back into place, if it doesn't go all the way in, you'll have to adjust the wiring above it some.
21. Screw all the screws back into the assembly, make sure it's flush with the headliner and tight. Test relay one last time and reinstall bulbs and lenses. Reinstall any plastic parts in the rear of the car that you removed to install the harness.
22. Enjoy your new transformer.
http://www.rdtiburon.com/index.php?showtopic=7393&st=0
CLICK ON ANY PICTURES TO VIEW THEM LARGER. Or HUGER as may be. These are with my old camera.
If you know what you are doing, this is simple.
The WINDOW Relays are the ones in the Greenish box.
The SUNROOF relays are in the BLUISH box.
The WINDOW relays are very easy to install.
This requires a large and small Phillips screwdriver and a wire cutter. You also may need an inline fuse holder and a 30 amp fuse.
1. Remove both door panels.
2. Wrap self adhesive foam around relay box.
3. Plug the relay harness into the OEM harness on the door (Remove the switch assy from the door panel) and to the switch. See above picture.
4. Plug in the wiring harness to the relay. Only one end will fit into any of the plugs. See above picture.
5. Plug the SMALLER wiring harness inbetween the switch and OEM harness on the passenger side.
6. Run the RED power wire around the outside of the car (door open, hood open) to the battery and temporarily connect.
(AT THIS POINT EVERYTHING SHOULD BE PLUGGED IN AND CONNECTED.)
7. Turn ignition to ON, but don't start the car.
8. Quickly push the drivers side window button to the down position for about .5 second. Watch the window go down on it's own. If it doesn't, you held it too long or for too short. I push mine to the FULL down positon and let go.
9. Push the drivers window button UP for approx .5 seconds, watch it go all the way up.
Repeat steps 8 & 9 for the passenger window (Only works from the DRIVERS switch set).
10. Click both switches on drivers side down for .5 second and watch both go down at once.
11. Switch engine off. Both windows should go all the way back up on their own after about 2 seconds.
NOTE!!!
If the passenger one doesn't go all the way up, don't panic. Look at the relay box, you'll note there is a hole on the side with a white phillips "Pot" adjustment on it.
Take a small phillips head screwdriver and adjust it slowly. Be careful when adjusting, if you break it, we are not responsible. It should turn very easily. If it doesn't turn, try the opposite direction. This "Pot" adjustment will adjust the amount of resistance the system allows before it stops trying to close the window. So make about a 1/2 turn adjustment, turn the ignition back on, and repeat steps 10 and 11. Repeat this process until the windows go all the way up on their own after you turn the ignition off.
12. With ignition off, pull the power wire back off for the relay and cut the fuze off. You now need to feed the power wire thru the inside of the door assy, making sure it won't get caught in any moving parts. Feed it forward to the edge of the door and either thru the stock wire passage (EXTREMELY HARD TO GET THRU), or go down about 4 inches and cut a hole thru the small plastic grommet there. Feed it down thru the grommet in the door frame and give the wire enough slack for opening and closing the door. After the wire is in the fuse compartment area, just feed it thru the firewall into the engine bay. (YES, YOU COULD CONNECT THIS INSIDE SOMEWHERE, BUT REMEMBER, IT NEEDS A LOT OF POWER. 30 AMPS, AND IT HAS TO BE CONTINUOUS)
13. With the wire in the engine bay, make sure to run it in a manner to keep it away from VERY hot items and anything moving. Run the wire to your battery but do not connect it yet. At this point you can either try to find a way to use the fuse that came with it, or get one of those inline fuse holders and a 30 amp fuse for it. Connect to your battery. (I crimped mine on a ring terminal and put it on one of my spare battery posts.)
14. Reverify that everything is working via steps 10 and 11.
15. Reinstall passenger door panel. After panel is on, do steps 10 and 11 for the passenger side again.
16. Reinstall drivers door panel. Be VERY carefull as to where the lengthened wires go and where you put the relay box.
17. Re test steps 10 and 11 a few more times. Just to make sure everything is working and nothing is scraping or getting in the way.
18. Enjoy.
I super simplified this, so it shouldn't be any issues. Make sure you do the testing or you may not get everything right. The adjustments are easy, and it only took me one try to get it adjusted.
Although I haven't tested it, these are supposed to also STOP closing and go back down if something interfears with them. So watch your car when you walk away to make sure someone doesn't try to get their arm in the way. It'll go back up in 30 seconds, but just for peace of mind, make sure they go all the way up. You also want to make sure not to walk off for the first 20 to 30 times you use this, as your passenger side may need to be adjusted.
I've had NO problems with mine at all, and they've been installed and USED for over 8 months now.
SUNROOF.
This one is perty easy, and requires you to cut one wire.
You need a set of wire cutters and a large phillips screwdriver, you also need a very thin flat head screwdriver and a small flashlight.
1. Turn off the sunroof door lights.
2. Remove the light lenses, you'll see a slot where you can use the flat headed screwdriver to do this.
3. Open the sunglasses holder.
4. Remove the bulbs from the lights, and remove all 4 large phillips screws holding the sunroof control assembly in place.
5. Remove the sunroof assembly. Note how it comes out so you can reinstall it easily.
6. Get in the back seat. The plastic cover that is above your head at the back of the headliner needs to come off. The only way to do so is to work your fingers under it and pull it off. Don't YANK it, as you'll break something. Try to be gentle, but get it off. I can't remember if you need to loosen the side panels first or not. The deal is you need enough room to be able to pull down on the headliner enough to reach the sunroof motor assembly. Just be careful, and remove just what you need to to accomplish this.
7. Get back up front. Disconnect the wiring harnesses from the sunroof control assembly.
8. Wrap relay box with the self adhesive foam included in package.
ENSURE YOUR KEY IS OUT OF THE IGNITION
9. There are 2 relay harnesses. Only one connects in the front. Connect it to the relay box, and connect the other 2 connectors to the corresponding harnesses in the roof and sunroof control assembly. Refer to the above picture.
10. You'll see a whitish wire in the control assembly with a green stripe. This is the wire to cut. Cut it in the center and strip both sides of the wire.
11. On the relay harness, you'll note there is a orange wire and a black wire coming off of it with a crimp in place on each. The wire you just cut and stripped will be going into these crimps. BEFORE YOU CRIMP, we need to test. So, for now, just stuff the relay assembly into the gaping hole in the roof, up to the right.
12. Place the stripped wires in the CRIMPS, BUT DO NOT CRIMP. Just make sure they are getting some contact. The orange wire should go to the stripped wire going into the connector, the black wire should go to the stripped wire going to the OEM switch assembly.
13. Climb back into the rear seat with the second harness.
14. Pull gently down on the headliner until you can see the sunroof motor and relay assembly with your flashlight. The relays are small metal cubes, about 2 inch by 2 inch. Remove the wiring harness from the the OEM relays and install your relay harness, bypassing the OEM relays completely. You'll note in the pictures that the RELAY HARNESS you are installing has a green wire loop that goes back on itself, make sure it is installed as shown, with the green loop end going to the harness plug on the LEFT, or drivers side.
15. Turn on the ignition but do not start the car.
16. Quickly push the OPEN button on your sunroof controls for about .5 second. Sunroof should open to the TILT position. Push on the close button for the same time and it should fully close. IF NOTHING HAPPENS, make sure that the stripped wires are in their crimps, making sure they have some contact (It would have been nice to have some help here when I installed them). Also ensure that you installed the harness in the REAR correctly and are bypassing both OEM relays as shown in the pictures above. Turn the ignition on and try again. If it STILL doesn't work, try one of the following.
a. Guarantee the stripped wires have some sort of contact. Either slightly crimp them in place or use a pin or something to conduct power to them. Make sure that you have the wires going to the correct color.
b. Get into the back seat and turn the relay harness you installed around.
After you have tested step 16 again and it WORKS...
17. With the ignition on, push the sunroof open button for .5 second, it will tilt open. Push again after it stops and it should open all the way. Push close once, and it should close all the way. Open it fully one last time, and turn the ignition off. It should close on it's own.
18. If you have the Sunroof and window relays, make sure to test them together, to see if they all close all the way. If not, you will have to adjust the "Pot" on the window to fine tune it. I never had to touch the one on the sunroof relay set.
19. After you've fully tested everything and it works fine, carefully CRIMP the wires in place. Ensure they still work once more.
20. Carefully route the extended wiring harnesses into the cavity in the roof. Make sure the relay is out of the way in the headliner up and above the passenger seat. Carefully push the sunroof control assembly back into place, if it doesn't go all the way in, you'll have to adjust the wiring above it some.
21. Screw all the screws back into the assembly, make sure it's flush with the headliner and tight. Test relay one last time and reinstall bulbs and lenses. Reinstall any plastic parts in the rear of the car that you removed to install the harness.
22. Enjoy your new transformer.
 10-30-2005, 05:00 PM
#2
Senior Member

Join Date: Jul 2005
Posts: 580
Likes: 0
Received 0 Likes
on
0 Posts
Lol...only question I have is how to get the door panels off? I tried to get them off for painting, but they wouldn't come off. Is it save to just rip em off? Or is there any special places where theres some PITA clip that holds them on haha.
10-30-2005, 05:03 PM
#3
Senior Member
Thread Starter
Join Date: Mar 2002
Location: Los Lunas, New Mexico, USA.
Posts: 34,642
Likes: 0
Received 0 Likes
on
0 Posts
Vehicle: 2001 Hyundai Tiburon, 2004 Kia Sorento, 2010 Kia Soul
There's a DIY listed for that here.
It's really easy.
First off. Take the Triangle plastic part off above the door, inside from the mirror. It just pops off.
Then you remove the 2 screws on the EDGE of the door, where the latch mechanism is. Then, there are 2 screws inside the pull handle on the inside of the door. Undo the covers and take them both off. There are 2 screws on the FRONT edge, near the tube for the vent air to come thru the door. Lastly, take off the little screw that holds the inside door OPENING handle, then remove that cover. The entire door panel comes off easy. You MAY want to slide your fingers along the edge so you can pop the plastic holders around the bottom edge. Only 2 I belive.
A total of 7 screws.
10-30-2005, 05:04 PM
#4
Moderator

Join Date: Mar 2006
Location: Arizona
Posts: 6,976
Likes: 0
Received 0 Likes
on
0 Posts
Vehicle: N/A as in Not Applicable, not Naturally Aspirated
Redz pretty much summed it up (beat me to it).
Remember to unplug window switch before attempting to remove door panel.
Slide up and out.
Remember to unplug window switch before attempting to remove door panel.
Slide up and out.
10-30-2005, 05:27 PM
#5
Senior Member
Thread Starter
Join Date: Mar 2002
Location: Los Lunas, New Mexico, USA.
Posts: 34,642
Likes: 0
Received 0 Likes
on
0 Posts
Vehicle: 2001 Hyundai Tiburon, 2004 Kia Sorento, 2010 Kia Soul
You'll find with these Relay kits in there, it's much easier to take theharness off of the switch assy.
10-31-2005, 11:24 AM
#6
Senior Member
Join Date: Jul 2005
Posts: 580
Likes: 0
Received 0 Likes
on
0 Posts
Ok cool. Just noticed your guage clusterd/dash removal topic. Thank God! I have to paint my gauge cluster surround thing and that thing was SUCH A PITA! I just gave up and put it back on lmao.
Cool cool. thanksz fing02.gif
Cool cool. thanksz fing02.gif
11-01-2005, 12:54 PM
#7
Senior Member

Join Date: Mar 2006
Posts: 537
Likes: 0
Received 0 Likes
on
0 Posts
Vehicle: 1998 Hyundai Tiburon
Got my sunroof relay today, I'm gonna try to put it in tomorrow.
**Update**
Well, it didn't work.
Orange and black wires like you say and green loop plug on the left=no work
Orange and black same and switched green loop plug to right=no work
Switched orange and black and green loop still on right=no work
Orange and black still switched green loop on left=no work
Here's what did happen: With the orange and black wires like you said, the new relay box made no noise but when I switched them it would click a few times then when I took the wires off it clicked again. It's like it wanted to work on its own without me pushing the open button. With orange and black opposite of what you say and the green loop on the left, the sunroof opened very quickly and closed just as fast without me doing anything. And by opened I mean like 1/2" - 1" tops. It kind of scared me because I was just looking at it thinking WTF??
And just a tip for the next person to try this, when you are taking off the trim piece from the back of the headliner be very careful. It is very sharp on the edge and it sliced right into my finger like a razor blade.
Oh, and the clicking is only if I move the whole thing around. It doesn't do it all the time. I just went out and redid everything with the same results. Fuse is good, I guess tomorrow I'll put it all back to stock and see if the sunroof opens that way. It did a few days ago so I don't know, we'll see.
11-01-2005, 01:07 PM
#8
Senior Member
Thread Starter
Join Date: Mar 2002
Location: Los Lunas, New Mexico, USA.
Posts: 34,642
Likes: 0
Received 0 Likes
on
0 Posts
Vehicle: 2001 Hyundai Tiburon, 2004 Kia Sorento, 2010 Kia Soul
Hmm...
Double check that you cut the right wire and that it's getting contact.
Also, try connecting it all up (Sunroof should be closed), then try opening it or closing it while you adjust the POT adjustment.
I'm pretty sure those pics I took were of the final setup, I can go take new ones if ya'll want.
Double check that you cut the right wire and that it's getting contact.
Also, try connecting it all up (Sunroof should be closed), then try opening it or closing it while you adjust the POT adjustment.
I'm pretty sure those pics I took were of the final setup, I can go take new ones if ya'll want.
11-01-2005, 01:46 PM
#10
Senior Member
Thread Starter
Join Date: Mar 2002
Location: Los Lunas, New Mexico, USA.
Posts: 34,642
Likes: 0
Received 0 Likes
on
0 Posts
Vehicle: 2001 Hyundai Tiburon, 2004 Kia Sorento, 2010 Kia Soul
I'll head out there in a bit and get pics of everything. Now I want to make SURE. LOL

