Diy - Making Vent Angel Eye Lights
 07-02-2005, 01:04 AM
#1
Senior Member
Thread Starter

Join Date: Jul 2004
Location: Las Vegas, NV
Posts: 155
Likes: 0
Received 0 Likes
on
0 Posts
This is my first attempt at writing a DIY. If there is any questions or anything that needs to be added/removed just let me know. I will do my best. Enjoy.
Material List:
1/4" Acrylic Rod for 3mm LED's (a 3/8" rod should work for 5mm LED's)
Color of Choice LED (2 per ring, 8 total)
220 Ohm resistor (1 per ring, 4 total)
Wire
Dremel Tool (or something to cut the acrylic and the grooves in the rings)
Drill
Drill Bits (3/16" for 3mm or 1/4" for 5mm, also smaller ones to start the holes in the
rings)
Soldering Iron
Heat Gun
Heat Shrink and/or Black Tape
Phillips Screwdriver and/or Flathead Screwdriver
Wood Block (for making the ring mold)
Screws or Nails
To Make the Mold for the Rings:
1. Measure the diameter for the door vent (I got 2 13/16”) and the center vents
(since they are oval you might have to measure them yourself, but I got a height
of 2 7/16" and a width of 2 7/8" ) and subtract the size of the rod (1/4” which is
1/2" total taken off in this case). I came up with the inside diameter of 2 5/16”
for the door vent and a height of 1 15/16" with a width of 2 3/8" for the center
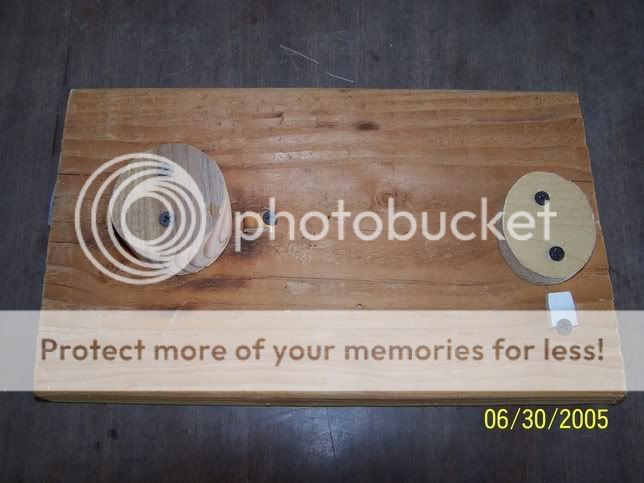
vent. Take a wood block (I used a 2x4) and cut out the inside diameter circle or
oval. Nail or screw the circle or oval block onto another board to get a crude
mold for which you can bend the rod around. Also add a small piece of wood to
act as a spacer block to hold the rod in place.
To Make the Rings:
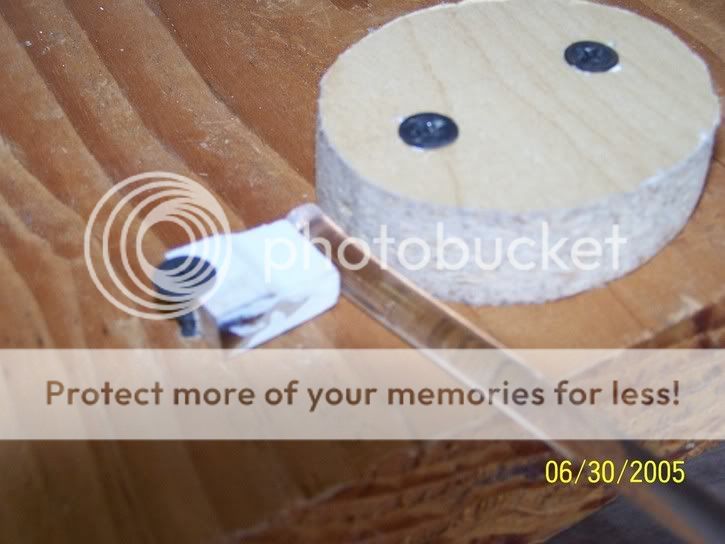
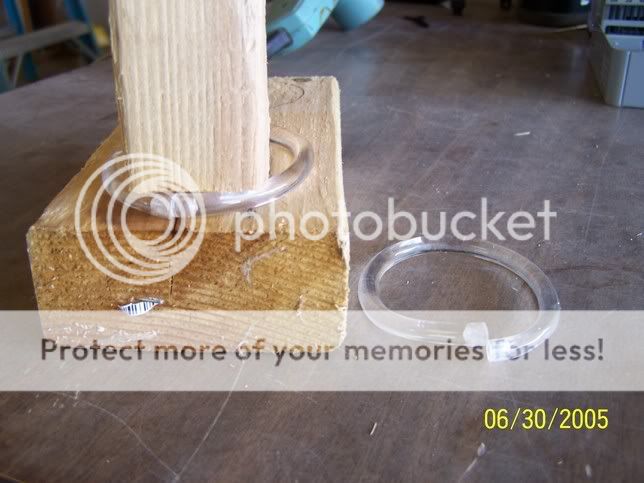
1. Place one end of the rod on the mold and secure it with the spacer block. You
don’t need to cut the rod to a certain length. Longer is better so you have room
to pull it around, you will cut the rest off later.
2. Using the heat gun, slowly heat up a small section of the rod until you are able
to bend it around the mold. Be sure not to heat it up to much or stretch the rod
out.
3. Let it cool a little bit then move onto the next section working all the way
around until you make the circle/oval.
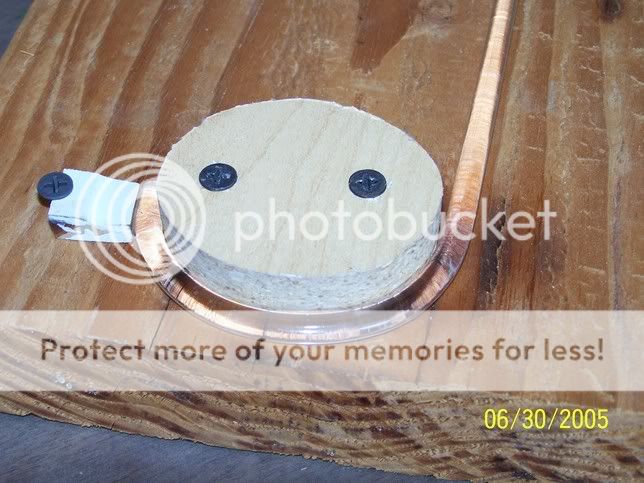
When you get back to where you started bring the rod up and over where you
started to complete the circle/oval.
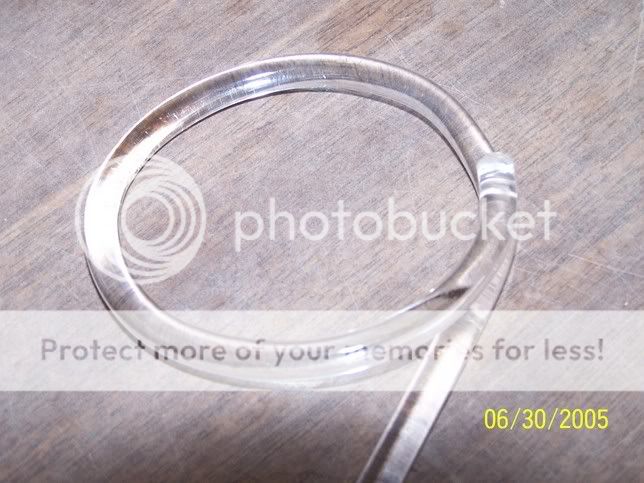
4. After taking off the mold cut the extra rod off where the ring will make a
complete circle/oval.
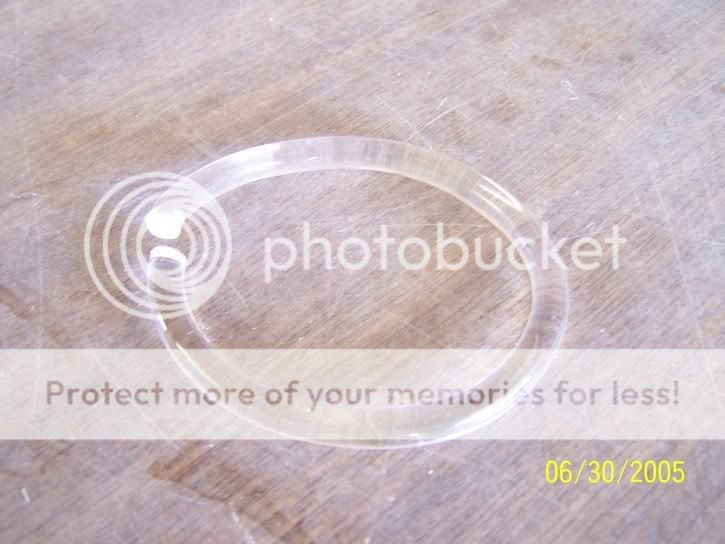
5. Now drill the hole in each end for the LEDs. Using a smaller drill bit to start the
hole, and then work to the size of drill bit for the LED, making sure it is centered
in the middle of it. Being careful not to get to close to the edge.
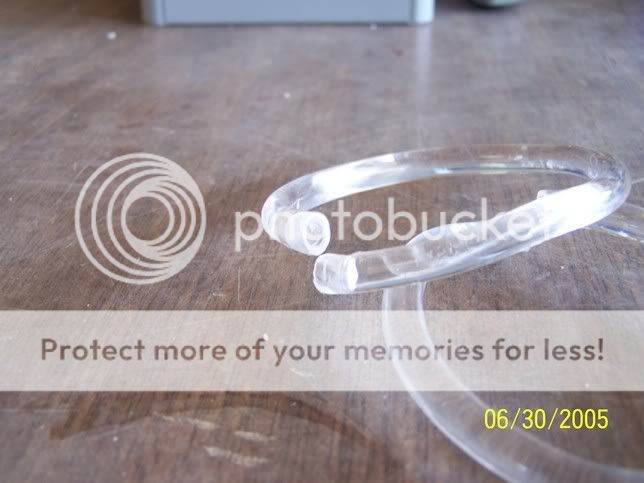
You want to make the hole deep enough so the end of the LED is flush with edge.
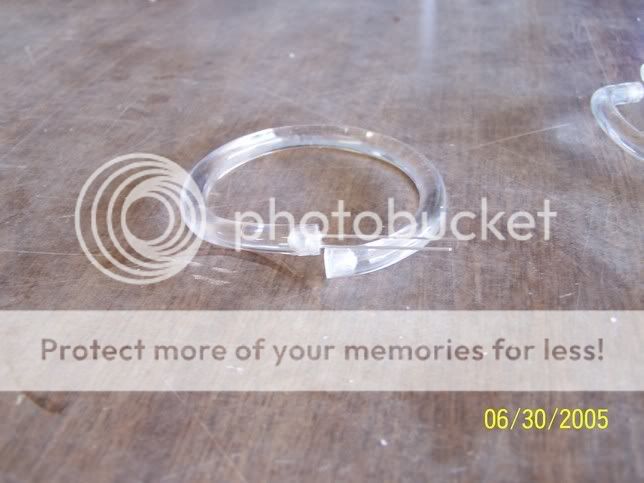
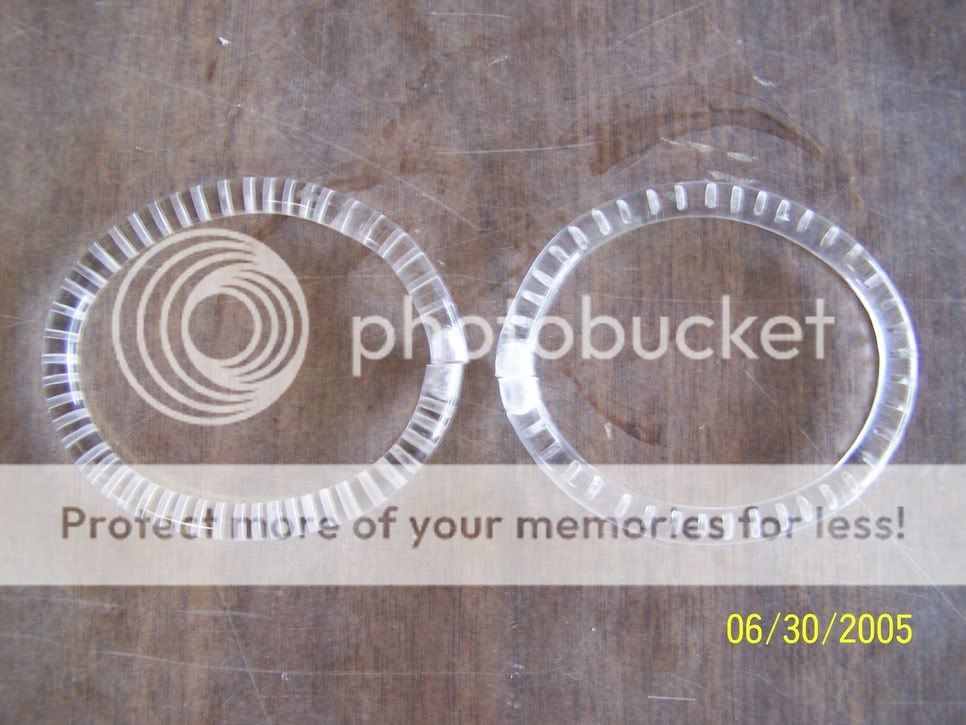
6. Flatten out the ring between to wood blocks and heat it with the heat gun to
make it stay flat.
7. Using the dremel tool or a small saw, cut the groove so they are about 1mm
deep and about 3-4mm apart. The more cuts you put in it the more dimmer the
lights become. Make the cuts all the way around.
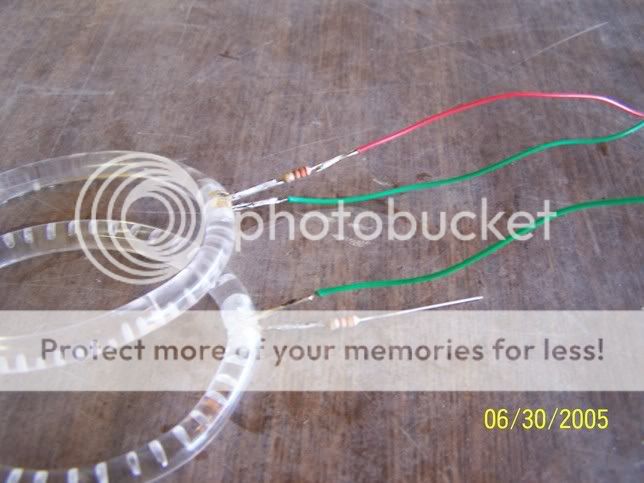
8. Take the LEDs and bend them in a 90 degree angle so that the negative and
positive leads are together. And place them in the holes of the ring.

9. Solder the leads together also soldering the wires to them. Make sure to solder
the 220 Ohm resistor to the positive lead (the positive lead is the longer one).
Use about how much wire you will use, longer is better. That all depends on how
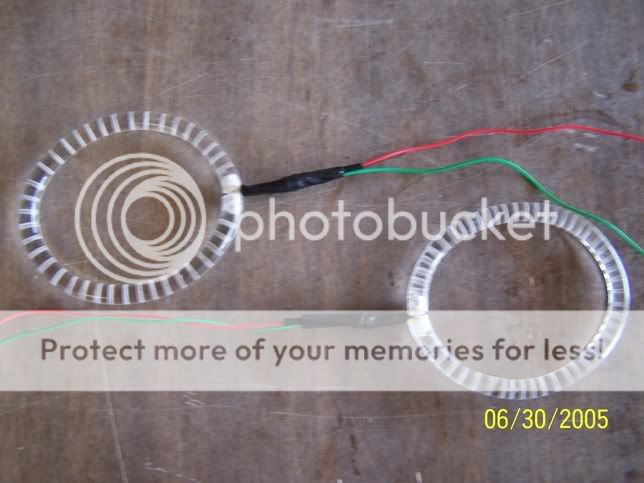
you want to run the wiring. Add the heat shrink or tape the wire. I used
telephone wire since it is small and already has a plastic covering to keep the
wires together.
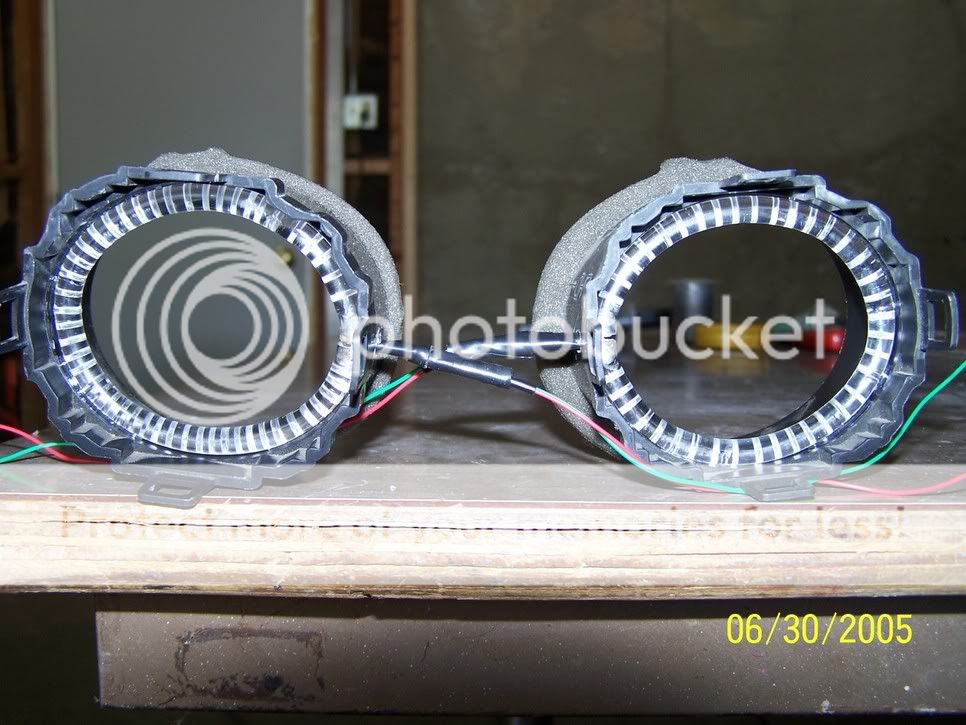
10. The ring will now be done and ready for install.


Material List:
1/4" Acrylic Rod for 3mm LED's (a 3/8" rod should work for 5mm LED's)
Color of Choice LED (2 per ring, 8 total)
220 Ohm resistor (1 per ring, 4 total)
Wire
Dremel Tool (or something to cut the acrylic and the grooves in the rings)
Drill
Drill Bits (3/16" for 3mm or 1/4" for 5mm, also smaller ones to start the holes in the
rings)
Soldering Iron
Heat Gun
Heat Shrink and/or Black Tape
Phillips Screwdriver and/or Flathead Screwdriver
Wood Block (for making the ring mold)
Screws or Nails
To Make the Mold for the Rings:
1. Measure the diameter for the door vent (I got 2 13/16”) and the center vents
(since they are oval you might have to measure them yourself, but I got a height
of 2 7/16" and a width of 2 7/8" ) and subtract the size of the rod (1/4” which is
1/2" total taken off in this case). I came up with the inside diameter of 2 5/16”
for the door vent and a height of 1 15/16" with a width of 2 3/8" for the center
vent. Take a wood block (I used a 2x4) and cut out the inside diameter circle or
oval. Nail or screw the circle or oval block onto another board to get a crude
mold for which you can bend the rod around. Also add a small piece of wood to
act as a spacer block to hold the rod in place.
To Make the Rings:
1. Place one end of the rod on the mold and secure it with the spacer block. You
don’t need to cut the rod to a certain length. Longer is better so you have room
to pull it around, you will cut the rest off later.
2. Using the heat gun, slowly heat up a small section of the rod until you are able
to bend it around the mold. Be sure not to heat it up to much or stretch the rod
out.
3. Let it cool a little bit then move onto the next section working all the way
around until you make the circle/oval.
When you get back to where you started bring the rod up and over where you
started to complete the circle/oval.
4. After taking off the mold cut the extra rod off where the ring will make a
complete circle/oval.
5. Now drill the hole in each end for the LEDs. Using a smaller drill bit to start the
hole, and then work to the size of drill bit for the LED, making sure it is centered
in the middle of it. Being careful not to get to close to the edge.
You want to make the hole deep enough so the end of the LED is flush with edge.
6. Flatten out the ring between to wood blocks and heat it with the heat gun to
make it stay flat.
7. Using the dremel tool or a small saw, cut the groove so they are about 1mm
deep and about 3-4mm apart. The more cuts you put in it the more dimmer the
lights become. Make the cuts all the way around.
8. Take the LEDs and bend them in a 90 degree angle so that the negative and
positive leads are together. And place them in the holes of the ring.
9. Solder the leads together also soldering the wires to them. Make sure to solder
the 220 Ohm resistor to the positive lead (the positive lead is the longer one).
Use about how much wire you will use, longer is better. That all depends on how
you want to run the wiring. Add the heat shrink or tape the wire. I used
telephone wire since it is small and already has a plastic covering to keep the
wires together.
10. The ring will now be done and ready for install.
 07-02-2005, 01:43 AM
#2
http://www.hyundaiaftermarket.org/images/vendor1.png


Join Date: Dec 2002
Posts: 3,237
Likes: 0
Received 0 Likes
on
0 Posts
Brilliant write up. You guys should really try this, he did a great job. Its fun to see what you can come up with. I think everyone should mess with LEDs at least once.
 07-02-2005, 08:46 AM
#4
Senior Member
Thread Starter
Join Date: Jul 2004
Location: Las Vegas, NV
Posts: 155
Likes: 0
Received 0 Likes
on
0 Posts
I wasn't sure if I should add the installation because there is already a DIY for Interior Haloz Install: DIY - Interior HALOZ Install
I could add on how I installed them and ran the wiring. But I would need some help as to how I would go about doing it? Is there a way to edit the first post and continue on or do I have to make a reply to this topic?
Also I was wondering if we should keep the questions and comments here or have them on another topic?
I just want to make sure that I am doing this correctly before I go and do something wrong and get in trouble. wink1.gif
To quickly answer Nightwish, I used quick disconnects near the rings so I could remove the door/dash without having to cut the wires. The wires I used were telephone wire, its small and has a plastic shield covering which keeps it nice and easy to run the wires. I brought all the wires to a location with a switch.
07-02-2005, 12:31 PM
#5
Senior Member

Join Date: Mar 2006
Posts: 9,172
Likes: 0
Received 0 Likes
on
0 Posts
Vehicle: 2001/Hyundai/Tiburon
nice write up. adding to the listing.
if you want to add installation instructions, just make a new post and i will merge it with the first one.
for the leds, what made you choose that resistance value? it seems a little low, which may decrease the life of your led slightly.
if you want to add installation instructions, just make a new post and i will merge it with the first one.
for the leds, what made you choose that resistance value? it seems a little low, which may decrease the life of your led slightly.
 07-03-2005, 12:16 AM
#7
Senior Member
Join Date: Mar 2002
Location: Los Lunas, New Mexico, USA.
Posts: 34,642
Likes: 0
Received 0 Likes
on
0 Posts
Vehicle: 2001 Hyundai Tiburon, 2004 Kia Sorento, 2010 Kia Soul
Search my noobish friend, search.
fing02.gif wink1.gif
Serious, you'd be suprised what a simple google search would find.
fing02.gif wink1.gif
Serious, you'd be suprised what a simple google search would find.
07-03-2005, 08:34 AM
#8
Senior Member
Join Date: Mar 2006
Posts: 9,172
Likes: 0
Received 0 Likes
on
0 Posts
Vehicle: 2001/Hyundai/Tiburon
 07-03-2005, 09:35 AM
#10
Senior Member
Thread Starter
Join Date: Jul 2004
Location: Las Vegas, NV
Posts: 155
Likes: 0
Received 0 Likes
on
0 Posts
^^^ Yeah you just cut the grooves on one side and the smooth side is the side you put towards the vent ( the side you look at). Sorry for not adding that
<div class='quotetop'>QUOTE (tibby01 @ Jul 2 2005, 10:31 AM)</div><div class='quotemain'>nice write up. adding to the listing.
if you want to add installation instructions, just make a new post and i will merge it with the first one.
for the leds, what made you choose that resistance value? it seems a little low, which may decrease the life of your led slightly.
<div align='right'><{POST_SNAPBACK}></div></div>
Well after the holiday I will do a write up for that, Thanks.
As for the resistance value, I used a LED calculator that I found at this link:
LED Calculator